
Related Manuals for Kompernass WK 8 A1


Summary of Contents for Kompernass WK 8 A1
- Page 1 GAME/SURVEILLANCE CAMERA WK 8 A1 GAME/SURVEILLANCE CAMERA WILD-/ÜBERWACHUNGS- Operating instructions KAMERA Bedienungsanleitung IAN 288238...
- Page 2 Before reading, unfold both pages containing illustrations and familiarise yourself with all functions of the device. Klappen Sie vor dem Lesen die beiden Seiten mit den Abbildungen aus und machen Sie sich anschließend mit allen Funktionen des Gerätes vertraut. GB / IE / NI Operating instructions Page DE / AT / CH...
- Page 4 − − − − − − − −...
-
Page 5: Table Of Contents
Using an adapter card ....... . . 17 GB │ IE │ NI │ 1 ■ WK 8 A1... - Page 6 Technical data ........40 Kompernass Handels GmbH warranty ....42 Service .
-
Page 7: Introduction
The risk shall be borne solely by the user. GB │ IE │ NI │ 3 ■ WK 8 A1... -
Page 8: Notes On Trademarks
A warning notice at this hazard level indicates a potentially hazardous situation. Failure to avoid this hazardous situation could result in injury. ► Follow the instructions in this warning notice to prevent injury. │ GB │ IE │ NI ■ 4 WK 8 A1... -
Page 9: Safety
Children and people who, due to their physical, intellectual or motor abilities, are incapable of operating the appliance safely may only use the appliance under the supervision or direction of a responsible person. GB │ IE │ NI │ 5 ■ WK 8 A1... - Page 10 If you notice any unusual noises, smoke or similar unusual situa- tions, remove the batteries and disconnect any attached mains adapter from the power supply and contact Customer Service (see Chapter "Service"). │ GB │ IE │ NI ■ 6 WK 8 A1...
-
Page 11: Risk Of Injury If Batteries Are Improperly Handled
■ Children must be supervised to ensure they do not play with the memory card. Seek medical help immediately if the memory card is accidentally swallowed. GB │ IE │ NI │ 7 ■ WK 8 A1... -
Page 12: Possible Infringements Of The Rights Of Third Parties
This identification can be made by means of an identifier related to a specific person, e.g. a car number plate. Personal identifiability must avoided under all circumstances. │ GB │ IE │ NI ■ 8 WK 8 A1... - Page 13 The respective legal requirements of the country in which the camera is being used should always be observed to avoid possible infringe- ments of the rights of third parties. GB │ IE │ NI │ 9 ■ WK 8 A1...
-
Page 14: Descriptions Of Components
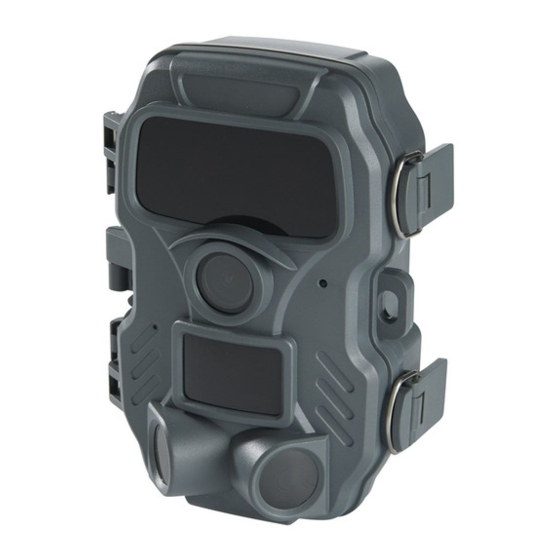
Figure C: Screen Battery compartment Locking clamps Mode selector switch (OFF - TEST - ON) Speakers Control panel buttons Figure D: DC connection socket (for mains adapter; not supplied) │ GB │ IE │ NI ■ 10 WK 8 A1... - Page 15 Mini USB to USB 2.0 connection cable Securing strap Strap catch Storage box Adapter card (microSD to SD) microSDHC memory card (8 GB) (symbol) 8 x 1.5 V type AA/Mignon/LR6 batteries (symbol) Operating instructions (symbol) GB │ IE │ NI │ 11 ■ WK 8 A1...
-
Page 16: Initial Operation
Remove all packaging materials and the protective film from the device. Please check the contents of the package (see fold-out pages). The following components are included in delivery: ▯ Game/surveillance camera WK 8 A1 ▯ Wall bracket ▯ 3 x anchors ▯... -
Page 17: Disposal Of Packaging Materials
Please be aware that protection from dust and water spray will be limited when used with an external mains adapter. GB │ IE │ NI │ 13 ■ WK 8 A1... -
Page 18: Opening And Closing The Camera
. The mains adapter must supply a direct-current voltage of 6 V with at least 1.5 A. Use a barrel jack whose interior polarity is connected to the plus pole ( │ GB │ IE │ NI ■ 14 WK 8 A1... -
Page 19: Video Connection
Use a microSDHC card with a speed rating of 10. Using memory cards with a speed rating of less than 10 can lead to picture errors during recording. GB │ IE │ NI │ 15 ■ WK 8 A1... - Page 20 Then remove the memory card. │ GB │ IE │ NI ■ 16 WK 8 A1...
-
Page 21: Using An Adapter Card
The write-protect switch protects the microSDHC memory card only as long as it is in the adapter. As soon as you remove the microSDHC memory card, the write protection will no longer be available. GB │ IE │ NI │ 17 ■ WK 8 A1... -
Page 22: Handling And Operation
Pressing the SHOT button again ends the recording. Press the MENU button to open the settings menu. ♦ Settings Mode Photo resolution Photo series Video resolution Time lapse video res Back Select │ GB │ IE │ NI ■ 18 WK 8 A1... -
Page 23: Video Resolution
720 × 480P, 640 × 480P or 320 × 240P. The higher the resolution, the more details can be seen on captures. At higher resolutions, the capacity of the memory card is exhausted faster. GB │ IE │ NI │ 19 ■ WK 8 A1... -
Page 24: Audio Recording
"Off", confirm with the OK button to deactivate the side motion sensors. Otherwise the moving branches will trigger recordings. The default setting is "On". │ GB │ IE │ NI ■ 20 WK 8 A1... - Page 25 Start: Stop: Hr:Min Hr:Min ♦ Press the buttons to set the hour for the start of the active phase. GB │ IE │ NI │ 21 ■ WK 8 A1...
- Page 26 Use the setting „Time lapse video“ to put time lapse photos together to create a video. One second of video consists of five photos. │ GB │ IE │ NI ■ 22 WK 8 A1...
- Page 27 When time lapse is activated, the motion sensors are deactivated. Language Here you can set English, German, Finnish, Swedish, Spanish, French, Italian, Dutch, Portuguese, Czech or Polish as the menu language. GB │ IE │ NI │ 23 ■ WK 8 A1...
-
Page 28: Night Mode
Files will continue to be deleted until the new file can be saved on the microSDHC memory card . You can only overwrite files if the mode selector switch is set to the "On" position. │ GB │ IE │ NI ■ 24 WK 8 A1... -
Page 29: Password Protection
first digit between 0–9. ♦ Then switch to the next field using the button. ♦ Repeat the steps described above to set all four digits. GB │ IE │ NI │ 25 ■ WK 8 A1... - Page 30 OFF position and then to the TEST position. The camera can now be used without entering a password. NOTICE ► This procedure will permanently delete any previously made settings and return the device to the factory settings. │ GB │ IE │ NI ■ 26 WK 8 A1...
-
Page 31: Reset Settings
(incl. any passwords you have set) will be deleted and the factory settings restored. Version In this menu item, you can view the version of the camera software. GB │ IE │ NI │ 27 ■ WK 8 A1... -
Page 32: Attaching With The Securing Strap
Pull the securing strap tight until the camera is fastened firmly and then release the clip. ♦ To remove the camera, press the clip of the strap latch down and pull the securing strap out of the strap latch. │ GB │ IE │ NI ■ 28 WK 8 A1... -
Page 33: Using The Wall Bracket
To move the camera into its final position, undo the two joint wing screws a little, position the camera and fix the position by tightening the two joint wing screws. GB │ IE │ NI │ 29 ■ WK 8 A1... -
Page 34: Aligning The Camera
88° on the horizontal plane and 63° on the vertical. The detection range for videos is approx. 85° on the horizontal plane and 45° on the vertical. │ GB │ IE │ NI ■ 30 WK 8 A1... -
Page 35: Activating Live Mode
However, reflective objects such as traffic signs can cause overexposure if they are located within the recording range. Please note that night exposures are made in black and white. GB │ IE │ NI │ 31 ■ WK 8 A1... -
Page 36: Displaying Recordings On The Screen
H: Video length Display for photo recording Display of the photo resolution Moon phase, degrees Celsius, degrees Fahrenheit, date and time of recording (photo stamp) Date and time of recording │ GB │ IE │ NI ■ 32 WK 8 A1... - Page 37 Press the buttons to select the desired menu entry which you can then activate with the OK button. Use the MENU button to navigate one menu level backwards. GB │ IE │ NI │ 33 ■ WK 8 A1...
- Page 38 ♦ Select "Write-protect all files" to protect all saved recordings from accidental deletion. ♦ Select "Unlock current file" to remove the write protection for the currently selected recording. │ GB │ IE │ NI ■ 34 WK 8 A1...
-
Page 39: Showing Recordings On An External Monitor
Afterwards, you can use your file explorer to display the contents of the microSDHC memory card Now carry out the desired file operations. GB │ IE │ NI │ 35 ■ WK 8 A1... -
Page 40: Cleaning
This is the only way to ensure that the interior of the device is adequately protected from moisture. ■ If you need to replace the seal, contact customer service (see the Service chapter). │ GB │ IE │ NI ■ 36 WK 8 A1... -
Page 41: Troubleshooting
If you are unsatisfied with not work. the service life of the bat- teries, insert an additional 4 x 1.5 V AA/Mignon/ LR6 batteries in the bat- tery compartment. GB │ IE │ NI │ 37 ■ WK 8 A1... - Page 42 NOTICE ► If you are unable to resolve the problem by taking any of the aforementioned steps, please contact the Customer Service department. │ GB │ IE │ NI ■ 38 WK 8 A1...
-
Page 43: Storage When Not In Use
The purpose of this requirement is to ensure that batteries are disposed of in an environmentally friendly manner. Only dispose of batteries when they are fully discharged. GB │ IE │ NI │ 39 ■ WK 8 A1... -
Page 44: Appendix
Photo resolutions/ Res. 3: 8 megapixels Video frame rate (3264 x 2448 pixels) Res. 4: 5 megapixels (2592 x 1944 pixels) Res. 5: 3 megapixels (2048 x 1536 pixels) │ GB │ IE │ NI ■ 40 WK 8 A1... - Page 45 5 to 75 % (no condensation) Dimensions (W x H x D) approx. 13.9 x 10.0 x 7.6 cm Weight approx. 490 g (incl. 8 batteries) *These photo resolutions are interpolated. GB │ IE │ NI │ 41 ■ WK 8 A1...
-
Page 46: Kompernass Handels Gmbh Warranty
Kompernass Handels GmbH warranty Dear Customer, This appliance has a 3-year warranty valid from the date of purchase. If this product has any faults, you, the buyer, have certain statutory rights. Your statutory rights are not restricted in any way by the war- ranty described below. - Page 47 (bottom left), or as a sticker on the rear or bottom of the appliance. ■ If functional or other defects occur, please contact the service department listed either by telephone or by e-mail. GB │ IE │ NI │ 43 ■ WK 8 A1...
-
Page 48: Service
Please note that the following address is not the service address. Please use the service address provided in the operating instructions. KOMPERNASS HANDELS GMBH BURGSTRASSE 21 DE - 44867 BOCHUM GERMANY www.kompernass.com │ GB │ IE │ NI ■ 44 WK 8 A1... - Page 49 Adapterkarte verwenden ....... 61 DE │ AT │ CH │ 45 ■ WK 8 A1...
- Page 50 Importeur ......... . . 88 │ DE │ AT │ CH ■ 46 WK 8 A1...
-
Page 51: Einführung
Ansprüche jeglicher Art wegen Schäden aus nicht bestimmungsge- mäßer Verwendung, unsachgemäßen Reparaturen, unerlaubt vor- genommener Veränderungen oder Verwendung nicht zugelassener Ersatzteile sind ausgeschlossen. Das Risiko trägt allein der Benutzer. DE │ AT │ CH │ 47 ■ WK 8 A1... -
Page 52: Hinweise Zu Warenzeichen
Situation. Falls die gefährliche Situation nicht vermieden wird, kann dies zu Verletzungen führen. ► Die Anweisungen in diesem Warnhinweis befolgen, um Verlet- zungen von Personen zu vermeiden. │ DE │ AT │ CH ■ 48 WK 8 A1... -
Page 53: Sicherheit
Kinder und Personen, die aufgrund ihrer körperlichen, geistigen oder motorischen Fähigkeiten nicht in der Lage sind, das Gerät sicher zu bedienen, dürfen das Gerät nur unter Aufsicht oder Anweisung durch eine verantwortliche Person benutzen. DE │ AT │ CH │ 49 ■ WK 8 A1... - Page 54 Sollten Sie ungewöhnliche Geräusche, Rauch oder ähnlich un- klare Situationen wahrnehmen, entnehmen Sie die Batterien oder trennen ein ggf. angeschlossenes Netzteil von der Stromversor- gung und wenden sich an den Service (siehe Kapitel „Service”). │ DE │ AT │ CH ■ 50 WK 8 A1...
-
Page 55: Verletzungsgefahr Durch Falschen Umgang Mit Batterien
Kinder müssen beaufsichtigt werden, um sicherzustellen, dass sie nicht mit der Speicherkarte spielen. Sollte versehentlich eine Speicherkarte verschluckt worden sein, muss sofort medizinische Hilfe in Anspruch genommen werden. DE │ AT │ CH │ 51 ■ WK 8 A1... -
Page 56: Mögliche Verletzung Von Rechten Dritter
Person zu einer bestimmten Zeit an einem bestimmten Ort war. Die Identifikation kann dabei auch über ein per- sonenbezogenes Kennzeichen, wie z.B. das Fahrzeugkennzeichen, erfolgen. Eine personelle Bestimmbarkeit von Personen ist unbedingt zu vermeiden. │ DE │ AT │ CH ■ 52 WK 8 A1... - Page 57 Ziel zu gelangen (z.B. am Eingang einer Sehenswürdigkeit), so liegt mangels Freiwilligkeit keine wirksame Einwilligung vor. Beachten Sie zu möglichen Verletzungen von Rechten Dritter immer die gesetzlichen Bestimmungen des jeweiligen Einsatzlandes. DE │ AT │ CH │ 53 ■ WK 8 A1...
-
Page 58: Teilebeschreibung
Frontaler Bewegungssensor Seitliche Bewegungssensoren Mikrofonöffnung Abbildung B: Baumhalterung Stativgewinde Abbildung C: Bildschirm Batteriefach Verschlussklammern Betriebswahlschalter (OFF - TEST - ON) Lautsprecher Bedienfeldtasten Abbildung D: DC-Anschlussbuchse (für Netzadapter; nicht mitgeliefert) │ DE │ AT │ CH ■ 54 WK 8 A1... - Page 59 TV-Kabel (Miniklinke auf Cinch; Audio/Video) Mini-USB auf USB 2.0 Anschlusskabel Befestigungsgurt Gurtverschluss Aufbewahrungsbox Adapterkarte (microSD auf SD) microSDHC-Speicherkarte (8 GB) (Symbolbild) 8 x 1,5 V Batterien Typ AA/Mignon/LR6 (Symbolbild) Bedienungsanleitung (Symbolbild) DE │ AT │ CH │ 55 ■ WK 8 A1...
-
Page 60: Inbetriebnahme
Verpackung oder durch Transport wenden Sie sich an die Service-Hotline (siehe Kapitel Service). ► Für die Montage der Wandhalterung benötigen Sie folgende zusätzliche Teile: Bleistift, Bohrmaschine, 6 mm Steinbohrer, Kreuzschlitz-Schraubendreher │ DE │ AT │ CH ■ 56 WK 8 A1... -
Page 61: Entsorgung Der Verpackung
Dichtung intakt und sauber sind. Bitte beachten Sie, dass der Staub- u. Spritzwasserschutz nur noch eingeschränkt gegeben ist, wenn das Gerät mit einem externen Netzteil betrieben wird. DE │ AT │ CH │ 57 ■ WK 8 A1... -
Page 62: Öffnen Und Verschließen Der Kamera
Sollten Sie das Gerät über einen Netzadapter (nicht mitgeliefert) betreiben, öffnen Sie die Gummidichtung an der linken Seite der Kamera und stecken Sie den Stecker des Netzadapterkabels in die DC-Anschlussbuchse . Der Netzadapter muss eine Gleich- │ DE │ AT │ CH ■ 58 WK 8 A1... -
Page 63: Videoanschluss
32 GB Kapazität. ► Verwenden Sie eine microSDHC-Speicherkarte der Geschwin- digkeitsklasse 10. Bei Speicherkarten mit einer niedrigeren Geschwindigkeitsklasse als 10 kann es zu Fehldarstellungen bei der Aufnahme kommen. DE │ AT │ CH │ 59 ■ WK 8 A1... - Page 64 Speicherkarten- einschub des Gerätes zu entnehmen, drücken Sie leicht auf die nach außen ragende Kante der Speicherkarte, so dass diese ausrastet. Entnehmen Sie dann die Speicherkarte. │ DE │ AT │ CH ■ 60 WK 8 A1...
-
Page 65: Adapterkarte Verwenden
Position „LOCK“ (siehe Abbildung). ► Der Schreibschutzschalter schützt die microSDHC-Speicher- karte nur während sie sich in der Adapterkarte befindet. Sobald Sie die microSDHC-Speicherkarte herausnehmen, steht kein Schreibschutz mehr zur Verfügung. DE │ AT │ CH │ 61 ■ WK 8 A1... -
Page 66: Bedienung Und Betrieb
Drücken Sie die SHOT-Taste, um eine Aufnahme (Foto oder Video) ♦ manuell zu starten. Erneutes drücken der SHOT-Taste beendet die Aufnahme. Drücken Sie die MENU-Taste, um das Einstellungs-Menü zu öffnen. ♦ Einstellungen Modus Fotoauflösung Serienaufnahme Videoauflösung Zeitraffer-Videoau │ DE │ AT │ CH ■ 62 WK 8 A1... - Page 67 Wählen Sie die Videoauflösung aus: 1920 × 1080P, 1280 × 720P, 720 × 480P, 640 × 480P oder 320 × 240P. Je höher die Auflösung ist, desto detailreicher sind die Aufnahmen. Bei höherer Auflösung ist die Kapazität der Speicherkarte schneller erschöpft. DE │ AT │ CH │ 63 ■ WK 8 A1...
- Page 68 Äste gestört, wählen Sie „Aus“, bestätigen mit der OK-Taste und schalten die seitlichen Bewegungssensoren damit ab. Ansonsten werden durch die sich bewegenden Äste Auf- nahmen ausgelöst. Voreingestellt ist „Ein“. │ DE │ AT │ CH ■ 64 WK 8 A1...
- Page 69 Endzeit für die aktive Phase einstellen: Ziel-Aufnahmezeit einstellen Start: Stopp: Std: Min Std: Min ♦ Drücken Sie die / -Tasten, um die Stunde für den Start der aktiven Phase einzustellen. DE │ AT │ CH │ 65 ■ WK 8 A1...
- Page 70 Aufnahme manuell abgebrochen wird. Mit der Einstellung „Zeitraffer-Video“ wird ein Video durch die Fotos der Zeitraffer-Aufnahme erstellt. Eine Sekunde des Videos besteht dabei aus fünf aufgezeichneten Fotos. │ DE │ AT │ CH ■ 66 WK 8 A1...
- Page 71 Bestätigen Sie Ihre Eingabe mit der OK-Taste. Drücken Sie anschlie- ♦ ßend die MENU-Taste, um dieses Untermenü zu schließen. HINWEIS ► Bei aktivierter Zeitraffer-Aufnahme sind die Bewegungssensoren deaktiviert. DE │ AT │ CH │ 67 ■ WK 8 A1...
- Page 72 Es werden so viele Dateien gelöscht, bis die neue Aufnahme auf die microSDHC-Speicherkarte passt. Sie können Dateien nur überschreiben, wenn sich der Betriebswahlschalter der Stellung „ON“ befindet. │ DE │ AT │ CH ■ 68 WK 8 A1...
- Page 73 Bildschirmmenü können Sie dann eine vierstellige Zahlenkombination einstellen: ♦ Drücken Sie die / -Tasten, um die erste Zahl zwischen 0 – 9 auszuwählen. ♦ Wechseln Sie mit der -Taste zum nächsten Feld. DE │ AT │ CH │ 69 ■ WK 8 A1...
- Page 74 Kamera zu entsperren und in den Auslieferungs- zustand zurück zu versetzen: ♦ Laden Sie die Software der Wildkamera im Produktunterstützungs- bereich auf www.kompernass.com herunter. ♦ Entpacken Sie die Datei und kopieren die Dateien „ISP_SD.bin“ und „Rom_CodeWK8A1.bin“ auf eine leere Speicherkarte.
- Page 75 Ihnen vorgenommenen Einstellungen sowie ein ggf. gesetztes Passwort gelöscht und der Auslieferungs- zustand wiederhergestellt. Version In diesem Menüpunkt können Sie sich den Versionsstand der Kamerasoftware anzeigen lassen. DE │ AT │ CH │ 71 ■ WK 8 A1...
-
Page 76: Montage Mit Befestigungsgurt
Mit Hilfe der mitgelieferten Wandhalterung können Sie die Kamera an Wänden oder Decken fest montieren. Bevor Sie die Wandhalterung montieren, sollten Sie sicherstellen, dass alle vorhandenen Schrauben fest angezogen sind. │ DE │ AT │ CH ■ 72 WK 8 A1... - Page 77 Um die Kamera in die endgültige Position zu bringen, öffnen Sie die beiden Gelenk-Flügelschrauben ein wenig, richten die Kamera aus und fixieren die Position durch Festziehen der beiden Gelenk-Flügelschrauben. DE │ AT │ CH │ 73 ■ WK 8 A1...
-
Page 78: Kamera Ausrichten
100° von Ecke zu Ecke. Das Aufnahmefeld für Fotos liegt bei horizontal ca. 88° und vertikal ca. 63°. Das Aufnahmefeld für Videos liegt bei horizontal ca. 85° und vertikal ca. 45°. │ DE │ AT │ CH ■ 74 WK 8 A1... -
Page 79: Live-Modus Aktivieren
Distanz von ca. 3 m bis 20 m, ohne dabei das Objekt überzubelichten. Reflektierende Gegenstände (z. B. Verkehrs- schilder) können allerdings auch innerhalb dieser Reichweite zu Überbelichtungen führen. Bitte beachten Sie, dass Nachtaufnahmen in schwarz/weiß erfolgen. DE │ AT │ CH │ 75 ■ WK 8 A1... -
Page 80: Aufnahmen Auf Dem Bildschirm Anzeigen
G: Wiedergabe mit der OK-Taste starten H: Anzeige der Videolänge Anzeige für Fotoaufnahme Anzeige der Fotoauflösung Mondphase, Grad Celsius, Grad Fahrenheit, Datum und Uhrzeit der Aufnahme (Fotostempel) Datum und Uhrzeit der Aufnahme │ DE │ AT │ CH ■ 76 WK 8 A1... - Page 81 ♦ Drücken Sie die / -Tasten, um den gewünschten Menüeintrag auszuwählen, den Sie dann mit der OK-Taste aufrufen. Mit der MENU-Taste wechseln Sie jeweils eine Menüebene zurück. DE │ AT │ CH │ 77 ■ WK 8 A1...
- Page 82 Wählen Sie „Alle schreibschützen“, um alle bereits gespeicherten Aufnahmen gegen versehentliches Löschen zu schützen. ♦ Wählen Sie „Auswahl entsperren“, um den Schreibschutz für die gerade angewählte Aufnahme aufzuheben. │ DE │ AT │ CH ■ 78 WK 8 A1...
-
Page 83: Aufnahmen Auf Externem Monitor Anzeigen
Dieser erkennt das Gerät nun als „Wechseldatenträger“ und installiert automatisch die benötigten Treiber. Anschließend kann mit dem Datei-Explorer der Inhalt der microSDHC-Speicherkarte angezeigt werden. Führen Sie dann die gewünschten Dateioperatio- nen durch. DE │ AT │ CH │ 79 ■ WK 8 A1... -
Page 84: Reinigung
Nur so können die Dichtungen das Geräteinnere vor Feuchtigkeit schützen. ■ Sollten Sie die Dichtungen austauschen wollen, wenden Sie sich an den Service (siehe Kapitel Service). │ DE │ AT │ CH ■ 80 WK 8 A1... -
Page 85: Fehlerbehebung
Ersetzen Sie die Batterien erschöpft. in der Kamera. Sollten Die Kamera Sie mit der Betriebsdauer funktioniert nicht. der Batterien unzufrieden sein, setzen Sie zusätzlich 4 Stück 1,5 V-Batterien AA/Mignon/LR6 in das Batteriefach ein. DE │ AT │ CH │ 81 ■ WK 8 A1... - Page 86 HINWEIS ► Wenn Sie mit den vorstehend genannten Schritten das Problem nicht lösen können, wenden Sie sich bitte an den Kundendienst. │ DE │ AT │ CH ■ 82 WK 8 A1...
-
Page 87: Lagerung Bei Nichtbenutzung
Sammelstelle seiner Gemeinde, seines Stadtteils oder im Handel abzugeben. Diese Verpflichtung dient dazu, dass Batterien/Akkus einer umweltschonenden Entsorgung zugeführt werden können. Geben Sie Batterien/Akkus nur im entladenen Zustand zurück. DE │ AT │ CH │ 83 ■ WK 8 A1... -
Page 88: Anhang
Aufl. 2: 12 MPixel (4000 x 3000 Pixel)* Foto Auflösungen Aufl. 3: 8 MPixel (3264 x 2448 Pixel) Aufl. 4: 5 MPixel (2592 x 1944 Pixel) Aufl. 5: 3 MPixel (2048 x 1536 Pixel) │ DE │ AT │ CH ■ 84 WK 8 A1... - Page 89 5 bis 75 % (keine Kondensation) Abmessungen (B x T x H) ca. 13,9 × 10,0 x 7,6 cm Gewicht ca. 490 g (inkl. 8 Batterien) *Diese Fotoauflösungen sind interpoliert. DE │ AT │ CH │ 85 ■ WK 8 A1...
-
Page 90: Garantie Der Kompernaß Handels Gmbh
Dies gilt auch für ersetzte und reparierte Teile. Eventuell schon beim Kauf vorhandene Schäden und Mängel müssen sofort nach dem Aus- packen gemeldet werden. Nach Ablauf der Garantiezeit anfallende Reparaturen sind kostenpflichtig. │ DE │ AT │ CH ■ 86 WK 8 A1... - Page 91 Gravur, auf dem Titelblatt Ihrer Anleitung (unten links) oder als Aufkleber auf der Rück- oder Unterseite. ■ Sollten Funktionsfehler oder sonstige Mängel auftreten, kontak- tieren Sie zunächst die nachfolgend benannte Serviceabteilung telefonisch oder per E-Mail. DE │ AT │ CH │ 87 ■ WK 8 A1...
-
Page 92: Service
Importeur Bitte beachten Sie, dass die folgende Anschrift keine Serviceanschrift ist. Kontaktieren Sie zunächst die benannte Servicestelle. KOMPERNASS HANDELS GMBH BURGSTRASSE 21 DE - 44867 BOCHUM DEUTSCHLAND www.kompernass.com │ DE │ AT │ CH ■ 88 WK 8 A1... - Page 93 KOMPERNASS HANDELS GMBH BURGSTRASSE 21 DE - 44867 BOCHUM GERMANY www.kompernass.com Last Information Update · Stand der Informationen: 11 / 2017 · Ident.-No.: WK8A1-092017-5 IAN 288238...
Need help?
Do you have a question about the WK 8 A1 and is the answer not in the manual?
Questions and answers