Table of Contents
Advertisement
Advertisement
Table of Contents

Related Manuals for Digital Sputnik DS1


Summary of Contents for Digital Sputnik DS1
- Page 1 DS1 User Manual June 2019...
-
Page 2: Table Of Contents
DS1 User Manual Table of Content Safety instructions Intended use 1. HARDWARE Parts list: DS1 Advanced System / DS1 System DS1 System Specifications Hardware and Firmware Versions What's included PSU interface Module setup 2.CONTROL Color page Color control Setup Page... -
Page 3: Safety Instructions
DS1 User Manual Safety instructions Safety instructions Please read through these instructions carefully before operating the DS LED Lighting System, and keep these instructions for future reference. There are numerous safety instructions and warnings that must be followed for your own safety. -
Page 4: Intended Use
DS1 User Manual Intended use Intended use This product has been designed as a professional illumination tool for dry environments. Please always follow the safety instructions. Any usage other than described in this manual is not advised and can damage the product and lead to risks such as fire, electric shock, etc. -
Page 5: Hardware
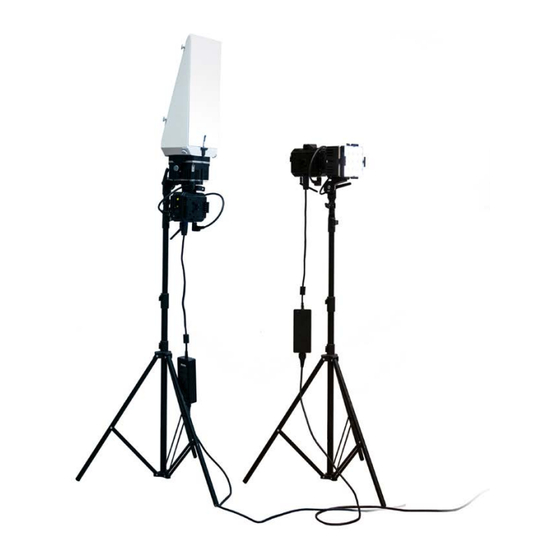
DS1 User Manual 1. HARDWARE / DS1 /Ds1 Dual System 1. HARDWARE Parts list DS1 Dual System DS1 System 1 Pcs – DS1 Dual Cardboard Box 1 Pcs – DS1 Cardboard Box 2 Pcs – DS1 PSU 1 Pcs – DS1 PSU 2 Pcs –... -
Page 6: Ds1 System Specifications
Dimensions of a single light module: 116 x 116 mm/4 x 4 in square, 2.8lb/1.3kg Dimensions of DS1 unit: 12 x 4.0 x 4.0" /300 x 116.0 x 116.0 mm, 6.6lb/3kg Dimensions of the DS1 basic case/foam: 16.2 x 12.3 x 7.2'' 410x312x180 mm Note: The DS1 system comes packed in a cardboard box that includes a standardized cut-out foam. -
Page 7: Hardware And Firmware Versions
DS1 User Manual 1. HARDWARE / Hardware and Firmware Versions Hardware and Firmware Versions This user manual covers features up to v2.67.5 firmware. Some functionality may not be available with earlier firmware versions Firmware updates are released on a semi-regular basis. We recommend updating to the latest available firmware version so all product features are available. -
Page 8: What's Included
DS1 User Manual 1. HARDWARE / What's included What's included: PSU - Can also be referred to as Ballast. Light Module Cable - 2ft/0.75m-long The brain of the operations, gives power male to male connector that connects the and controls the light module. - Page 9 AC/DC Converter - The DS1 AC/DC Con- mount that is both a baby and junior pin. verter from Digital Sputnik provides uni- versal 90 to 260 VAC current to the DS1 power supply. XLR Y-Cable - It is a pass-through cable that allows you to split the DMX signal be- tween fixtures.
-
Page 10: Psu Interface
Screen Jog-wheel Rotating jog-wheel with push functionality. Center of jog-wheel acts as OK button. Screen Gateway to your DS1 system. All color pa- rameters, settings and system information is presented on here. Jog-Wheel For easier control, the orientation of the display screen will rotate 180°depending on... - Page 11 Gold Mount systems can be purchased in the Digital Sputnik web store and installation of the extra battery plate can be done by the user. On releases prior to 2018 the DS1 PSU has two V mount battery plates by default.
- Page 12 The DS1 system comes with the Light Module, PSU and Tripod Mount already assembled to one fixture. This is the standard setup of the DS1 fixture. But the fixture can be shaped and assembled any way needed Here are some key points to keep in mind Eccentric lock when building your fixture.
-
Page 13: Module Setup
DS1 User Manual 1. HARDWARE / Module setup Module setup The DS1 PSU has two eccentric lock mounts. One on the short and one on the long side of the PSU. The mounting procedure is identical to the tripod setup. -
Page 14: Control
DS1 User Manual 2. CONTROL / Color page / Color control 2.CONTROL Color page Color control From all menu pages “COLOR” menu will Turn the jog-wheel slowly for precise con- always be accessible from the bottom of trol. The incremental raise of the value is... - Page 15 DS1 User Manual 2. CONTROL / Color page / Color control Temperature presets, are as follows: 1500, the color wheel. The default is 120 degrees, 3200, 5600 and 10000 K. Using the twist which means Green on the top end (when saturation is 100% or higher) and Magenta knob will allow increment changes of 100K.
- Page 16 DS1 User Manual 2. CONTROL / Color page / Color control Colorwheel 1500 K GREEN (120°) YELLOW (60°) CYAN (180°) RED (0°) BLUE (240°) MAGENTA (300°) WHITE POINT CAN BE CHANGED FROM 1500 K TO 10000 K GREEN (120°) YELLOW (60°) RED (0°)
- Page 17 DS1 User Manual 2. CONTROL / Color page / Color control 5. Fan Mode - You can set the fan mode Please note that ITSH settings will be recorded after 6 seconds after manual in- to adapt the cooling and noise level to the environment.
-
Page 18: Setup Page
DS1 User Manual 2. CONTROL / Setup page Setup Page Allows the user to alter specific function- ality and check working information about the PSU and light module. To navigate between the DS DMX page, SETUP and WiFi pages, press OK when the page name is highlighted and use the jog wheel. - Page 19 DS1 User Manual 2. CONTROL / Setup page 3. Curve - changes the dimming curve of the value range. It can be set so the value is increased and decreased linearly(LIN) or by a square factor(SQR). Note that when using “LIN” the light output...
-
Page 20: Ds Mode On/Ds Addr
2. CONTROL / DS DMX page DS mode ON/DS ADDR “DS mode” “ON” should only be used when controlling DS1 from the “DS DMX” iOS app. When in need to change DMX universe or DMX mode set “DS mode” to “OFF”... -
Page 21: Ds Mode Off/Ds Addr
DS1 User Manual 2. CONTROL / DS DMX page If “DS MODE” is ”ON”, the DS1 will assume DS mode OFF/ DMX mode example the standard DMX subset of the “DS16” per- • DS16 - DMX personality. sonality. (Universe is 0, Net 0, Subnet 0) Default is DS16 •... -
Page 22: Various Dmx Personalities
This can be used to visually identify DS1. This can be achieved remotely using RDM the correct DMX daisy-chain. instead. This is an oversight and will be fixed in the next software release. -
Page 23: Wifi Page
The created wifi network name is by WIFI module is in the “Server” (Access Point) default the Serial of the DS1 PSU. The serial mode can be found on the side of the DS1 PSU on • DS016240019 a silver background sticker. This WiFi net-... - Page 24 2. CONTROL / WiFi page Client mode: Through the DS DMX app for iOS, it is possible to connect the DS1 to another DS Art-Net enabled PSU, or to an existing WiFi network (a wireless router). If possible connect the DS1 to a DHCP enabled router.
- Page 25 Reset WIFI This setting is used to reset the WiFi mod- ule to the default Server (Access Point) set- ting with the Serial Number of the DS1 PSU as its network name (SSID). The Serial Number can be checked on the side of the DS1 PSU.
- Page 26 DS1 User Manual 2. CONTROL / WiFi page Factory reset A factory reset can be performed in order to change PSU settings to their default values. This option is located on the bottom of the SETUP page. The following parameters will be changed: •...
-
Page 27: Upgrade
DS WiFi module, or through a wired connection (DMX to USB cable with FTDi chip available for purchase at www. digitalsputnik.com). Perform a Wifi reset before upgrading DS1 over WiFi.* *Refer to “WiFi Page” Bootloader Mode If there have been firmware updating... -
Page 28: Warning Codes (Flashing Codes)
DS1 User Manual 3. WARNING CODES Warning codes (flashing codes) Code Description ArtDmx stream is incoming from the WiFI module. ArtDMX Works under Remote=WiFi only. DMX stream is incoming from the XLR-5 pin on the DMX/RDM handle. Works under Remote=DMX only. -
Page 29: Error Codes
Critical/blocking codes; the device attempts to clear these every 30 seconds. A manual attempt to clear the error can also be made on the DS1 from a single device or Master (topmost) device in a stack, by pressing OK when the code is on screen. But when the problem persists the code reappears immediately.
Need help?
Do you have a question about the DS1 and is the answer not in the manual?
Questions and answers