Table of Contents
Advertisement
Quick Links
Advertisement
Table of Contents

Related Manuals for BMW G 310 R


Summary of Contents for BMW G 310 R
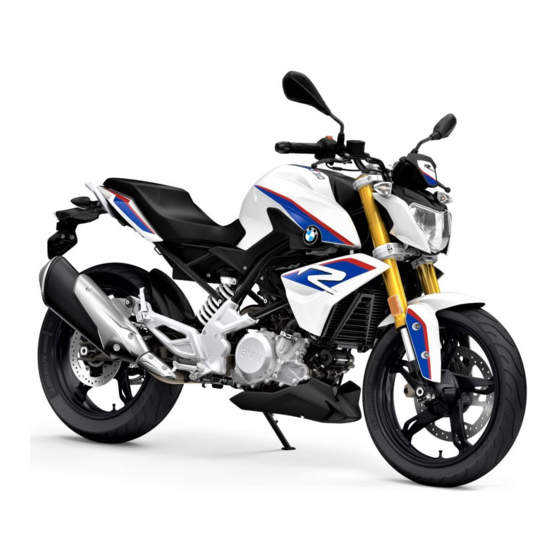
- Page 1 BMW Motorrad The Ultimate Riding Machine bmw‑motorrad.com Rider's Manual G 310 R...
- Page 2 Vehicle data/dealership details Vehicle data Dealership details Model Person to contact in Service department Ms/Mr Vehicle Identification Number Phone number Colour code Date of first registration Dealership address/phone number (com- Registration number pany stamp)
- Page 3 BMW. It contains im- We hope you will enjoy riding portant information on how to your BMW and that all your jour- operate the controls and how to neys will be pleasant and safe make the best possible use of all your BMW's technical features.
-
Page 4: Table Of Contents
Table of Contents Engine speed display ..30 Refuelling ....54 Securing motorcycle for 1 General instructions ..5 4 Operation . - Page 5 12 Service ....125 Preserving paintwork ..110 BMW Motorrad Service . . . 126 Laying up the motor- BMW Motorrad Mobility cycle .
-
Page 7: General Instructions
General instructions Quick & easy reference ....6 Abbreviations and symbols ..6 Equipment ......7 Technical data . -
Page 8: Quick & Easy Reference
WARNING Medium-risk through your authorised hazard. Non-avoidance can BMW Motorrad dealer; Indicates the end of a lead to fatal or severe injury. optional accessories passage relating to spe- DANGER High-risk haz- have to be retrofitted to cific accessories or items ard. -
Page 9: Equipment
Equipment Deutsches Institut für Normung e. V. (DIN). Versions for individual When you purchased your BMW countries may differ. motorcycle, you chose a model with individual equipment. This Actuality Rider's Manual describes selec- The high safety and quality level ted optional accessories (OA) of BMW motorcycles is ensured from BMW. -
Page 11: General Views
General views General view, left side ....11 General view, right side ... . . 13 Underneath the seat . -
Page 13: General View, Left Side
General view, left side with extra socket Power socket ( 101) Adjusting ring for spring preload ( Seat lock ( Chain settings ( Engine oil level indicator Type plate Table of tyre pressures... -
Page 15: General View, Right Side
General view, right side Fuel filler neck ( Brake-fluid reservoir, front Vehicle Identification Num- Coolant expansion tank Oil filler neck ( Brake-fluid reservoir, rear Grab handle (... -
Page 16: Underneath The Seat
Underneath the seat Battery ( Diagnostic connector Fuse box ( Rider's Manual ( Toolkit (... -
Page 17: Multifunction Switch, Left
Multifunction switch, left Headlight flasher ( High beam/low-beam headlight rocker switch Turn indicators ( Horn... -
Page 18: Right
Multifunction switch, right Emergency off switch (kill switch) ( Starter button (... -
Page 19: Instrument Panel
Instrument panel Pushbutton Select display ( 36). Telltale lights ( Multifunction display Warning lights ( Photosensor for the bright- ness control in the multi- function display rpm redline warning 52). -
Page 21: Status Indicators
Status indicators Warning and telltale lights ... 20 Multifunction display ....21 Warnings ......22 Service-due indicator . -
Page 22: Warning And Telltale Lights
Warning and telltale lights Telltale light for neutral High-beam headlight tell- tale light ( Turn signal indicator light Fuel reserve indicator light 27) ( Warning light for vehicle voltage ( General warning light ABS warning light ( Malfunction indicator lamp... -
Page 23: Multifunction Display
Multifunction display On-board computer Display area for values Service-due indicator Clock ( Warning symbols ( Gear, "N" is displayed when idling Speed Engine speed ( Fuel level ( 27) (... -
Page 24: Warnings
Warnings pending on how urgent the warn- ing is, the general warning light Mode of presentation will either light up or flash red or Warnings are indicated by the yellow. corresponding warning lights. If two or more warnings occur at the same time, all the appropriate warning lights and warning sym- bols appear. - Page 25 Warnings, overview Telltale and warning Warning symbols in the Meaning lights display Warning light for Vehicle voltage is too low ( vehicle voltage lights up. General warning Temperature sym- Coolant temperature too high ( bol appears on the light flashes red. display.
- Page 26 Telltale and warning Warning symbols in the Meaning lights display ABS telltale and ABS self-diagnosis not completed warning light flashes. ABS telltale and ABS fault ( warning light shows. Fuel reserve indic- Fuel down to reserve ( ator light lights up. SERVICE General warning Service appointment has passed (...
- Page 27 Vehicle voltage is too low an authorised BMW Motorrad Temperature symbol ap- pears on the display. dealer. Warning light for vehicle voltage lights up. Possible cause: ATTENTION The coolant circuit is faulty. WARNING Riding with overheated en- If possible, allow the engine to cool down.
- Page 28 Possible cause: specialist workshop, preferably WARNING The engine control unit has an authorised BMW Motorrad diagnosed a fault which impairs Engine damage when run- dealer. the engine performance or ning in emergency-operation It is possible to continue to ride throttle response.
-
Page 29: Abs Fault
BMW Motorrad ABS fault Fuel down to reserve dealer. Fuel reserve indicator light ABS telltale and warning You can continue riding; pollut- light shows. lights up. ant emissions are higher than Possible cause: the threshold values. WARNING The ABS control unit has detec- ABS self-diagnosis not ted a fault. -
Page 30: Service-Due Indicator
1 and the service due regularly by a specialist work- date 3 are shown on the display. shop, preferably an authorised BMW Motorrad dealer. If servicing is due in less than The motorcycle remains op- SERVICE 1000 km, the... -
Page 31: Fuel Reserve
Fuel reserve message 1, the remaining dis- The range reading appears tance 2 and the service due automatically on the multifunc- Range date 3 are shown on the display. tion display when fuel is down to the reserve level. Permanent SERVICE After a refuelling stop, the message range is recalculated if the... -
Page 32: Engine Speed Display
Engine speed display Unit for engine speed display: 1000 revolutions per minute Low engine speed range Segments for engine speed display High engine speed range rpm redline warning 52). -
Page 33: Operation
Operation Ignition ......32 Lights ....... 34 Turn indicators . -
Page 34: Ignition
Ignition Switching on ignition If the camber of the roadway permits, turn the handlebars all Keys the way to the left. You receive 2 vehicle keys. Ignition switch/steering lock, fuel filler cap lock and seat lock are all operated with the same key. Lock the handlebars ATTENTION Insert the ignition key 1 into... - Page 35 Switching off ignition Emergency off switch (kill Do not operate the kill switch when riding. switch) Turn the ignition key 1 to the OFF position. A = Operation mode Push the emergency-off Handlebars (steering lock) are switch 1 forwards to switch off not locked.
-
Page 36: Lights
Lights High-beam headlight, Headlight flasher, operating operating Low-beam headlight and sidelights The low-beam headlight and side light switch on automatic- ally when the ignition is switched NOTICE The low-beam headlight and the side light drain the battery. Press the switch 1 down away Press button 1. - Page 37 Push the switch 1 to the left. The left turn indicator is switched on. The turn indicator telltale light flashes. Push the switch 1 to the right. The right turn indicator is switched on. The turn indicator telltale light flashes. Push the switch 1 to the centre position to switch off the turn indicators.
-
Page 38: Multifunction Display
Multifunction display Select display Requirement The vehicle is at a standstill. Switch on the ignition. The on-board computer read- ings appear on the display. Repeatedly short-press but- ton 1 until the reading shows the value you want. Possible displays: Total distance travelled: TRIP1 Trip distance 1: TRIP2... -
Page 39: Date And Time
Date and time Press button 1 briefly and re- Once you have set the day peatedly to change the minutes correctly, press and hold but- Setting the clock (increases). ton 1 down. Select display ( 36). Once you have the set the Month 6 flashes. -
Page 40: Resetting The Average Values
CONSI SPEED The trip distances 2 which appears need resetting have been se- on the display. lected. TRIP1 TRIP2 appears on the display. Push the rear seat bench 2 down to relieve the strain on the lock, and at the same time Press and hold button 1 until use the ignition key to unlock the value 3 has been reset. -
Page 41: Installing The Seat
Installing the seat Fit the seat bench 1 with the fixture 3 centrally into the bat- tery tray 4. Attach the detent pin 2 and push it into the lock. -
Page 43: Adjustment
Adjustment Mirrors ......42 Headlight ......42 Spring preload . -
Page 44: Mirrors
Mirrors Adjusting mirror arm Left mirror (lock nut) to Adjusting mirrors adapter 22 Nm Push protective cap 1 over the threaded fastener. Headlight Adjusting headlight for driving on left/driving on Push protective cap 1 for the right threaded fastener up on the Turn the mirror to the desired This motorcycle has a mirror arm. -
Page 45: Spring Preload
Remove front trim panel 2 on rect headlight beam throw, have left and right. the setting checked by a special- ist workshop, preferably an au- thorised BMW Motorrad dealer. Attach the front trim panel 2 Adjusting headlight beam using hooks 4 to the front throw mask 5. -
Page 46: Spring Preload
Adjusting spring preload Basic setting of spring for rear wheel preload, rear Make sure the ground is level Stage 1 (One-up riding and firm and place the motor- without luggage) cycle on its stand. Stage 5 (One-up with luggage) Stage 10 (Two-up riding and luggage) Install screws 1. -
Page 47: Riding
Riding Safety instructions ....46 Checklist ......48 Starting . -
Page 48: Safety Instructions
3 and 4 and as stated on the label inside of the year. Your authorised tighten. the case (see also the section BMW Motorrad dealer will be glad to advise you on the correct entitled "Accessories"). Speed clothing for every purpose. -
Page 49: Catalytic Converter
Insufficient tyre pressure Do not inhale exhaust fumes. Do not run the fuel tank dry. Poor tyre tread Do not run the engine in an Do not remove the spark plug enclosed space. connector while the engine is Etc. running. Top speed Risk of burn injury Stop the engine immediately if... -
Page 50: Checklist
Checklist Overheating due to insufficient Check rear brake pad thickness cooling; in extreme cases vehicle 70). Comply with checklist fire Checking brake-fluid level, front At regular intervals, use the Do not allow the engine to idle brakes ( 71). checklist below to check your unnecessarily. - Page 51 Pre-Ride-Check NOTICE The instrument cluster runs a test of the warning and indicator You cannot start the motorcycle lights and the display, known as with the side stand extended and the Pre-Ride-Check, after the a gear engaged. The engine will ignition has been switched on.
- Page 52 ABS self-diagnosis ABS self-diagnosis not Phase 3 completed BMW Motorrad Integral ABS per- The warning and indicator lights forms self-diagnosis to ensure its and the rpm redline warning go The ABS function is not avail- operability. Self-diagnosis starts...
-
Page 53: Running In
Longer stopping distance, risk of Running-in speed quickly as possible by a accident specialist workshop, preferably Apply the brakes in good an authorised BMW Motorrad time. No full throttle (Odometer dealer. reading 0...1000 km) Tyres Note the mileage after which... -
Page 54: Rpm Redline Warning
10800 min but the vehicle is not yet in sixth clutch at the same time. Shift up to the next gear. gear. BMW Motorrad ABS prevents the front wheels from locking. Brakes In the "panic braking situations" How can stopping... -
Page 55: Parking Your Motorcycle
Parking your Descending mountain Riding on salted or gritted roads passes motorcycle After work has been carried on Side stand the brakes, due to traces of oil WARNING Switch off the engine. or grease Braking only with the rear Riding on dirt-covered surfaces On a gradient, the motorcycle brake on mountain descents or off-road... -
Page 56: Refuelling
Do not sit or lean on the Risk of damage to parts if vehicle Do not attempt to run the vehicle while it is propped on topples vehicle on leaded fuel or fuel the side stand. with metallic additives (e.g. Do not lean or sit on the manganese or iron). - Page 57 Refuelling Make sure the ground is level and firm and place the motor- WARNING cycle on its side stand. Fuel is highly flammable Risk of fire and explosion Do not smoke. Never bring a naked flame near the fuel tank. Refuel with fuel of the grade WARNING stated above;...
-
Page 58: Securing Motorcycle For Transporta
level is down to reserve will not Securing motorcycle Secure the vehicle to prevent it be switched off. toppling, preferably with the as- for transportation sistance of a second person. Make sure that all components NOTICE Push the motorcycle onto the that might come into contact transportation flat and hold it in The "usable fuel capacity"... - Page 59 At the front, loop a strap over the bottom fork bridge on each side. Pull the straps down and tight. At the rear, secure the straps to the rear footrests on both sides and tighten the straps. Uniformly tighten all the straps. The motorcycle is lashed down securely.
-
Page 61: Engineering Details
Engineering details General instructions ....60 Anti-lock brake system ... . . 60... -
Page 62: General Instructions
As soon as is registers the ac- force, so the wheels continue to bmw-motorrad.com/technik turn and driving stability is main- tual circumstances, the system tained irrespective of the condi- reacts instantly and adjusts brak-... - Page 63 ABS function is deactivated What significance momentum take over and even for safety reasons and an ABS devolves on regular BMW Motorrad ABS is unable to fault message is issued. Self-dia- maintenance? counteract their effects. gnosis has to complete before fault messages can be issued.
-
Page 65: Maintenance
Maintenance General instructions ....64 Diagnostic connector ....96 Toolkit ......64 Front-wheel stand . -
Page 66: General Instructions
If you are in doubt, consult a the battery holder. Adjusting spring preload specialist workshop, preferably Replace fuses ( 94). for rear wheel ( 44). your authorised BMW Motorrad 10 Fuses Allen key dealer. 10 A, 15 A and 30 A 5 mm... -
Page 67: Front-Wheel Stand
Push the two adapters 2 apart ATTENTION Install the rear-wheel stand until the front forks fit between 66). Use of the BMW Motorrad them. front wheel stand without ac- Use locating pins 3 to set the Use basic stand with front-... -
Page 68: Rear-Wheel Stand
Rear-wheel stand Install the rear-wheel stand Align the two adapters 2 so ATTENTION that the front forks are securely seated. Centre stand retracts if mo- Tighten clamping screws 1. torcycle is lifted too high Set the height of the stand 3 Risk of damage to parts if vehicle so that it raises the rear wheel topples... -
Page 69: Engine Oil
Push the rear-wheel stand Place the motorcycle down until the motorcycle on an auxiliary stand; is standing upright and the BMW Motorrad recommends handle of the rear-wheel stand the BMW Motorrad auxiliary is resting on the floor. stand. -
Page 70: Brake System
Use of insufficient engine oil by a specialist workshop, or too much engine oil preferably an authorised Engine damage BMW Motorrad dealer. Always make sure that the oil level is correct. Topping up the engine oil Top up the engine oil to the Make sure the ground is level specified level. - Page 71 Have the brakes checked by a Visually inspect the brake pads min 1.0 mm (Friction lining specialist workshop, preferably to ascertain their thickness. without carrier plate) an authorised BMW Motorrad If the wear indicating marks are dealer. no longer visible: Checking front brake pad thickness...
- Page 72 In order to ensure the depend- BMW Motorrad recommends ability of the brake system, do you only install genuine brake pads from BMW Motorrad. not permit the brake pads to wear past the minimum per- Check rear brake pad missible thickness.
- Page 73 Brake fluid, DOT4 by a specialist workshop, You should never allow the preferably an authorised brake fluid level to drop below BMW Motorrad dealer. Set the handlebars so that the the MIN mark. (Brake-fluid brake fluid tank is horizontal. reservoir horizontal) Check the brake fluid level in the sight glass 1.
- Page 74 If the brake fluid level drops be- low the permitted level: Have the defect rectified as quickly as possible by a spe- cialist workshop, preferably an authorised BMW Motorrad dealer. Checking the brake-fluid level, rear brakes Check the brake fluid level in...
-
Page 75: Clutch
Have the clutch checked by a brake fluid reservoir specialist workshop, preferably Considerably reduced braking Clutch-lever play an authorised BMW Motorrad power due to air in the brake dealer. system 1...2 mm (at the hand lever, Check the brake-fluid level at... -
Page 76: Coolant
Adjust the clutch-lever Repeat the steps until the toward the inside of the right clutch-lever play is set side trim panel. play correctly. Install cover 4. Coolant Check coolant level Requirement The engine is cold. Hold the motorcycle upright, ideally with help from another Loosen cover 4. -
Page 77: Wheel Rims And Tyres
The ised BMW Motorrad dealer. locations of the marks are indic- Coolant-full quantity ated on the edge of the tyre, e.g. -
Page 78: Wheels
Sudden loss of tyre pressure Wheels workshop beforehand, preferably Install valve caps fitted with an authorised BMW Motorrad Effect of wheel size on rubber sealing rings and tighten dealer. chassis and suspension firmly. - Page 79 Place the motorcycle on an auxiliary stand. BMW Motorrad recommends you use the BMW Motorrad rear-wheel stand. Install the rear-wheel stand 66). Lift the front of the motorcycle Slacken clamping screws 1.
-
Page 80: Installing Front Wheel
Roll the front wheel into pos- an authorised BMW Motorrad Remove spacer bush 5 from ition between the front forks. dealer. the wheel hub. In this process, take care not to damage the wheel speed sensor. - Page 81 Lift front wheel and fit quick- Install screw 3 and tighten to Clamping screws in axle release axle 4. specified torque. Counter-hold holder quick-release axle on the right- Remove front-wheel stand and hand side. firmly compress front forks sev- Tightening sequence: Tighten eral times.
-
Page 82: Removing Rear Wheel
Tightening sequence: Tighten screws six times in alternate without centre stand sequence Lift the motorcycle, preferably 19 Nm with a BMW Motorrad rear- Removing the front-wheel wheel stand. stand. Install the rear-wheel stand Remove the adhesive tape 66). - Page 83 quick-release axle has been removed. Remove nut 6 using the right Remove the quick-release tool from the toolkit. axle 8 and remove the chain tensioner 7. Remove washer. Press brake caliper 1 against Slacken locknuts 3 on left and brake disc 2. right.
-
Page 84: Installing The Rear Wheel
Roll the rear wheel to the rear the fasteners checked by a and clear of the swinging arm specialist workshop, preferably and at the same time pull an authorised BMW Motorrad When rolling the rear wheel brake-caliper carrier 11 back dealer. clear of the motorcycle, take... - Page 85 Position the brake-caliper sup- Roll the rear wheel further into Roll the rear wheel as far port 1 on the guide 2. the swinging arm, while push- forward as possible and loop ing brake-caliper carrier 11 for- chain 9 over the sprocket. ward at the same time.
-
Page 86: Chain
Chain to the same scale value on the ing sure that you fit the quick- release axle securely into the right and left. Adjust the chain tension chain tensioner. Tighten locknuts 3 on left and Make sure the ground is level right to the specified tightening and firm and place the motor- torque. - Page 87 To prolong chain life, If chain deflection is outside per- reaches the position with the BMW Motorrad recommends mitted tolerance: lowest amount of chain sag. the use of BMW Motorrad Adjust the chain tension chain lubricant, or: 84). Lubricant Lubricating chain...
-
Page 88: Light Source
Seek the advice of a specialist Pull the front mask 2 forward. workshop, preferably an author- Replacing bulbs for low- ised BMW Motorrad dealer. Remove cover 4. beam headlight and high- Disengage the wire spring beam headlight clip 5 from the stop and fold Open the front mask ( 86). - Page 89 Bulb for low-beam and high-beam headlight H4 / 12 V / 60 W / 55 W To avoid soiling the glass, touch the bulb 6 only at the base. Remove the bulb 6 from the Install cover 4. socket 7. Connect plug 3.
- Page 90 Replace the defective bulb. Bulb for parking light W5W / 12 V / 5 W Use a clean, dry cloth to hold the bulb in order to keep the glass free of foreign matter. Pull the socket 3 out of the Fit the socket 3 into the head- headlight housing.
- Page 91 Replacing bulbs for front Replace the defective bulb. and rear turn indicators Bulbs for flashing turn Make sure the ground is level indicators, front and firm and place the motor- RY10W / 12 V / 10 W cycle on its stand. Switch off the ignition.
-
Page 92: Jump-Starting
Replacing LED turn Seek the advice of a specialist workshop, preferably an author- indicators ised BMW Motorrad dealer. with LED flashing turn indicat- Jump-starting If the LED flashing turn indicators CAUTION fail, they must be replaced. Un- der these circumstances:... -
Page 93: Battery
gine by connecting leads to the Remove seat ( 38). Disconnect the jump lead from on-board socket. the negative terminal first, then Run the engine of the donor disconnect the second lead vehicle during jump-starting. from the positive terminal. ATTENTION Begin by connecting one end Installing the seat ( 39). - Page 94 NOTICE charging. Connecting battery to motor- cycle ( 93). BMW Motorrad has developed a Disconnecting battery from float charger specially designed motorcycle ( 92). Disconnecting battery for compatibility with the elec- from motorcycle Recharging disconnected tronics of your motorcycle.
- Page 95 Connecting battery to motorcycle Remove screw 1. ATTENTION Battery not disconnected in First install the positive battery accordance with correct pro- cable 2 and cover with the pro- cedure tective cap 3. Risk of short-circuit Then install battery negative Always proceed in compliance lead 1.
-
Page 96: Fuses
will be necessary to enter the The holder is now only at- Attach the right side of the tached to the wiring harness 3. holder to the battery tray 2. current date in the instrument panel, in order to ensure that the Push the holder and the wiring Fold the holder 1 down and service-due indicator functions... - Page 97 BMW Motorrad dealer. Installing the seat ( 39). Fuse assignment Press latch 1. Press the lock 4 in on both sides. Open the fuse box 2. Remove cap 5. Consult the fuse assignment diagram below and replace the Consult the fuse assignment defective fuse.
-
Page 98: Diagnostic Connector
Only have the diagnostic con- Fuse 4 nector loosened by a specialist workshop or other authorised 20 A (ABS pressure modu- persons during your next BMW Service appointment. lator) Fuse 8 for radiator fan Have the work performed by Fuse 5 Fuse for radiator fan appropriately trained staff. - Page 99 Press in retainers 1. Seat diagnostic connector 2 in bracket 3. Disengage diagnostic con- nector 2 from holder 3. Retainers 1 engage with an audible click. The interface to the diagnosis and information system can Installing the seat ( 39). be connected to diagnostic connector 2.
-
Page 101: Accessories
Accessories General instructions ....100 Heated handlebar grips ... . 100 Power socket ..... . 101 Topcase . -
Page 102: General Instructions
Use only parts and accessor- accessories NOTICE ies approved by BMW for your vehicle. The handlebar grips have two- BMW has conducted extens- stage heating. Stage two is for ive testing of the parts and ac-... -
Page 103: Power Socket
Power socket Topcase advisable to switch to stage one as soon as the grips are warm. with extra socket with luggage carrier with topcase Connection of electrical devices Installing topcase You can start using electrical WARNING devices connected to the mo- torcycle's sockets only when Topcase not properly se- the ignition is switched on. - Page 104 Hook the topcase into the Turn the key in the topcase Push lock barrel 1 forward. luggage carrier 4. Make sure lock to position 1 and remove Lever 2 pops up. that the hooks 2 fit securely the key from the lock. Pull the release lever all the into the corresponding mount- way up.
- Page 105 Closing topcase Removing the topcase Push release lever 1 down until it engages. Pull release lever 1 all the way Turn the key in the topcase Turn the key in the topcase lock to position 1. lock to the LOCK position and The handle pops out.
-
Page 106: Topcaselight
Lift the topcase at the rear and NOTICE remove it from the luggage carrier. When the key is horizontal in the lock, the release levers are TopcaseLight locked. with luggage carrier with topcase Light Installing topcase Light Insert the base 5 into the WARNING slot 4. -
Page 107: Maximum Payload And Maximum
Removing the topcase topcase. Light Contact your authorised BMW Motorrad dealer if you Turn the key until it is vertical in the lock. -
Page 109: Care
Care Care products ..... 108 Washing the vehicle ....108 Cleaning easily damaged compon- ents . -
Page 110: Care Products
Care products dry the brake discs and brake pads. BMW Motorrad recommends BMW Motorrad recommends that you use BMW insect re- that you use the cleaning ATTENTION and care products you can mover to soften and wash off insects and stubborn dirt on... -
Page 111: Cleaning Easily Damaged
Body panels to rubber seals Use chrome polish for additional Clean the trim panels with water Damage to the rubber seals treatment. and BMW plastic care emulsion. Do not use silicone sprays Radiator or care products that contain NOTICE silicon. -
Page 112: Paint
Paint BMW Motorrad recommends us- Spray the brake and clutch ing BMW tar remover for remov- lever pivots and the main and Washing the vehicle regularly ing specks of tar. Remember to side stand pivots with a suit- will help counteract the long- wax the parts treated in this way. -
Page 113: Technical Data
Technical data Troubleshooting chart ... . . 112 Riding specifications ....124 Screw connections ....113 Accessories . -
Page 114: Troubleshooting Chart
Troubleshooting chart The engine does not start. Possible cause Rectification Side stand extended and gear engaged Retract the side stand. Kill switch activated Set emergency-off switch to operation mode 33). Gear engaged and clutch not disengaged Operate the clutch or put the transmission into idle so that the idle mode indicator light lights up. -
Page 115: Screw Connections
Screw connections Front wheel Value Valid Screw in front-wheel quick-re- lease axle M12 x 20 50 Nm Clamping screws in axle holder M8 x 30 Tighten screws six times in alternate sequence 19 Nm Rear wheel Value Valid Locknut of the final-drive chain tensioning screw 19 Nm Rear quick-release axle in... - Page 116 Mirrors Value Valid Right mirror (lock nut) to ad- apter M10 x 1.25 Left-hand thread, 22 Nm Left mirror (lock nut) to adapter M10 x 1.25 22 Nm...
-
Page 117: Fuel
SAE 15W-50, API SJ / JASO MA2 Additives (e.g. molybdenum-based) are not per- missible because they can attack coated compon- ents of the engine, BMW Motorrad recommends BMW Motorrad ADVANTEC Pro oil. Engine oil, quantity for topping up max 185 ml, Difference between MIN and MAX... -
Page 118: Engine
Engine Location of engine number Crankcase, lower part, right Engine type A82A03A Engine design Water-cooled, 1-cylinder, four-stroke engine with four valves that are actuated via rocker arms, two overhead camshafts and a counterbalance shaft Displacement 313 cm Cylinder bore 80 mm Piston stroke 62.1 mm Compression ratio... -
Page 119: Clutch
Clutch Clutch type Multiplate clutch running in oil bath Clutch-lever play 1...2 mm, at the hand lever, handlebars are in straight-ahead position, engine is cold Transmission Gearbox type Claw-shift 6-speed gearbox, integrated into en- gine block Gearbox transmission ratios 3.083, Primary transmission ratio 1:3.000, 1st gear 1:2.063, 2nd gear 1:1.588, 3rd gear... -
Page 120: Rear-Wheel Drive
Rear-wheel drive Type of final drive Continuous Z-ring chain with jerk damping in the rear hub Chain deflection 40...50 mm, Motorcycle with no weight applied, supported on its side stand Permissible chain length max 144.30 mm, measured centre to centre over 10 pins, chain pulled taut Final drive, number of teeth (Pinion / sprocket) 16/40... -
Page 121: Chassis And Suspension
Chassis and suspension Front wheel Type of front suspension Upside-down telescopic fork Spring travel, front 140 mm, at wheel Rear wheel Type of rear suspension Two-arm aluminium swinging arm Spring travel, rear 131 mm, at wheel Brakes Front wheel Type of front brake 4-piston fixed caliper Brake-pad material, front Sintered metal... -
Page 122: Wheels And Tyres
Rear wheel Type of rear brake 1-piston floating caliper Brake-pad material, rear Organic material Brake disc thickness, rear 4.5 mm, when new min 4 mm, Wear limit Blow-by clearance of the footbrake lever 2.0...2.5 mm, between footbrake lever and limit position on footrest plate Wheels and tyres Speed category, front/rear tyres... - Page 123 Rear wheel Rear-wheel type Aluminium cast wheel Rear wheel rim size 4.0 " x 17 " Tyre designation, rear 150/60 R 17 Load index, rear tyre min. 56 Permissible rear-wheel imbalance max 45 g Tyre pressure Tyre pressure, front 2.2 bar, with cold tyres; one-up and two-up riding Tyre pressure, rear 2.3 bar, with cold tyres;...
-
Page 124: Electrical System
Electrical system Fuses Fuse 1 7.5 A, Oxygen sensor, tank vent valve, secondary air system, injection system, electric fuel pump Fuse 2 7.5 A, Heated grips, engine control unit, ABS pressure modulator, diagnostic connector, extra socket Fuse 3 30 A, Main fuse Fuse 4 20 A, ABS pressure modulator Fuse 5... -
Page 125: Dimensions
Lighting Bulb for low-beam and high-beam headlight H4 / 12 V / 60 W / 55 W Bulb for parking light W5W / 12 V / 5 W Bulb for tail light/brake light Light source for the number plate light LED integrated in rear light Bulbs for flashing turn indicators, front RY10W / 12 V / 10 W... -
Page 126: Weights
Weights Vehicle kerb weight 158.5 kg, DIN unladen weight, ready for road, 90 % load of fuel, without OE Permissible gross weight 345 kg Maximum payload 186.5 kg Riding specifications Starting capability on uphill gradients (at permiss- max 20° ible gross weight) Top speed 143 km/h Accessories... -
Page 127: Service
Service BMW Motorrad Service ... . 126 BMW Motorrad Mobility services ......126 Maintenance work . -
Page 128: Bmw Motorrad Service
BMW Motorrad has an extensive dealer. network of dealerships in place As the owner of a new BMW to look after you and your mo- motorcycle, in the event of a In order to help ensure that your torcycle in more than 100 coun-... - Page 129 1000 km in advance when the time for a BMW Service service is approaching, on the The BMW Service is carried out basis of the programmed values. once a year; the extent of ser- vicing can vary, depending on...
-
Page 131: Maintenance Schedule
Maintenance schedule every 40.000 km or every 4 years (whichever comes BMW Running-in check first) Standard BMW service Engine-oil change, with filter Replace air filter element Replace chainset Replace spark plug Check valve clearance Oil change in the tele- scopic forks... -
Page 132: Confirmation Of Mainten
Confirmation of maintenance work BMW Motorrad Service, standard scope The activities in the BMW Motorrad Service standard scope are listed below. The actual scope of main- tenance work for your vehicle may differ. Performing vehicle test with BMW Motorrad diagnosis system... - Page 133 BMW Pre-delivery BMW Running-in Check Check Completed Completed Odometer reading Next service at the latest or, if reached beforehand Odometer reading Stamp, signature Stamp, signature...
- Page 134 BMW Service Item Completed BMW Motorrad Service, standard scope Odometer reading Oil change, engine, with filter Checking valve clearance Next service Renewing air cleaner insert at the latest Replacing chainset Oil change in telescopic front forks or, if reached beforehand...
- Page 135 BMW Service Item Completed BMW Motorrad Service, standard scope Odometer reading Oil change, engine, with filter Checking valve clearance Next service Renewing air cleaner insert at the latest Replacing chainset Oil change in telescopic front forks or, if reached beforehand...
- Page 136 BMW Service Item Completed BMW Motorrad Service, standard scope Odometer reading Oil change, engine, with filter Checking valve clearance Next service Renewing air cleaner insert at the latest Replacing chainset Oil change in telescopic front forks or, if reached beforehand...
- Page 137 BMW Service Item Completed BMW Motorrad Service, standard scope Odometer reading Oil change, engine, with filter Checking valve clearance Next service Renewing air cleaner insert at the latest Replacing chainset Oil change in telescopic front forks or, if reached beforehand...
- Page 138 BMW Service Item Completed BMW Motorrad Service, standard scope Odometer reading Oil change, engine, with filter Checking valve clearance Next service Renewing air cleaner insert at the latest Replacing chainset Oil change in telescopic front forks or, if reached beforehand...
- Page 139 BMW Service Item Completed BMW Motorrad Service, standard scope Odometer reading Oil change, engine, with filter Checking valve clearance Next service Renewing air cleaner insert at the latest Replacing chainset Oil change in telescopic front forks or, if reached beforehand...
- Page 140 BMW Service Item Completed BMW Motorrad Service, standard scope Odometer reading Oil change, engine, with filter Checking valve clearance Next service Renewing air cleaner insert at the latest Replacing chainset Oil change in telescopic front forks or, if reached beforehand...
- Page 141 BMW Service Item Completed BMW Motorrad Service, standard scope Odometer reading Oil change, engine, with filter Checking valve clearance Next service Renewing air cleaner insert at the latest Replacing chainset Oil change in telescopic front forks or, if reached beforehand...
- Page 142 BMW Service Item Completed BMW Motorrad Service, standard scope Odometer reading Oil change, engine, with filter Checking valve clearance Next service Renewing air cleaner insert at the latest Replacing chainset Oil change in telescopic front forks or, if reached beforehand...
- Page 143 BMW Service Item Completed BMW Motorrad Service, standard scope Odometer reading Oil change, engine, with filter Checking valve clearance Next service Renewing air cleaner insert at the latest Replacing chainset Oil change in telescopic front forks or, if reached beforehand...
- Page 144 BMW Service Item Completed BMW Motorrad Service, standard scope Odometer reading Oil change, engine, with filter Checking valve clearance Next service Renewing air cleaner insert at the latest Replacing chainset Oil change in telescopic front forks or, if reached beforehand...
- Page 145 BMW Service Item Completed BMW Motorrad Service, standard scope Odometer reading Oil change, engine, with filter Checking valve clearance Next service Renewing air cleaner insert at the latest Replacing chainset Oil change in telescopic front forks or, if reached beforehand...
-
Page 146: Confirmation Of Service
Confirmation of service The table is intended as a record of maintenance and repair work, the installation of optional accessories and, if appropriate, special campaign (recall) work. Item Odometer Date reading... - Page 147 Item Odometer Date reading...
-
Page 148: Index
Position on the vehicle, 14 Abbreviations and symbols, 6 Care recharging connected Body panels, 109 battery, 92 Engineering details, 60 Care products, 108 recharging disconnected Self-diagnosis, 50 Chrome, 109 battery, 92 Warning light, 27 Paint, 110 remove, 93 Plastics, 109 Accessories Technical data, 122 General instructions, 100... - Page 149 Clutch Dimensions Frame Adjusting play, 74 Technical data, 123 Technical data, 118 Checking function, 73 Front-wheel stand Checking play, 73 Electrics Installing, 65 Technical data, 117 Technical data, 122 Fuel Confirmation of maintenance Emergency off switch (kill switch) Displaying current consumption work, 130 Emergency-off, 33 (CONSA), 36...
- Page 150 Multifunction display, 21 Replacing LED rear light, 90 Ignition Right multifunction switch, 16 Replacing LED turn switching off, 33 indicators, 90 Right side of the vehicle, 13 switching on, 32 Replacing number-plate Underneath the seat, 14 Instrument panel light, 90 Warning and telltale lights, 20 Overview, 17 Technical data, 123...
- Page 151 Mirrors Running gear Paint care, 110 Adjusting, 42 Technical data, 119 Parking, 53 Mobility services, 126 Running in, 51 Photosensor, 17 Motorcycle Power socket care, 107 Notes on use, 101 Safety instructions cleaning, 107 Position on the vehicle, 11 for brakes, 52 Lashing, 56 Pre-Ride-Check, 49 for riding, 46...
- Page 152 Spring preload Standards, 7 Turn indicators Control, 15 Adjuster, rear, 11 Transmission, 117 operate, 34 Adjusting, 44 Weights, 124 Type plate Starting, 48 Wheels and tyres, 120 Position on the vehicle, 11 Control, 16 Telltale lights, 17 Tyres Steering lock Fuel reserve, 27 Checking tread depth, 75 Locking, 32...
- Page 153 Warnings ABS, 27 Coolant temperature, 25 Engine warning, 26 Malfunction indicator lamp, 26 Mode of presentation, 22 Overtemperature, 25 Symbol for engine electronics, 25 Warnings, overview, 23 Weights Payload table, 11 Technical data, 124 Wheels Change of size, 76 Checking rims, 75 Installing front wheel, 78 Installing the rear wheel, 82 Removing front wheel, 76...
- Page 155 Errors and omissions excepted. © 2016 Bayerische Motoren Werke Aktiengesellschaft 80788 Munich, Germany Not to be reproduced by any means whatsoever, wholly or in part, without the written per- mission of BMW Motorrad, After Sales.
- Page 156 2.2 bar, with cold tyres; one-up and two-up riding Tyre pressure, rear 2.3 bar, with cold tyres; one-up and two-up riding You can find further information on all aspects of your vehicle at: bmwmotorrad.com BMW recommends *01408392971* Order No.: 01 40 8 392 971 04.2016, 3rd edition, 01...
Need help?
Do you have a question about the G 310 R and is the answer not in the manual?
Questions and answers