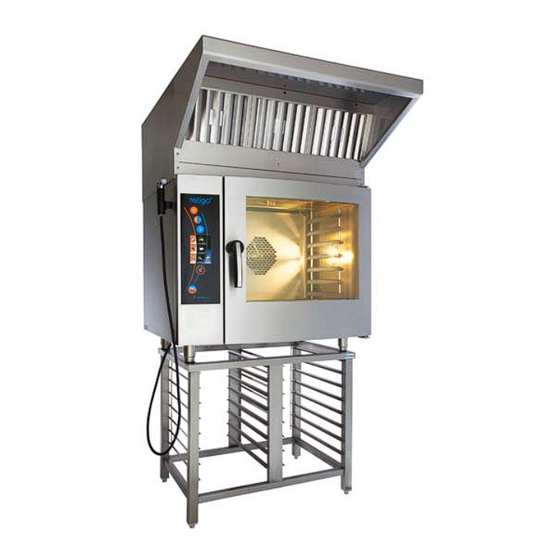
Retigo Vision VENT Technical Documentation Manual
Hide thumbs
Also See for Vision VENT:
- Operating manual (66 pages) ,
- User manual (44 pages) ,
- Operating manual (16 pages)
Table of Contents
Advertisement
Quick Links
Advertisement
Table of Contents

Subscribe to Our Youtube Channel
Summary of Contents for Retigo Vision VENT
- Page 1 Vision VENT Technical documentati on RETIGO 2011...
-
Page 3: Table Of Contents
SAFETY INSTRUCTION......................5 1. General safety data ........................5 2. Operating personnel designation....................5 3. Perfect condition ........................5 4. Safety rules for work with the RETIGO Company products .............5 TECHNICAL DATA........................6 TRANSPORT AND INSTALLATION....................7 1. Appliance transportation ......................7 2. Waste disposal ...........................7 3. -
Page 4: Introduction
I N T R O D U C T I O N 2. Use and description of the hood The RETIGO Company is very grateful to you for your decision to use our equipment. Your newly acquired appliance represents rare fusion of long-term experien-... -
Page 5: How To Use This Manual
Some of those are listed... - Page 6 Any reconstructions or alterations of the device done by you are for safety reasons not allowed and will remove all responsibility for consequent damages from the RETIGO Company. Accidental mistakes or omissions are covered within the contractual warranty obligations, negotiated in the contract when elimina- ting all further claims.
-
Page 7: Safety Instruction
Operate this appliance only while it is in a perfect condition. Do not remove any safety features such as covers etc. Do not make any alterations. 4. Safety rules for work with the RETIGO Company products To assure safe work with this appliance, please ad- here to the following safety precautions. -
Page 8: Technical Data
TECHNICAL DATA T E C H N I C A L D A T A B a s i c t e c h n i c a l p a r a m e t e r s Weight: 60 kg Dimensions (d x w x h): 1130 x 930 x 412 mm Noise - min./max.:... -
Page 9: Transport And Installation
Nr. 8 and replace the pins (see picture I). The Retigo Corporation is entitled to use the Green • Place the hood on the combi steamer. Make sure point trademark in accordance with Law 477/2001 you correctly match the hood inlet (a pipe in the rear Coll., (94/62/ES), which means the cost associated... -
Page 10: Eletrical Connections Of The Air Condensation Hood
TRANSPORT AND INSTALLATION Picture I – Use this pins instead of screws • Place the hood on the combi steamer. Make sure you Picture III - Grease filters installation correctly match the hood inlet (a pipe in the rear part of the hood) to the combi steamer little chimney –... - Page 11 TRANSPORT AND INSTALLATION The hood connections to the electric supply must be done by a qualified professional only. Pict. 3 - The bushing in the power panel Connecting the UTP cable • Run the control UTP cable from the hood towards the Pict.
-
Page 12: The Hood Set-Up And Control
TRANSPORT AND INSTALLATION Connection to the Orange Combi Steamer: After returning to the main menu by repeatedly pu- Connect the hood control panel to the RS 485 serial shing the “Return“ button, the set-up is finished. bus connector. Connection to the Blue Combi Steamer: Disconnect the RS 485 serial bus connector commu- nication cable from the frequency converter and plug it into the two-way splitter RJ 45 - (delivered as part... - Page 13 TRANSPORT AND INSTALLATION After following the above described steps, the hood will function properly. Should that not be the case, the combi steamer display will show an error message. The message code enables you to recognize the nature of the problem. Problems associated with the hood are marked with a code ending with the digit 5 following a decimal point (XX.5).
-
Page 14: Maintance And Cleaning
MAINTENANCE AND CLEANING M A I N T E N A N C E A N D C L E A N I N G The RETIGO Company recommends regular clea- Maintenance and cleaning must be perfor- ning and maintenance of the appliance by a authorized med by qualified personnel only. - Page 16 RETIGO Ltd. Láň 2310, PS 43 756 64 Rožnov pod Radhoštěm Czech republic tel.: +420 571 665 511 fax: +420 571 665 554 e-mail: info@retigo.cz www.retigo.com TSD-11-H-EN_R00...


Need help?
Do you have a question about the Vision VENT and is the answer not in the manual?
Questions and answers