Advertisement
Available languages
Available languages
Congratulations on the purchase of your Coolaroo® Simple Lift™ Outdoor Roller Shade. Whether you choose to install it in your apartment or home on a
window, balcony, patio, porch or deck, simply follow the directions included here to create a safer, more enjoyable environment with increased privacy.
(4) Idle end
(2) Mounting
brackets
(8) Wood
screws
(9) Drywall
anchors
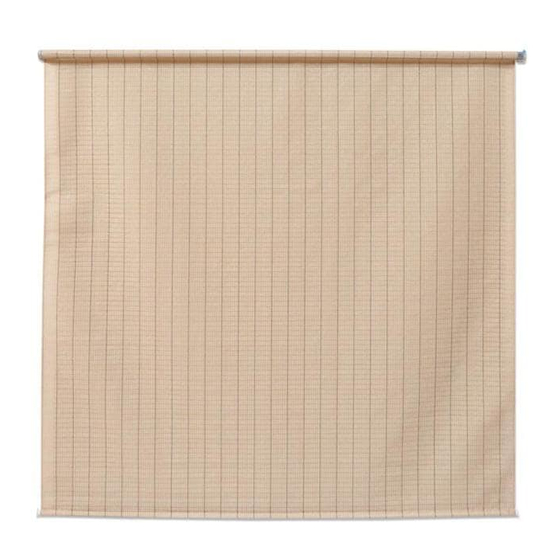
(5) Shade
(6) Bottom rail
Your Simple Lift™ Outdoor Roller Shade is fully assembled and only needs to be installed before it can be used. Before beginning the steps below, please
take a moment to review the parts list you will need to hang the shade.
Your Simple Lift™ Outdoor Roller Shade can either be hung from the top of a surface (i.e. window frame, (Fig. 1) or side mounted on the inside surface of a
wall, patio or porch. Regardless of how you choose to install the shade, the installation instructions remain the same.
1
INSTALL THE MOUNTING BRACKETS
A. Using the mounting bracket as your guide, mark the holes where the
screws will go with a pencil. The tension wheel bracket will need to be
installed on the right hand side.
Note: Be sure the brackets on both ends are level and in
line with each other.
Use a 3/16" drill bit to pre-drill the holes. If you are mounting the
B.
shade on a material other than wood The optional wall anchors which
can be inserted into the pre-drilled holes are included.
C. Mount the installation brackets to the ceiling or wall using the wood
screws provided. (Fig. 1)
2
INSTALL THE SHADE
A. Next, position the shade so that the tension wheel side of the roller
shade is on the right. (Fig. 2)
Note: You will also want to position the head rail (roll) so that
the red tension brake is facing you. This will make it easier for
you to remove the brake as described in Step E.
Outdoor Roller Shade
Simple Lift
TM
INSTRUCTION MANUAL
(1) Head rail
(3) Tension wheel
component
(7) Bottom
rail cap
PARTS LIST
1
Head rail
2
Mounting brackets
3
Tension wheel component
4
Idle end
5
Shade
6
Bottom rail
7
Bottom rail cap
8
Wood screws
9
Drywall anchors
Fig.1
Fig.2
ADDITIONAL TOOLS
QTY
NEEDED
1
Screwdriver
2
Measuring tape
1
Pencil
Drill with 3/16" drill bit
1
1
1
2
4
4
20 minute set up
(approximate time)
Advertisement
Table of Contents

Subscribe to Our Youtube Channel
Related Manuals for Coolaroo Simple Lift


Summary of Contents for Coolaroo Simple Lift
- Page 1 Your Simple Lift™ Outdoor Roller Shade can either be hung from the top of a surface (i.e. window frame, (Fig. 1) or side mounted on the inside surface of a wall, patio or porch.
- Page 2 Do not use bleach or chlorine. Register and Order Replacement Parts Online: Questions or Comments? Contact us at: www.coolaroousa.com Gale Pacific USA, Inc. | www.coolaroousa.com | 1-800-560-4667 5.04.004.270 © by Gale Pacific Limited. All rights reserved. Coolaroo® is a registered trademark of Gale Pacific Limited.
- Page 3 étapes ci-dessous, veuillez prendre quelques instants pour examiner la liste des pièces dont vous aurez besoin pour accrocher le store. Votre store à enroulement d’extérieur Simple Lift™ peut être accroché depuis le haut d’une surface (p.ex. un cadre de fenêtre, (Fig. 1) ou monté latéralement sur la surface intérieure d’un mur, d’une terrasse ou d’un porche.
- Page 4 Des questions ou des commentaires? Communiquez avec nous au: www.coolaroousa.com Gale Pacific USA, Inc. | www.coolaroousa.com | 1-800-560-4667 © Gale Pacific Limited. Tous droits réservés. Coolaroo® est une marque de commerce déposée de Gale Pacific Limited. 5.04.004.270...
- Page 5 La persiana en rollo para exteriores Simple Lift™ puede colgarse desde la parte superior de una superficie (es decir, el marco de una ventana), (Fig. 1) o instalarse lateralmente desde la superficie interior de una pared, el patio o el porche, sin importar cuál aunque la instalación varía según el tipo de cerca que...
- Page 6 ¿Preguntas o comentarios? Póngase en contacto al: www.coolaroousa.com Gale Pacific USA, Inc. | www.coolaroousa.com | 1-800-560-4667 5.04.004.270 © por Gale Pacific Limited. Todos los derechos reservados. Coolaroo® es una marca registrada de Gale Pacific Limited.
Need help?
Do you have a question about the Simple Lift and is the answer not in the manual?
Questions and answers
getting tension so shade will roll back up
To adjust the tension on a Coolaroo Simple Lift shade:
1. Remove the tension wheel brake if it is in place (save it for future adjustments).
2. To increase tension (faster retraction): Use the tension wheel and turn it 1 or 2 times counterclockwise.
3. To decrease tension (slower retraction): Use the tension wheel and turn it 1 or 2 times clockwise.
4. Test the shade after each adjustment by raising and lowering it.
5. Repeat the adjustment as needed until the desired retraction speed is achieved.
6. Reinstall the tension wheel brake after adjusting to secure the setting.
This answer is automatically generated
are the clear plastic tension wheels available?