Table of Contents
Advertisement
Quick Links
Download this manual
See also:
User Manual
Advertisement
Table of Contents

Related Manuals for CipherLab 9500


Summary of Contents for CipherLab 9500
- Page 1 Windows CE Mobile Computer 9500 Version 2.14...
- Page 2 Due to continued product development this information may change without notice. The information and intellectual property contained herein is confidential between CIPHERLAB and the client and remains the exclusive property of CIPHERLAB CO., LTD. If you find any problems in the documentation, please report them to us in writing.
-
Page 3: For Canada
IMPORTANT NOTICES FOR USA This equipment has been tested and found to comply with the limits for a Class B digital device, pursuant to Part 15 of the FCC Rules. These limits are designed to provide reasonable protection against harmful interference in a residential installation. This equipment generates, uses and can radiate radio frequency energy and, if not installed and used in accordance with the instructions, may cause harmful interference to radio communications. -
Page 4: For Product With Laser
DISPOSE OF USED BATTERIES ACCORDING TO THE INSTRUCTIONS. The use of any batteries or charging devices, which are not originally sold or manufactured by CipherLab, will void your warranty and may cause damage to human body or the product itself. -
Page 5: Release Notes
RELEASE NOTES Version Date Notes Modified: 3.5 Upgrading OS Image — Procedures updated 2.14 May 04, 2011 2.13 Mar. 18, 2011 Modified: Important Notices — Modify RF statement Modified: Remove Clean boot 2.12 Feb. 23, 2011 New: Calibrating the Screen 2.11 Nov. - Page 6 New: Charging the Battery — 4-Slot Battery Charger 2.04 Mar. 04, 2008 New: 1.1.3 and 2.1.2 — Battery charge icon with dynamic bars New: 2.1.2 and 3.2.4 — Wi-Fi status icon with dynamic bars for wireless signal strength Modified: 2.5.3 — Auto Run examples Modified: 4.2 Bluetooth Manager —...
-
Page 7: Table Of Contents
Installing Battery .......................... 9 Charging & Communications......................11 Using Wireless Networks ......................11 Using Cradle ..........................12 Calibrating the Screen ........................13 USING 9500 MOBILE COMPUTER..................... 15 1.1 Battery ............................15 1.1.1 Understanding the Battery Icons ..................16 1.1.2 Power Management......................17 1.2 Memory ............................. 18 1.2.1 Caution of Data Loss......................19... - Page 8 2.5 System Reset ..........................46 2.5.1 Software Reset (Warm Reboot)..................46 2.5.2 Hardware Reset (Cold Reboot)..................46 2.6 Auto Run............................ 47 CONFIGURING 9500 MOBILE COMPUTER..................49 3.1 Application Manager ........................49 3.2 Device Name & Configuration ....................50 3.2.1 Changing Device Name ....................50 3.2.2 Understanding Device Configuration ................51 3.3 System Settings ........................52...
- Page 9 9500 Mobile Computer Reference Manual 5.1.3 Set Discoverable ......................69 5.2 Search Devices ......................... 70 5.3 Pair Devices ..........................71 5.3.1 Identify Remote Device....................71 5.3.2 Pair ............................ 72 5.3.3 Unpair ..........................74 5.4 File Transfer ..........................75 5.4.1 Upload a File........................75 5.4.2 Download a File........................76 5.5 Object Push..........................
- Page 10 9500 Mobile Computer Reference Manual Electrical Characteristics ......................110 Physical Characteristics ........................110 Environmental Characteristics .....................111 Programming Support........................111 Accessories............................112 SCAN ENGINE SETTINGS.........................113 Symbologies Supported ........................113 RFID Tags Supported ........................115 LINEAR IMAGER (CCD), LASER (SE950) ..................117 Reader Settings Table........................117 Symbology Settings Table......................118 LR, ELR LASER..........................123 Reader Settings Table........................123...
-
Page 11: Introduction
INTRODUCTION 9500 Mobile Computer, running Windows CE 5.0, is designed to allow more flexibility in customization of applications. CipherLab has integrated powerful utilities for data collection, processing, and transmission. Its large color transflective TFT display guarantees ease in reading in all lighting conditions. -
Page 12: Features
9500 Mobile Computer Reference Manual FEATURES Ergonomic design - ruggedized yet streamlined, with hand strap for secure hold Built tough to survive drop test and sealed against moisture/dust to industrial standard IP 64 Microsoft Windows CE 5.0 operating system, 520 MHz Intel PXA270 processor... -
Page 13: Inside The Package
INSIDE THE PACKAGE The following items are included in the package. Save the box and packaging material for future use in case you need to store or ship the mobile computer. 9500 Mobile Computer Rechargeable Li-ion battery pack Stylus Hand Strap Product CD Note: For battery charging, you will need to purchase a charging cradle separately. - Page 14 9500 Mobile Computer Reference Manual...
-
Page 15: Quick Start
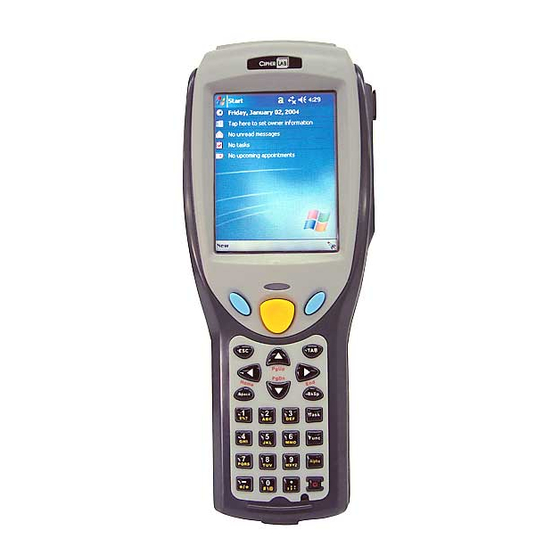
QUICK START OVERVIEW Figure 1: Overview... -
Page 16: Installing Hand Strap
9500 Mobile Computer Reference Manual INSTALLING HAND STRAP The hand strap is ideal for one-handed operation, which requires safe and convenient hold of the mobile computer. Warning: Always make sure the hand strap is well hooked and screwed to the back of the mobile computer before use. -
Page 17: Installing Pistol Grip
Quick Start INSTALLING PISTOL GRIP This contoured pistol grip enables intuitive trigger-and-scan operation, which is very helpful in scan intensive applications. When a pistol grip is necessary, install it to the mobile computer by following these steps: 1) Place the mobile computer face down on a flat and clean surface. 2) Remove the shield-like cover on the back of the mobile computer by unscrewing. -
Page 18: Inserting Sd Or Cf Card
9500 Mobile Computer Reference Manual INSERTING SD OR CF CARD When you wish to expand memory or add a peripheral, follow these steps to install the CF or SD card to the mobile computer: 1) Press to turn off the mobile computer. -
Page 19: Installing Battery
Quick Start INSTALLING BATTERY When you first receive the package, the rechargeable functionality of the backup battery is turned off. It is controlled by a DIP switch inside the battery compartment as shown below. For shipping and storage purposes, save the mobile computer and the main battery in separate packages, and slide the DIP switch to the OFF position (to your right). - Page 20 9500 Mobile Computer Reference Manual Figure 5: Installing the Main Battery...
-
Page 21: Charging & Communications
Quick Start CHARGING & COMMUNICATIONS The main and backup batteries may not be charged to full for shipment. When you first receive the package, you will need to charge batteries to full before using the mobile computer. Because the internal backup battery is constantly charged from the main battery, the initial charging requires installing the battery pack to the mobile computer and then seating the mobile computer in the cradle for charging. -
Page 22: Using Cradle
9500 Mobile Computer Reference Manual USING CRADLE The cradle is designed for charging and communications at the same time. 1) Place the cradle on a flat and clean surface. 2) Connect the power supply cord to the power jack on the back of the cradle, and then connect the other end of the power supply cord to a suitable power outlet. -
Page 23: Calibrating The Screen
Quick Start CALIBRATING THE SCREEN Starting from OS version 1.44G0409.101122, the recalibration process is required to ensure touch screen accuracy for initial use. Follow the on-screen instruction to complete the recalibration process, and then press the [Enter] key to save new settings. - Page 24 9500 Mobile Computer Reference Manual...
-
Page 25: Using 9500 Mobile Computer
1.1 BATTERY Main Battery 9500 Mobile Computer is powered by a rechargeable 3.7 V/4000 mAh Li-ion battery pack, and it takes approximately 4 hours to fully charge it. However, the charging time may vary by working condition. During normal operation, the mobile computer can work for up to 21 hours in batch mode. -
Page 26: Understanding The Battery Icons
9500 Mobile Computer Reference Manual 1.1.1 UNDERSTANDING THE BATTERY ICONS The battery pack is the only power source for the mobile computer to work. It also charges the backup battery on the main board so that the data stored in SRAM can be retained properly. -
Page 27: Power Management
If you keep the default settings, 9500 will enter the User Idle state in 1 minute, go to the System Idle state in another 3 minutes, and then the Suspend state in another 5 minutes. -
Page 28: Memory
9500 Mobile Computer Reference Manual 1.2 MEMORY Flash Memory (ROM) 128 megabytes flash memory for storing OS (Windows CE 5.0) and custom application programs. Yet a small portion of the memory is referred to as DiskOnChip, which can store data and programs that you wish to retain even after hardware reset. -
Page 29: Caution Of Data Loss
Chapter 1 Using 9500 Mobile Computer 1.2.1 CAUTION OF DATA LOSS When the main battery is removed or drained, the backup battery on the main board is to retain the contents of SRAM and maintain the OS in suspend mode for at least 6 hours, on condition that the backup battery has already been fully charged. - Page 30 9500 Mobile Computer Reference Manual Double-tap My Device on the desktop, and then tap and hold the DiskOnChip icon. Select Properties from the pop-up menu. In the Properties tab, it displays the current capacity and usage of DiskOnChip. Note: The DiskOnChip is part of the onboard 128 MB flash memory. Because the flash memory is non-volatile, data or programs stored in DiskOnChip will not be erased after hardware reset.
-
Page 31: Keypad
Chapter 1 Using 9500 Mobile Computer 1.3 KEYPAD Silicon rubber has been chosen for their durability and prompt feedback. Note: Functionality of keys is application-dependent. The 27-key keypad includes alphanumeric, navigation, function keys, and so on. This keypad is set to numeric mode by default. -
Page 32: Keypad Settings
9500 Mobile Computer Reference Manual 1.3.1 KEYPAD SETTINGS The LED backlight of keypad is turned off by default. It can be toggled ON/OFF by the key combination: . It is suggested to turn on the keypad backlight while working in a dark area; however, using backlight while on battery power will substantially reduce battery power. -
Page 33: Function Key
Chapter 1 Using 9500 Mobile Computer 1.3.3 FUNCTION KEY The [Func] (= Function) key serves as a modifier key, and the functionality of each key combination is application-dependent. 1) To enable this modifier key, press on the keypad. Its icon will appear on the status bar. -
Page 34: Touch Screen
9500 Mobile Computer Reference Manual 1.4 TOUCH SCREEN The mobile computer comes with a 3.5" TFT graphic LCD, 320 by 240 pixels resolution (QVGA). The LED backlight of screen, which helps ease reading under dim environments, can be controlled manually and automatically. -
Page 35: Re-Calibrating The Screen
Chapter 1 Using 9500 Mobile Computer 3) Select one or both of the check boxes to automatically turn off the LCD backlight when using batteries or external power. From the appropriate list, select the amount of time the device should be idle before the backlight is turned off. -
Page 36: Notifications
9500 Mobile Computer Reference Manual 1.5 NOTIFICATIONS 1.5.1 STATUS LED The tri-color LED on top of the [SCAN] button is used to provide information on the charging status or wireless power status. Tri-color LED Status Description Red LED Solid Charging 9500... -
Page 37: Data Capture
Chapter 1 Using 9500 Mobile Computer 1.6 DATA CAPTURE A wide variety of scan engines is available for delivering flexibility to meet different requirements. Depending on the scan engine integrated, the mobile computer is capable of scanning barcodes of a number of symbologies that are enabled by default while running ReaderConfig.exe. -
Page 38: Charging & Communications
9500 Mobile Computer Reference Manual 1.7 CHARGING & COMMUNICATIONS Item Description Charging slot for seating the mobile computer LED Indicators ( , Link/TX, Power) Charging slot for spare battery USB Device Port USB Host Port Ethernet Port (RJ-45) Power Jack Figure 7: Charging &... -
Page 39: Battery Charger
Using 9500 Mobile Computer 1.8 BATTERY CHARGER Below is the 4-Slot Battery Charger for 9500. 1) The Battery Charger can be mounted on table or wall. Drill two holes (centers spaced 160 millimeters apart), secure the two supplied screws, and mount the Battery Charger by sliding over screws. - Page 40 9500 Mobile Computer Reference Manual...
-
Page 41: Learning Windows Ce Basics
Chapter 2 LEARNING WINDOWS CE BASICS This chapter mainly describes the basic skills to work with 9500 Mobile Computer. The add-on utilities for applications regarding data collection, processing, and transmission, are introduced in the following chapters. 9500 Mobile Computer is specifically designed for real-time data collection in the Windows CE 5.0 environment. -
Page 42: Getting Started
9500 Mobile Computer Reference Manual 2.1 GETTING STARTED When 9500 Mobile Computer is fully charged, you may remove it from the cradle. Then, press to turn on the mobile computer and wait for the Windows CE desktop to come up. If you are using the mobile computer for the first time, there are a couple of things to do after the desktop comes up. -
Page 43: Desktop
Chapter 2 Learning Windows CE Basics 2.1.2 DESKTOP The desktop appears when the mobile computer is turned on. Tap and hold anywhere blank on the screen to manage or configure the desktop. Alternatively, you may tap to the right of the taskbar, and then select Desktop. Note: To customize the desktop, tap anywhere blank on the desktop and select Properties. -
Page 44: Taskbar
9500 Mobile Computer Reference Manual 2.1.3 TASKBAR The taskbar is at the bottom of the screen for displaying the following: Start button SIP button Switch Task button Status icons for various connections, minimized program windows, and so on. Note: To configure different connections, go to Start | Settings and select Network and Dial-up Connections. - Page 45 Chapter 2 Learning Windows CE Basics indicates specific network connection fails Using Bluetooth disconnected). Double-tap it to access the Wireless Information tab if there is any. Bluetooth PAN connection Ethernet connection It indicates a specific network connection has been established successfully.
-
Page 46: Start Menu
9500 Mobile Computer Reference Manual 2.1.4 START MENU Tap the Start button on the taskbar to open the Start Menu. Options Description Programs Provides access to available programs that are stored in the directory: \Windows\Programs Favorites Provides access to your favorite links to webpages that are stored in the... -
Page 47: Input Methods
Data entry can be performed by the following methods: Physical Keypad Type with the physical keypad. Data Capture Scan barcode or RFID tag in applications, e.g. WordPad, CipherLab's FORGE Application Generator, etc. Software Keypad Type or write using SIP (Soft Input Panel): Tap the SIP button on the taskbar to select a SIP mode or hide the input panel. -
Page 48: Managing Programs
9500 Mobile Computer Reference Manual 2.2 MANAGING PROGRAMS 2.2.1 QUICK LAUNCH A PROGRAM Tap the Start button to view the Start Menu. To quick launch a program, tap it from the Programs folder. Note: Alternatively, you may tap Start and select Run to run a specific program or open a document. -
Page 49: Exit A Program
Chapter 2 Learning Windows CE Basics 2.2.3 EXIT A PROGRAM In general, the system manages memory automatically, and there is no need to exit a program in order to open another or to conserve memory. However, random access memory (SDRAM) may be used up when running too many programs. As a result, it will slow down the operation or cause program errors. -
Page 50: Using Activesync
9500 Mobile Computer Reference Manual 2.3 USING ACTIVESYNC ActiveSync is used to synchronize information between 9500 Mobile Computer and your desktop computer, to install programs on the mobile computer, and to backup and restore the mobile computer. The Microsoft ActiveSync program has to be installed on your desktop computer first. -
Page 51: Add/Remove Programs
Chapter 2 Learning Windows CE Basics 2.3.2 ADD/REMOVE PROGRAMS Click [Add/Remove Programs] from the Tools Menu so that you can proceed to install a program that is designed to be used on a mobile device running Windows CE. If a user program is no longer desired, you may remove it from the system. -
Page 52: Explore Device
9500 Mobile Computer Reference Manual 2.3.3 EXPLORE DEVICE Add a Program to Start Menu 1. When connected, open the Microsoft ActiveSync window on your desktop computer. 2. Click the Explorer button from the toolbar. 3. Navigate through file folders to find the program you desire. -
Page 53: Backup/Restore
You can perform a backup by during the ActiveSync operation. The backup file is stored on your desktop computer. Note: The CipherLab Backup Utility is provided in OS 1.20.0409.070524 or later versions for the same purposes, and will save the backup file to the DiskOnChip folder. -
Page 54: Using Windows Explorer
9500 Mobile Computer Reference Manual 2.4 USING WINDOWS EXPLORER 2.4.1 ADD A PROGRAM TO START MENU 1) Go to Start | Programs and select Windows Explorer. Alternatively, you can press the [Task] key on the keypad to launch Windows Explorer. -
Page 55: Create A New Folder
Chapter 2 Learning Windows CE Basics 2.4.2 CREATE A NEW FOLDER 1) Go to Start | Programs and select Windows Explorer. Alternatively, you can press the [Task] key on the keypad to launch Windows Explorer. 2) Navigate through file folders to find where you wish to create a new folder. 3) Tap and hold anywhere blank on the window and select [New Folder] from the pop-up menu. -
Page 56: System Reset
SDRAM. Data and program files stored in SDRAM will be erased after hardware reset. But you can restore data that is previously synchronized with your computer by performing an ActiveSync operation, or backed up by using CipherLab Backup Utility. Hardware Reset (= Cold Reboot) Press and [Reset] button at the same time. -
Page 57: Auto Run
Chapter 2 Learning Windows CE Basics 2.6 AUTO RUN Auto Run is supported in OS 1.20.0409.070524 or later versions. To find out your OS version, go to Start | Settings | Control Panel and select System. Select the Device Name tab. Upon hardware or software reset, the OS shall automatically execute AutoRun.exe and/or AutoRun.ini if any of the two files can be found in the “\DiskOnChip”... - Page 58 9500 Mobile Computer Reference Manual...
-
Page 59: Configuring 9500 Mobile Computer
Note: User settings are stored in SDRAM and will be overwritten by the system defaults after hardware reset. However, you can use the CipherLab Backup Utility to backup the current registry for restore purpose. -
Page 60: Device Name & Configuration
9500 Mobile Computer Reference Manual 3.2 DEVICE NAME & CONFIGURATION 3.2.1 CHANGING DEVICE NAME 1) Go to Start | Settings | Control Panel and select System to obtain essential system information. 2) Select the Device Name tab to change the identification for the mobile computer. -
Page 61: Understanding Device Configuration
Configuring 9500 Mobile Computer 3.2.2 UNDERSTANDING DEVICE CONFIGURATION The device configuration of 9500 Mobile Computer is displayed in 5 digits: xxxx-x Take the screenshot of System Properties above for example. Its device configuration is “5410-0”; therefore, the mobile computer has the following features –... -
Page 62: System Settings
9500 Mobile Computer Reference Manual 3.3 SYSTEM SETTINGS Go to Start | Settings | Control Panel. Items Description In the [Accessibility] dialog box, you may use these options to customize the way an external keyboard, display, or mouse functions. Many of these features are useful to people without disabilities. - Page 63 Chapter 3 Configuring 9500 Mobile Computer In the [Display Properties] dialog box, Background tab: Select an image for the background. Appearance tab: Select a desired color scheme for windows, dialog boxes, and items. Backlight tab: Specify for how long the mobile computer is idle and then the backlight will be automatically turned off while on battery power and external power (in the charging cradle) respectively.
- Page 64 9500 Mobile Computer Reference Manual In the [Power Properties] dialog box, Battery tab: You may view the current status of main and backup batteries. Schemes tab: You may configure the power scheme and switching. Device Status tab: You may view the devices that are consuming power.
-
Page 65: Connection Settings
Chapter 3 Configuring 9500 Mobile Computer 3.4 CONNECTION SETTINGS There are two ways to access the connections settings: Go to Start | Settings | Control Panel and select Network and Dial-up Connections. Go to Start | Settings | Network and Dial-up Connections. - Page 66 9500 Mobile Computer Reference Manual This is a shortcut to GPRS connection. Note that the power to the GPRS module must be turned on through Power Management for establishing a connection. When GPRS power is turned on, the icon will become...
- Page 67 Chapter 3 Configuring 9500 Mobile Computer Toolbar Items Description Remarks Tap this button to open the Connection menu. The Tap and hold the icon of a available options depend on the connection you desired connection type. select. Then, select an option from its associated menu.
-
Page 68: Upgrading Os Image
9500 can enter the "Download" mode. 4) Seat 9500 in the cradle. 5) Press [Enter] on 9500 to start the download process. It will try to connect to your computer. 6) In the Image Tool, it will show 9500 has been connected successfully. - Page 69 It will take approximately 5 minutes before a message is displayed on the mobile computer to indicate the OS upgrade is completed successfully. It will then perform hardware reset on 9500 automatically. Warning: Do not press any key on the mobile computer while upgrading OS image...
- Page 70 9500 Mobile Computer Reference Manual...
-
Page 71: Using 802.11 Radio
Chapter 4 USING 802.11 RADIO The Wi-Fi module integrated on the mobile computer lets you configure and connect to network wirelessly. IN THIS CHAPTER 4.1 Turn On Wi-Fi Power ..........61 4.2 WLAN Connection ............62 4.1 TURN ON WI-FI POWER 1) Tap the icon on the taskbar to access Power Management. -
Page 72: Wlan Connection
9500 Mobile Computer Reference Manual 4.2 WLAN CONNECTION 4.2.1 CONNECTING TO WI-FI ACCESS POINT 1) Double-tap on the taskbar to access WLAN1. 2) On the Wireless Information tab, select an available network and tap [Connect]. 3) If you need to change the network settings, double-tap the selected network, and the Wireless Properties dialog box appears for configuration. -
Page 73: Configuring Wi-Fi Properties
Chapter 4 Using 802.11 Radio 4.2.2 CONFIGURING WI-FI PROPERTIES 1) Double-tap [Add New...] to add a new network option. 2) If the network configuration is correct, tap [OK] in the Wireless Properties dialog box. 3) Tap [Advanced] on the Wireless Information tab for more network settings. -
Page 74: Rssi Trigger
9500 Mobile Computer Reference Manual 4.2.2 RSSI TRIGGER RSSI stands for Received Signal Strength Indication. Use an RSSI value to determine when it comes below a certain threshold at which point the mobile computer will seamlessly switch the network connection, for example, while moving in and out of range between different access points. -
Page 75: Using Bluetooth
Chapter 5 USING BLUETOOTH Bluetooth Manager lets you configure Bluetooth settings and use Bluetooth services provided on the remote devices. IN THIS CHAPTER 5.1 Turn on Bluetooth Power..........65 5.2 Search Devices............70 5.3 Pair Devices .............. 71 5.4 File Transfer.............. 75 5.5 Object Push .............. -
Page 76: Bluetooth Profiles Supported
If you tap the button for the first time, it will start the inquiry process to discover nearby Bluetooth devices. Tap this button to view Bluetooth services provided on 9500. By default, these services are all available, and therefore, displayed along with a plug icon "... - Page 77 Chapter 5 Using Bluetooth Tap this button to view Bluetooth properties. General tab It displays device name, MAC address, as well as the device type. If you wish to change the device name of the mobile computer, go to Start | Settings | Control Panel and select System. Security Authentication Setting: It is disabled by default.
- Page 78 9500 Mobile Computer Reference Manual Start minimized: When selected, once you run Bluetooth Manager, its window will be minimized to an icon on the taskbar. Only when you tap the icon, will it open Bluetooth Manager window. Refer to the "Minimized"...
-
Page 79: Set Discoverable
Chapter 5 Using Bluetooth 5.1.3 SET DISCOVERABLE 1) Tap to access the menu that allows you to set your device discoverable. 2) In the Security tab, cancel the check box if you want to hide the mobile computer from other Bluetooth devices. When Bluetooth Manager window is minimized, tap on the taskbar to maximize the window. -
Page 80: Search Devices
9500 Mobile Computer Reference Manual 5.2 SEARCH DEVICES 1) Tap to discover nearby Bluetooth devices. 2) Wait for a few seconds, and it will list the discovered devices. 3) If you do not see the device that you want to connect to, make sure it is set discoverable. -
Page 81: Pair Devices
Chapter 5 Using Bluetooth 5.3 PAIR DEVICES 5.3.1 IDENTIFY REMOTE DEVICE From the device list, tap and hold the desired device to select [Properties] from the pop-up menu. -
Page 82: Pair
9500 Mobile Computer Reference Manual 5.3.2 PAIR When authentication is enabled on the remote device, you will have to exchange a passkey (= pair) with it before starting a connection. 1) From the device list, tap and hold the desired device to select [Pair] from the pop-up menu. - Page 83 Chapter 5 Using Bluetooth 3) Once paired successfully, the paired device will be displayed along with a lock icon " ". 4) Double-tap the remote device to find out the available Bluetooth services.
-
Page 84: Unpair
9500 Mobile Computer Reference Manual 5) Tap and hold a desired Bluetooth service, e.g. Serial Port Service, to select [Connect] from the pop-up menu. Refer to the following sections: 5.4 File Transfer 5.5 Object Push 5.6 Serial Port Service 6) Once the connection has been established, the connected service will be displayed along with a plug icon "... -
Page 85: File Transfer
Chapter 5 Using Bluetooth 5.4 FILE TRANSFER 5.4.1 UPLOAD A FILE 1) Tap and hold the File Transfer service. 2) Select [Connect] (and assign COM port if necessary). 3) Tap and hold anywhere blank to select [Add file] from the pop-up menu. 4) Choose the file you wish to upload to the remote device. -
Page 86: Download A File
9500 Mobile Computer Reference Manual 5.4.2 DOWNLOAD A FILE 1) Tap and hold the File Transfer service. 2) Select [Connect] (and assign COM port if necessary). 3) Tap and hold a desired file to select [Get File] from the pop-up menu. The mobile... -
Page 87: Object Push
Chapter 5 Using Bluetooth 5.5 OBJECT PUSH 1) Tap and hold the Object Push service. 2) Select [Push file] to send a file or PIM item, e.g. a business card. 3) Choose the file you wish to send. 4) The mobile computer will start sending the file. -
Page 88: Serial Port Service
9500 Mobile Computer Reference Manual 5.6 SERIAL PORT SERVICE 5.6.1 SERIAL PORT SERVICE 1) Tap and hold the Serial Port Service. 2) Select [Connect] from the pop-up menu. If "Auto Client COM Port" is disabled in , you will need to select a COM port. -
Page 89: Bluetooth Activesync
Chapter 5 Using Bluetooth 5.6.2 BLUETOOTH ACTIVESYNC For ActiveSync via Bluetooth, you must configure Bluetooth settings correctly on your computer first. 1) Configure Bluetooth settings for your computer, such as “Turn discovery on”, adding a COM port (Incoming), etc. - Page 90 9500 Mobile Computer Reference Manual 2) Allow connections to the specified COM port in ActiveSync. 3) Connect the mobile computer to your computer. 4) On the mobile computer, tap and hold Serial Port Service to select [Connect to ActiveSync] from the pop-up menu. It uses COM8 to connect to your computer by...
- Page 91 Chapter 5 Using Bluetooth 5) To stop ActiveSync via Bluetooth, tap and then tap [Connect via Cradle].
-
Page 92: Manage Local Services
9500 Mobile Computer Reference Manual 5.7 MANAGE LOCAL SERVICES By default, File Transfer, Serial Port, and Object Push services are made available, and therefore, displayed along with a plug icon “ ”. 5.7.1 SERIAL PORT SERVICE Change Serial COM Port You can change the COM port. -
Page 93: File Transfer
Chapter 5 Using Bluetooth 5.7.2 FILE TRANSFER Change Local Path You can change the FTP folder. Tap and hold it to select [Properties] from the pop-up menu. By default, uploading files to the mobile computer is allowed. You can cancel the check box to prohibit uploading. - Page 94 9500 Mobile Computer Reference Manual...
-
Page 95: Using Gprs
Chapter 6 USING GPRS 9500 Mobile Computer allows connecting to network over General Packet Radio Service (GPRS). Insert SIM card before turning on the power to GPRS module. Refer to Inserting SD or CF Card. Note: This icon on the taskbar indicates that other CF card is present instead of GPRS. - Page 96 9500 Mobile Computer Reference Manual 3) A dialog box will be displayed asking you to enter the PIN code. Note: The PIN verification on the mobile computer only allows two attempts because the system will always process the default number first (= "1234" for factory setting).
-
Page 97: Gprs Connection
Chapter 6 Using GPRS 6.2 GPRS CONNECTION 6.2.1 CONNECTING TO GPRS MODEM 1) Go to Start | Settings | Network and Dial-up Connections. 2) Tap and hold "GPRS" to select [Connect] from the pop-up menu. 3) If your dial-up configuration is correct, tap the [Connect] button in the Dial-Up Connection dialog box. -
Page 98: Configuring Dialing Properties
9500 Mobile Computer Reference Manual 6.2.2 CONFIGURING DIALING PROPERTIES If you need to configure the dial-up settings, tap the [Dial Properties] button in the Dial-Up Connection dialog box. Note: Alternatively, you may go to Start | Settings | Control Panel and select... -
Page 99: Configuring Gprs Properties
Chapter 6 Using GPRS 6.2.3 CONFIGURING GPRS PROPERTIES 1) Go to Start | Settings | Network and Dial-up Connections. 2) Tap and hold "GPRS" to select [Properties] from the pop-up menu. 3) The default GPRS modem will appear as shown below. Tap [Configure]. - Page 100 9500 Mobile Computer Reference Manual 4) Select the Call Options tab. The special modem commands inserted into the dial string must be [+CGDCONT=1,,"AP name"]. For example, change "INTERNET" below to the name of your GPRS AP.
-
Page 101: Using Reader Configuration Utility
Chapter 7 USING READER CONFIGURATION UTILITY Reader Configuration Utility is the tool that lets you manage the barcode and RFID readers integrated on the mobile computer. IN THIS CHAPTER 7.1 Run ReaderConfig.exe ..........92 7.2 Barcode Reader Settings..........93 7.3 RFID Reader Settings ..........94 7.4 Data Output .............. -
Page 102: Run Readerconfig.exe
9500 Mobile Computer Reference Manual 7.1 RUN READERCONFIG.EXE 1) Go to Start | Programs | ReaderConfig to open the Reader Configuration Utility. The associated icon will appear on the taskbar. 2) Tap the icon to access the menu that allows you to choose and enable one or both of the readers. -
Page 103: Barcode Reader Settings
Chapter 7 Using Reader Configuration Utility 7.2 BARCODE READER SETTINGS The barcode reader configurations depend on the scan engine(s) installed. You can tell which reader is currently in use and make necessary changes on the General tab. Barcode Reader Description CCD/Laser Reader If installed, tap the [Barcode Reader] button to configure the reader settings for CCD or Laser scan engine. -
Page 104: Rfid Reader Settings
9500 Mobile Computer Reference Manual 7.3 RFID READER SETTINGS If the RFID scan engine is present, configurable options will be displayed. Note: Because it is possible to read barcode and RFID tag at the same time, it is recommended that only one scan engine is enabled at a time to prevent from misreading. -
Page 105: Read Operation
Chapter 7 Using Reader Configuration Utility 7.3.1 READ OPERATION Read Settings By default, the RFID tag is read from byte 0 of the default page. However, the default page, amount of bytes and number of pages of each tag may be different. Specify how many bytes of data you want to read from the tag. -
Page 106: Data Output
Call Windows API (ReadMsgQueue) in your application to retrieve the decoded data. Note: (1) Refer to CipherLab WinCE Products Programming Guide for details on Windows Message and Windows Event. Sample programs are provided by request. (2) For the use of a different program rather than ReaderConfig.exe, a dynamic-link library (DLL) file is provided. -
Page 107: Notifications (For Good Read)
Chapter 7 Using Reader Configuration Utility Suffix String 0~10 characters NULL Display Code Select the check box to prefix the code type to barcode data after Disabled Type decoding a barcode. Display Code Select the check box to suffix the code length to barcode data Disabled Length after decoding a barcode. - Page 108 9500 Mobile Computer Reference Manual...
-
Page 109: More Applications
Chapter 8 MORE APPLICATIONS 9500 Mobile Computer provides more utilities and applications which are made accessible from START | Programs. Backup Utility lets you manipulate the way to backup programs and data. Inbox lets you send and receive e-mail by connecting to a POP3 or IMAP4 server. -
Page 110: Backup Utility
Mobile Computers. 8.1.1 MANAGING THE REGISTRY Go to Start | Programs | BackupUtility to open the CipherLab Backup Utility. If you are using this backup utility for the first time, you must manually save the system registry to the DiskOnChip folder first! Tap [Save] now to save the current system... -
Page 111: Preparing For Backup
Chapter 8 More Applications Warning: As long as you make any changes to the system configurations and settings, you must tap [Save] to update the system registry here. Otherwise, it will reload the old registry values in use after a cold boot. If you wish to reset the current system configurations and settings to defaults, tap [Reset] to delete the current system registry "\DiskOnChip\Sysbak\Registry.dat". -
Page 112: Backing Up Files
9500 Mobile Computer Reference Manual 8.1.3 BACKING UP FILES 1) Select the items you wish to backup, and tap [Backup]. 2) Tap if you need to save the backup to a different directory or file name (.bkp). By default, it will save the selected items to the DiskOnChip folder by the current date - the format of filename is "Backup_(4-digit year)(2-digit month)(2-digit date)". -
Page 113: Using Backups For Restore
Chapter 8 More Applications Note: If you wish to backup files to this new directory or file name in future runs, you must tap on the toolbar to save the current settings and exit the application. 8.1.4 USING BACKUPS FOR RESTORE After the backup operation, tap the Restore tab and it will automatically start scanning for any .bkp files. - Page 114 9500 Mobile Computer Reference Manual Starting from version 1.00.0011, the backup file version is included in “File Information”. If the selected backup file is generated by an earlier version, such version information will be blank, and it will not be allowed for Auto Restore! Close the warning dialog and it will abort the Auto Restore setting.
-
Page 115: Inbox
Chapter 8 More Applications 8.2 INBOX You can send and receive e-mail by connecting to a POP3 or IMAP4 server. Inbox provides an e-mail service for each method you use. Go to Start | Programs | Inbox to open the Inbox application. Tap and drag the toolbar handle to move it under the menu bar. -
Page 116: Creating An E-Mail Box
9500 Mobile Computer Reference Manual 8.2.1 CREATING AN E-MAIL BOX 1) Select Services | Options from the menu bar. 2) Tap and drag the dialog box to show the right edge. Tap [Add] to create an e-mail service. - Page 117 Chapter 8 More Applications 3) In the Service Name dialog box, select POP3 Mail or IMAP4 Mail for the service type. 4) Change the name of e-mail service if necessary. Tap [OK]. 5) Proceed with the POP3 or IMAP4 Mail Service Definition (from 1/3 to 3/3). GPRS: Send and Receive e-mail through GPRS connection.
-
Page 118: Synchronizing Inbox
9500 Mobile Computer Reference Manual 8.2.2 SYNCHRONIZING INBOX You can synchronize the e-mail messages in Inbox with either Microsoft Outlook or Microsoft Exchange Server on your computer through the default ActiveSync mail service. When you seat the mobile computer in the cradle and connect it to your computer for the first time, ActiveSync 3.7.1 will guide you through setting up a partnership between the... -
Page 119: Specifications
SPECIFICATIONS PLATFORM, PROCESSOR & MEMORY Operating System & CPU Windows Version Microsoft Windows CE 5.0 Marvell PXA270 at 520 MHz Memory 128 MB non-volatile NAND flash memory 128 MB on-board SDRAM memory Expansion Slots One Secure Digital (SD) card slot for inserting memory card; One Compact Flash (CF) Type II card slot for memory card or peripheral card such as GPRS card COMMUNICATIONS &... -
Page 120: Electrical Characteristics
9500 Mobile Computer Reference Manual ELECTRICAL CHARACTERISTICS Batteries Standard Battery Pack Rechargeable Li-ion battery - 3.7 V, 4000 mAh Backup Battery Rechargeable Lithium battery - 3.7 V, 110 mAh Data retention for at least 6 hours Power Adapter Power Supply Cord... -
Page 121: Environmental Characteristics
Environment Visual Studio .NET 2003 eMbedded Visual C++ 4.0 SP4 Software Development Kit 9500 SDK or Windows CE 5.0 Standard SDK System API (LIB and DLL) for system configuration Reader API (DLL) for reader configuration Software & Utilities Reader Configuration Utility... -
Page 122: Accessories
9500 Mobile Computer Reference Manual ACCESSORIES Accessory Options Memory Card, SD or CF Pistol Grip Belt Holster Protective Cover Spare rechargeable battery pack 4-Slot Battery Charger Charging & Communication Cradle Vehicle Cradle Travel Charger... -
Page 123: Scan Engine Settings
Appendix I SCAN ENGINE SETTINGS The Reader Configuration Utility (ReaderConfig.exe) allows configuring the following reader types, depending on the module equipped on your mobile computer: 1D Linear Imager (CCD) 1D Laser (SE950) 1D Long Range Laser 1D Extra Long Range Laser 2D Imager RFID reader Options of different reader combination are allowed, such as 1D+RFID and 2D+RFID. - Page 124 9500 Mobile Computer Reference Manual Code 128 Code 128 GS1-128 (EAN-128) ISBT 128 Code 2 of 5 Industrial 25 (Discrete 25) Interleaved 25 Matrix 25 Code 3 of 9 Code 39 Trioptic Code 39 Italian Pharmacode (Code 32) French Pharmacode...
-
Page 125: Rfid Tags Supported
Appendix I Scan Engine Settings RFID TAGS SUPPORTED The RFID reader supports read/write operations depending on the tags. The supported labels include ISO 15693, Icode®, ISO 14443A, and ISO 14443B. Currently, the performance of many tags has been confirmed, and the results are listed below for your reference. - Page 126 9500 Mobile Computer Reference Manual...
-
Page 127: Linear Imager (Ccd), Laser (Se950)
Appendix II LINEAR IMAGER (CCD), LASER (SE950) The tables below list reader settings as well as symbology settings for the Linear Imager (CCD) or Laser (SE950) scan engine. READER SETTINGS TABLE CCD/Laser Engine Description Default Time-out 3 sec. 1~9 (second) Set the maximum time for decoding to continue during a scan attempt. -
Page 128: Symbology Settings Table
9500 Mobile Computer Reference Manual SYMBOLOGY SETTINGS TABLE CCD/Laser Engine Description Default Codabar Enable Select Start/Stop If "Transmit Start/Stop Characters" is desired, select one abcd / abcd Characters set: abcd / abcd abcd / tn*e ABCD / ABCD ABCD / TN*E... - Page 129 Appendix II Linear Imager (CCD), Laser (SE950) One or two fixed lengths Select Length 4~127 Range Matrix 25 Enable Start/Stop Selection Refer to Industrial 25. Matrix 25 Verify Check Digit Decide whether to verify the check digit. If the check digit is incorrect, the barcode will not be accepted.
- Page 130 9500 Mobile Computer Reference Manual One or two fixed lengths Select Length 4~127 Range Negative Barcode Disable Plessey Disable Convert to UK Plessey When applied, each occurrence of the character "A" in the barcode data will be replaced by the character "X".
- Page 131 Appendix II Linear Imager (CCD), Laser (SE950) GTIN for EAN-13 The EAN-13 barcode will be expanded into 14-digit Global Trade Item Number (GTIN). Transmit Check Digit Decide whether to include the check digit in the data being transmitted. Addon 2 / Addon 5 Decide whether to decode EAN-13/UPC-A with addons.
- Page 132 9500 Mobile Computer Reference Manual...
-
Page 133: Lr, Elr Laser
Appendix III LR, ELR LASER The tables below list reader settings as well as symbology settings for the Long Range Laser (LR) or Extra Long Range Laser (ELR) scan engine. READER SETTINGS TABLE LR/ELR Engine Description Default Decode Time-out Set the maximum time for decoding to continue during a 3.0 sec. - Page 134 9500 Mobile Computer Reference Manual Scan Angle Select the scan angle for the Long Range Laser scan Narrow engine. “narrow” for 30° “wide” for 42° Scan Mode Laser mode Continuous Mode Non-stop scanning To decode the same barcode repeatedly, move away the scan beam and target it at the barcode for each scanning.
-
Page 135: Symbology Settings Table
Appendix III LR, ELR Laser SYMBOLOGY SETTINGS TABLE LR/ELR Engine Description Default Codabar Enable CLSI Editing When applied, the CLSI editing strips the start/stop characters and inserts a space after the first, fifth, and tenth characters of a 14-character Codabar barcode. The 14-character barcode length does not include start/stop characters. - Page 136 9500 Mobile Computer Reference Manual Code 39 Enable Convert to Code 32 Convert to Italian Pharmacode. Code 32 Prefix Prefix character "A" to Code 32 barcodes. Verify Check Digit Decide whether to verify the check digit. If the check digit is incorrect, the barcode will not be accepted.
- Page 137 Appendix III LR, ELR Laser Convert RSS to "Convert to UPC/EAN" only applies to GS1 Databar-14 and UPC/EAN GS1 Databar Limited barcodes not decoded as part of a Composite barcode. Convert to EAN-13 Strip the leading "010" from barcodes. "01" is the Application ID and must be followed by a single zero (the first digit encoded) Convert to UPC-A Strip the leading "0100"...
-
Page 138: Miscellaneous
9500 Mobile Computer Reference Manual Convert to UPC-A The UPC-E1 barcode will be expanded into UPC-A, and the next processing will follow the settings configured for UPC-A. UCC Coupon Extended Code Disable Read UPC-A barcodes starting with digit "5", EAN-13 barcodes starting with digits "99", and UPC-A/GS1-128 Coupon Codes. -
Page 139: Aim Code Id - Code Characters
Appendix III LR, ELR Laser AIM CODE ID – CODE CHARACTERS Code Character Code Type Code 39 Code 128 UPC/EAN Codabar Code 93 Code 11 Interleaved 25 Industrial 25 (Discrete 25), IATA 2 of 5 Code 39 Trioptic, Bookland EAN AIM CODE ID –... - Page 140 9500 Mobile Computer Reference Manual Five-digit addons only. EAN-8 data packet. A UPC-A with Addon 2 barcode, 012345678905-10, is transmitted to the host as a 21-character string, ]E00012345678905]E110. Bookland EAN Always transmit 0. Trioptic Code 39 Always transmit 0.
-
Page 141: Imager
Appendix IV 2D IMAGER The tables below list reader settings as well as symbology settings for the 2D scan engine. READER SETTINGS TABLE Description Default Decode Time-out Set the maximum time for decoding to continue during a 3.0 sec. scan attempt. 1~9 (second) Focus Mode Select the focus mode to control the working range:... - Page 142 9500 Mobile Computer Reference Manual The following barcodes must be read three times: Barcode Types “Excluded” Code Length Codabar 8 characters or less 4 characters or less Industrial 25 (Discrete 25) 8 characters or less Interleaved 25 8 characters or less Level 4 All barcodes must be successfully read three times before being decoded.
-
Page 143: Symbology Settings Table
Appendix IV 2D Imager SYMBOLOGY SETTINGS TABLE 1D SYMBOLOGIES 2D Engine Description Default Codabar Enable CLSI Editing When applied, the CLSI editing strips the start/stop characters and inserts a space after the first, fifth, and tenth characters of a 14-character Codabar barcode. The 14-character barcode length does not include start/stop characters. - Page 144 9500 Mobile Computer Reference Manual Verify Check Digit Decide whether to verify the check digit. If desired, select one of the algorithms below. If the check digit is incorrect, the barcode will not be accepted. USS algorithm OPCC algorithm Transmit Check Digit Decide whether to include the check digit in the data being transmitted.
- Page 145 Appendix IV 2D Imager Check Digit Algorithm One Check Digit Single Modulo 10 Mod 10/Mod 11 Two Check Digits Mod 10/Mod 10 Transmit Check Digit Decide whether to include the check digit in the data being transmitted. One or two fixed lengths Select Length 4~55 Range (1~55)
- Page 146 9500 Mobile Computer Reference Manual Addon 2 / Addon 5 Refer to UPC/EAN Addon setting. UPC-E0 Enable Transmit Check Digit Decide whether to include the UPC-E0 check digit in the data being transmitted. Transmit Preamble Decide whether to include the UPC-E0 preamble System System Number (and Country Code) in the data being transmitted.
- Page 147 Appendix IV 2D Imager One or two fixed lengths Select Length 4~55 Range (1~55) Postal Codes US Postnet Enable US Planet Enable Transmit US Postal US Postnet or US Planet must be enabled first! Enable Check Digit UK Postal Enable Transmit UK Postal UK Postal must be enabled first! Enable...
-
Page 148: Symbologies
9500 Mobile Computer Reference Manual 2D SYMBOLOGIES 2D Engine Description Default 2D Symbologies PDF417 Enable MicroPDF417 Disable MicroPDF417 Code 128 Transmit data from certain MicroPDF417 barcodes as if it Disable Emulation was encoded in Code 128 barcodes. Transmit Code Identifier... -
Page 149: Image Capture & Miscellaneous
Appendix IV 2D Imager Passthrough All Symbols Transmit and decode all Macro PDF symbols and perform no processing. In this mode, the host is responsible for detecting and parsing the Macro PDF sequences. ESC Characters When enabled, it uses the backslash "\" as an Escape None character for systems that can process transmissions containing special data sequences. - Page 150 9500 Mobile Computer Reference Manual Snapshot Aiming Decide whether to project the aiming pattern while Pattern capturing an image. Image Resolution Decide how to alter image resolution before compression. 640×480 Multiple pixels are combined to one pixel, resulting in a smaller image containing the original content with reduced resolution.
-
Page 151: Aim Code Id - Code Characters
Appendix IV 2D Imager AIM CODE ID – CODE CHARACTERS Code Character Code Type Code 39, Code 39 Full ASCII, Code 32 Code 128, Coupon (Code 128 portion) Data Matrix UPC/EAN, Coupon (UPC portion) GS1 DataBar (RSS) Codabar Code 93 Code 11 Interleaved 25 PDF417, Macro PDF417, Micro PDF417... - Page 152 9500 Mobile Computer Reference Manual Modulo 10 check digit verified and transmitted. Modulo 10 check digit verified but not transmitted. Discrete 25 Always transmit 0. UPC/EAN Standard data packet in full EAN country code format, which is 13 digits for UPC-A and UPC-E (not including addons).
- Page 153 Appendix IV 2D Imager Channel Interpretation). All data characters 92 doubled. Scan engine is set for Basic Channel operation (no escape character transmission protocol). Data characters 92 not doubled. When decoders are set to this mode, unbuffered Macro symbols and symbols requiring the decoder to convey ECI escape sequences cannot be transmitted.
Need help?
Do you have a question about the 9500 and is the answer not in the manual?
Questions and answers