Table of Contents
Advertisement
Quick Links
Advertisement
Table of Contents

Related Manuals for CipherLab RS38


Summary of Contents for CipherLab RS38
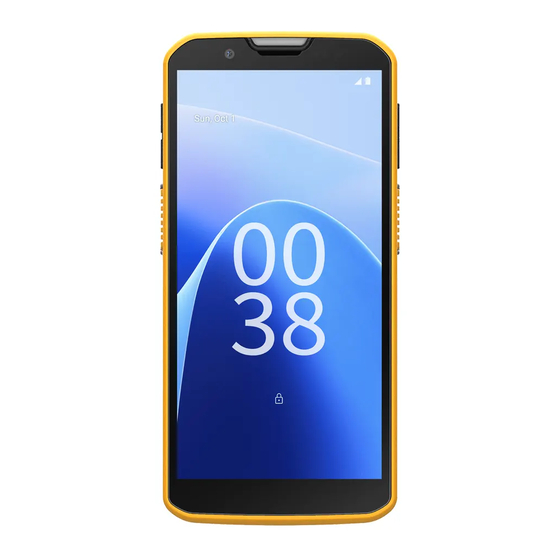
- Page 1 RS38 Mobile Computer Powered by Android™ 13 Version 1.1...
- Page 2 The editorial use of these names is for identification as well as to the benefit of the owners, with no intention of infringement. CIPHERLAB logo is a registered trademark of CIPHERLAB CO., LTD. All other brands, products and services, and trademark names are the property of their registered owners. The editorial use of these names is for identification as well as to the benefit of the owners, with no intention of infringement.
-
Page 3: Important Notices
Important Notices IMPORTANT NOTICES FOR USA This equipment has been tested and found to comply with the limits for a digital device, Class B pursuant to Part 15 of the FCC Rules. These limits are designed to provide reasonable protection against harmful interference in a residential installation. -
Page 4: For Product With Laser
The FCC has granted an Equipment Authorization for this device with all reported SAR levels evaluated as in compliance with the FCC RF exposure guidelines. SAR information on this device is on file with the FCC and can be found under the Display Grant section of www.fcc.gov/eot/ea/fccid after searching on FCC ID: Q3N-RS38... - Page 5 Important Notices Canada The radiated output power of the Wireless Device is below the Innovation, Science and Economic Development Canada (ISED) radio frequency exposure limits. The Wireless Device should be used in such a manner such that the potential for human contact during normal operation is minimized.
- Page 6 RS38 Mobile Computer Hereby, CIPHERLAB CO, declares that this RS38 is in compliance with the essential requirements and other relevant provisions of Directive 2014/53/EU. URL: www.cipherlab.com Indoor restriction: In EU, 5150 to 5350MHz is restricted indoor. Power Adapter Information ...
-
Page 7: Important Safety Instructions And Warnings For Li-Ion/Polymer Battery
IMPORTANT SAFETY INSTRUCTIONS AND WARNINGS FOR LI-ION/POLYMER BATTERY Lithium batteries are prone to capacity loss and swelling when exposed to high temperatures, excessive discharge, or overcharging. While CipherLab pre-charges batteries before shipment to prevent excessive discharge, it's crucial for customers to... -
Page 8: General Guideline And Warning
RS38 Mobile Computer GENERAL GUIDELINE AND WARNING Use specific Lithium Polymer/Li-ion charger from CipherLab only. Failure to do so may cause fire, which may result in personal injury and property damage. Never charge batteries unattended. When charging Lithium Polymer/Li-ion batteries, always ... -
Page 9: Charging Process
Important Notices CHARGING PROCESS Please ensure to charge the battery indoors, such as in a well-ventilated room, between 20℃ to 30℃. Do NOT charge battery under direct sunlight. When selecting the cell count or voltage for charging purposes, choose the cell count and ... -
Page 10: Storage & Transportation
RS38 Mobile Computer STORAGE & TRANSPORTATION Due to aviation regulations, CipherLab batteries are charged to approximately 30% of their full capacity during manufacturing. Battery should NOT be stored in fully charged or deeply discharged state, as it may damage ... -
Page 11: Product Warranty
Important Notices PRODUCT WARRANTY Product warranty is limited to original manufacturing defects in material only. Warranty will not apply to batteries with reduced capacity due to user scenario, unless determined to be a manufacturing flaw. Warranty does not cover collateral damage. Misuse, abuse, incorrect charging and other inappropriate use of this product are not covered under warranty. -
Page 12: Safety Precautions
Do not use any pointed or sharp objects against the screen surface. Do not use the styluses which are not supplied or approved by CIPHERLAB CO., LTD., to prevent possible scratches to the touch screen. Water residue on the touch screen may cause abnormal behaviors or the fall of its sensitivity ... -
Page 13: Scanner
Important Notices SCANNER Scan a 1D barcode 1) Open and tap on the menu bar. ReaderConfig Scan Test 2) Aim the scanning window at the barcode to read. Move the device, having the barcode located in the center of the scanning area. 3) Press any of the two side triggers. -
Page 14: Care & Maintenance
RS38 Mobile Computer CARE & MAINTENANCE This mobile computer is intended for industrial use. The mobile computer is rated IP65 /IP68, however, damage may be done to the mobile computer if it is exposed to extreme temperatures or soaked in water. -
Page 15: Release Notes
Release Notes RELEASE NOTES Version Date Notes Aug, 22 . 2024 Added Section 6.14. DisplayLink. Apr, 15th. 2024 Initial release. ... -
Page 16: Table Of Contents
1.2.1. Charge the Mobile Computer ................. 31 1.2.2. Wired Data Transmission ................. 38 1.2.3. Using Wireless Networks ................. 39 CHAPTER 2. USING THE RS38 MOBILE COMPUTER ............. 40 2.1. Battery ........................41 2.1.1. Battery Status Indicators .................. 42 2.1.2. Monitor Battery Level ..................44 2.1.3. - Page 17 CONTENTS 2.1.5. Battery Precautions ................... 55 2.2. Memory ........................ 57 2.2.1. Check Memory Usage ..................58 2.2.2. Manage Storage Space ..................61 2.3. Touch Screen ....................... 71 2.3.1. Screen Brightness ....................71 2.3.2. Screen Rotation ....................72 2.3.3. Screen Timeout Settings................... 78 2.3.4.
- Page 18 Call Settings ....................... 168 5.2.8. Make Multi-Party Calls ..................169 5.3. Audio Modes ..................... 170 5.4. In-call Volume ....................171 CHAPTER 6. CIPHERLAB UTILITIES ..................172 6.1. A-Demo ....................... 173 6.2. AppLock ......................175 6.3. Barcode To Setting ................... 176 6.4.
- Page 19 CONTENTS 6.8. Signature Capture .................... 185 6.9. SIP Controller ....................186 6.10. Software Trigger ....................190 6.11. LogGen ....................... 194 6.12. Wireless Init ....................... 195 6.13. Ping ........................196 6.14. DisplayLink ......................199 SPECIFICATIONS ........................200 Physical Characteristics ......................200 Platform, Processor &...
-
Page 20: Introduction
RS38 Mobile Computer INTRODUCTION The RS38 mobile computer, running on Android 13, offers a lightweight design and user-friendly interface. It provides a range of powerful tools aimed at enhancing flexibility through customization. Specifically designed to work as an industrial PDA, it provides rich options of data collection, voice and data communication, long-lasting working hours, and so on. -
Page 21: Features
Introduction FEATURES Built tough to survive drop test and sealed against moisture/dust to industrial standard IP65/ IP68. Android 13 operating system with a powerful Qualcomm QCM4490. 128GB Flash memory to store OS and software programs. 8GB LPDDR5 RAM to store and run programs, as well as store program data. ... -
Page 22: Inside The Package
Workstation Connect Cradle Mobile Computer Pistol Rubber Boot UHF RFID Reader 4-Slot Battery Charger 5-Slot Charging Cradle 4-Slot Charging Cradle & 4-Slot Battery Cradle RELATED DOCUMENTATION Please visit CipherLab website to access the related documentation about the RS38 mobile computer. -
Page 23: Chapter 1. Quick Start
Chapter 1. Quick Start Chapter 1 CHAPTER 1. QUICK START This chapter helps you get started with your mobile computer by providing an overview of its exterior, detailing battery installation/removal, and introducing the charging and communication features. IN THIS CHAPTER 1.1. -
Page 24: Overview
RS38 Mobile Computer 1.1. OVERVIEW No. Description Description No. Description Power Button Volume Down Button Hand Strap Hole (Cover) Status LED 1 Volume Up Button Rear Camera with flash Status LED 2 Scan Window NFC Detection Area Touchscreen Function Key Hand Strap Hole Microphone &... -
Page 25: Install/Remove Battery
Chapter 1. Quick Start 1.1.1. INSTALL/REMOVE BATTERY For shipping and storage purposes, the mobile computer and the main battery are saved in separate packages. Note: (1) Any improper handling may reduce the battery life. (2) Always use a fully-charged main battery for battery replacement. To install the main battery: The Lower End Groove... - Page 26 RS38 Mobile Computer 2) Simultaneously press the two release latches inward and press down on the battery. 2. Press the release latches then press down. 3) Press the top of the battery with your thumbs to ensure it securely snaps into place.
-
Page 27: Remove Battery
Chapter 1. Quick Start REMOVE BATTERY To remove the battery: 1) Press and hold the release latches inward. 1. Press and hold the release latches inward. 2) Lift the battery from the device to remove. 2. Lift the battery up to remove. -
Page 28: Install/Remove Sim Card And Memory Card
1.1.2. INSTALL/REMOVE SIM CARD AND MEMORY CARD The RS38 mobile computer has a SIM card slot and a memory card slot on the hidden tray located at the top edge of the battery compartment. To access them, gently drag out the tray using your fingernail. - Page 29 4) Gently push back the tray into the device. Note: The SIM card slot exclusively supports Nano SIM cards. The RS38 ensures compatibility with 3G/4G/5G networks. The RS38 also ensures eSIM compatibility; please refer to the section Setting up eSIM.
-
Page 30: Power On/Off Mobile Computer
RS38 Mobile Computer 1.1.3. POWER ON/OFF MOBILE COMPUTER POWER ON To power on the mobile computer, press and hold the power button located on the top end of the device. The mobile computer will turn on and show the Home Screen after splash screen. -
Page 31: Charging & Communication
Workstation Connect Cradle along with the power adapter. Alternatively, you can charge your device using a USB Type-C cable connected to a host computer, although this method is slower than using the RS38 Workstation Connect Cradle. CHARGING TIME Main Battery requires approximately 3.5 hours to be fully charged from empty, while the... - Page 32 RS38 Mobile Computer BATTERY STATUS & STATUS LED DURING CHARGE When the RS38 mobile computer is connected to an external power source, the Status LED located in the upper-right corner of the touch screen displays as follows: LED Status Description...
- Page 33 The RS38 Workstation Connect Cradle is available in two models: the WCCN Model, facilitating both charging and data transmission, and the CHCN Model, designed specifically for charging purposes. Equipped with a main charging station for the RS38 mobile computer and a spare battery compartment, the RS38 Cradle offers added convenience for charging needs.
- Page 34 To charge your mobile computer using the RS38 Workstation Connect Cradle: 1) Disconnect the USB Type-C cable from the RS38 mobile computer if it is currently connected. 2) Insert the appropriate interior cap depending on whether you are charging with or without the rubber boot.
- Page 35 Chapter 1. Quick Start To charge without the rubber boot, choose the interior cap without a frame. 3) Insert the RS38 mobile computer onto the Cradle. To remove, simply take the device out.
- Page 36 RS38 Mobile Computer 4) Place the battery into the spare battery compartment of the cradle, making sure the side with the release latches faces downward. Press down to secure it into place. To remove the device or the battery, simply lift it out from the cradle.
- Page 37 The mobile computer displays its own charging status, while the spare battery's charging status is indicated by the LED on the Cradle. Refer to the table below for the spare battery's charging information. LED on the RS38 Mobile Computer: Indicates the charging status of the main battery. LED on the cradle: Indicates the charging status of the spare battery.
-
Page 38: Wired Data Transmission
PC client is not possible. To transfer all types of files between your device and PC, choose “ ”. File Transfer To activate the sharing of the RS38’s internet connection with the connected PC, select “USB tethering”. connect communicate with ... -
Page 39: Using Wireless Networks
Chapter 1. Quick Start To modify USB settings after exiting the "USB Preferences" page, swipe down from the status bar to access the Notifications Drawer. Then, tap the relevant system notification regarding USB usage to modify USB settings further. 1.2.3. USING WIRELESS NETWORKS The mobile computer supports widely applied wireless technologies, including Bluetooth Class ®... -
Page 40: Chapter 2. Using The Rs38 Mobile Computer
RS38 Mobile Computer Chapter 2 CHAPTER 2. USING THE RS38 MOBILE COMPUTER This chapter walks you through the fundamental usage and features of this device. IN THIS CHAPTER 2.1. Battery ....................41 2.2. Memory ....................57 2.3. Touch Screen ..................71 2.4. -
Page 41: Battery
Chapter 2. Using the RS38 Mobile Computer 2.1. BATTERY MAIN BATTERY The main battery powers the mobile computer with a rechargeable 3.87V, 4000mAh Li-Polymer battery pack, requiring approximately 3.5 hours to fully charge from empty. While charging, the LED above the screen will light up in breathing red light, transitioning to breathing green when the capacity reaches over 90%. -
Page 42: Battery Status Indicators
RS38 Mobile Computer 2.1.1. BATTERY STATUS INDICATORS The main battery pack serves as the sole power source for the mobile computer’s proper functioning. Therefore, when the main battery level becomes low, promply replace the battery pack with a charged one or initiate the charging process. Most importantly, regularly save important data to prevent potential loss. - Page 43 Chapter 2. Using the RS38 Mobile Computer The percentage beside the battery icon on the status bar can be switched on or off in Drawer (All Apps) | Settings | Battery | Battery Percentage. Warning: Once the battery level drops below 15%, the low battery notification will be displayed on the screen.
-
Page 44: Monitor Battery Level
RS38 Mobile Computer 2.1.2. MONITOR BATTERY LEVEL MAIN BATTERY LEVEL To check main battery level, please go to App Drawer | Settings | Battery The battery level percentage provides a clear indication of the remaining battery power. Tap on “Battery usage” to view the usage since last full charge, including the battery discharge rate, the... -
Page 45: Battery Saver Mode
Chapter 2. Using the RS38 Mobile Computer BATTERY SAVER MODE Enabling “Battery Saver” conserves energy by restricting power-intensive features, such as location services, vibration, and most background processing data, especially when the main battery is low. To schedule automatic activation of the Battery Saver mode: 1) Tap “Battery Saver”... - Page 46 RS38 Mobile Computer To manually activate Battery Saver mode: 1) Tap "Use Battery Saver" to activate the battery saver function; the battery icon on the status bar will turn orange upon enabling this feature. Enabling "Turn off when charged" automatically deactivates Battery Saver mode once the battery is charged to 90%.
- Page 47 Chapter 2. Using the RS38 Mobile Computer You can also swipe down from the status bar to reveal the Quick Settings Panel or Quick Settings Menu, the tap the Battery Saver icon to enable or disable it. Icon Description Battery saver mode is OFF.
-
Page 48: Battery Optimization
RS38 Mobile Computer BATTERY OPTIMIZATION With Battery optimization enabled for applications, you can ensure that they remain inactive when your device is idle or hasn't been used for days. To enable battery optimization for specific apps: 1) Tap “Battery usage” on the Battery page. -
Page 49: Low Battery Alert
LOW SUB BATTERY ALERT When the main battery’s power is drained out, the RS38 mobile computer will automatically suspend using the backup battery’s power for 10 minutes. If the backup battery's power is low, the "Low Sub Battery"... -
Page 50: Replace Main Battery
RS38 Mobile Computer 2.1.3. REPLACE MAIN BATTERY When the main battery level is low, follow the steps below to replace a fully charged battery for replacement.. SHUT DOWN TO REPLACE THE MAIN BATTERY To replace the main battery: 1) Make sure the sub battery and the new main battery are fully charged. - Page 51 Chapter 2. Using the RS38 Mobile Computer BATTERY SWAP RS38 backup battery provides system power during a battery swap. When the battery cover is removed, the system enters suspend mode and won’t resume until the battery cover is reattached and the power button is pressed. Please refer to “Low Sub Battery...
- Page 52 Thus, to prevent data loss, DO NOT replace the main battery when backup battery’s power is low. Connect the RS38 mobile computer to an external power source and charge it untill the “Low Sub Battery” notification icon disappears from the status bar. Once the notification...
-
Page 53: Power Management
Chapter 2. Using the RS38 Mobile Computer 2.1.4. POWER MANAGEMENT Efficient power management is crucial for portable devices, particularly during travel. Here are some tips to help you conserve battery power. Carry an extra main battery pack with you on the road. - Page 54 RS38 Mobile Computer ENTER AIRPLANE MODE Activating Airplane mode on your device disables all wireless radios, including call functions and data connections like Bluetooth, Wi-Fi, and 3G/4G/5G, leading to significant battery power savings. To enter mode: Airplane 1) Swipe down from the top of the screen to open...
-
Page 55: Battery Precautions
If the battery temperature reaches 55°C, an "Over Battery Temperature" warning will prompt you to remove the battery. Additionally, the RS38 will automatically shut down if the battery temperature reaches 58°C, as the battery cannot discharge at such high temperature. - Page 56 If the battery temperature drops to 0℃ or lower while charging, the red Status LED on the front panel will blink, accompamied by a warning window. This serves as a reminder for the user to disconnect the charger, and the RS38 mobile computer will automatically suspend battery charging.
-
Page 57: Memory
32GB) or a microSDXC (up to 1TB). When selecting an SD card for optimal compatibility and performance with the RS38, please make sure it meets your required capacity. If using an SDXC card, use a new card and ensure it hasn’t been previously used in other host devices such as computers, cameras, or readers. -
Page 58: Check Memory Usage
RS38 Mobile Computer 2.2.1. CHECK MEMORY USAGE The memory manager provides an overview of the device’s RAM usage. To check memory usage, enable “Developer Option” in advanced. ENABLE DEVELOPER OPTIONS 1) To enable “Developer options”, go to App Drawer (All Apps) - Page 59 Chapter 2. Using the RS38 Mobile Computer Once you become a developer, you can locate Developer options within the System page. CHECK MEMORY USAGE Go to App Drawer Settings System Developer options Memory enter memory manager screen.
- Page 60 RS38 Mobile Computer The main screen not only provides information about used and free memory space in RAM but also offers insights into how your usage patterns have affacted the overall performance of the device. To analyze the memory usage by the system and apps over an extended period, simply tap the dropdown list to select a different time span.
-
Page 61: Manage Storage Space
Chapter 2. Using the RS38 Mobile Computer 2.2.2. MANAGE STORAGE SPACE The SD card can serve as an extension of your Android device’s internal storage, supplementing the built-in 128 GB of flash memory to store the OS, applications and files, rather than merely serving as a portable storage option. - Page 62 RS38 Mobile Computer On the Storage screen, this disk can be managed separately. The SD card is considered a separate storage, the capacity of which is not included in total device storage. To start: 1) Insert the SD card. A notification icon indicating that an SD card is detected will be shown in the status bar.
- Page 63 Chapter 2. Using the RS38 Mobile Computer 3) Once the SD card is formatted, swipe down from the status bar to reveal Notification Drawer. You will find a notification indicating that the SD card is ready for use. Tap “EXPLORE” to access the content.
- Page 64 RS38 Mobile Computer TRANSFER PHOTOS & MEDIA CONTENT BETWEEN DEVICE & PC To transfer photos and media between this device and a PC when the mounted SD card is set as portable storage, please follow these steps: 1) Connect your mobile computer to the PC using a USB Type-C cable, and the “USB Preferences”...
- Page 65 Chapter 2. Using the RS38 Mobile Computer CONVERT THE SD CARD TO INTERNAL STORAGE You can convert the SD Card from portable storage to internal storage at anytime. Before proceeding, ensure you make a backup of the files on this disk if you wish to retain them.
- Page 66 RS38 Mobile Computer 3) When the “Format this SD card?” popup appears, tap “FORMAT” to proceed. Once the formatting is complete, you will be guided to the storage page. 4) If you select "Move content later" during formatting and later wish to transfer multimedia files to the new SD card, navigate to the storage page, tap More then choose "Migrate...
- Page 67 Chapter 2. Using the RS38 Mobile Computer SET UP SD CARD AS INTERNAL STORAGE Using SD card as internal storage allows you to extend your existing device storage and to store huge applications. This SD card will be reformatted and encrypted with a file format that is not readable by another device.
- Page 68 RS38 Mobile Computer To start: 1) Insert the SD card, then tap on the notification to set up the detected SD card. 2) Tap on “Format another way” to choose “Format SD card for internal storage”. 3) To avoide losing content, back it up to another SD card or device then tap “Format”. .
- Page 69 Chapter 2. Using the RS38 Mobile Computer Note: It is recommended that you select “Move content” at Step 4 to have the device immediately start making use of SD card space. If you select “Move later”, the device will continue to consider device’s original storage the primary location to save files.
- Page 70 RS38 Mobile Computer 3) On “Format SD card for portable storage” page, tap on “Format card” to have this SD card re-formatted into a file type accessible by other devices.. 4) When the formatting is completed, tap “DONE”. Note: Please do back up important files on this SD card before proceeding formatting.
-
Page 71: Touch Screen
Chapter 2. Using the RS38 Mobile Computer 2.3. TOUCH SCREEN The mobile computer is equipped with a 6.0-inch display that is outdoor viewable and optically bonded to a Corning Gorilla Victus Touch Panel. This display features a high-definition ® ®... -
Page 72: Screen Rotation
RS38 Mobile Computer Note: To save battery power, dim the screen brightness while working in well-lit areas, or set a shorter screen timeout for the screen backlight to go off.. With Adaptive brightness enabled, your screen brightness will autimatically adjust to your environment and activities. - Page 73 Chapter 2. Using the RS38 Mobile Computer Alternatively, swipe down from the top of the screen to open the Quick Settings Menu, then tap the Auto rotate icon to enable screen rotation. Icon Description Auto rotate mode is OFF. Auto rotate mode is ON.
- Page 74 RS38 Mobile Computer HOME SCREEN ROTATION To enable Home screen rotation, please make sure Auto Rotation is enable. 1) Press any empty spot on Home screen. 2) Tap “Home Settings” and enable “Allow Home screen rotation”. REMOVE AUTO ROTATION FROM QUICK SETTING MENU To minimize accidental activation of the auto-rotation function, remove the Auto rotate switch icon from the Quick Settings Menu.
- Page 75 Chapter 2. Using the RS38 Mobile Computer 2) Tap on and hold the Auto-rotate icon, and drag it to the “Drage here to remove” area and then release it. 3) Return to the “Quick Settings Menu”, the “Auto rotate” switch icon is now hidden.
- Page 76 RS38 Mobile Computer REMOVE AUTO ROTATION FROM THE DISPLAY SETTING PAGE On the Display setting page, “Auto-rotate screen” is listed under “Other display controls”. To remove “Auto-rotate screen” on the Display setting page, please go to App Drawer (All Apps)
- Page 77 Chapter 2. Using the RS38 Mobile Computer Now the option “Auto-rotate screen” is hidden on the “Display” page. Note: Auto-rotation is not supported for certain applications. Without enabling “ ”, auto-rotation is inapplicable in Home Allow Home Screen Rotation Screen and screen.
-
Page 78: Screen Timeout Settings
RS38 Mobile Computer 2.3.3. SCREEN TIMEOUT SETTINGS Screen Timeout automatically turns off your device’s display after a set period of inactivity for power-saving purposes. To set Screen Timeout duration, go to | Settings | Display App Drawer (All Apps) | Screen timeout, and choose the screen timeout duration. -
Page 79: Display Size And Text
Chapter 2. Using the RS38 Mobile Computer 2.3.4. DISPLAY SIZE AND TEXT Adjust the “Display size and text” to customize the visual and text size on your device for optimal readability and comfort. 1) Go to App Drawer (All Apps) -
Page 80: Notifications
RS38 Mobile Computer 2.4. NOTIFICATIONS 2.4.1. STATUS LED This section provides information about LED 1 2. LED 1 indicates charging status, while LED 2 handles reader and system notifications. LED 1 for Charging Indication Status Description Breathing Red Charging the mobile computer (0% to 90%) -
Page 81: Sound And Vibration
Chapter 2. Using the RS38 Mobile Computer 2.4.3. SOUND AND VIBRATION The mobile computer is equipped with a programmable integrated vibrator, offering tactile feedback for assistance in noisy environments. Additionally, you have the option to set the device to vibrate only, muting all system sounds and replacing them with the vibrator. -
Page 82: Sound & Vibration Settings
RS38 Mobile Computer The media volume can be adjusted by pressing the key, or Volume Up Volume Down dragging the slider on quick sound menu. Tapping on the More icon opens the pop-up volume panel, while continue tapping on the “SETTINGS”... - Page 83 Chapter 2. Using the RS38 Mobile Computer Adjust the volume for , and Media Call Ring & notification Alarm by dragging the sliders. The Media icon turns from when the Media volume is on. The Ring & notivication icon turns from...
- Page 84 RS38 Mobile Computer Enter “Voice Mode” or “Headset Playback” to adjust volume in a loud environment. 1) Swipe to the bottom of the page and tap on Voice Mode or Headset Playback to enlarge the volume. 2) Tap on “Loudness Mode” if is volume is not sufficient. A caution window will appear upon selection.
- Page 85 Chapter 2. Using the RS38 Mobile Computer Swipe down the page to toggle the switches to enable or disable additional settings related to sound and vibration. DISABLE UNWANTED NOTIFICATIONS WITH “DO NOT DISTURB” You can temporarily disable specific notifications (vibration or sound) using “...
- Page 86 RS38 Mobile Computer 2) Long press the “Do Not Disturb” icon in the Quick Settings Menu to access additional settings. Alternatively, go to | Settings | Sound & vibration App Drawer (All Apps) Do Not Disturb.
-
Page 87: Date And Time
Chapter 2. Using the RS38 Mobile Computer 2.5. DATE AND TIME By default, the mobile computer automatically synchronizes the date and time to the WWAN network (if connected). To set the date and time manually: 1) Go to | Settings | System | Date &... - Page 88 RS38 Mobile Computer 3) Continue tapping on “Time” to set the correct time. To set time zone manually: Disable “Set time zone automatically” and then tap “Time zone” to select the correct time zone by “Region”.
- Page 89 Chapter 2. Using the RS38 Mobile Computer Alternativly, select time zone by UTC offset” “ In the bottom page, you can also change the Time Format by selecting “Use locale default” or “Use 24-hour format” to toggle the displayed time.
- Page 90 RS38 Mobile Computer To Sync device time with NTP server for accuracy: Tap “ ” on the bottom page to input NTP server address, then tap “ to save. NTP Server OK”...
-
Page 91: Language & Keyboard Input
Chapter 2. Using the RS38 Mobile Computer 2.6. LANGUAGE & KEYBOARD INPUT App Drawer (All Apps) Settings System Language & input change the system language, default keyboard type, and configure keyboard input and speech settings. 2.6.1. CHANGE DISPLAY LANGUAGE To change display language: 1) On Language &... - Page 92 RS38 Mobile Computer 2) Click “ ” to select your desired system language. Add a language 3) Press and hold your preferred system language, then drag it to the top to set it as the primary language. Release to apply the changes instantly.
- Page 93 Chapter 2. Using the RS38 Mobile Computer DELETE LANGUAGE To delete language(s): 1) Tap on the more button , then tap “ ”. Remove 2) Select the language to delete. Please note that the display language will be changed once it...
-
Page 94: On-Screen Keyboard
RS38 Mobile Computer 2.6.2. ON-SCREEN KEYBOARD Simply tap a text input field to automatically open an on-screen keyboard. The virtual keyboard will adapt to the data type (text or numbers) required for that specific field. SELECT KEYBOARD (INPUT METHOD) 1) To add a language on keyboard, tap System | Language &... - Page 95 Chapter 2. Using the RS38 Mobile Computer EDIT TEXT Tap and hold text on the screen to open a text editing menu, allowing you to select all, copy, or paste text within or across applications.
-
Page 96: Sound And Volume
RS38 Mobile Computer 2.7. SOUND AND VOLUME Adjust system and ringer volume by using the volume buttons located on the left side of the mobile computer. 2.8. DATA CAPTURE 2.7.1. BARCODE READER Select from a range of scan engines to enhance flexibility, catering to diverse operational requirements. -
Page 97: Chapter 3. Basic Operation
Chapter 3 CHAPTER 3. BASIC OPERATION This chapter covers fundamental skills for using the RS38 mobile computer, including home screen navigation, system status checking, and notification management. Subsequent chapters delve into additional utilities for data collection, processing, and transmission within specific applications. -
Page 98: Home Screen
RS38 Mobile Computer 3.1. HOME SCREEN When your mobile computer is fully charged, activate it by pressing the Power Key for three seconds. This action will prompt the appearance of a locked screen, indicating the device is ready for use. -
Page 99: Application & Widget On Home Screen
Chapter 3. Basic Operation 3.1.1. APPLICATION & WIDGET ON HOME SCREEN ADD APP & APP SHORTCUT TO HOME SCREEN To add an application to home screen: 1) Open the App Drawer 2) Locate the application, tap, and hold. 3) Drag to the home screen and drop to place. To add the app shortcuts in certain applications to the home screen: To add such applications from to home screen:... -
Page 100: Folder On Home Screen
RS38 Mobile Computer ARRANGE THE APPLICATIONS, SHORTCUT AND WIDGETS ON HOME SCREEN To move an app, shortcut, or widget on your customized home screen, tap and hold the desired item. Drag it to any location on the home screen. Otherwise, drag the unwanted shortcut/widget to “X Remove”... -
Page 101: Navigation Method
Chapter 3. Basic Operation 3.2. NAVIGATION METHOD Navigation is to set how you control the device by using swipes and other actions or tapping on buttons. 3.2.1. CHANGE THE NAVIGATION METHOD The default navigation method is 3-button navigation which appears as the menu bar on the bottom of the screen. - Page 102 RS38 Mobile Computer The available options are: Gesture navigation 3-button navigation (default) GESTURE NAVIGATION “Gesture navigation” enables screen and menu navigation through gesture-based controls rather than buttons. Once enabled, you can control the device screen using the following...
-
Page 103: Button Navigation
Chapter 3. Basic Operation Tap on the setting button to enter “Gesture Settings” page. Here, you can set how far you need to swipe from the screen's edge to trigger the “Back” gesture. Higher sensitivity means a greater distance from the screen edge is required. 3-BUTTON NAVIGATION The default navigation method is 3-button navigation, which includes Home, Back, and Recently Used Apps. -
Page 104: Recently Used Applications
RS38 Mobile Computer 3.2.2. RECENTLY USED APPLICATIONS To reveal the Recently Used Apps Menu, you can: For “Gesture navigation”: For “3-button navigation”: Slowly swipe up from the bottom of the Simply tap on the “Recently Used Apps” button. -
Page 105: Status Bar
Chapter 3. Basic Operation 3.3. STATUS BAR The left side of the status bar displays notification icons, while the right side shows status icons. 3.3.1. ICONS ON STATUS BAR NOTIFICATION ICONS Icon Description Receive system notification like “USB debugging connected” or USB file transfer turned on”... -
Page 106: Status Icons
RS38 Mobile Computer STATUS ICONS Icon Description The device is currently connected to a Bluetooth device. The device is currently connected to a Wi-Fi network and performing data transmission. Airplane mode is active, deactivating all wireless radios. Alarm is currently active. -
Page 107: Open Quick Setting Menu
Chapter 3. Basic Operation 3.3.2. OPEN QUICK SETTING MENU Quick Settings in the status bar provide easy access to essential device settings such as power, Bluetooth, and Wi-Fi connectivity, allowing you to make adjustments swiftly. With a short swipe from the status bar, the Quick Setting Panel is revealed. Open the Quick Setting Menu by swiping from the top to the bottom of the screen. - Page 108 RS38 Mobile Computer Tap on the two buttons, , on the bottom side of the Quick Setting Menu will respectively enter the below pages: “Edit” Page: “Settings” Page: ...
- Page 109 Chapter 3. Basic Operation EDIT QUICK SETTING MENU To customize Quick Setting Menu, please: 1) Click “EDIT” to get into Edit page. 2) Remove: To remove certain item, please tap on and hold the icon to be removed, and drag it to the “DRAG HERE TO REMOVE”...
- Page 110 RS38 Mobile Computer 3) Add: To add certain item, please tap on and hold the icon to be added and drag it to the upper area and then release it. 4) Return to the Quick Settings Menu, all the settings are done.
- Page 111 Chapter 3. Basic Operation RESET QUICK SETTING MENU To reset the Quick Setting Menu, please: 1) Tap “EDIT” to enter Edit page. 2) Tap Reset in the upper-right corner.
-
Page 112: Open Notifications Drawer
RS38 Mobile Computer 3.3.3. OPEN NOTIFICATIONS DRAWER Status bar notification icons alert you to new events such as incoming calls, messages, or USB connections. CHECK OUT NOTIFICATION To check out details of the events, swipe down from the status bar to open... - Page 113 Chapter 3. Basic Operation DISABLE NOTIFICATION You can turn off the notification of a specific app by tapping and holding on the notifications card until the corresponding app name reveals. Tap to choose “Default”, “Silent”, or “Turn off notifications”. 1) Go to | Settings | Apps | See all XX apps to find the...
- Page 114 RS38 Mobile Computer 2) Tap to enter the “App info” page and tap “Notifications” to switch on or off “Show notifications” and other settings. CLEAR NOTIFICATION To dismiss all notifications at a time, please tap on “CLEAR ALL”. Ongoing notifications and...
-
Page 115: Suspend & Lock
SUSPEND RS38 Press the power button to suspend the mobile computer. The mobile computer will... -
Page 116: Lock Device
RS38 Mobile Computer 3.4.2. LOCK DEVICE Setting a screen lock allows you to protect your personal data on the device when it's not in your possession. With various screen lock options available, including Smart Lock, you can enjoy enhanced security and convenience. - Page 117 Chapter 3. Basic Operation By selecting a Pattern, PIN, or Password method, a setting icon appears next to “Screen lock”. Tap to enter “Screen lock” page for further configurations. Screen Lock advanced settings are: Item Description Set the time interval between screen timeout and automatically locking Lock after screen timeout the screen.
-
Page 118: Os Update
RS38 Mobile Computer 3.4.3. OS UPDATE Updating the operating system on the mobile computer helps maintain it at an optimized state. You may choose to update the system by establishing a wireless network connection to the Internet and downloading the update file from the OTA server. -
Page 119: Automatic Update
AUTOMATIC UPDATE The automatic update feature of RS38 mobile computer is off by default, and you can change the setting by ADC (Android Deployment Configurator) to turn it on. -
Page 120: Sd Card Update
RS38 Mobile Computer 3.4.5. SD CARD UPDATE RS38 mobile computer automatically searches the available update files in your mobile computer’s storage and then install it. Please obtain the latest system update image file, and then rename and copy the file as “sdupdate.zip”... -
Page 121: Back Up Your Data
Chapter 3. Basic Operation 3.5. BACK UP YOUR DATA With Backup, you can securely store your personal data, including Google Calendar settings, Google contacts, Chrome browser data, and Gmail settings, along with selected system settings, in your Google Account. This ensures that your information is backed up to the cloud via a network connection.This allows you to easily restore the settings on this device after a Factory Reset (refer to ). - Page 122 RS38 Mobile Computer Note: Photos To back up your photos and videos, open from the and log in to App Drawer your Google Account to sync the files on your device with Google Photo Library. To back up other data such as audio or video files stored on the device, utilize the Google Drive service.
-
Page 123: Reset To Factory Default
When configuring your RS38 mobile computer using ADC (Android Deployment Configurator), the settings will automatically back up to the “enterprise partition” of your RS38 mobile computer. The settings saved in the enterprise partition will not be erased by proceeding with “Erase all data (factory reset)”. - Page 124 RS38 Mobile Computer 3) Confirm the action by tapping on “Erase all data” and enter the verification code (Please contact with to obtain your verification code). Finally, tap “OK” support@cipherlab.com.tw to initiate the factory reset.
-
Page 125: Erase All Date (Factory Reset With Enterprise)
Confirm the action by tapping on “Erase all data”, then enter the verification code (Please contact with to obtain your verification code), and tap “OK” to support@cipherlab.com.tw initiate the enterprise reset. Please note that “Erase all data (factory reset with enterprise)” will erase all the data, including the settings backed up in the enterprise partition by ADC (Android Deployment Configurator). -
Page 126: Welcome Wizard
RS38 Mobile Computer 3.6.3. WELCOME WIZARD Upon booting up the mobile computer for the first time after the reset, the Welcome Wizard will guide you through setting up the environment and restoring apps and data. During setup, you can tap “SKIP” to proceed to the next step, completing the respective settings later in the App... - Page 127 Chapter 3. Basic Operation Step 2 To complete the deployment of the device through the QR code generated by ADC (Android Deployment Configurator) or ReMoCloud, tap the blank space on the screen six times to access the scanning page. Step 3 ...
- Page 128 RS38 Mobile Computer Step 4 Tap “Accept & Continue” to proceed. Step 5 Insert your SIM to connect to mobile network, or tap on “SKIP” to the next st...
- Page 129 Chapter 3. Basic Operation If not enrolling the device through ADC or ReMoCloud, tap “Start”. Choose a Wi-Fi network or to tap on “Set up offline” , then confirm with “CONTINUE” to the next step. Step 6 Choose Google services that you want to be enabled, and tap “ACCEPT” to proceed.
- Page 130 RS38 Mobile Computer Step 7 Set up the protection methods to protect this device, or merely “SKIP” this step. Step 8 It takes few seconds to complete the settings. Once the initial setup is completed, the Home app screen shows up. Apps and settings will be...
-
Page 131: Chapter 4. Wireless Radios
CHAPTER 4. WIRELESS RADIOS This chapter will guide you through the configuration and establishment of wireless network connections using the integrated Wi-Fi module of the RS38 mobile computer. IN THIS CHAPTER 4.1. Use Wireless Local Area Network (Wi-Fi) ........132 4.2. -
Page 132: Use Wireless Local Area Network (Wi-Fi)
RS38 Mobile Computer 4.1. USE WIRELESS LOCAL AREA NETWORK (WI-FI) 4.1.1. CONNECT TO WI-FI NETWORK To power on Wi-Fi: 1) Go to | Settings | Network & Internet |Internet. App Drawer 2) Tap the Wi-Fi switch to scan for available networks. - Page 133 Chapter 4. Wireless Radios 3) Select a network to connect. If the network is an open one, the mobile computer will attempt to connect to it directly. Once connected, the status will change to “Connected”. If the network is a secured one, the mobile computer will prompt a dialog to enter the password for the connection.
-
Page 134: Manually Add Wi-Fi Network
RS38 Mobile Computer 4.1.2. MANUALLY ADD WI-FI NETWORK If the network you would like to connect to does not broadcast its SSID, or if the network is out of range, you may add it manually. 1) Go to | Settings | Network &... - Page 135 Chapter 4. Wireless Radios “Enhanced Open” is for public networks and provides no authentication. For WEP, WPA/WPA2-Personal, and WPA3-Personal connections: Enter the required password and tap “ Save” For “WPA/WPA2/WPA3-Enterprose” connections, choose the EAP method (PEAP, TLS, TTLS, PWD, SIM, AKA, AKA’), and the Phase 2 authentication (MSCHAPV2, GTC, SIM, AKA, AKA’).
- Page 136 RS38 Mobile Computer 5) For advanced options, select the Proxy server and IPv4 settings if necessary. By default, no proxy is set, and IP settings are configured for DHCP.
-
Page 137: Wi-Fi Preference
Chapter 4. Wireless Radios 4.1.3. WI-FI PREFERENCE To access Network Preferences: 1) Go to App Drawer (All Apps) Settings Network & internet Internet 2) Scroll down to the bottom of the page to enter “ ”. Network preferences... - Page 138 RS38 Mobile Computer The available settings are as bellow: Item Description Tap to enter the page for further settings. Please refer to Cipherlab Proprietary Settings Cipherlab Proprietary Settings for details. Even you’ve turned off Wi-Fi, the device will automatically turn Turn on Wi-Fi automatically on your Wi-Fi connection when there’s the saved network...
- Page 139 Chapter 4. Wireless Radios CIPHERLAB PROPRIETARY SETTINGS To configure the grayed out options listed on “Cipherlab Proprietary Settings”, Wi-Fi must be turned off. Turn on Wi-Fi again to apply the settings once the configuration is done. 1) Turn off Wi-Fi, then tap on “Network Preferences” and select “Cipherllab Proprietary Settings”.
- Page 140 Tap to enable the monitor to check legality of IP address. Select most suitable frequency channel optimal Channel Selection performance. Reset to Default Reset all settings to default. Note: Cipherlab Proprietary Settings cannot be configured while Wi-Fi is turned on.
-
Page 141: Modify Wi-Fi Network
Chapter 4. Wireless Radios 4.1.4. MODIFY WI-FI NETWORK MODIFY THE CONNECTED NETWORK To change the settings for a connected network: 1) Tap a connected network in the Wi-Fi hotspot list to enter its “Network details” page. 2) Tap “Edit ” to open the pop-up menu. 3) Modify the network settings, and tap “Save”. - Page 142 RS38 Mobile Computer MODIFY THE SAVED NETWORK To change the settings for a saved network: 1) Tap and hold a saved network in the Wi-Fi hotspot list. 2) Tap “Modify” in the pop-up menu. 3) In the dialog box that opens, modify the network settings, and tap “Save”.
-
Page 143: Disconnect Wi-Fi Network
Chapter 4. Wireless Radios 4.1.5. DISCONNECT WI-FI NETWORK To disconnect a connected network: 1) Tap a connected network in the Wi-Fi hotspot list to enter its “ ” page. Network details 2) Tap “DISCONNECT”. To forget a saved network: 1) Tap and hold a saved network in the Wi-Fi hotspot list. 2) Tap “... -
Page 144: Use Bluetooth
RS38 Mobile Computer 4.2. USE BLUETOOTH The RS38 mobile computer allows you to configure Bluetooth settings and manage Bluetooth services provided on remote devices. 4.2.1. BLUETOOTH PROFILES Bluetooth Profiles Supported Generic Access Profile (GAP) For device discovery and authentication. Service Discovery Access Profile (SDAP) Discovers services on remote devices. - Page 145 Chapter 4. Wireless Radios Bluetooth Profiles Supported General Audio/Video Distribution (GAVDP) Provides a basis for A2DP and VDP. Profile Transfers Phone Book Objects to a car kit to display Phone Book Access Profile (PBAP) the information of an incoming call received on the mobile computer, or initiate a call.
-
Page 146: Turn On Bluetooth
RS38 Mobile Computer 4.2.2. TURN ON BLUETOOTH Bluetooth is turned off by default, and you can turn it on or off by tapping the Bluetooth icon Quick Settings Menu Quick Settings Panel Icon Description Bluetooth is OFF. Bluetooth is ON. - Page 147 Chapter 4. Wireless Radios To enter “Connected devices” page for further Bluetooth settings, please long press the Bluetooth icon on Quick Settings Menu or Quick Settings Panel: 1) Alternatively, go to App Drawer (All Application) | Settings | Connected devices | Connection preferences | Bluetooth...
- Page 148 RS38 Mobile Computer 2) Tap the switch to turn on this function while enabling the Bluetooth visibility of this device. Note: When turned on, Bluetooth remains active even during suspension on the mobile computer. However, activating Airplane Mode will disable Bluetooth power, overriding any previous...
-
Page 149: Change Bluetooth Name
Chapter 4. Wireless Radios 4.2.3. CHANGE BLUETOOTH NAME To change the Bluetooth name of this mobile computer: 1) Go to App Drawer (All Application) | Settings | Connected devices Connection preferences | Bluetooth 2) Tap on “Device name,” and a pop-up window titled “Rename this device” will appear. 3) Type a new name in the field and tap “RENAME”... -
Page 150: Pair Bluetooth Devices
RS38 Mobile Computer 4.2.4. PAIR BLUETOOTH DEVICES 1) Go to App Drawer (All Application) | Settings | Connected devices Connection preferences | Bluetooth 2) Tap “+ Pair new device” to scan for available Bluetooth devices nearby. 3) Scroll through the list and tap the device you would like to pair. - Page 151 Chapter 4. Wireless Radios 5) Once pairing is done, you can find the Bluetooth device in App Drawer | Settings Connected devices | Saved devices. Note: If the device you want to pair with is not listed, ensure that Bluetooth visibility is enabled on that device.
-
Page 152: Unpair Bluetooth Device
RS38 Mobile Computer 4.2.5. UNPAIR BLUETOOTH DEVICE To unpair a paired device: 1) In the Saved devices list, tap the setting button next to the saved device. 2) On the Device details screen, tap on “FORGET”. 3) Confirm by tapping “Forget device” in the pop-up window. -
Page 153: Use Near Field Communications
Chapter 4. Wireless Radios 4.3. USE NEAR FIELD COMMUNICATIONS Near field communications (NFC) utilize close proximity (4 cm or less) to establish radio communication through electromagnetic fields. When NFC is enabled, the mobile computer can collect information from NFC tags, exchange data with other NFC-supported devices, and, if authorized, even modify information on the NFC tag. -
Page 154: Pair With Nfc Enabled Bluetooth Devices
RS38 Mobile Computer 4.3.1. PAIR WITH NFC ENABLED BLUETOOTH DEVICES 1) Make sure that NFC and Bluetooth discovery are both enabled on the device you want to pair with. 2) Hold the mobile computer without covering the antenna area. NFC Detection Area 3) Move the mobile computer in proximity to the device for pairing, and a screen notification will appear to indicate successful pairing. -
Page 155: Chapter 5. Using The Phone
Installing SIM Card and Memory Card Additionally, the device is equipped with eSIM and 5G technology for enhanced communication capabilities. Note: RS38 Mobile Computer only supports Nano SIM card, and the Wi-Fi only model does not support SIM card. IN THIS CHAPTER 5.1. -
Page 156: Sim Card Management
RS38 Mobile Computer 5.1. SIM CARD MANAGEMENT The default setting for celluar networks is “ ”. To manually select Automatically select network the cellular network, please: 1) Go to App Drawer | Settings | Network & Internet | SIMs 2) On the mobile network page, scroll to locate “Automatically select network” and disable it. - Page 157 Chapter 5. Using the Phone 3) By turning off “ ”, “ ” pops up to list the Automatically select network Choose network network after searching. Select your preferred network from the list. 4) A notification appears if the selected network is unavailable. Please repeat the aforesaid steps to select the network again.
- Page 158 RS38 Mobile Computer SETTING UP ESIM eSIM is a digital alternative to physical SIM cards, streamlines the process of transferring or obtaining mobile plans. To set up eSIM: 1) Go to App Drawer | Settings | Network & Internet 2) Tap , or tap on the plus icon [+] next to SIMs to add one.
-
Page 159: Emergency Calls
Chapter 5. Using the Phone EMERGENCY CALLS Depending on your service provider, the mobile computer may support making emergency phone calls even when the SIM card is locked or absent. Emergency phone numbers will vary by country. -
Page 160: Phone Application
RS38 Mobile Computer 5.2. PHONE APPLICATION Once a SIM card is installed on the mobile computer or an eSIM is added and activated, a signal icon will appear at the top of the Quick Settings Menu, indicating the strength of the connection... -
Page 161: Phone Interface
Chapter 5. Using the Phone 5.2.1. PHONE INTERFACE To launch the phone application, please go to App Drawer (All Apps) | Phone The application “Phone” contains three tab pages: Item Description Favorite Display your favorite contacts & your frequent calls. History List all the call history. - Page 162 RS38 Mobile Computer ADD FAVORITE CONTACTS Your favorite contacts are displayed on “Favorite” tab pages for quickly making phone calls. To add a favorite contact: 1) On “Contacts” tab page, tap on the contact you would like to set to be your favorite to enter the contact detail page.
-
Page 163: Place Call
Chapter 5. Using the Phone 5.2.2. PLACE CALL to expand the dial pad, enter the phone number in the dial pad, and tap initiate the call. If you need to frequently make calls to an interactive voice system, you may tap next to the number and select Add 2-sec pause for soft pause (a pause of 2 seconds to the buttons) or a hard pause (a pause that will wait for your confirmation to... -
Page 164: During A Call
RS38 Mobile Computer 5.2.3. DURING A CALL When a call is connected, the phone keypad features the following buttons. To hold the call or to add call, tap on “More”: Button Description Mute Mute the call. Keypad Open the numeric keypad. -
Page 165: Receive Incoming Call
Chapter 5. Using the Phone 5.2.4. RECEIVE INCOMING CALL When receiving an incomming call, tap “Answer” to pick it up. Incoming calls will be logged in the Phone application; in the case of a missed call, a notification will be displayed. Please refer to Check Missed Calls To mute the ringtone of an incoming call, press the volume down button. -
Page 166: Check Missed Calls
RS38 Mobile Computer 5.2.5. CHECK MISSED CALLS If you have a missed call, a notification icon will appear on the status bar. The missed calls notification will also be displayed on the lock screen. To manage notification on lock screen:... -
Page 167: Call History
Chapter 5. Using the Phone 5.2.6. CALL HISTORY To check the call history, open the Phone application and tap to enter the Recents tab, where a list of recent calls is displayed. Alternatively, tap on the more button , then choose “Call history ”... -
Page 168: Call Settings
RS38 Mobile Computer 5.2.7. CALL SETTINGS Tap on more button and select “Settings” to enter the settings page: Tap on each setting for more setting options. -
Page 169: Make Multi-Party Calls
Chapter 5. Using the Phone 5.2.8. MAKE MULTI-PARTY CALLS To make multi-party conference calls: 1) On the Phone application page, enter the 1 number to call and tap to initiate the call. 2) After the call has begun, tap Add to add another member. -
Page 170: Audio Modes
Note that the speakerphone is automatically muted when a Bluetooth headset is connected. USE WIRED HEADSET The RS38 mobile computer supports a USB Type-C audio adapter for connecting headsets. To use this feature, insert a USB Type-C audio adapter into the USB-C port and connect it with a wired headset. -
Page 171: In-Call Volume
Chapter 5. Using the Phone 5.4. IN-CALL VOLUME Use the Volume Buttons to adjust the ringer volume and system sound level. During a call, use the volume buttons to adjust the in-call conversation volume. -
Page 172: Chapter 6. Cipherlab Utilities
RS38 Mobile Computer Chapter 6 CHAPTER 6. CIPHERLAB UTILITIES This chapter introduces the built-in applications developed by CipherLab. You can access these applications in your App Drawer. IN THIS CHAPTER 6.1. A-Demo ....................173 6.2. AppLock ....................175 6.3. Barcode To Setting................176 6.4. -
Page 173: A-Demo
Chapter 6. CipherLab Utilities 6.1. A-DEMO is an application that provides a brief introduction to all the built-in applications A-Demo developed by CipherLab. Enter the main screen and swipe left or right to select the item to get the function introduction. - Page 174 RS38 Mobile Computer Users can launch these apps by tapping “ ” on the App’s introduction page. START...
-
Page 175: Applock
Chapter 6. CipherLab Utilities 6.2. APPLOCK AppLock controls the interface provided to users, exerting over the operation system and restricting access to system resources. When properly configured, AppLock allows productive applications to function normally while restricting access to less productive ones. -
Page 176: Barcode To Setting
RS38 Mobile Computer 6.3. BARCODE TO SETTING BarcodeToSetting is designed to read the setting barcodes generated by ADC (Android Deployment Configurator) in order to apply the configuration. Launching “BarcodeToSetting” will display the main screen as shown below: Item Description Total The total amount of the barcodes to be scanned. - Page 177 Chapter 6. CipherLab Utilities The setting barcodes you generated by ADC might be 1D or 2D as the example figures shows: 1D barcodes: 2D barcode: ...
- Page 178 RS38 Mobile Computer HOW TO APPLY THE SETTINGS BY SCANNING BARCODE Simply aim the scanning window at the barcode to read and press any of the side trigger. The scanning light beams to read the printed barcodes. After scanning the setting barcodes, it takes a few seconds for your device to apply the...
- Page 179 Chapter 6. CipherLab Utilities RESET (DATA INITIALIZE) During the scanning procedure, you have the option to perform a “Reset” to start over. Alternatively, after completing the configuration, you can tap the “Reset” button to scan other barcodes you generated and apply additional settings.
- Page 180 RS38 Mobile Computer MORE MENU Tap on the more button on the action bar to open the more menu. The items on the more menu: Item Description Check the checkbox to enable recording of events that occur during BarcodeToSetting” runs.
-
Page 181: Bt Printer Mate
Chapter 6. CipherLab Utilities 6.4. BT PRINTER MATE BT Printer Mate is an application which provides user interface to pair with Bluetooth printers. 6.5. BUTTON ASSIGNMENT Button Assignment can redefine the functions of physical keys so that they trigger different actions. Settings made to one or more keys can be saved as a profile, allowing users to switch conveniently in between different sets of settings. -
Page 182: Enterprise Settings
RS38 Mobile Computer 6.5. ENTERPRISE SETTINGS Enterprise Settings in RS38 mobile computer offers various functional settings tailored to the project model. DIMMING MODE TIMEOUT “Dimming Mode Timeout” is disabled by default. To enable this function, choose the provided option of idle time. -
Page 183: Hf Rfid Configuration
Chapter 6. CipherLab Utilities 6.6. HF RFID CONFIGURATION HF RFID Configuration is a NFC application designed for reading and writing NFC tags and RFID compatible chips. Simply place the NFC tag or RFID chip close to the NFC detecting area of your device to initiate the process. -
Page 184: Readerconfig
RS38 Mobile Computer 6.7. READERCONFIG ReaderConfig is a built-in application designed for configuring the scan engine within the mobile compute. It enables users to customize their scanner preferences and specify how decoded data is output. Users can use symbology and scanner settings and export them as a profile for importing again or implementing identical Reader Config settings on multiple devices. -
Page 185: Signature Capture
Chapter 6. CipherLab Utilities 6.8. SIGNATURE CAPTURE Signature Capture is a simple and easy application which transforms your device into a signature pad for user to draw the signature. Users can create digital signatures and save them in the device storage with multiple file formats. -
Page 186: Sip Controller
RS38 Mobile Computer 6.9. SIP CONTROLLER SIP Controller is a built-in application that allows users to quickly open or close the virtual keyboard by tapping on the floating button. LAUNCH SIP CONTROLLER To launch SIP Controller: 1) On App Drawer screen, tap on “SIP Controller”... - Page 187 Chapter 6. CipherLab Utilities 3) Now, the “SIP Controller” button appears on the screen, allowing you to invoke the virtual keyboard by tapping on it. Additionally, you have the flexibility to drag this button to any position on the screen.
- Page 188 RS38 Mobile Computer FORCE TO DISPLAY “ ” is ineffective for the devicedim whose OS is above Android 11. Force to display SWITCH VIRTUAL KEYBOARD You can configure “Virtual Keyboard 1” and “Virtual Keyboard 2” to be the keyboards invoked by SIP Controller.
-
Page 189: Version Information
Chapter 6. CipherLab Utilities EXIT SIP CONTROLLER Tap on “Stop” to disable SIP Controller on-screen button. Tap to quit “SIP Controller”. VERSION INFORMATION Tap on the more button on the action bar and select “About” to check the current version of SIP... -
Page 190: Software Trigger
RS38 Mobile Computer 6.10. SOFTWARE TRIGGER Software Trigger is an application running on a mobile device, functioning as a virtual trigger key. It always floats on top of all other programs, providing convenient control of the barcode scanner. By tapping and holding this virtual button, the device will consistently cast a... - Page 191 Chapter 6. CipherLab Utilities LAUNCH SOFTWARE TRIGGER Please follow the steps below to launch Software Trigger: 1) Open the “Software Trigger” app from the App Drawer to access the main screen. 2) Select the size of the virtual trigger button.
- Page 192 RS38 Mobile Computer 4) Always-accessible software keys will appear on your screen. Drag the trigger button to a position where you find it easy to control. EXIT SOFTWARE TRIGGER To disable this virtual trigger button, enter Software Trigger application screen, and tap “Stop”.
- Page 193 Chapter 6. CipherLab Utilities VERSION INFORMATION To check the current version of Software Trigger, please tap on the more button on the action bar and select “About”.
-
Page 194: Loggen
RS38 Mobile Computer 6.11. LOGGEN LogGen is a host log generator utility specifically designed to assist on-site operators in collecting all event logs (except TE log on Android 11) from mobile computers. With just a tap on one button within this app, logs belonging to the device can be easily generated. IT personnel can then use the history of these events to simulate the real environment and solve problems either locally or remotely. -
Page 195: Wireless Init
Chapter 6. CipherLab Utilities 6.12. WIRELESS INIT Wireless Init is a valuable utility designed for on-site operators dealing with unstable networks. This tool allows users to reset and reconnect all wireless connections, including Bluetooth, Wi-Fi, and 4G LTE/5G, with the simple tap of a button. -
Page 196: Ping
RS38 Mobile Computer 6.13. PING Ping is a versatile network diagnostic utility that includes three valuable tools: Ping, Traceroute, and Wi-Fi status. These tools help diagnose and analyze the current network status efficiently. LAUNCH PING APPLICATION 1) Go to and tap on the app “Ping”... - Page 197 Chapter 6. CipherLab Utilities GENERAL SETTINGS FOR TOOLS To configure tool-related settings, tap “General Setting” on the Option Menu. The following setting page will be displayed. To reset all settings of this application, tap the Reset icon Settings Description Ping Count Specify the total amount of packets that will be sent to the destination host.
- Page 198 RS38 Mobile Computer -Do PMTU discovery, fragment locally when packet size is large -Do not set DF flag Traceroute Disable IP By disabling the function of IP address mapping, Traceroute tool will only show address IP address during tracking route without converting IP address into the host mapping name.
-
Page 199: Displaylink
PC, or any other compatible display device, providing a larger display area for your work. Before mirroring your screen, ensure the RS38 cradle is powered and the HDMI cable is securely connected to your device. To mirror your screen, follow the steps below: 1) Insert the RS38 mobile computer into the cradle’s main charging station. -
Page 200: Specifications
RS38 Mobile Computer SPECIFICATIONS PHYSICAL CHARACTERISTICS Dimensions & Weight Dimensions 165.5 mm(L) x 78.5 mm(W) x 15 mm(T) Weight 268 g ±1.5% with standard battery Color Touch Screen Display Display 6.0 inch Full High Definition (1080 X 2160) GFF ,Outdoor viewable, optically bonded to Touch Panel... -
Page 201: Platform, Processor & Memory
Specifications Audio 1. Built-in Dual Speakers 2. Built-in Receiver 3. Bluetooth headset support, Hands-Free Profile (HFP) 1.6 specification with Wideband speech. 4. USB type-C audio adapter. (Support analog & digital type earphone.) 5. AMR-WB HD-voice support (MODEM default support) PLATFORM, PROCESSOR & MEMORY Operating System &... - Page 202 RS38 Mobile Computer WLAN IEEE 802.11 a/b/g/n/ac/ax/d/h/i/r/k/v/w/mc, support fast roaming Support DBS(Dual Band Simultaneous), WiFi 6e with WiFi MIMO2x2 (802.11 ax for Wi-Fi 6 model only) (2412~2472 MHz: 18.33dBm 5180~5240MHz: 19.46dBm, 5260~5320MHz: 20.35dBm, 5500~5700MHz: 20.92dBm, 5745~5825MHz: 20.06dBm) WWAN GSM:850/900/1800/1900 WCDMA: B1(2100), B2(1900),B4,B5(850),B6,B8(850),...
-
Page 203: Electrical Characteristics
Specifications ELECTRICAL CHARACTERISTICS Battery Main Battery Rechargeable Li-polymer battery: 3.87V, 4500mAh Charging ambient temperature: 0℃~40℃ Battery cell charging temperature: 0℃~50℃ Minimum charging time: 3.5 hours @25℃ (2A@5V) Built-in gas gauge IC for overcharge/over-discharge/overcurrent/short circuit protection Support battery hot swap (0°C~50°C) Over Temperature Protection: -1±3°C / 50±3°C Extended Battery Rechargeable Li-polymer battery:3.87V, 6800mAh... -
Page 204: Environmental Characteristics
RS38 Mobile Computer Certification CTA(CCC, SRRC, MII), RoHS, FAC, CU, NCC, CE, WEEE,FCC, IC, NCC, TBL, JRL, BIS, WPC, , REACH, CA65, TSCA, BC, NrCAN, NBTC Wi-Fi Only SRRC, CCC, BSMI, NCC, CE, FCC, IC, WEEE, RoHS, REACH, CA65, TSCA, BC, NrCAN Working Time At 25℃, support working time... -
Page 205: Programming Support
Specifications Electrostatic Discharge (ESD) Per IEC 61000-4-2, ±15 kV air discharge; ±8 kV direct contact discharge PROGRAMMING SUPPORT Development Environment & Tools JAVA Environment Android Studio Software Development Kit: JAR Environment: Visual Studio Software Development Kit: DLL (Xamarin Library) -
Page 206: Application Menu
APPENDIX I APPLICATION MENU Icon Name Description This application provides a brief introduction to CipherLab's various A-Demo applications. Users can launch these apps by tapping “START” on the app's introduction page. An application designed to restrict the system resources available to... - Page 207 Appendix I Icon Name Description Find quick answers, explore your interests, and stay up to date with Google Discover. Gmail Connect, create, and collaborate with Gmail, part of Google Workspace. Chrome is a fast, secure browser built by Google that helps you search, Chrome browse, and get things done online.
- Page 208 RS38 Mobile Computer Icon Name Description Camera Take photos and record videos to capture the moments. Recorder Recorder brings the power of search to audio recording. Enjoy your favorite videos and channels with the official YouTube YouTube app. YouTube Music...
-
Page 209: Open Source License
Appendix II APPENDIX II OPEN SOURCE LICENSE The Reader Config involves the android-serialport-api project of Apache License Version 2.0, January 2004. http://www.apache.org/licenses/ TERMS AND CONDITIONS FOR USE, REPRODUCTION, AND DISTRIBUTION... - Page 210 RS38 Mobile Computer 1. Definitions. "License" shall mean the terms and conditions for use, reproduction, and distribution as defined by Sections 1 through 9 of this document. "Licensor" shall mean the copyright owner or entity authorized by the copyright owner that is granting the License.
- Page 211 Appendix II "Contribution" shall mean any work of authorship, including the original version of the Work and any modifications or additions to that Work or Derivative Works thereof, that is intentionally submitted to Licensor for inclusion in the Work by the copyright owner or by an individual or Legal Entity authorized to submit on behalf of the copyright owner.
- Page 212 RS38 Mobile Computer 4. Redistribution. You may reproduce and distribute copies of the Work or Derivative Works thereof in any medium, with or without modifications, and in Source or Object form, provided that You meet the following conditions: a. You must give any other recipients of the Work or Derivative Works a copy of this License;...
- Page 213 Appendix II 6. Trademarks. This License does not grant permission to use the trade names, trademarks, service marks, or product names of the Licensor, except as required for reasonable and customary use in describing the origin of the Work and reproducing the content of the NOTICE file.
Need help?
Do you have a question about the RS38 and is the answer not in the manual?
Questions and answers