Sign In
Upload
Download
Table of Contents
Contents
Add to my manuals
Delete from my manuals
Share
URL of this page:
HTML Link:
Bookmark this page
Add
Manual will be automatically added to "My Manuals"
Print this page
×
Bookmark added
×
Added to my manuals
Manuals
Brands
JLG Manuals
Boom Lifts
800S
Operation and safety manual
JLG 800S Operation And Safety Manual
Hide thumbs
Also See for 800S
:
Operation & safety manual
(166 pages)
1
2
3
4
5
6
Table Of Contents
7
8
9
10
11
12
13
14
15
16
17
18
19
20
21
22
23
24
25
26
27
28
29
30
31
32
33
34
35
36
37
38
39
40
41
42
43
44
45
46
47
48
49
50
51
52
53
54
55
56
57
58
59
60
61
62
63
64
65
66
67
68
69
70
71
72
73
74
75
76
77
78
79
80
81
82
83
84
85
86
87
88
89
90
91
92
93
94
95
96
97
98
99
100
101
102
103
104
105
106
107
108
109
110
111
112
113
114
115
116
117
118
119
120
121
122
123
124
125
126
127
128
129
130
131
132
133
134
135
136
137
138
139
140
141
142
143
144
145
146
147
148
149
150
151
152
153
154
155
156
157
158
159
160
161
162
page
of
162
Go
/
162
Contents
Table of Contents
Bookmarks
Table of Contents
Revision Log
Table of Contents
Section 1 - Safety Precautions
General
Pre-Operation
Operator Training and Knowledge
Workplace Inspection
Machine Inspection
Operation
General
Trip and Fall Hazards
Electrocution Hazards
Tipping Hazards
Crushing and Collision Hazards
Towing, Lifting, and Hauling
Maintenance
Maintenance Hazards
Battery Hazards
Section 2. User Responsibilities, Machine Preparation, and Inspection
2.1 Personnel Training
Operator Training
Training Supervision
Operator Responsibility
Preparation, Inspection, and Maintenance
Pre-Start Inspection
Function Check
Skyguard Function Test
General
2.3 Horizontal and Capacity Limit Switches
Oscillating Axle Lockout Test (if Equipped)
Section 3 - Machine Controls and Indicators
General
Controls and Indicators
Ground Control Console
Ground Control Indicator Panel
Platform Console
Platform Control Indicator Panel
Section 4 - Machine Operation
Description
Operating Characteristics and Limitations
Capacities
Stability
Engine Operation
Starting Procedure
Shutdown Procedure
Fuel Reserve / Shut-Off System
Air Shutoff Valve (ASOV) (if Equipped)
Traveling (Driving)
Traveling Forward and Reverse
Traveling on a Grade
Steering
Platform
Platform Level Adjustment
Platform Rotation
Boom
Swinging the Boom
Raising and Lowering the Boom
Telescoping the Main Boom
Function Speed Control
Machine Safety System Override (MSSO)(CE Only)
4.10 Skyguard Operation
Oscillating Axle Lockout Test (if Equipped)
4.12 Emergency Towing
Tow Bar (if Equipped)
4.14 Shut down and Park
4.15 Lifting and Tie down
Lifting
Tie down
Section 5 - Emergency Procedures
General
Incident Notification
Emergency Operation
Operator Unable to Control Machine
Platform or Boom Caught Overhead
Control System
Emergency Towing Procedures
Machine Safety System Override (Msso)
Section 6 - Accessories
Fall Arrest Platform
Safety Precautions
Pipe Racks
Capacity Specifications (Australia Only)
Safety Precautions
Preparation and Inspection
Operation
Skyair
Compressor Specifications
Accessory Ratings
Safety Precautions
Preparation and Inspection
Operation
Skycutter
Accessory Ratings
Generator Output
Safety Precautions
Preparation and Inspection
Operation
Skyglazier
Capacity Specifications
Safety Precautions
Preparation and Inspection
Operation
Skypower
Generator Output
Accessory Ratings
Safety Precautions
Preparation and Inspection
Operation
Skywelder
Generator Output
Welding Accessories
Accessory Ratings
Safety Precautions
Preparation and Inspection
Operation
Soft Touch
Bolt-On External Fall Arrest
Inspection before Use
Section - 7 - General Specifications & Operator
Introduction
Operating Specifications
Specifications and Performance Data
Capacities
Engine Data
Battery
Tires
Major Component Weights
Hydraulic Oil
Serial Number Location
Specifications
Engine Specifications
Maintenance and Lubrication
Tires & Wheels
Tire Inflation
Tire Damage
Tire Replacement
Wheel Replacement
Wheel Installation
Propane Fuel Filter Replacement
Removal
Installation
Propane Fuel System Pressure Relief
Supplemental Information
Section 8 - Inspection and Repair Log
Advertisement
Quick Links
Download this manual
Operation and Safety Manual
Original Instructions - Keep this manual with the machine at all times.
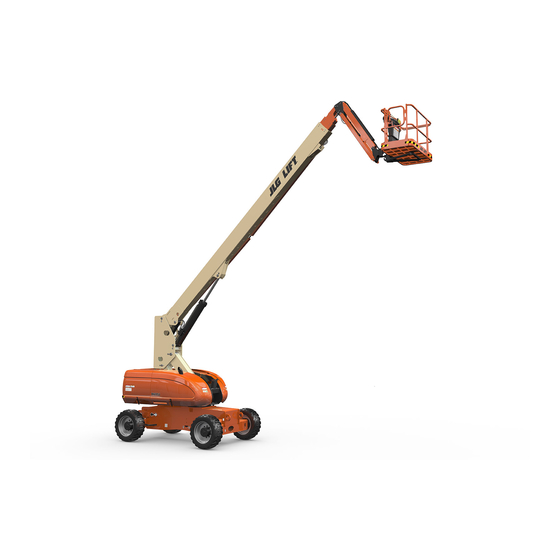
Boom Lift Models
800S
810SJ
860SJ
S/N 0300182743 &
B300001328 to Present
AS/NZS
ANSI
3121630
®
June 29, 2018 - Rev I
Table of
Contents
Previous
Page
Next
Page
1
2
3
4
5
Advertisement
Table of Contents
Need help?
Do you have a question about the 800S and is the answer not in the manual?
Ask a question
Questions and answers
Related Manuals for JLG 800S
Boom Lifts JLG 800S Operation & Safety Manual
(166 pages)
Boom Lifts JLG 860S Operation And Safety Manual
(128 pages)
Boom Lifts JLG 80HX Service And Maintenance Manual
(176 pages)
Boom Lifts JLG 80SL Service Maintenance Manual
(162 pages)
Boom Lifts JLG 800a Operation And Safety Manual
(160 pages)
Boom Lifts JLG 800A Service And Maintenance Manual
(172 pages)
Boom Lifts JLG SKYTRAK 6036 Operation & Safety Manual
(168 pages)
Boom Lifts JLG Toucan 800 Operation And Safety Manual
(62 pages)
Boom Lifts JLG Toucan 870 Operation And Safety Manual
(62 pages)
Boom Lifts JLG Toucan 8e Operation And Safety Manual
(136 pages)
Boom Lifts JLG TOUCAN 8E Service And Maintenance Manual
(191 pages)
Boom Lifts JLG 810SJ Operation And Safety Manual
(162 pages)
Boom Lifts JLG 800AJ HC3 Operation & Safety Manual
(160 pages)
Boom Lifts JLG 943 Supplemental Repair Manual
Drive axle (128 pages)
Boom Lifts JLG 1250AJP Troubleshooting Manual
(326 pages)
Boom Lifts JLG 1930ES Operation And Safety Manual
(112 pages)
This manual is also suitable for:
810sj
860sj
Table of Contents
Print
Rename the bookmark
Delete bookmark?
Delete from my manuals?
Login
Sign In
OR
Sign in with Facebook
Sign in with Google
Upload manual
Upload from disk
Upload from URL


Need help?
Do you have a question about the 800S and is the answer not in the manual?
Questions and answers