Table of Contents
Advertisement
Advertisement
Table of Contents

Related Manuals for Leica C-Lux 3


Summary of Contents for Leica C-Lux 3
- Page 1 LEICA C-LUX 3 Instructions...
-
Page 2: Table Of Contents
LEICA C-LUX 3 Dear Customer May we take the opportunity of thanking you for having purchased this LEICA C-LUX 3. Please read the instructions carefully and keep them for future reference. Contents Safety instructions and precautions ... Names of the components ... -
Page 3: Safety Instructions And Precautions
Declaration of Conformity Trade Name: Model No.: Responsible party / Support Contact: Leica Camera AG, This device complies with Part 15 of the FCC Rules. Operation is subject to the following two conditions: (1) This device may not cause harmful interference, and (2) this device must accept any interference received, including interference that may cause undesired operation. - Page 4 THE FOLLOWING APPLIES ONLY IN GREAT BRITAIN The rating plate is on the underside of the digital camera. Caution for AC mains lead For your safety, please read the following text carefully. This appliance is supplied with a moulded three pin mains plug for your safety and convenience. A 5-ampere fuse is fitted in this plug.
-
Page 5: Safety Instructions
Attention: To reduce the risk of fire, electric shock and disturbances, use only recommended accessories and do not expose the device to rain or humid- ity. Do not remove the cover or the rear cover. Please consult Leica Customer Service for repair work. - Page 6 If device is not used for some time loose its capacity. from specialist retailers). Picture data inappropriate handling. Leica will not be liable for any damage resulting from the loss of recorded data. Using tripods detaching the camera. You may damage the thread or scratch the camera,...
- Page 7 Storing memory cards Damaged cards could result in loss of data! might knock against the camera, the display or lens and cause damage. Leica dealer. magnetic equipment such as: - Televisions - Microwave ovens - Video games - Radio transmitters - High voltage lines, etc.
-
Page 8: Legal Notice
Battery/Charger unit: Rechargeable lithium-ion battery. Power generation is based on the chemical reaction in the interior of the cell. This reaction is affected by ambient tem- perature and humidity. Too high or too low a tempera- ture will shorten service life of the battery. -
Page 9: Names Of The Components
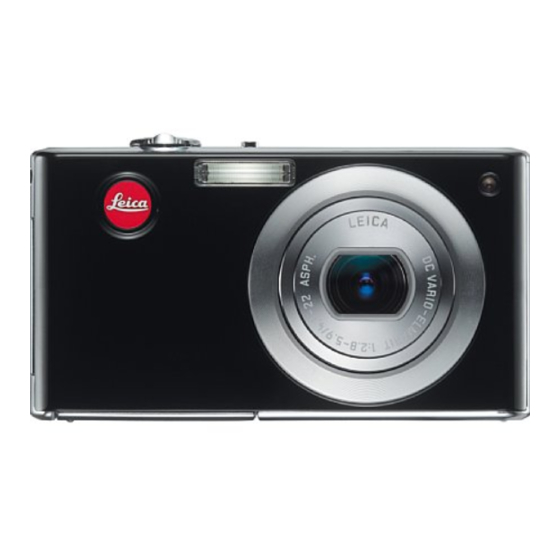
Names of the components Self timer indicator AF (focus) assist lamp Flash Lens Card/battery cover Release lever Microphone Speaker LCD monitor Cursor left / Self-timer button MENU/SET button Display button Tripod thread ON/OFF switch Shutter button Zoom lever Mode dial Strap eyelet Mode switch Comp. -
Page 10: About The Lcd Monitor
About the LCD monitor Recording 1 Recording mode 2 Flash mode 3 Focus 4 Resolution 5 Quality 10 ISO sensitivity Recording with settings 1 Macro mode 2 White balance 3 ISO sensitivity 10 Travel date 4 Colour mode 11 Elapsed rec. time 5 Picutre mode 12 Age/Location 6 Available rec. -
Page 11: About The Lcd Monitor
About the LCD monitor Changing the display Not possible dur- ing menu screen In recording mode In playback mode If [TRAVEL DATE] and/or [AGE] is set, the number of days passed since the travel date/birthday. During slide shows Brightening the monitor Not possible in: - Playback mode... -
Page 12: About The Histogram
About the histogram A histogram is a graph that displays brightness along the horizontal axis (black to white) and the number of pixels at each brightness level on the vertical axis. It allows you to easily check a picture’s exposure. Examples of histogram: Properly Exposed Dark, mid-tone, and... -
Page 13: Using For The First Time
AV Cable 1,2,3 One item only, depending on the specified country. you are not using a card. card in the manual. Original accessories These accessories match your Leica camera and enhance it even further. Article AC Adaptor (USA) ˝ (UK/HK) ˝... - Page 14 Charging the battery The battery is not charged when the camera is shipped. warm after using/charging. any time, e.g. even if it is not fully discharged. dedicated charger indoors only. Battery cannot be charged in the camera even if the optional AC adaptor is at- tached.
- Page 15 Using for the first time Inserting the card Ensure that the unit is turned OFF. Without an inserted card, a limited amount of pictures can be stored in the internal memory. tion terminals of the card. To remove the card, press until it clicks.
- Page 16 Setting Language, Time and Date [CLOCK SET]. for at least 24 hrs to store the clock settings for 3 months, even when the battery is removed. cannot be printed on pictures correctly. You can also set a travel date: 01 Select [TRAVEL DATE] from the [SETUP] menu, and then press 02 Press to select [SET] and then press [MENU/SET].
-
Page 17: Snapshot Mode
Snapshot mode Set ON/OFF switch to ON, mode switch to mode dial to The status indicator lights up for about 1 sec. Press MENU/SET and select mode in menu, aim the camera at your subject with both hands Focus the subject - To change settings, press not focused: focused:... - Page 18 Scene detection If the camera identifies a specific type of scene, the respective icon is displayed in the upper left corner. mode can automatically detect five scenes. If none of these scene modes matches your subject, the camera will record with standard settings. the faces will be optimal.
-
Page 19: Program Mode
Program mode Compared to the Snapshot mode, many more menu items can be set and pictures with greater freedom can be taken. Set ON/OFF switch to ON, mode switch to mode dial to The status indicator lights up for about 1 sec. Press MENU/SET and select mode in menu, aim... - Page 20 Focus the subject - To change settings, press not focused: focused: - For more information on how to focus a subject, please see page 30, on Take the picture - Depending on the setting, pictures taken vertically are shown rotated. - Use a tripod if the shake alert appears.
-
Page 21: Scene Mode
Scene mode Taking pictures with scene modes that match specific situations. If selected, Set ON/OFF switch to ON, mode switch to mode dial to The status indicator lights up for about 1 sec. Press MENU/SET and select a scene in menu, aim the camera at your subject with both hands... - Page 22 [PORTRAIT] tele Detects flesh tone areas like human faces and adds soft [SOFT SKIN] - If a part of the background etc. is a colour close to skin colour, this part is also smoothed. - This mode may not be effective when there is insufficient brightness. Subject can be recorded either slim or stretched, and at [TRANSFORM] the same time, skin can be recorded smoothly.
- Page 23 [SPORTS] - This mode is suitable for taking pictures of subjects at distances of 5 m (16.4 feet) or more. [NIGHT PORTRAIT] - Use the flash, you can set to - Since the shutter speed becomes slower, use a tripod and the self-timer for taking pictures.
- Page 24 Suitable for taking pictures of your baby. Age can be [BABY 1/2] displayed with pictures if you set the birthday. can select to have these appear at the time of playback, or have them stamped Birthday/Name setting: 1. Press to select [AGE] and then press 2.
- Page 25 [HI-SPEED BURST] 1. Press to select aspect ratio and resolution and then press [MENU/SET]. 2. Take pictures. Pictures are taken as long as the shutter button is pressed. Maximum continuous frequency Number of recordable pictures - The continuous speed changes according to the recording conditions. - The number of continuous recording pictures is limited by the picture-taking conditions and the type and/or status of the card used.
- Page 26 For taking picture of fireworks. Press shutter when the [FIREWORKS] fireworks fully spread. We recommend using a tripod. - This mode is most effective when the subject is 10 m (32.8 feet) or more away. - The shutter speed becomes the following: 1/4th of a second or 2 seconds (The shutter speed becomes 2 seconds only when the camera has determined that there is little camera shake such as when using a tripod etc.)
-
Page 27: Motion Picture Mode
Motion picture mode ing starts. Audio is recorded simultaneously with the built-in microphone. mode and switch camera ON The status indicator lights up for about 1 sec. Select mode and aim the camera at your subject with both hands Select aspect ratio and quality or pro- ceed with step 4 Aspect Ratio... - Page 28 Focus the subject - The available recording time is displayed on the top right, the elapsed recording time on the bottom right. not focused: focused: - For more information, on how to focus a subject, please see page 30. Start / Stop recording - If the writing speed of the recording may stop.
-
Page 29: Advanced Functions
Taking pictures - advanced functions Self-timer seconds. Press the shutter button halfway to focus. mode. - The self timer cannot be set to 2 sec. in - The self timer cannot be set to 10 sec. in [SELF PORTRAIT] in - The self timer does not work in Makro mode Take pictures of subjects as... - Page 30 Exposure compensation Use this function when you cannot achieve an appropriate in brightness between the sub- ject and the background. stored even if the camera is off. not be set in mode. Auto bracketing 3 pictures are automatically sure range. - The flash is set to - The function is cancelled after turning off the camera.
-
Page 31: Using The Flash
Using the flash Select a flash mode Press repeatedly AUTO Flash is fired automatically when the re- cording conditions make it necessary. AUTO/Red-eye reduction Use this when you take pictures of people in low light conditions. Forced ON Permanently on. Use this when your sub- ject is back-lit or under fluorescent light. - Page 32 Available flash settings by recording mode - If you bring the flash too close to an object, the object may be distorted or discoloured by the heat or lighting from the flash. - When you take a picture beyond the not be adjusted properly and the picture may become bright or dark.
-
Page 33: The Setup Menu
The SETUP Menu Enter the SETUP menu [CLOCK SET] Changing the date and time. [WORLD TIME] Set the time in your home area and travel destination. [TRAVEL DATE] [TRAVEL SETUP] Set the departure and return date of your travel. [LOCATION] [BEEP] [BEEP LEVEL] Set beep level to desired volume. - Page 34 [OFF] - [LCD MODE] = The LCD works in its normal mode. [OFF] = Brightness is auto-adjusted. [AUTO POWER LCD] = The LCD is brighter and easier to see. [POWER LCD] - The LCD monitor automatically returns to normal brightness after 30 seconds when recording in [POWER LCD] mode.
- Page 35 [RESET] Resets the recording- or setup settings to their initial settings. - The folder number and the clock settings are not changed. - When the [RESET] setting is selected during recording, the operation ing, this is normal and not indicative of malfunctioning. [USB MODE] Set how to transfer pictures from the camera: [SELECT ON CONNECTION]...
-
Page 36: The Rec Menu
The REC Menu Limited in Snapshot mode Enter the REC menu [PICTURE SIZE] Set the desired resolution. The higher the numbers, the finer the detail of the pictures will appear even when they are printed. Aspect Ratio 3648 x 2736 3072 x 2304 2560 x 1920 2048 x 1536... - Page 37 [QUALITY] Set the compression rate at which the pictures are to be stored. = Giving priority to the picture quality. [FINE] [STANDARD] [ASPECT RATIO] This allows you to select the aspect ratio of the pictures to suit printing or the playback method. = Aspect ratio of a 4:3 TV.
- Page 38 - The optimal white balance will differ depending on the type of fluo- rescent lighting being recorded under so use balance item. - The white balance fine adjustment level in you reset the white balance using [AF MODE] This allows the focusing method that suits the positions and number of the subjects to be selected.
- Page 39 Setting up AF Tracking: 1. Bring the subject to the AF tracking frame and press - AF area will continuously focus on the subject’s movement once the subject is recognised. (Dynamic tracking) - AF tracking is turned off when 2. Take the picture. - If it fails to lock, AF area will flash red, and disappear.
- Page 40 [I.EXPOSURE] [OFF] - [ON] big difference in brightness between the background and subject, to record the image the way you saw it. - When [ON] is set, is displayed on the screen. [DIGITAL ZOOM] [OFF] - [ON] No deterioration Extended optical zoom mechanism resolution to - The magnification level differs depending on [PICTURE SIZE] and [AS- PECT RATIO] setting.
- Page 41 - When you take pictures in dark places, image noise may become visible. To avoid noise, we recommend setting to [NATURAL]. [NATURAL] or [VIVID] in - Different colour modes can be set in different [REC] modes. [STABILIZER] Using one of these modes, camera shake during picture taking is de- tected, and the camera automatically compensates the camera shake.
-
Page 42: The Quick Menu
The QUICK menu For further information on any of these settings, please see the corresponding Enter Q.MENU able items according to the current recording mode: [REC MENU] Snapshot mode [BURST] [PICTURE SIZE] Program mode [BURST] [I. EXPOSURE] [PICTURE SIZE] Scene mode [BURST] [PICTURE SIZE] Motion picture mode... -
Page 43: Playing Back Pictures And Motion Pictures
Playing back pictures and motion pictures Switch camera ON and mode The first picture is Browse files - 1 picture per screen (initial mode) - 12 pictures per screen - 30 pictures per screen - by recording date (calendar mode) Enlarging pictures Possible enlarging factors: For different playback modes, please see [PLAYBACK MODE] on page 52. -
Page 44: Deleting Files
Deleting files Deleting files 1. Select [SINGLE], [MULTI] or [ALL] by pressing [MENU/SET]. 2. - [SINGLE] mode deletes the current picture or motion picture. - In [MULTI] mode select pictures or motion pictures by pressing and mark them by pressing [DISPLAY]. Selected pictures are marked with - In [ALL] mode, all pictures or motion pictures are deleted. -
Page 45: The Playback Menu
The PLAYBACK Menu Enter the PLAYBACK menu [CALENDAR] View pictures by recording date in the calendar view. 1. Enter the [CALENDAR] by pressing 2. Select month by pressing 3. Select day by pressing 4. Press [MENU/SET] to view day. 5. Press to view picture OR press again. - Page 46 [TEXT STAMP] [SINGLE] - [MULTI] the recorded pictures. Not for movies/protected pictures. 1. Enter [TEXT STAMP] by pressing 2. Select [SINGLE] or [MULTI] by pressing 3. - In [SINGLE] mode select picture by pressing with [MENU/SET]. - In [MULTI] mode select pictures by pressing them by pressing [DISPLAY], confirm selection with [MENU/SET].
- Page 47 [TRIMMING] ture. Not for movies/protected pictures. 1. Enter [TRIMMING] by pressing 2. Select picture by pressing 3. Zoom into the picture by using the tele wide 4. Press 5. Press [MENU/SET] to confirm trimming. 6. Press 7. Press - Trimming pictures recorded with other equipment might be impossible. [LEVELING] 1.
- Page 48 [ROTATE] In this mode you can rotate pictures manually in 90° steps. 1. Enter [ROTATE] by pressing 2. Select a picture by pressing 3. Press to select the rotation direction and press [MENU/SET] to confirm. 4. Press to return to the PLAYBACK menu. - Rotating pictures recorded with other equipment might be impossible.
- Page 49 [DPOF PRINT] A system to select which picture to print, how many copies of each picture and with/without date stamp. Ask your photo printing store. 1. Enter [DPOF PRINT] by pressing 2. Select [SINGLE] or [MULTI] by pressing 3. - In [SINGLE] mode select picture by pressing with [MENU/SET].
- Page 50 [AUDIO DUB.] 1. Enter [ADIO DUB.] by pressing 2. Select a picture by pressing pressing [MENU/SET]. 3. If there is already audio recorded, press ing with [MENU/SET]. 4. To stop recording, press [MENU/SET] again. 5. Continue editing from step 2 or press BACK menu.
-
Page 51: The Playback Mode Menu
The PLAYBACK MODE Menu Enter the PLAYBACK MODE menu [NORMAL PLAY] View pictures and motion pictures in the normal playback mode. 1. Select picture by pressing - Playback motion pictures or audio (if available) by pressing 2. To finish the normal playback, set the mode switch to record [SLIDE SHOW] different playback methods. - Page 52 Slide show [SETUP] settings: [EFFECT] [NATURAL], [SLOW], [SWING], [URBAN], [OFF], [AUTO] - Each of these effects uses different audio and screen effects. - In [URBAN] pictures might be displayed in black and white. selected. The pictures are played back with the default effects of each category.
-
Page 53: Connecting To A Computer
Connecting to a computer reader for SD memory cards instead of connecting the camera directly to the computer. the USB connection cable. Otherwise, data may be destroyed. Connect camera to PC Insert the USB plugs straight in or straight out to avoid deform- ing the terminals. - Page 54 [Windows] If you are connecting the camera for the first time, the required driver is installed automatically. [Apple Macintosh] The drive is displayed as an icon on the screen as follows: - No card inserted: Apply USB cable Do not disconnect to the computer while ACCESS is displayed.
-
Page 55: Connecting To A Tv
Connecting to a TV you can watch pictures and motion pictures on the TV screen. NTSC or PAL system when you set [VIDEO OUT] in the [SETUP] menu. component cable is connected. Connect with the supplied AV cable Insert the AV plugs straight in or straight out to avoid damaging the terminals. - Page 56 Set the required video output settings in the [SETUP] menu: [VIDEO OUT] Set to match the colour television system in each country. [NTSC] = Video output is set to NTSC system. [PAL] = Video output is set to PAL system. [TV ASPECT] Set to match the type of TV.
-
Page 57: Connecting To A Printer
Connecting to a printer the USB connection cable, you can select the pictures to print and start printing on the camera’s screen. power becomes low while the camera and the printer are connected, the status indicator flashes and the alarm beeps. If this happens during printing, stop printing at once. - Page 58 Paper sizes Printer settings priorized L/3.5” x 5” 89 x 127 mm 2L/5” x 7” 127 x 178 mm POSTCARD 100 x 148 mm 210 x 297 mm 297 x 420 mm Connect USB cable Switch ON and to the camera connect USB cable to the printer Select print style...
-
Page 59: Message Displays
Message displays In some cases confirmation or error message appear on the screen. The most important messages are as follows: [THIS MEMORY CARD IS LOCKED] set at [LOCK]. Unlock it to record pictures. [NO VALID PICTURE TO PLAY] Take a picture/insert a card with a picture. [THIS PICTURE IS PROTECTED] Delete the picture after cancelling the protection setting. -
Page 60: Correcting Faults / Troubleshooting
[MOTION RECORDING WAS CANCELLED DUE TO THE LIMITATION OF…] [A FOLDER CANNOT BE CREATED] A folder cannot be created, as no more memory numbers are available. Format menu after formatting, the folder number is reset to 100. [PICTURE IS DISPLAYED FOR 4:3/16:9 TV] message. - Page 61 The subject is not focused properly. Recorded picture is blurred. Optical image stabilizer is not effective. Taking pictures using auto bracket is not possible. The recorded picture looks rough. Image noise appears on the picture. The brightness or the hue of the recorded picture is different from the actual scene.
- Page 62 LCD monitor is too bright or too dark. Black, red, blue and green spots appear on LCD monitor. Image noise appears on LCD monitor. Flash Flash is not fired. Flash is fired several times. Playback The picture being played back is rotated and displayed in an unexpected direction.
- Page 63 Motion pictures cannot be played back on the TV. The picture is not displayed fully on the TV. Picture cannot be transferred when camera is connected to computer. The card / built-in memory is not recognized by the computer. Picture cannot be printed when camera is connected to a printer.
-
Page 64: Index
Index AF/AE Lock ... AF Assist Lamp ... AF Mode ... Aspect Ratio ... Aspect Conversion ... Audio Dubbing ... Audio Recording ... Auto Bracketing... Auto Review ... Backlight ... Battery ... 7, 9, 15 Beep ... Built-in Memory ... Burst ... -
Page 65: Functions That Cannot Be Combined
Functions that cannot be combined Function [AUTO POWER LCD] [POWER SAVE] [AUTO LCD OFF] [AUTO REVIEW] Extended Optical Zoom [DIGITAL ZOOM] [HISTOGRAM] [FLASH] [SELFTIMER] [EXPOSURE] [AUTO BRACKET] [PICTURE SIZE] [QUALITY] [ASPECT RATIO] [INTELLIGENT ISO] [SENSITIVITY] [WHITE BALANCE] [WB ADJUST.] Conditions under which the function cannot be set mode mode mode... - Page 66 [QUICK AF] [BURST] [I.EXPOSURE] [COLOR MODE] [MIN. SHTR SPEED] [AUDIO REC.] [AF ASSIST LAMP] Playback Zoom [TITLE EDIT] [TEXT STAMP] [RESIZE] [TRIMMING] [LEVELING] [ASPECT CONV.] [ROTATE] [ROTATE DISP.] PRINT WITH DATE [AUDIO DUB.] Functions that cannot be combined, while the component cable is connected: - Creation of still pictures from motion pictures.
-
Page 67: Number Of Recordable Pictures
Number of recordable pictures card.) pending on the subjects. Aspect ratio Picture size Quality Built-in memory Card 1 GB 2 GB 4 GB 8 GB 1580 16 GB 3180 32 GB 6390 12500 9010 17700 12870 24780 19820 38120 Aspect ratio Picture size Quality Built-in memory... - Page 68 Aspect ratio Picture size Quality Built-in memory Card 1 GB 2 GB 4 GB 1720 8 GB 1770 3500 16 GB 3580 7050 32 GB 7180 14160 10110 19820 14360 27530 22020 41300 Aspect ratio Picture size Quality Built-in memory Card 1 GB 2 GB...
-
Page 69: Recording Time
Recording time able recording time for up to 2 GB only is displayed on the screen. the screen may not decrease in order. Quality Built-in memory Card 1 GB 2 GB 4 GB 8 GB 16 GB 32 GB 4 sec 14 sec 17 sec 12 sec... -
Page 70: Technical Specifications
Technical specifications Technical specifications may be subject to change. Information for your safety. Camera: Power source: Power consumption: Camera effective pixels: Image sensor: Lens: Digital zoom: Extended optical zoom: Focus: Normal focus range: Macro / Still picture / mode focus range: Scene mode focus range: There may be differences in the above settings. - Page 71 ISO sensitivity: Shutter speed: White balance: Exposure (AE): Metering mode: LCD-Monitor: Flash: Microphone/Speaker: Recording media: Picture size Still picture: Motion pictures: Quality: File format for photos Still picture: Pictures with audio: Motion pictures: Interface Digital: Analog video/audio: Terminal [COMPONENT OUT]: [AV OUT/DIGITAL]: [DC IN]: AUTO/100/200/400/800/1600...
- Page 72 Dimensions (WxHxD): Weight: Operating temperature: Operating humidity: Battery charger: Information for your safety Input: Output: Equipment mobility: Battery Pack: Information for your safety Voltage: 0 °C to 40 °C (32 °F to 104 °F) 0.8A 3.6V...
-
Page 73: Leica Service Addresses
Not only do we provide top performing products of high quality from observa- tion to playback. For many years we have been providing practical seminars and training courses at the Leica Academy as a special service. Here, a knowledge of the world of photography, projection and enlargement is brought home to both by a trained team of experts in modern equipped classrooms located in the general photography to interesting special fields, offering a wealth of suggestions,... - Page 74 Leica Camera AG / Oskar-Barnack-Str. 11 / D-35606 Solms www.leica-cameras.com / info@leica-camera.com Telefon +49 (0) 64 42-208-0 / Telefax +49 (0) 64 42-208-333...
Need help?
Do you have a question about the C-Lux 3 and is the answer not in the manual?
Questions and answers