
Related Manuals for Nevco MPCX 1500


Summary of Contents for Nevco MPCX 1500
- Page 1 Scoreboard Operator’s Instructions MPCX Baseball Control Since 1934 Retain this manual in your permanent files Rev. 02/03/2011 135-0115...
- Page 2 9515 9715 Thank You Thank You for choosing NEVCO. We appreciate your business. The following instructions will help you become familiar with the operation and features of the scoreboard system. Please take a few minutes to study this manual, and to practice with the control.
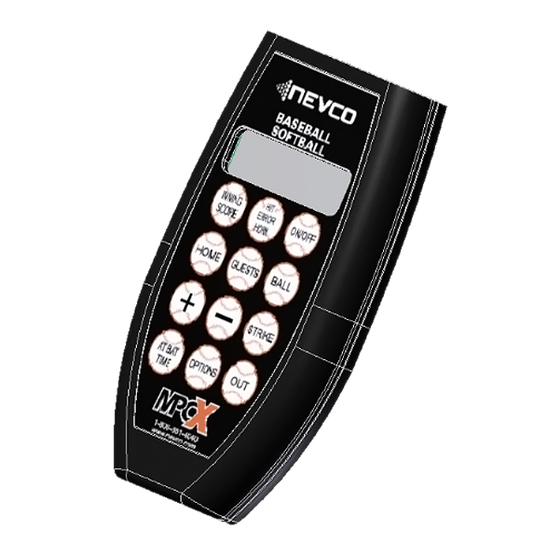
- Page 3 BNC Connector LED Status Indicator Belt Clip (On steady = Power) (Signal out to scoreboard) (Blinking = Signal I/O) Power Input Not Used (9 V DC) Battery Compartment Cover (2 x AA) MPCX CONTROL (rear view) MPCX Receiver HIT / ERROR / HORN LCD Display (16 characters x 2 lines) INNING / SCORE (also functions as Power ON / OFF Switch...
-
Page 4: Table Of Contents
TABLE OF CONTENTS QUICK START GUIDE ......................... 1 STANDARD SCOREBOARD ....................1 SCOREBOARD INNING BY INNING SCORING ............3 WITH SCOREBOARD TIMER ....................5 WITH KEYBOARD FUNCTIONS......................8 GREETING ........................8 SCREEN MAIN ..........................9 SCREEN BALL, STRIKE OUT ....................10 SCREEN HIT / ERROR / HORN .................... -
Page 5: Quick Start Guide
QUICK START GUIDE STANDARD SCOREBOARD For models 1500, 1510, 1530, 1535, 1550, 1000, 1010, 1030, 1035 Note: It is assumed here that the control has been configured for this scoreboard type and the control has been linked to the desired receiver(s). Both functions are explained in the setup guide that comes with a new control. The control is set to “Standard”... - Page 6 To enter the At Bat information Press At Bat: G - The control will display AT BAT TIME At Bat: H - Use the keys to specify the team batting. HOME GUESTS At Bat: H - Use the keys to enter the player’s number. Note: Hold the key down for fast advance.
-
Page 7: Scoreboard With Inning By Inning Scoring
QUICK START GUIDE SCOREBOARD with INNING BY INNING SCORING For models 1503, 1506, 1508, 1003, 1006 Note: It is assumed here that the control has been configured for this scoreboard type and the control has been linked to the desired receiver(s). Both functions are explained in the setup guide that comes with a new control. (Also see pages 14-18 of this manual for detailed instructions). - Page 8 To enter the At Bat information Press At Bat: G - The control will display AT BAT TIME At Bat: G - Use the keys to specify the team batting. HOME GUESTS At Bat: G - Use the keys to enter the player’s number. Note: Hold the key down for fast advance.
-
Page 9: Scoreboard With Timer
QUICK START GUIDE SCOREBOARD with TIMER For models 1515, 1520, 1525, 1015, 1020, 1025, 9505, 9515 Note: It is assumed here that the control has been configured for this scoreboard type and the control has been linked to the desired receiver(s). Both functions are explained in the setup guide that comes with a new control. (Also see pages 14-18 of this manual for detailed instructions). - Page 10 To Set the Time Press AT BAT Timer The control will display TIME Press(+) Press The control will display AT BAT Set Time: TIME Use the “+” and “-” keys to enter the minutes. 0:00 Note: Hold the key down for fast advance. Press The control will display Set Time:...
- Page 11 You are now ready for the game to begin. .To start the timer Press Timer The control will display AT BAT TIME Press(+) Press to start the timer. Inn: 1 Time ON The control will display Home: 0 Guest: 0 Strikes:0 To stop the timer Press...
-
Page 12: Keyboard Functions
KEYBOARD FUNCTIONS GREETING screen Accessed GREETING MPCX Baseball When the control is Powered ON, the greeting showing the pressing >>>>> type of control and the sport is displayed. This greeting continues to be displayed while the control establishes communications with its receiver(s). (May take up to 30 ON/OFF seconds) When you are done using the control turn it OFF to conserve... -
Page 13: Main Screen
MAIN screen Inn: 1 Accessed MAIN Home: 0 Guest: 0 The main screen shows the Inning, the Timer Status (for pressing boards with timers), and the Scores. You must use this screen if you want to change the Inning or Scores. Press INNING / Inn: 1 SCORE any time to return to this screen. -
Page 14: Ball, Strike Out Screen
BALL, STRIKE OUT screen Accessed BALL, STRIKE, OUT Balls:1 Outs:0 This screen shows the Balls, Strikes, and Outs. It appears pressing Strikes:0 when a BALL, STRIKE, or OUT key is pressed. Press and release one of these keys to add one to its count. If you press and hold BALL or STRIKE, the Balls and Strikes will be reset BALL (cleared). -
Page 15: Hit / Error / Horn Screen
HIT / ERROR / HORN screen Accessed HIT / ERROR / HORN Hits These screens provide access to the Hits and Errors functions pressing Home: 0 Guest: 0 as well as the Horn. The cursor indicates the currently selected team. Use the HOME or GUESTS keys to select the team, then, use the “+”key to turn ON the Hit or Error indicator on the ERROR scoreboard. -
Page 16: At Bat Screen
AT BAT screen (for scoreboards without a timer) Accessed AT BAT At Bat: G - This screen is for entering the AT BAT information. Use the pressing HOME or GUESTS keys to select the team batting. Use the “+” or “-” keys to enter the player number. (Hold down the “+” or “-”... -
Page 17: Time Screen
TIME screen (for scoreboards with a timer) Accessed TIME Timer This screen handles the time functions. You must be at this pressing Press(+) screen in order to start the time running. It also allows you to Strikes:0 set the time. The cursor indicates the Minutes or Seconds as being selected. -
Page 18: Options Menu
Options Menu Several option settings are available to fine tune the scoreboard system to your needs. These settings are saved in the control. They are remembered even if the control is turned OFF or the batteries removed. When a control turns ON the scoreboard, these settings are sent to the scoreboard and are used to define how it operates. - Page 19 Enter Code to affect how the control operates. Generally, these settings Change Settings need not be changed and should only be changed by an experienced operator or under direction from the Nevco Service Department. Press the following key sequence: HOME GUESTS to gain access to the following additional menu items.
- Page 20 The Security setting is used to allow multiple controls to Security simultaneously operate the scoreboard. (+)On (-)Off With the Security set to (+)ON, the scoreboard will ignore all other controls and can be operated only by the control that turned it ON. When this control is turned OFF another control can be used to turn the scoreboard ON.
-
Page 21: Scoreboard With Inning By Inning Scoring
This menu option reports the number of receivers the control is Link Control 0/0 currently linked to (0/0), and the number of receivers on its Press (+) “Link To” list (0/0). The option also allows you to link a control to a scoreboard (receiver) or group of scoreboards (receivers). - Page 22 The next press of the options key will display one of the following screens. It indicates which of the scoreboard types the control is currently configured to operate. Use the “+” key to toggle thru the types of scoreboards. Press INNING / SCORE or AT BAT / TIME to exit the options routine.
-
Page 23: Troubleshooting Chart
Scoreboard is being controlled by more Set Security to “(+) ON”. (See Options scoreboard assumes the security level of the than one control Menu) control that turns it ON. If the problem persists please contact the Nevco Service Department. 800-851-4040... - Page 24 —Consult the dealer or an experienced radio/ TV technician for help. The user is cautioned that changes and modifications made to the equipment without the approval of Nevco could void the user’s authority to operate this equipment. This class B digital apparatus meets all requirements of the Canadian Interference- Causing Equipment Regulations.
Need help?
Do you have a question about the MPCX 1500 and is the answer not in the manual?
Questions and answers