Advertisement
Table of Contents
- 1 Table of Contents
- 2 Accessories List
- 3 Laser TV Diagram
- 4 STEP 1 Mount the Screen
- 5 STEP 2 Install the Laser TV
- 6 USB Extension
- 7 STEP 3 Adjust the Display Image and the Screen
- 8 STEP 4 Use Your Remote
- 9 STEP 5. Proceeed through the Screen Setup Menu
- 10 STEP 6.TV Setup
- 11 Maintenance & Quick Problem-Solving Tips
- 12 Product Specifications
- 13 Recycling / Licenses
- Download this manual
Advertisement
Table of Contents

Related Manuals for Hisense Laser TV


Summary of Contents for Hisense Laser TV
- Page 1 ES-A18A101-1...
- Page 2 USER MANUAL Read the manual carefully and ensure you have fully understood its contents before operating this device for the first time. English...
- Page 3 ▌Important Notice Paragraphs beginning with the symbol indicate important instructions, tips or conditions for the following settings. For your own safety and the optimal performance of your device, ensure to read the safety instructions before performing any installation. It is not guarantee operation and performance of peripheral devices made by other manufacturers. We disclaim any liability or damage that may arise from operation and/or performance from usage of such other maker’s peripheral devices.
- Page 4 ▌Safety Instructions To ensure safe and correct use of this product, always comply with the following precautions to avoid dangerous situations and damage to your unit: The lightning flash with arrowhead symbol, within an equilateral triangle is intended to alert the user to the presence of uninsulated dangerous voltage within the product's enclosure that may be of sufficient magnitude to constitute a risk of electric shock.
- Page 5 „ Power Supply „ Power plug and power cable Incorrect voltages can damage the device. Only connect this unit - Do not touch the power plug with wet hands. to a power supply with the correct voltage and frequency noted - Do not place heavy objects on the power cable.
- Page 6 tablecloths, curtains, etc. or temporarily stop using headphones. - Do not dry clothing etc. on top of the unit. „ Thunder Storms - Take care not to touch the ventilation openings since they may become hot. Pull out the power plug and all connected antenna cables from - Do not insert foreign objects into the device through the vents.
- Page 7 damaged. Take care not to scratch it with fingernails or other - Do not mix different battery types. hard objects. - Do no use rechargeable batteries. - Also wipe the power plug with a dry cloth at regular intervals. - Do not burn or break up batteries. - Be sure to dispose of batteries correctly.
- Page 8 SIMPLIFIED EU DECLARATION OF CONFORMITY Hereby, Hisense Electric Co.,Ltd. declares that the radio equipment type [H100LDAUK / H100LDA / 100LDA / ERF6G60 / ERF6E60 / ERF6F60] is in compliance with Directive 2014/53/EU. The full text of the EU declaration of conformity is available at the following internet address: http://global.hisense.com/cuse/cedoc.
-
Page 9: Table Of Contents
Congratulations on the purchase of your new TV! This Manual will walk you through a few easy steps to set up your TV. Please visit Hisense official website for more details. Product image is only for reference, actual product may vary in appearance. -
Page 10: Accessories List
• Laser TV User Manual × 1 • AAA batteries × 2 • Laser TV European Guarantee × 1 • Gloves for handling the Laser TV × 2 • Cleaning kit for the lens × 1 • Power cord × 1 •... -
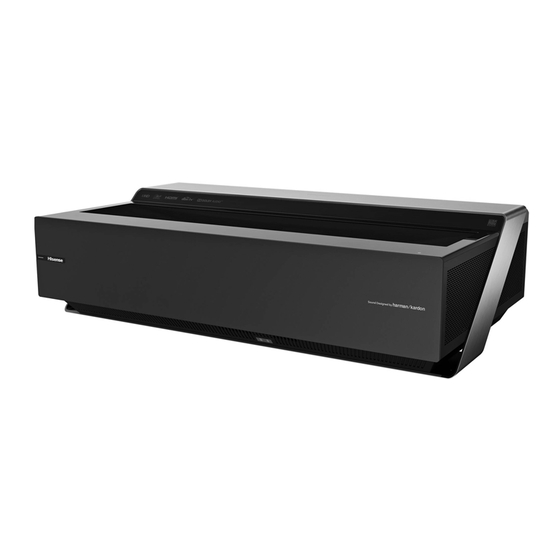
Page 11: Laser Tv Diagram
Laser TV Diagram Power Indicator Air vents Remote control receiver protection Lens with Power button sensor laser We strongly recommend that two people handle this device when moving it from one place to another. Be sure to protect the lens when you handle this device. -
Page 12: Step 1 Mount The Screen
We strongly recommend that two people handle this device when moving it from one place to another. Be sure to protect the lens when you handle this device. We recommend to connect all cables to the ports on the back of the Laser TV before positioning the TV. (Audio, video, Ethernet cables and external devices are not included.) Check to ensure that you have selected the right cables for the ports and that they are connected securely. - Page 13 (not included) Satellite antenna Outdoor Antenna Cable ANT OUT Antenna Cable (75Ω) VHF/UHF Antenna NOTE: ANT1 Jack supports power supply for satellite antenna (13/18V, 0.5A max.) CAM CARD SMART CARD NOTE: Before you insert/remove the CI+ module, ensure that the TV is switched off. Then insert the CI card into the CI+ module in accordance with the Service Provider’s instructions.
-
Page 14: Usb Extension
External audio devices Left-right audio adapter AUDIO IN White DIGITAL SERVICE 2 AUDIO AUDIO OUT Speakers Digital audio adapter Audio Amplifier 3.5mm stereo HDMI 3(4K@30Hz) HDMI 4(4K@30Hz) HDMI 1(4K@60Hz) HDMI 2(4K@60Hz) Computer Ethernet (you will need a router for Internet External AV devices connectivity) USB 1... - Page 15 Wired setup LAN ( Connect your TV to your network by connecting the LAN port on the back of your TV to an external modem or router using a LAN (Ethernet/Cat 5) cable. See the illustration below. TV PORT IP Sharer (Router) External Modem (with DHCP server) (ADSL / VDSL / Cable TV)
- Page 16 WARNING: Insufficient ventilation space will cause this 1. Position the Laser TV so it is parallel with the screen surface. We recommend the distance from the back panel of device to overheat or become damaged. the Laser TV to the wall to be 8 1/8 inches.
-
Page 17: Step 3 Adjust The Display Image And The Screen
FIT THE BOTTOM OF THE IMAGE TO THE SCREEN If the bottom of the image is lower on the left and higher on the • If the image shifts to the left side, then move the Laser TV to right, rotate the device counterclockwise. - Page 18 • If the bottom of the image is wider than the screen, then ADJUST THE UPPER-RIGHT CORNER OF THE IMAGE move the Laser TV closer to the screen. 1. If the top of the image is lower on the left and higher on...
- Page 19 TV sits stably. FILL THE TOP OF THE IMAGE TO THE SCREEN If the top of the image is wider than the screen, then use the wrench to rotate the center-front foot of the Laser TV clockwise. center-front foot...
- Page 20 If the top of the image is narrower than the screen, then use the wrench to rotate the left- and right-back feet of the Laser TV clockwise, until the left and right borders of the image are parallel with the screen borders. Next, move the projector further from the screen to fill the image to screen width.
-
Page 21: Step 4 Use Your Remote
STEP 4 Use Your Remote BUTTONS ON YOUR TV REMOTE NOTE: The button labels are provided as a reference. The actual appearance of the remote that is included with the TV, may differ from this diagram. Receive the voice (This function is only supported in some countries or regions.) NOTE: The information here will vary Power button... - Page 22 1. Press and slide the back cover to open the battery REMOTE CONTROL RANGE INFORMATION compartment of the remote control. • The remote control can work at a distance of up to 26 feet in 2. Insert two AAA size batteries. Make sure to match the front of the TV set.
-
Page 23: Step 5. Proceeed Through The Screen Setup Menu
STEP 5 Proceed through the Screen Setup STEP 6 TV Setup Menu Once you are satisfied with the projected image, select "TV Setup" to configure additional settings, including Network Connection. PROJECTION MODE If you need to flip the image over top-to-bottom and/or left-to- Select your desired language to be displayed Language right, select the Projection Mode and press the LEFT/RIGHT... -
Page 24: Maintenance & Quick Problem-Solving Tips
Maintenance • Do not touch this device when it is running or just turned off because it may be hot. • Do not wipe this device with oil because it may deteriorate the exterior or damage the paint. Contact with rubber or ethylene products for a long time may cause stains on this device. - Page 25 The picture is normal but there is no sound 1. Check the volume settings. 2. Check if 'Mute' mode is set to On. Sound but no picture or black and white picture 1. If the picture is black and white, unplug the TV from the AC outlet and replug it after 60 seconds. 2.
-
Page 26: Product Specifications
Product Specifications Model Name 100" Laser TV 27.1 × 8.1 × 16.4 inches Dimension (W × H × D) (689 × 206 × 416 mm) Weight 50 lbs (22.7 kg) Active Screen Size (Diagonal) 100 inches Screen resolution 3840 × 2160 Audio power 2 ×... - Page 27 Model ZDGFMT7668AU Bluetooth Module Frequency Range 2.400~2.485GHz specifications Output Power (Max.) 2.400~2.485GHz, Class1, 7dBm Model ERF6G60 / ERF6E60 / ERF6F60 Remote Control Frequency Range 2.400~2.4835GHz specifications Output Power (Max.) 2.400~2.4835GHz 5dBm Temperature: 41°F - 95°F (5°C - 35°C) Environmental conditions Humidity: 20% - 80% RH Atmospheric pressure: 86 kPa - 106 kPa RGB / 60 Hz (640×480, 800×600, 1024×768)
-
Page 28: Recycling / Licenses
Recycling / Licenses The terms HDMI and HDMI High-Definition WEEE (Waste Electronic Electric Equipment) Multimedia Interface, and the HDMI Logo are trademarks or registered trademarks of HDMI European Directive 2012/19/EU Licensing LLC in the United States and other This symbol on the product or on its packaging indicates that countries.
Need help?
Do you have a question about the Laser TV and is the answer not in the manual?
Questions and answers