
Related Manuals for ujk technology 719241


Summary of Contents for ujk technology 719241
- Page 1 Kit Code 717126 Kit Code 719241 Original Instructions Compact Router Table Hole assembly instructions including the UJK table tops, fence assembly, table inserts and other accessories AT&M: 23/05/2019 BOOK REF: 104389...
-
Page 2: Table Of Contents
Index of Contents • Introduction • What’s Included 04-05-06-07 • Optional Accessories 08-09-10-11 • Kit Specification • General Instructions for 230V Machines • General Safety Instructions • Assembly 14-15-16-17-18-19-20-21 • Illustration & Parts Description 22-23 • Mounting the Router to the Universal Base Plate 24-25 •... -
Page 3: Introduction
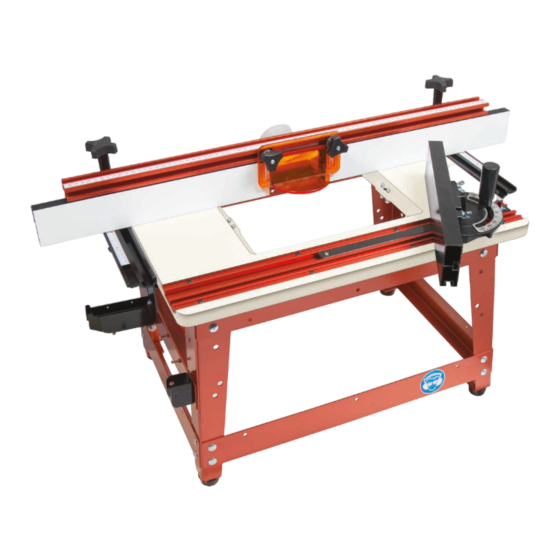
T-track slot for other jigs and accessories. The 230 x 306mm central aperture will accept any of the UJK Technology router table inserts as well as the UJK router elevator. The top measures 600 x 400 and is pre-drilled to fit the UJK Compact router table leg stand, fence assembly or optional dust collection box. -
Page 4: What's Included
What’s Included UJK Router Table Stand Quantity Item Part Code 502533 Bag 1 Containing: 1 No Mitre Fence Bracket Holder with two Phillips screws and washers Bag 2 Containing: 1 No Tool Bracket (with two pre-drilled holes) 4 No Rubber Feet 4 No Phillips Screws (M6x20mm) 2 No... - Page 5 What’s Included UJK Router Table Stand Quantity Item Part Code 502533 4 No Leg Supports Brackets 2 No Front and Back Upper Panels 1 No Front Lower Panel 2 No Side Lower Panels 2 No Side Upper Panels 1 No Side Centre Panel 1 No Rear Extractor Panels...
- Page 6 What’s Included UJK Router Table Tops Quantity Item Part Code 1 No UJK Compact Cast Iron router table top 502532 102544 1 No UJK Compact Laminated router table top Code 502532 Code 102544 Bag Containing Bag Containing 10 No Countersink Phillips Screws (M6x20mm) 10 No Countersink Phillips Wood Screws 10 No...
- Page 7 What’s Included...
-
Page 8: Optional Accessories
502565 502566 • A range of central inserts for the • Axminster or UJK router elevator • Also suitable for UJK Technology aluminium and phenolic router table insert plates. • Sizes include 12.6mm, 38mm, 63.4mm plus a guide bush 951187 adaptor. - Page 9 Dust extraction from a router table can be difficult and for it to work effectively it needs to extract from both above and below the table. Designed to fit the UJK Technology Pro and Compact router tables this device fits below the table top enclosing the router.
- Page 10 Used horizontally, you can measure or adjust a router table fence relative to the cutter. The UJK Technology Digital Height Gauge will also measure a mortice to a depth of 99mm. 10) UJK Technology Compact Mitre Gauge & Fence...
- Page 11 This is particularly relevant if your workpiece is narrower than the gap in your router fence. The UJK Technology Coping Sled holds the key to working safely, securely and achieving accurate results.
-
Page 12: Kit Specification
Kit Specification UJK Technology Compact Router Table with Cast Iron Table Top Code 717126 Rating Trade Table Size 686 x 406 x 40mm Fence Size 789 x 90mm Dust Extraction Outlet 62mm UJK Technology Compact Router Table with Laminated Table Top... -
Page 13: General Safety Instructions
General Safety Instructions 1. Make sure that the operator has been properly trained 12. Secure the table to a work surface and never stand or and has read and understands the Owner’s Manual before lean on it. Serious injury can occur if the table is tipped or if operating any machinery. -
Page 14: Assembly
Assembly Fig 03 UJK Router Table Stand Assembly Step 1 Locate the bag containing the coach bolts (M6x12mm) (6), M6 flat washers and nuts (7-8), leg support brackets (A) and side upper/lower panels (D-E). Offer up the pre-drilled holes in the leg supports with the holes in the upper/lower panels as shown in fig 1 and secure using the M6 nuts bolts washers. - Page 15 Assembly Step 5 Locate the four rubber feet (3), (M6x20mm) Phillips screws (4), flat washers (7) and M6 nuts (8), see fig 6. Fig 09-10-11 Turn the stand over, place a rubber foot on top of the leg support bracket (A)and line up the pre-drilled holes. Place a flat washer (7) over the Phillips screw (4) and insert the screw into the foot’s recess, secure in place with the nut (8), see fig 6-7.
- Page 16 Assembly The Phillips screws are for hanging tools for storage. Note: Fig 15-16 Adjust the screw depth and clamp in postion using the nut for larger tools. Fig 13 Phillips screws UJK Router Table Top Assembly WARNING! THE CAST IRON TOP IS VERY HEAVY SEEK HELP! There are two router table tops that can be mounted Locate the ten Hex screws, flat washers and spring washer...
- Page 17 • ( Code 502747) 10mm Phenolic Insert • (Code 502748) 10mm Aluminium Insert with Universal Base • (Code 502701) UJK Technology Router Elevator The following instructions are for the optional UJK 6mm Aluminium table insert but it will apply for the Step 2 Insert a grub screw into each threaded corner of other options as well.
- Page 18 Assembly Fig 26 Straight edge Hex key Grub screw Step 2 Insert three (1/4”) square nuts (h) into the machined slot to each fixing bracket (L), see fig 30. Locate the two Step 3 Insert the two countersink Hex screws down into fence fixing brackets (K), M6 Hex screws (e) and flat washers the countersink holes in the table inset to lock the insert in (j), line up the machined slots in the bracket (K) with the...
- Page 19 Assembly Fig 32 Locking knob Scale Step 6 Locate the two adjustable wood faces (M), lineup the ‘T’ bolts (d) with the ‘T’ slots in the wood face (M) and Step 4 Locate the two lock Hex nuts (g) and slide each one slide on the wood face, lightly tighten, see fig 36.
- Page 20 Assembly Step 8 Loosen the two locking knobs beneath the fixing Step 9 Locate the extraction moulding (I), loosen the two brackets (K), slide the two scales until it reads (ZERO) to the locking knobs (b) either side of the extraction surround on front face of the fence assembly, lightly tighten the locking the fence (H), slide the extraction moulding (I) over the ‘T’...
- Page 21 Assembly Fig 46-47 Mitre fence Wing nut extension Hex bolt/washer Step 11 Mount the dust shield (J) through the ‘T’ bolts (d), place a flat washer (i) over the bolts and secure using two locking knobs (b), see figs 44-45. Fig 44-45 Tool Storage Holders To store your tools when not in use, place the mitre fence...
-
Page 22: Illustration & Parts Description
Illustration & Parts Description Fence locking knob Adjustable wood face Dust shield Fence Table Mitre fence bracket holder Tool hanger screws Tool bracket UJK leg stand frame Mitre fence assembly Table insert spanner Winding handle for UJK router elevator... - Page 23 Illustration & Parts Description Mitre fence extention Fence scale Extraction moulding Mitre fence UJK technology router table with optional dust extraction box attached...
-
Page 24: Mounting The Router To The Universal Base Plate
Mounting the Router to the Universal Base Plate 10mm Aluminium Router Table Insert with Universal Base Plate (Code 502748) The information below is reproduced from the Axminster universal base plate fitting instructions. Hole numbers, screw types and how many required are given for mounting different router models to the base plate. - Page 25 Mounting the Router to the Universal Base Plate 176mm 6.55mm M4x10mm M4x12mm UNF10 M5x16mm M5x20mm M6x16mm M6x30mm M6x12mm M4x6mm x1/2”...
- Page 26 Mounting the Router to the 10mm Table Inserts Fig 01 • 10mm Aluminium Table Insert (Code 105932) Router cutter • 10mm Phenolic Insert (Code 502747) What’s Included 1 No Insert Plate Step 2 Place the template (B) on top of the router, line up the concentric circle ridges with the router base plate and 1 No Insert Plate Template...
- Page 27 Mounting the Router to the 10mm Table Inserts Fig 05-06 NOTE: THIS MAY VERY DEPENDING ON ROUTER MODEL Fig 03 Secure the template Centre punch holes Step 4 Turn over the insert plate (A) (with the logo face down), place the template (B) on top of the insert plate and centre the template as shown, see fig 4 Fig 04 Marked holes...
-
Page 28: Operating Instructions
Mounting the Router to the 10mm Table Inserts / Operating Instructions Fig 07-08 Connecting a Dust Extractor BEFORE ROUTING CONNECT THE MACHINE TO A DUST EXTRACTION SYSTEM. ALWAYS TURN ON THE DUST EXTRACTOR BEFORE STARTING THE ROUTER AND ALWAYS STOP THE ROUTER BEFORE TURNING OFF THE DUST EXTRACTOR. -
Page 29: General Guide To Router Cutters
General Guide to Router Cutters History (STC) Solid Tungsten Carbide Cutters The cutters that are used with a router have developed STC (Solid Tungsten Carbide) cutters are ground from a over the last 35 years to allow a variety of tasks to be solid section of tungsten carbide. -
Page 30: General Guide To Router Cutters
General Guide to Router Cutters This rule is very difficult to enforce as some cuts will Shanks and Cutter Length combine, using the total diameter and a side cut. So what 1/2" shank cutters are inherently stronger which means do we class as 3mm? The major factor being the material they are less likely to bend or snap than the small 1/4"... - Page 31 Exploded Diagram/Parts List...
- Page 32 Exploded Diagram/Parts List Router Table & Stand Assembly (E Type) Index No Part No Description Size 2716E014 Router Table (686mm×407mm) 27160015 Stand Cross Relief 27160016 Stand Side Support 27160017 Stand Leg 27160018 Stand Tie Bar (Front 27160018A Stand Tie Bar (Rear 27160019 Stand Tie Bar (L&R 27160022...
- Page 33 Exploded Diagram/Parts List 22100120 Pointer 906316014 Round Head Screw 3/16” ×1/4” 938014025 Lock Knob 1/4” ×25 32240057 Miter Fence 904M06030 Hex Cap Bolt M6×30 913M06000 Butterfly Nut 905M06020 Flat Head Screw M6×20 Continues Over...
- Page 34 Exploded Diagram/Parts List Router Table Fence Assembly Index No Part No Description Size 32240032 Router Table Fence 905mm 27160032 Router Table Fence 778mm 60100001A Lock Handle 5/16” T3224002 Scale 905mm T2716002 Scale 778mm 32240033 T-Bolt 9145162302 Flat Washer 939M08000B Lock Knob 32240034 Lock Nut 32240035...
- Page 35 Exploded Diagram/Parts List 27160041 Rule Plate 205mm T3224003 Scale 300mm T2716003 Scale 205mm 935014000 Square Nut 1/4” 9140141602 Flat Washer 901M06012 Hex Socket Cap Screw 3224 M6×12 901M06012 Hex Socket Cap Screw 2716 M6×12 904014058 Hex Bolt 1/4”×5/8” 940M06012 Lock Knob M6×12 32240042 Fence Feather board...
- Page 36 The UJK technology brand was launched by Axminster in 2012 with the intention of encompassing a range of carefully selected products that Axminster held in particular high esteem. Many of these products are designed by and manufactured by Axminster. The range includes routing, measuring and wood jointing products and has proven to be extremely popular.
Need help?
Do you have a question about the 719241 and is the answer not in the manual?
Questions and answers