Tennant SENTINEL Service Manual
Diesel, machine serial number range (s/n 011000- )
Hide thumbs
Also See for SENTINEL:
- Operator's manual (138 pages) ,
- Operator's manual (132 pages) ,
- Operator's manual (150 pages)
Table of Contents
Advertisement
Quick Links
Download this manual
See also:
Operator's Manual
Advertisement
Table of Contents
Troubleshooting

Related Manuals for Tennant SENTINEL


Summary of Contents for Tennant SENTINEL
- Page 1 ® SENTINEL (Diesel) Service Manual Machine Serial Number Range (S/N 011000- Tennant True ® Parts North America / International 9018524 For the latest Parts Manuals and other Rev. 00 (05-2019) language Operator Manuals, visit: *9018524* www.tennantco.com/manuals...
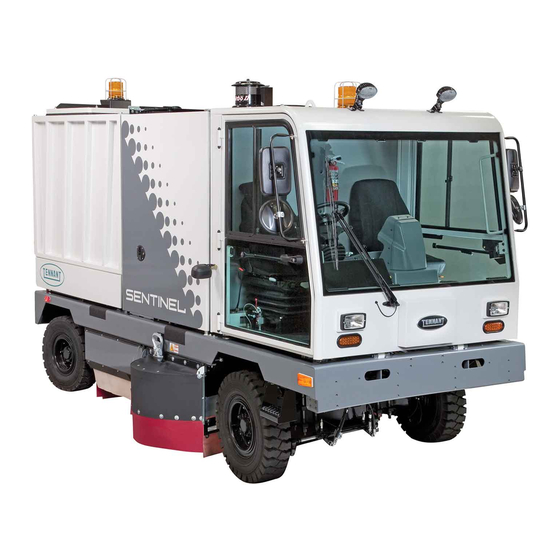
- Page 2 Always remember to recycle. INTENDED USE The Sentinel is an industrial rider machine designed to sweep hard surfaces (concrete, asphalt, stone, synthetic, etc). Typical applications include industrial warehouses, manufacturing facilities, distribution facilities, stadiums, arenas, convention centers, parking facilities, transportation terminals, and construction sites. Do not use this machine on soil, grass, artifi...
-
Page 3: Table Of Contents
Replacing The Main Brush .......53 Vario Sweeping Brush (Option) ....33 Checking And Adjusting The Main Conveyor Bearings ........33 Brush Pattern ........55 Conveyor Chain ........34 Side Brush ..........55 Differential ..........34 Replacing The Side Brush .......55 Main Brush Support Rods ......34 Sentinel 9018524 (05-2019) - Page 4 Main Brush And Conveyor Systems .....83 Chart .............147 Hopper System ..........84 Component Locator ........148 Vacuum Fan And Filter Shaker Systems..85 Component Locations Tables ......151 Hopper Full Sensing System ......86 Hopper Door And Vacuum Wand Door Sensing Systems ........87 Sentinel 9018524 (05-2019)
- Page 5 Propel System (Page 1) ......211 Hydraulic Symbols Key .......175 Propel System (Page 2) ......212 Solenoid Valve Details ........176 Operational Matrix ........213 Sentinel Conveyor And Main Brush Vacuum Fan Motor .........213 Forward ..........177 Filter Shaker Motor .........213 Sentinel Conveyor And Main Brush Hopper System ........213...
- Page 6 Installing The Service Brake Assembly ...........257 Installing The Service Brake Seal Kit ..262 Removing The Parking Brake Assembly ...........266 Hopper ...........272 Replacing The Vacuum Fan Hydraulic Motor(s) ......272 Lights/Cameras/Alarms/Sensors ....274 Replacing The Light(s)/Camera(s)/ Alarm(s)/Thermo Sentry ....274 Air Conditioner System .......276 Sentinel 9018524 (05-2019)
-
Page 7: Safety Precautions
- With pads or accessories not supplied or WARNING: Hopper door pinch point. approved by Tennant. The use of other pads Stay clear of hopper door. may impair safety. - Without fi lters in place or with clogged fi lters. - Page 8 - Do not modify the machine from its original - Move machine with care when hopper is design. raised. - Use Tennant supplied or approved - Make sure adequate clearance is available replacement parts. before raising hopper. - Wear personal protective equipment as...
- Page 9 WARNING LABEL - Side brush WARNING LABEL - Raised can move. Do not step on side cab may fall. Engage cab brush. support bar. Located on front Located above side brush(es). Located below cab on frame. of machine. Sentinel 9018524 (05-2019)
- Page 10 fi ll clear of hopper lift arms. spout. Located on both sides of support bar, on rear center of hopper lift, and on both sides Located on side of hopper of hopper lift (High Dump). lift (High Dump). Sentinel 9018524 (05-2019)
-
Page 11: General Information
E. Dust Filter F. Vacuum Fans G. Hopper Door H. Vacuum Wand (Option) I. Hopper Lift J. Main Brush K. Side Brush(es) L. Water Tank (right side) M. Fuel Tank (right side) N. Vario Sweeping Brush (Option) Sentinel 9018524 (05-2019) -
Page 12: Instruments And Controls
U. Engine RPM command indicator J. Fuel level indicator V. Speedometer/button (MPH/KPH) K. DEF (Diesel Exhaust Fluid) tank level W. Tachometer (RPM) indicator (Tier 4F Emissions Engine) L. Engine pre-heat indicator M. High exhaust system temperature Indicator (Tier 4F Emissions Engine) Sentinel 9018524 (05-2019) -
Page 13: Main Console Controls
W. Right side brush wet dust control knob K. Filter shaker button (Option) L. Conveyor reverse button X. Air circulation vents M. Hopper lift button (High Dump Model) N. Hopper tilt back button O. Hopper door open button Sentinel 9018524 (05-2019) -
Page 14: Operator Controls
F. Windshield wiper and washer switch G. Ignition switch H. Directional switch I. Parking brake switch J. Parking lights, headlights, bright headlights, signal, and horn switch K. Steering wheel tilt lever L. Service brake pedal M. Propel pedal Sentinel 9018524 (05-2019) -
Page 15: Overhead Controls
C. Hazard light switch D. Side brush spot light(s) switch E. Rear night sweeping light switch (Option) F. Front night sweeping light switch (Option) G. High pressure washer switch (Option) H. Radio/compact disc player (Option) - Not Shown Sentinel 9018524 (05-2019) -
Page 16: Machine Symbols
Vario Sweeping Brush Arm Heater/Air Conditioner Fan Swing Right Vario Sweeping Brush Up−Down Air Conditioner Vario Sweeping Brush Rotation Flow Rate Vario Sweeping Brush Left Water Horn Valve Knob Vario Sweeping Brush Right Vacuum Fan Water Valve Knob Sentinel 9018524 (05-2019) - Page 17 Right Side Brush (Wet Dust Diesel Fuel Only Control) Hazard Light Signal/4−Way Warning Lights Rear Night Sweeping Light Side Brush Spot Light High Pressure Washer Front Night Sweeping Light Hopper Tilt Back Hopper Tilt Forward Hopper Lift Hopper Lower Forward/Reverse Sentinel 9018524 (05-2019)
-
Page 18: Touchscreen Icons
Disable automatic Screen brightness Regeneration required regeneration High exhaust system Engine alert Engine pre-heat temperature Service alert High beam Turn signal/4-Way fl asher Diesel Exhaust Fluid Engine temperature Fuel level (DEF) Engine oil pressure Battery charge Help/information Sentinel 9018524 (05-2019) -
Page 19: Tilting The Cab
WARNING: Raised cab may fall. Engage cab support bar. 7. Keep the chain from the overhead hoist attached for added support. 8. To lower the cab, disengage the cab support and use the hoist to lower the cab. Sentinel 9018524 (05-2019) -
Page 20: Tilting The Cab With The Cab Jack (Option)
6. Use the cab jack handle to tighten the cab jack valve. Twist the handle clockwise to tighten the 3. Pinch the windshield wiper hose with a small valve. cable tie or clamp. Sentinel 9018524 (05-2019) - Page 21 10. Reinstall the hardware to secure the cab, remove the cable tie/clamp from the windshield wiper fl uid hose, and reinstall both door springs onto the back of the cab. Sentinel 9018524 (05-2019)
-
Page 22: Fastener Torques
424 - 550 Nm 508 - 660 Nm 177 - 230 Nm 409 - 530 Nm 574 - 745 Nm 686 - 890 Nm 227 - 295 Nm 520 - 675 Nm 732 - 950 Nm 879 - 1140 Nm Sentinel 9018524 (05-2019) -
Page 23: Specifi Cations
2895 mm (114 in) Protection Grade IPX3 Values determined as per IEC 60335-2-72 Measure Sound pressure level LpA Sound pressure uncertainty KpA Sound power level LWA + Uncertainty KWA Vibration - Hand-arm 2.5 m/s Vibration - Whole body 0.5 m/s Sentinel 9018524 (05-2019) -
Page 24: General Machine Performance
5-W40 API diesel classifi cation CK-4 Air conditioner Refrigerant R134a − total charge capacity, 0.74 kg (1 lb 10 oz) PAG - Refrigerant oil, 59.148 ml (2 oz.) 19.0 L (5.0 gal) capacity True-Blue DEF (Diesel Exhaust Fluid) - per ISO 22241-1 Sentinel 9018524 (05-2019) -
Page 25: Steering
Spring activated dry multi−disc on front axle TIRES Location Type Size Ply Rating Pressure Front and Rear (4) Bias Ply Pneumatic 7 x 12 in 930−1000 kPa (135−145 psi) Front and Rear (4) Radial Pneumatic 7 x 12 in 930−1000 kPa (135−145 psi) Sentinel 9018524 (05-2019) -
Page 26: Machine Dimensions
GENERAL INFORMATION MACHINE DIMENSIONS 1510 mm 2970 mm (117 in) (59.5 in) 4445 mm (175 in) 5230 mm (206 in) 5460 mm (215 in) 356839 Sentinel 9018524 (05-2019) -
Page 27: Maintenance
T = Trained Personnel. Interval Person Key Description Procedure Lubricant/ No. of Resp. Fluid Service Points Daily Engine Check oil level Check water separator for water, drain Check cooling fan for damage Check crankcase breather tube for blockages and damage Sentinel 9018524 (05-2019) - Page 28 (**) after the fi rst 250 hours of operation. LUBRICANT/FLUID Universal tractor fl uid (Mobilfl uid 424) (TENNANT part no. 767766) Engine oil, API diesel classifi cation 5W-40, CK-4, full synthetic Blue DEF fl uid or equivalent API registered fl uid, per ISO 22241-1 HYDO TennantTrue premium hydraulic fl...
- Page 29 Differential Check oil level Hours Service brakes Check fl uid level Engine Check alternator/fan belt Hours tensioner for damage Hydraulic Replace reservoir fi ller cap Hours Hydraulic Check hoses for wear and damage Sentinel 9018524 (05-2019)
- Page 30 (**) after the fi rst 250 hours of operation. LUBRICANT/FLUID Universal tractor fl uid (Mobilfl uid 424) (TENNANT part no. 767766) Engine oil, API diesel classifi cation 5W-40, CK-4, full synthetic True-Blue DEF fl uid or equivalent API registered fl uid, per ISO 22241-1 HYDO TennantTrue premium hydraulic fl...
-
Page 31: Lubrication
MAINTENANCE LUBRICATION 351930 NOTE: Lettered references for lubrication section on following LUBRICATION section pages. Sentinel 9018524 (05-2019) -
Page 32: Hopper Tilt (Low Dump)
351933 351932 WARNING: Raised hopper may fall. Engage hopper support pin. AXLE LEAF SPRINGS The axle leaf springs (C) have twelve grease fi ttings. Lubricate the axle leaf springs after every 200 hours of operation. Sentinel 9018524 (05-2019) -
Page 33: Steering Cylinder
fi ttings. Lubricate the wheel pivot points after every 200 hours of operation. SIDE BRUSH PIVOT Each side brush pivot (F) has a grease fi tting. Lubricate the side brush pivot(s) after every 200 hours of operation. Sentinel 9018524 (05-2019) -
Page 34: Conveyor Chain
DIFFERENTIAL Check the lubricant level in the differential (J) after every 400 hours of operation by removing the fi ller plug. Change the differential lubricant after every 1600 hours of operation. Use SAE 90 weight gear lubricant. Sentinel 9018524 (05-2019) -
Page 35: Hydraulics
fi ller cap gasket before installing the cap onto the reservoir. Replace the hydraulic fl uid fi lter element after every 1200 hours of operation, or when the hydraulic fi lter gauge reads outside of the green area. Sentinel 9018524 (05-2019) -
Page 36: Replacing The Hydraulic Fluid Filter
3. Allow the oil to drain from the fi lter into the tank (Allow to drain for approximately 5 minutes). 4. Lift the fi lter and internal bowl out of the reservoir and place into an oil pan. Remove the top part of the fi lter element. Sentinel 9018524 (05-2019) -
Page 37: Hydraulic Fluid
1057708 121.0 L (32 gal) If using a locally-available hydraulic fl uid, be sure the specifi cations match Tennant hydraulic fl uid specifi cations. Substitute fl uids can cause premature failure of hydraulic components. ATTENTION! Hydraulic components depend on 00002 system hydraulic fl... -
Page 38: Purging Air From The Hydraulic Conveyor Lift System
6. Disconnect the hydraulic hose from the top fi tting of the right lift cylinder and drain the hydraulic fl uid into a pan to purge air from the hose. 7. Reconnect the hose to the right lift cylinder. Sentinel 9018524 (05-2019) -
Page 39: Engine
Diesel (LSD) or Biodiesel up to 20% (B20) fuel Only. DO NOT add aftermarket additives to the fuel in this machine. Engine damage due to use of other fuels and aftermarket additives may not be covered under the machine warranty. Sentinel 9018524 (05-2019) -
Page 40: Cooling System
Check the radiator coolant level in the radiator site cleaning compound. Add one pint of conditioner glass daily. The coolant level must be visible in the (TENNANT part no. 770172) to each coolant radiator site glass. Use distilled water mixed with change. -
Page 41: Air Filter Indicator
Clean the air fi lter element after every 250 hours of operation. Replace the air fi lter element when the air fi lter indicator shows restriction in the air intake system or the fi lter element is damaged. Refer to AIR FILTER INDICATOR. Sentinel 9018524 (05-2019) -
Page 42: Air Intake Screen
FOR SAFETY: Keep fl ames and sparks away from fuel system service area. Keep area well ventilated. Start the engine and run the machine at idle RPM. Observe the air fi lter indicator to ensure no air restriction is shown on the indicator. Sentinel 9018524 (05-2019) -
Page 43: Fuel Water Separator
3. Twist and remove the DEF tank cap from the ENGINE). DEF tank. 00000 12:35 PM 00000 1750 4. Fill the DEF tank with DEF. Do Not overfi ll the DEF tank. 5. Reinstall DEF tank cap/retainer pin onto the DEF tank. Sentinel 9018524 (05-2019) -
Page 44: Def Dosing Unit And Filter (Tier 4F Emissions Engine)
4000 hours of operation. Remove the DEF dosing unit cap and DEF fi lter equalizing element from the DEF dosing unit to access the DEF dosing fi lter. Remove the DEF dosing fi lter from the DEF dosing unit. Sentinel 9018524 (05-2019) -
Page 45: Fuel Lines
Check and adjust the alternator/fan belt tension every 100 hours of operation. Check the alternator/fan belt tensioner for damage after every 500 hours of operation. FOR SAFETY: When servicing machine, avoid moving parts. Do not wear loose jackets, shirts, or sleeves. Sentinel 9018524 (05-2019) -
Page 46: Fuses And Relays
Fan Medium FU29 Open 12 VDC, 40 A Fan High FU30 Open 12 VDC, 40 A Hopper Moving FU31 Night Lights 12 VDC, 40 A Seat Switch FU32 Side Brush/Beacon Lights 12 VDC, 40 A Accessory #2 Sentinel 9018524 (05-2019) - Page 47 NOTE: When the battery is disconnected, the Check and clean the cab fi lters after every 50 parking brake will automatically engage. hours of operation. Clean cab fi lters with soap and water. Replace damaged or worn fi lters. Sentinel 9018524 (05-2019)
-
Page 48: Windshield Washer Fluid
fi ns when cleaning. Clean thoroughly windshield washer fl uid. to prevent the fi ns from becoming encrusted with dust. Check the condenser tubes for wear and damage after every 250 hours of operation. Replace damaged tubes. Sentinel 9018524 (05-2019) -
Page 49: Wet Dust Control Filter (Option)
Clean the water fi lter every 200 hours of operation. Remove the water fi lter and fl ush it with clean Ensure the chain is touching the fl oor at all times. water. Sentinel 9018524 (05-2019) -
Page 50: Debris Hopper
7. Use a garden hose or broom to clean the 9. Stretch the fi lter over the edges of the shaker hopper fi lter from the inside the hopper. frame. Pull the drawstring tight. 8. Turn on the machine. Sentinel 9018524 (05-2019) -
Page 51: Thermo-Sentry
See WARNINGS, FAULTS, AND INHIBITS. The Thermo-Sentry automatically reset when the air temperature in the hopper falls below 60° ± 3° C (140° ± 5° F). Sentinel 9018524 (05-2019) -
Page 52: Conveyor
As the conveyor chain wears, the locking ratchet mechanism moves up the pins mounted on the slide rails on both sides of the machine. Clean the ratchet mechanisms daily. Check the ratchet tips and pins for damage and wear daily. Sentinel 9018524 (05-2019) -
Page 53: Brushes
FOR SAFETY: Before leaving or servicing machine, stop on level surface, set parking brake, turn off machine and remove key. 4. Unhook the t-handles from the right side main brush access door and remove the right side main brush access door. Sentinel 9018524 (05-2019) - Page 54 17. Reinstall the skid plates to the idler plate. 18. Reinstall the right side main brush access door onto the machine. 19. Check and adjust the main brush pattern. See CHECKING AND ADJUSTING THE MAIN BRUSH PATTERN. Sentinel 9018524 (05-2019)
-
Page 55: Checking And Adjusting The Main Brush Pattern
WARNING: Side brush can move. Do not step on side brush. 5. Install the new side brush to the drive hub with the hardware removed earlier. 6. Check the side brush linkage for wear and loose hardware. Sentinel 9018524 (05-2019) -
Page 56: Skirts And Seals
Check the skirts for wear or damage daily. Check the skirts for wear or damage daily. Replace the skirts when they no longer touch the ground. NOTE: Tire pressure and amount of debris in the hopper will affect skirt clearances. Sentinel 9018524 (05-2019) -
Page 57: Brush Door Seals
The cab doors have seals are located along the frame. door edges. Check the seals for wear or damage every 100 Check the seals for wear or damage every 100 hours of operation. hours of operation. Sentinel 9018524 (05-2019) -
Page 58: Skids
The drain ports are located on the bottom of the wheel hubs. Check the fl uid level after every 400 hours of operation. Change the fl uid after every 1600 hours of operation. Sentinel 9018524 (05-2019) -
Page 59: Wheel Alignment
5. Place the red valve handle on the steering valve located on the front axle. 6. Turn the handle 90° counterclockwise to open the steering valve. 7. Release the parking brake switch. Sentinel 9018524 (05-2019) -
Page 60: Pushing, Towing, And Transporting The Machine
FOR SAFETY: When loading machine onto truck or trailer, use winch. Do not drive the machine onto the truck or trailer unless the loading surface is horizontal AND is 380 mm (15 in) or less from the ground. Sentinel 9018524 (05-2019) - Page 61 6. Set the parking brake switch and block the machine tires. Tie down the machine to the truck or trailer before transporting. The front tie-down locations are on the inside channels of the main frame. Sentinel 9018524 (05-2019)
-
Page 62: Machine Jacking
FOR SAFETY: When servicing machine, block machine tires before jacking machine up. Use a hoist or jack that will support the weight of the machine. Jack machine up at designated locations only. Support machine with jack stands. Sentinel 9018524 (05-2019) -
Page 63: Storing The Machine
9. Remove the water fi lter cap, located next to the water pump, and empty the water fi lter cap. 10. Leave the valves open if the machine is to be stored/not used for an extended period. Sentinel 9018524 (05-2019) -
Page 64: Troubleshooting
Press the close button (X) located in the upper right corner of the alert window to close the window. Press the alert indicator/button to reopen the alert window after it has been closed. 00000 12:35 PM 00000 Sentinel 9018524 (05-2019) -
Page 65: Warning And Fault Indicators
Key off/key on machine Water pump Water valve(s) are closed or a Ensure water valve(s) are open maintenance issue with dust control water pump Call service Machine repair issue Turn off machine. Call Tennant Service Representative. Sentinel 9018524 (05-2019) -
Page 66: Inhibit Indicators
Blocked conveyor Selected function will not operate Clear blockage from conveyor due to debris blocking conveyor Low solution Selected function will not operate Fill solution tank due to low solution (machines with dust control/power wand option only) Sentinel 9018524 (05-2019) - Page 67 Selected function will not operate Side brush option unavailable. due to machine not being equipped Button inactive with optional side brush Parking brake switch is set Selected function will not operate Release parking brake switch due to parking brake Sentinel 9018524 (05-2019)
-
Page 68: Fault Codes
Filter Shaker Circuit 1. Shorted load condition 1. Check wire harness and repair Short 2. Higher current draw than as needed. hardware design limit 0x0177 Filter Shaker Circuit FET 1. Control board problem 1. Replace control board. Short Sentinel 9018524 (05-2019) - Page 69 Right Brush Down Short 1. Shorted load condition 1. Check wire harness and repair 2. Higher current draw than as needed. hardware design limit 0x0247 Right Brush Down FET 1. Control board problem 1. Replace control board Short Sentinel 9018524 (05-2019)
- Page 70 1. Check wire harness and repair Conveyor Forward 2. Higher current draw than as needed. Circuit Short hardware design limit 0x0337 Main Brush and 1. Control board problem 1. Replace control board Conveyor Forward Circuit FET Short Sentinel 9018524 (05-2019)
- Page 71 Enable Hopper Circuit 1. Shorted load condition 1. Check wire harness and repair Short 2. Higher current draw than as needed hardware design limit 0x0387 Enable Hopper Circuit 1. Control board problem 1. Replace control board FET Short Sentinel 9018524 (05-2019)
- Page 72 1. Lower hopper 2. P1 pin 5 disconnected 2. Check connections/wiring 3. Hopper sensor SW14 disconnected 0x07b5 Engine Alternator Low 1. Battery/alternator voltage below 1. Charge battery Voltage 9.6 V 2. Check battery connections 3. Check alternator connections Sentinel 9018524 (05-2019)
- Page 73 0xff21 CAN Communication 1. Software run time problem 1. Turn off and restart machine Offl ine 2 2. Main wire harness disconnected 2. Check connections/wiring from control board 3. Replace control board 3. Control board not powered Sentinel 9018524 (05-2019)
-
Page 74: Engine Fault Codes
NOTE: Contact Tennant T.A.C. (Technical Assistance Center) for all other engine fault codes since any codes not listed may require assistance from the engine manufacturer. - Page 75 (Technical Assistance Center) if problem persists Engine Oil Rifl e Pressure - Check engine oil level. Add oil Data valid but below normal as needed. Contact Tennant operational range - Most Severe T.A.C. (Technical Assistance Level Center) if problem persists...
- Page 76 Add DEF as needed Fluid Quality - Data Valid But Below Normal Operating Range - Moderately Severe Level NOTE: Contact Tennant T.A.C. (Technical Assistance Center) for all other engine fault codes since any codes not listed may require assistance from the engine manufacturer.
-
Page 77: Key Switch
PREHEAT 1/RED PREHEAT 15/54 15/54 START START 1/RED 1/RED 30/1 30/1 OFF POSITION RUN POSITION START START 1/RED 13/BLK 12VDC 1/RED PREHEAT 15/54 START 1/RED 30/1 START POSITION START (Spring loaded - Returns to “RUN” unless held) Sentinel 9018524 (05-2019) -
Page 78: Starting System
START LOCKOUT RELAY 21/PNK 165/GRN INPUT_4 J2-10 UIM W134 Starter Negative 13/BLK Engine OEM RELAY 8 STARTER SOLENOID W145 STARTER B+ BUSBAR SOLENOID Engine ECM STARTER S TERM Battery Positive + RELAY 8 Battery Negative - Engine Harness Sentinel 9018524 (05-2019) -
Page 79: Charging System
90/TAN 93/ORA GND1 J2-1 10 AMP J2-2 USER INTERFACE MODULE W134 Starter Negative 13/BLK W137 W147 Engine OEM L-TERM ALT B+ B+ BUSBAR W112 W148 W149 STARTER Battery Positive + POSITIVE Battery Negative - FUSE ENGINE HARNESS Sentinel 9018524 (05-2019) -
Page 80: Engine Oil Pressure And Temperature Sensors
10 AMP AUX 1 RELAY P2-35 MAIN CONTROL BOARD 13/BLK 90/TAN CAN+ CAN- 93/ORA GND1 J2-1 10 AMP J2-2 J1939+/YEL OIL PRESSURE J2-5 USER INTERFACE J1939-/GRN ENG TEMP MODULE J2-6 Battery Positive + TOUCH SCREEN Battery Negative - Sentinel 9018524 (05-2019) -
Page 81: Engine Air Filter, Speed, And Fuel Level Sensors
FUEL LEVEL SENSOR 90/TAN 99/WHT P1-33 15 AMP 13/BLK 90/TAN CAN+ CAN- 93/ORA GND1 J2-1 J2-2 10 AMP CLOGGED J1939+/YEL ENGINE SIGNAL J2-5 USER INTERFACE J1939-/GRN ENG SPEED MODULE SENSOR J2-6 Battery Positive + TOUCH SCREEN Battery Negative - Sentinel 9018524 (05-2019) -
Page 82: Right And Left Brush Systems
91/PNK Enable Lift Circuits #2 P2-28 90/TAN 92/BRN P1-34 15 AMP P1-33 90/TAN 99/WHT 15 AMP 13/BLK 90/TAN CAN+ CAN- 93/ORA GND1 J2-1 10 AMP J2-2 USER INTERFACE MODULE Battery Positive + TOUCH SCREEN Battery Negative - Sentinel 9018524 (05-2019) -
Page 83: Main Brush And Conveyor Systems
92/BRN 129/WHT Conveyor Reverse P2-15 SV31 154/YEL 92/BRN Conveyor Down P2-19 P1-33 90/TAN 99/WHT 15 AMP 13/BLK 90/TAN CAN+ CAN- 93/ORA GND1 J2-1 10 AMP J2-2 USER INTERFACE MODULE Battery Positive + TOUCH SCREEN Battery Negative - Sentinel 9018524 (05-2019) -
Page 84: Hopper System
SV18 133/ORA 99/WHT Hopper Tilt Back P2-11 SV19 99/WHT 134/YEL Hopper Tilt Forward P2-12 SV32 162/BRN 99/WHT Hopper Enable P2-30 Hopper Harness 13/BLK 90/TAN CAN+ CAN- 93/ORA GND1 J2-1 10 AMP J2-2 USER INTERFACE MODULE TOUCH SCREEN Sentinel 9018524 (05-2019) -
Page 85: Vacuum Fan And Filter Shaker Systems
Vacuum Fans P2-20 SV16 131/PNK 92/BRN Filter Shaker P2-32 SV13 Hopper Harness P1-33 90/TAN 99/WHT 15 AMP 13/BLK 90/TAN CAN+ CAN- 93/ORA GND1 J2-1 10 AMP J2-2 USER INTERFACE MODULE Battery Positive + TOUCH SCREEN Battery Negative - Sentinel 9018524 (05-2019) -
Page 86: Hopper Full Sensing System
P1-8 Hopper Full P2-2 15 AMP 90/TAN 92/BRN P1-34 15 AMP 90/TAN 99/WHT P1-33 15 AMP 13/BLK 90/TAN CAN+ CAN- 93/ORA GND1 J2-1 10 AMP J2-2 USER INTERFACE MODULE Battery Positive + TOUCH SCREEN Battery Negative - Sentinel 9018524 (05-2019) -
Page 87: Hopper Door And Vacuum Wand Door Sensing Systems
Hopper Harness P1-34 SW19 15 AMP 146/BLU P1-10 90/TAN 99/WHT Conveyor Door Closed P1-33 15 AMP 13/BLK 90/TAN CAN+ CAN- 93/ORA GND1 J2-1 J2-2 10 AMP USER INTERFACE MODULE Battery Positive + TOUCH SCREEN Battery Negative - Sentinel 9018524 (05-2019) -
Page 88: Machine Speed Sensing System
149/WHT 13/BLK 15 AMP P1-30 90/TAN 92/BRN P1-34 15 AMP 90/TAN 99/WHT P1-33 15 AMP 13/BLK 90/TAN 93/ORA CAN+ CAN- GND1 J2-1 10 AMP J2-2 USER INTERFACE MODULE TOUCH SCREEN Battery Positive + Battery Negative - 93/ORA Sentinel 9018524 (05-2019) -
Page 89: Level And Hopper Tilt Sensing Systems
15 AMP 13/BLK 94/YEL P1-15 90/TAN 92/BRN P1-34 15 AMP 90/TAN 99/WHT P1-33 15 AMP 13/BLK 90/TAN CAN+ CAN- 93/ORA GND1 J2-1 10 AMP J2-2 USER INTERFACE MODULE TOUCH SCREEN Battery Positive + Battery Negative - 93/ORA Sentinel 9018524 (05-2019) -
Page 90: Blocked Conveyor And Hopper Temperature Sensing System
92/BRN P1-34 Hopper Harness 15 AMP SW13 90/TAN 99/WHT 140/TAN P1-33 P1-3 15 AMP Blocked Conveyor 13/BLK 90/TAN CAN+ CAN- 93/ORA GND1 J2-1 J2-2 10 AMP USER INTERFACE MODULE Battery Positive + TOUCH SCREEN Battery Negative - Sentinel 9018524 (05-2019) -
Page 91: Wet Dust Control System
Sol Tank Low 90/TAN 91/PNK P2-2 15 AMP 90/TAN 92/BRN P1-34 P1-33 90/TAN 99/WHT 15 AMP 13/BLK 90/TAN CAN+ CAN- 93/ORA GND1 J2-1 10 AMP J2-2 USER INTERFACE MODULE Battery Positive + TOUCH SCREEN Battery Negative - Sentinel 9018524 (05-2019) -
Page 92: Pressure Washer System
SWITCH 90/TAN 92/BRN CAB HARNESS P1-34 90/TAN 99/WHT P1-33 15 AMP 93/ORA 13/BLK 90/TAN CAN+ CAN- GND1 J2-1 10 AMP J2-2 21/PNK 165/GRN INPUT_4 J2-10 USER INTERFACE MODULE Battery Positive + Battery Negative - TOUCH SCREEN 93/ORA Sentinel 9018524 (05-2019) -
Page 93: Forward Propel And Brake Systems
15 AMP 90/TAN 92/BRN P1-34 90/TAN 99/WHT P1-33 15 AMP 93/ORA 90/TAN CAN+ CAN- 13/BLK GND1 J2-1 10 AMP J2-2 19/WHT 21/PNK 165/GRN INPUT_5 INPUT_4 J2-11 J2-10 USER INTERFACE MODULE Battery Positive + TOUCH SCREEN Battery Negative - Sentinel 9018524 (05-2019) -
Page 94: Reverse Propel And Brake Systems
15 AMP BOARD 37/PUR P2-17 90/TAN 91/PNK P2-2 15 AMP 90/TAN 92/BRN P1-34 90/TAN 99/WHT P1-33 15 AMP 93/ORA 90/TAN CAN+ CAN- 13/BLK GND1 J2-1 10 AMP J2-2 102/BRN 21/PNK 165/GRN INPUT_6 INPUT_4 J2-12 J2-10 USER INTERFACE MODULE Sentinel 9018524 (05-2019) -
Page 95: Vario Brush Tilt System
Pin 2 13/BLK Pin 13 SV23 109/WHT 120/TAN Pin 20 ARM MOVE/HEAD TILT SWITCH TILT BRUSH LEFT SOLENOID SV22 118/GRY 119/WHT Pin 22 TILT BRUSH REAR EDGE DOWN SOLENOID Battery Positive + 118/GRY Pin 10 Battery Negative - Sentinel 9018524 (05-2019) -
Page 96: Vario Brush Arm Swing/Slide System
13/BLK 109/WHT 117/PUR 117/PUR Pin 19 BRUSH ARM SHIFT 117/PUR LEFT SOLENOID ARM MOVE/HEAD Pin 12 TILT SWITCH SV15 118/GRY 115/GRN Pin 17 BRUSH ARM PIVOT CW SOLENOID Battery Positive + 118/GRY Pin 10 Battery Negative - Sentinel 9018524 (05-2019) -
Page 97: Vario Brush Raise/Lower And Rotate Systems
VARIO BRUSH ROTATE COUNTER-CLOCKWISE 103/ORA SOLENOID 105/GRN Pin 7 SW31 SV29 105/GRN 105/GRN 103/ORA VARIO BRUSH RAISE SOLENOID 106/BLU Pin 6 SV24 VARIO BRUSH 106/BLU 106/BLU RAISE/LOWER SWITCH VARIO BRUSH LOWER SOLENOID Battery Positive + Battery Negative - Sentinel 9018524 (05-2019) -
Page 98: Electrical Troubleshooting
TROUBLESHOOTING ELECTRICAL TROUBLESHOOTING MAIN WIRE HARNESS DIAGRAM Sentinel 9018524 (05-2019) - Page 99 TROUBLESHOOTING MAIN WIRE HARNESS DIAGRAM Sentinel 9018524 (05-2019)
- Page 100 TROUBLESHOOTING MAIN WIRE HARNESS DIAGRAM Sentinel 9018524 (05-2019)
- Page 101 TROUBLESHOOTING MAIN WIRE HARNESS DIAGRAM Sentinel 9018524 (05-2019)
- Page 102 TROUBLESHOOTING MAIN WIRE HARNESS DIAGRAM Sentinel 9018524 (05-2019)
- Page 103 TROUBLESHOOTING MAIN WIRE HARNESS DIAGRAM Sentinel 9018524 (05-2019)
- Page 104 TROUBLESHOOTING MAIN WIRE HARNESS DIAGRAM Sentinel 9018524 (05-2019)
- Page 105 TROUBLESHOOTING MAIN WIRE HARNESS DIAGRAM Sentinel 9018524 (05-2019)
- Page 106 TROUBLESHOOTING MAIN WIRE HARNESS DIAGRAM Sentinel 9018524 (05-2019)
- Page 107 TROUBLESHOOTING MAIN WIRE HARNESS DIAGRAM Sentinel 9018524 (05-2019)
- Page 108 TROUBLESHOOTING MAIN WIRE HARNESS DIAGRAM Sentinel 9018524 (05-2019)
- Page 109 TROUBLESHOOTING MAIN WIRE HARNESS DIAGRAM Sentinel 9018524 (05-2019)
- Page 110 TROUBLESHOOTING MAIN WIRE HARNESS DIAGRAM Sentinel 9018524 (05-2019)
- Page 111 TROUBLESHOOTING MAIN WIRE HARNESS DIAGRAM Sentinel 9018524 (05-2019)
- Page 112 TROUBLESHOOTING MAIN WIRE HARNESS DIAGRAM Sentinel 9018524 (05-2019)
-
Page 113: Main Wire Harness Notes
TROUBLESHOOTING MAIN WIRE HARNESS NOTES Sentinel 9018524 (05-2019) - Page 114 TROUBLESHOOTING MAIN WIRE HARNESS NOTES Sentinel 9018524 (05-2019)
- Page 115 TROUBLESHOOTING MAIN WIRE HARNESS NOTES Sentinel 9018524 (05-2019)
-
Page 116: Cab Wire Harness Diagram
TROUBLESHOOTING CAB WIRE HARNESS DIAGRAM Sentinel 9018524 (05-2019) - Page 117 TROUBLESHOOTING CAB WIRE HARNESS DIAGRAM Sentinel 9018524 (05-2019)
-
Page 118: Cab Wire Harness Notes
TROUBLESHOOTING CAB WIRE HARNESS NOTES Sentinel 9018524 (05-2019) -
Page 119: Hopper Wire Harness Diagram
TROUBLESHOOTING HOPPER WIRE HARNESS DIAGRAM Sentinel 9018524 (05-2019) - Page 120 TROUBLESHOOTING HOPPER WIRE HARNESS DIAGRAM Sentinel 9018524 (05-2019)
-
Page 121: Hopper Wire Harness Notes
TROUBLESHOOTING HOPPER WIRE HARNESS NOTES Sentinel 9018524 (05-2019) -
Page 122: Vario Brush Harness Diagram (Option)
TROUBLESHOOTING VARIO BRUSH HARNESS DIAGRAM (OPTION) Sentinel 9018524 (05-2019) - Page 123 TROUBLESHOOTING VARIO BRUSH HARNESS DIAGRAM (OPTION) Sentinel 9018524 (05-2019)
- Page 124 TROUBLESHOOTING VARIO BRUSH HARNESS DIAGRAM (OPTION) Sentinel 9018524 (05-2019)
-
Page 125: Electrical Schematic Symbols
3 Phase AC Induction Motor Energized Relay Coil Adaptor Harness Motor Encoder N.C. Relay Contacts Sensor (Variable Resistor) Notes Momenary Switch N.O. N.O. Relay Contacts Assembly Contact Switch N.C. Horn or Alarm AC Plug Solenoid Valve Capacitor Light Sentinel 9018524 (05-2019) -
Page 126: Electrical Schematic
TROUBLESHOOTING ELECTRICAL SCHEMATIC - PAGE 1 356858-1076547 Sentinel 9018524 (05-2019) - Page 127 TROUBLESHOOTING ELECTRICAL SCHEMATIC - PAGE 2 356858-1076547 Sentinel 9018524 (05-2019)
- Page 128 TROUBLESHOOTING ELECTRICAL SCHEMATIC - PAGE 3 356858-1076547 Sentinel 9018524 (05-2019)
- Page 129 TROUBLESHOOTING ELECTRICAL SCHEMATIC - PAGE 4 356858-1076547 Sentinel 9018524 (05-2019)
- Page 130 TROUBLESHOOTING ELECTRICAL SCHEMATIC - PAGE 5 356858-1076547 Sentinel 9018524 (05-2019)
- Page 131 TROUBLESHOOTING ELECTRICAL SCHEMATIC - PAGE 6 356858-1076547 Sentinel 9018524 (05-2019)
- Page 132 TROUBLESHOOTING ELECTRICAL SCHEMATIC - PAGE 7 Sentinel 9018524 (05-2019)
- Page 133 TROUBLESHOOTING ELECTRICAL SCHEMATIC - PAGE 8 Sentinel 9018524 (05-2019)
- Page 134 TROUBLESHOOTING ELECTRICAL SCHEMATIC - PAGE 9 Sentinel 9018524 (05-2019)
- Page 135 TROUBLESHOOTING ELECTRICAL SCHEMATIC - PAGE 10 Sentinel 9018524 (05-2019)
- Page 136 TROUBLESHOOTING ELECTRICAL SCHEMATIC - PAGE 11 Sentinel 9018524 (05-2019)
-
Page 137: Engine Wire Harness And Schematic
TROUBLESHOOTING ENGINE WIRE HARNESS AND SCHEMATIC Sentinel 9018524 (05-2019) - Page 138 TROUBLESHOOTING Sentinel 9018524 (05-2019)
- Page 139 TROUBLESHOOTING Sentinel 9018524 (05-2019)
- Page 140 TROUBLESHOOTING RELAY 1 SUPPLY MODULE RELAY 2 LINE HEATER 1 RELAY 5 LINE HEATER 2 RELAY 6 LINE HEATER 3 KEY SWITCH RELAY 4 RELAY 8 STARTER LOCKOUT RELAY 3 RELAY 7 SPARE Sentinel 9018524 (05-2019)
- Page 141 TROUBLESHOOTING Sentinel 9018524 (05-2019)
-
Page 142: Operational Matrix
SV32 Hopper Door Vaccum close button, or hopper lift/ Latch, Open button to lower/forward/back is pushed. Open operate Valve SV17 remains on until hopper Block door closed button is pushed. RV4@2750 psi, OR5@0.063 in hopper control block. Sentinel 9018524 (05-2019) -
Page 143: Hopper System (Continued)
Port Circuit Pressure Setting Lower & SV4/ Main G2 / C3 / 2750 psi Restrictor 0.040 at C4 Tension SV31 Brush & G2 / G3 Chains Conveyor / T10 250 psi Valve Block In Relief Block Return Sentinel 9018524 (05-2019) -
Page 144: Conveyor System (Continued)
fl uid fl ow to left Motor and Block Brush / side brush lift cylinder through Down M3 Left SV7. Pilot operated check valve (Option) Cylinder at PC1. SV10 controls left side Return brush Lift Sentinel 9018524 (05-2019) -
Page 145: Enable System
Vario Brush Tilt Front Edge Down SV26 and SV11 on Vario Brush Tilt Left SV26 and SV23 on Vario Brush Tilt Right SV26 and SV6 on Vario Brush Lift SV26 and SV29 on Vario Brush Lower SV26 and SV24 on Sentinel 9018524 (05-2019) -
Page 146: Connector Pin Designations
TROUBLESHOOTING CONNECTOR PIN DESIGNATIONS MACHINE CONTROL BOARD CONNECTOR PIN DESIGNATIONS VARIO BRUSH CONTROL BOARD CONNECTOR PIN DESIGNATIONS NOTE: View shown from wire harness side of the connector Sentinel 9018524 (05-2019) -
Page 147: Vario Brush Pin Chart
106/Blue Connects #1 Arm Up/Hold Switch 0vDC 105/Green Not Used Output 0vDC 111/Pink SV26 Enable Solenoid Connects to #19 Connects to #18 Key ON, Power Input 103/Orange Ground 0vDC 0vDC 13/Black 0vDC 114/Yellow SV25 0vDC 115/Green SV15 Sentinel 9018524 (05-2019) -
Page 148: Component Locator
Valve Block (Top of Frame under Hopper) Blocked Conveyor Pressure Switch (S16) (Mounted on Main Brush / Conveyor Valve Block) Hopper Load Limit Switch (S25) (Frame Rail beside Right Spring Shackle) Hopper & Vacuum Fan Valve Block (Underside of Hopper) Sentinel 9018524 (05-2019) - Page 149 Brush / Conveyor Valve Block) Touch & Gauge Panels (In Cab, Front & Center) Low Water Level Switch for Wet Dust Control (S28) (Lower Left Corner of Water Tank) Fuse / Relay Panel (In Cab, Rear of Center Console) Sentinel 9018524 (05-2019)
- Page 150 Windshield Washer Motor (MTR3) 12-Volt Battery (Back of Cab) (Frame Top, Hopper Door Switch (S24) Beneath Hopper) (Left Rear Hopper Pivot) Fuel Level Sender Hopper Load Limit Switch (SNSR5) (Frame Top, (S25)(Frame Rail Beside Front of Conveyor) Right Spring Shackle) Sentinel 9018524 (05-2019)
-
Page 151: Component Locations Tables
Side Brush / Brake Release Frame mount, center, under cab 1237096 Vario Swing / Slide / Rotate Behind front bumper 1237097 Vario Arm Top of Vario arm 1237098 1 / 2 Main Brush / Conveyor Left frame under front of hopper Sentinel 9018524 (05-2019) - Page 152 Pressure Washer hydraulic valve block SOL1 Engine fuel Engine, conveyor side, below fuel injector pump SOL2 Reverse propel Top of propel pump SOL3 Forward propel Top of propel pump SOL4 Injector pump timing Engine, conveyor side, below fuel injector pump Sentinel 9018524 (05-2019)
-
Page 153: Hydraulic Troubleshooting
TROUBLESHOOTING HYDRAULIC TROUBLESHOOTING RESERVOIR HYDRAULIC HOSE GROUP Sentinel 9018524 (05-2019) -
Page 154: Steering And Brake Hydraulic Hose Group
TROUBLESHOOTING STEERING AND BRAKE HYDRAULIC HOSE GROUP Sentinel 9018524 (05-2019) -
Page 155: Steering/Brake/Right Side Brush Hydraulic Hose Group
TROUBLESHOOTING STEERING/BRAKE/RIGHT SIDE BRUSH HYDRAULIC HOSE GROUP Sentinel 9018524 (05-2019) -
Page 156: Conveyor And Main Brush Hydraulic Hose Group
TROUBLESHOOTING CONVEYOR AND MAIN BRUSH HYDRAULIC HOSE GROUP Sentinel 9018524 (05-2019) -
Page 157: Propel Hydraulic Hose Group
TROUBLESHOOTING PROPEL HYDRAULIC HOSE GROUP Sentinel 9018524 (05-2019) -
Page 158: Low Dump Hydraulic Hose Group
TROUBLESHOOTING LOW DUMP HYDRAULIC HOSE GROUP Sentinel 9018524 (05-2019) -
Page 159: High Dump Hydraulic Hose Group (Option)
TROUBLESHOOTING HIGH DUMP HYDRAULIC HOSE GROUP (OPTION) Sentinel 9018524 (05-2019) -
Page 160: Left Side Brush Hydraulic Hose Group (Option)
TROUBLESHOOTING LEFT SIDE BRUSH HYDRAULIC HOSE GROUP (OPTION) Sentinel 9018524 (05-2019) -
Page 161: High Pressure Sprayer Hydraulic Hose Group (Option)
TROUBLESHOOTING HIGH PRESSURE SPRAYER HYDRAULIC HOSE GROUP (OPTION) Sentinel 9018524 (05-2019) -
Page 162: Vario Brush Hydraulic Hose Group (Option)
TROUBLESHOOTING VARIO BRUSH HYDRAULIC HOSE GROUP (OPTION) Sentinel 9018524 (05-2019) -
Page 163: Left Steering Hydraulic Hose Group (Option)
TROUBLESHOOTING LEFT STEERING HYDRAULIC HOSE GROUP (OPTION) Sentinel 9018524 (05-2019) -
Page 164: Hydraulic Pumps Group
TROUBLESHOOTING HYDRAULIC PUMPS GROUP Hydraulic flange fitting Hydraulic gear pump extension O-ring seal O-ring seal Piston pump Hydraulic elbow fitting Hydraulic flange fitting Hydraulic pump adapter Hydraulic pump gasket 1-stage hydraulic FRONT gear pump Sentinel 9018524 (05-2019) -
Page 165: Hydraulic Main Brush/Conveyor Lift Valve Group
TROUBLESHOOTING HYDRAULIC MAIN BRUSH/CONVEYOR LIFT VALVE GROUP 13 GPM hydraulic solenoid valve 2400 psi pressure switch assembly Hydraulic valve mounting bracket Frame of FRONT machine Outer valve cover PVC trim Inner valve molding cover Sentinel 9018524 (05-2019) -
Page 166: Hydraulic Hopper Control Valve Group
TROUBLESHOOTING HYDRAULIC HOPPER CONTROL VALVE GROUP Frame of machine Hydraulic valve mounting angle 12 VDC hydraulic solenoid valve FRONT Sentinel 9018524 (05-2019) -
Page 167: Hydraulic Side Brush Valve Group
TROUBLESHOOTING HYDRAULIC SIDE BRUSH VALVE GROUP Frame of machine Hydraulic return tube 24 GPM hydraulic solenoid valve 12 VDC pressure switch Sentinel 9018524 (05-2019) -
Page 168: Hydraulic Manifold And Priority Valve Group
TROUBLESHOOTING HYDRAULIC MANIFOLD AND PRIORITY VALVE GROUP Hydraulic clamp channel Hydraulic coupling dust cap Hydraulic QDC fitting assembly Hydraulic clamp Hydraulic return cooler tube Hydraulic clamp Hydraulic accumulator dual valve FRONT Sentinel 9018524 (05-2019) -
Page 169: Vario Brush Hydraulic Control Group
TROUBLESHOOTING VARIO BRUSH HYDRAULIC CONTROL GROUP Hydraulic pump gasket Hydraulic gear pump Gear Undercarriage rack Hydraulic gear motor 12 VDC hydraulic solenoid control valve FRONT Sentinel 9018524 (05-2019) -
Page 170: Hydraulic Schematic
TROUBLESHOOTING HYDRAULIC SCHEMATIC - PAGE 1 1058282 Sentinel 9018524 (05-2019) - Page 171 TROUBLESHOOTING HYDRAULIC SCHEMATIC - PAGE 2 1058282 Sentinel 9018524 (05-2019)
- Page 172 TROUBLESHOOTING HYDRAULIC SCHEMATIC - PAGE 3 1058282 Sentinel 9018524 (05-2019)
- Page 173 TROUBLESHOOTING HYDRAULIC SCHEMATIC - PAGE 4 Sentinel 9018524 (05-2019)
- Page 174 TROUBLESHOOTING HYDRAULIC SCHEMATIC - PAGE 5 1058282 Sentinel 9018524 (05-2019)
-
Page 175: Hydraulic Symbols Key
TROUBLESHOOTING HYDRAULIC SYMBOLS KEY SUCTION LINE PRESSURE / FLOW LINE RETURN LINE Indicates Energized Solenoid Valve Coil EXAMPLES Circled envelope is valve position for indicated hydraulic circuit SV32 SV12 Energized Coils Non-Energized Coils SV13 Sentinel 9018524 (05-2019) -
Page 176: Solenoid Valve Details
SOLENOID VALVE DETAILS SV23 SV22 SV12 SV25 SV10 SV14 SV16 SV17 SV11 SV13 SV15 SV23 SV29 SV25 SV21 SV22 SV18 SV19 SV26 SV24 SV20 SV11 SV15 SOL3 SV28 SV29 SV30A SV30B SV31 SV32 SV33 SV27 SV24 SOL2 Sentinel 9018524 (05-2019) -
Page 177: Sentinel Conveyor And Main Brush Forward
TROUBLESHOOTING SENTINEL CONVEYOR AND MAIN BRUSH FORWARD SV12 2400 PS SV12 SUCTION LINE PRESSURE / FLOW LINE RETURN LINE SV13 Sentinel 9018524 (05-2019) -
Page 178: Sentinel Conveyor And Main Brush Reverse
TROUBLESHOOTING SENTINEL CONVEYOR AND MAIN BRUSH REVERSE 2400 PSI REVERSE SV13 SV12 SUCTION LINE PRESSURE / FLOW LINE RETURN LINE SV13 Sentinel 9018524 (05-2019) -
Page 179: Main Brush Lower
TROUBLESHOOTING MAIN BRUSH LOWER 2400 PSI LOWER SUCTION LINE PRESSURE / FLOW LINE RETURN LINE Sentinel 9018524 (05-2019) -
Page 180: Conveyor Lower
TROUBLESHOOTING CONVEYOR LOWER SV31 2400 PSI LOWER SUCTION LINE PRESSURE / FLOW LINE RETURN LINE SV31 Sentinel 9018524 (05-2019) -
Page 181: Main Brush Lift, Conveyor Lift, And Conveyor Chain Tension
TROUBLESHOOTING MAIN BRUSH LIFT, CONVEYOR LIFT, AND CONVEYOR CHAIN TENSION SV31 2400 PSI LIFT LIFT SUCTION LINE PRESSURE / FLOW LINE RETURN LINE SV31 Sentinel 9018524 (05-2019) -
Page 182: Right Side Brush Rotate And Lower
TROUBLESHOOTING RIGHT SIDE BRUSH ROTATE AND LOWER SV10 2200 PSI LOWER SUCTION LINE PRESSURE / FLOW LINE RETURN LINE SV10 Sentinel 9018524 (05-2019) -
Page 183: Left Side Brush Rotate And Lower
TROUBLESHOOTING LEFT SIDE BRUSH ROTATE AND LOWER SV10 2200 PSI LOWER SUCTION LINE PRESSURE / FLOW LINE RETURN LINE SV10 Sentinel 9018524 (05-2019) -
Page 184: Right And Left Side Brush Rotate And Lower
TROUBLESHOOTING RIGHT AND LEFT SIDE BRUSH ROTATE AND LOWER SV10 220 0 P S I 2200 PSI LOWER LOWER SUCTION LINE PRESSURE / FLOW LINE RETURN LINE SV10 Sentinel 9018524 (05-2019) -
Page 185: Right And Left Side Brush Lift
TROUBLESHOOTING RIGHT AND LEFT SIDE BRUSH LIFT 2200 PSI LIFT LIFT SUCTION LINE PRESSURE / FLOW LINE RETURN LINE Sentinel 9018524 (05-2019) -
Page 186: Vacuum Fans Run
TROUBLESHOOTING VACUUM FANS RUN SV32 SV14 SUCTION LINE PRESSURE / FLOW LINE SV14 SV32 RETURN LINE Sentinel 9018524 (05-2019) -
Page 187: Filter Shaker Run
TROUBLESHOOTING FILTER SHAKER RUN SV32 SV16 SUCTION LINE PRESSURE / FLOW LINE SV16 SV32 RETURN LINE Sentinel 9018524 (05-2019) -
Page 188: Vacuum Fans And Filter Shaker Off
TROUBLESHOOTING VACUUM FANS AND FILTER SHAKER OFF SV32 SV14 SUCTION LINE PRESSURE / FLOW LINE SV14 SV32 RETURN LINE Sentinel 9018524 (05-2019) -
Page 189: Hopper Tilt Back (Dump)
TROUBLESHOOTING HOPPER TILT BACK (DUMP) SV32 SV18 TILT B ACK SV19 SUCTION LINE PRESSURE / FLOW LINE RETURN LINE SV18 SV19 SV32 Sentinel 9018524 (05-2019) -
Page 190: Hopper Tilt Forward (Sweep Position)
TROUBLESHOOTING HOPPER TILT FORWARD (SWEEP POSITION) SV32 SV18 TILT FORWARD SV19 SUCTION LINE PRESSURE / FLOW LINE RETURN LINE SV18 SV19 SV32 Sentinel 9018524 (05-2019) -
Page 191: Hopper Lift - High Dump (Optional)
TROUBLESHOOTING HOPPER LIFT - HIGH DUMP (OPTIONAL) SV32 LIFT SUCTION LINE PRESSURE / FLOW LINE RETURN LINE SV32 Sentinel 9018524 (05-2019) -
Page 192: Hopper Lower - High Dump (Optional)
TROUBLESHOOTING HOPPER LOWER - HIGH DUMP (OPTIONAL) SV32 SV14 LOWER Note: Lowering of hopper is due to gravity (weight of hopper) SUCTION LINE PRESSURE / FLOW LINE RETURN LINE SV14 SV32 Sentinel 9018524 (05-2019) -
Page 193: Hopper Door Lock (Latch Closed)
TROUBLESHOOTING HOPPER DOOR LOCK (LATCH CLOSED) NOTE: SV 32 Energized for SV32 4 seconds when Hopper Door Close button is pressed SV17 LOCK SUCTION LINE PRESSURE / FLOW LINE RETURN LINE SV17 SV32 Sentinel 9018524 (05-2019) -
Page 194: Hopper Door Unlock (Latch Open)
TROUBLESHOOTING HOPPER DOOR UNLOCK (LATCH OPEN) NOTE: SV 32 Energized for SV32 4 seconds when Hopper Door Open button is pressed SV17 UNLOCK SUCTION LINE PRESSURE / FLOW LINE RETURN LINE SV17 SV32 Sentinel 9018524 (05-2019) -
Page 195: Vario Brush Slide Rotate Clockwise (Optional)
TROUBLESHOOTING VARIO BRUSH SLIDE ROTATE CLOCKWISE (OPTIONAL) ROTATE CLOCKWISE SV27 SUCTION LINE PRESSURE / FLOW LINE SV26 RETURN LINE SV28 SV26 SV27 Sentinel 9018524 (05-2019) -
Page 196: Vario Brush Slide Rotate Counterclockwise (Optional)
TROUBLESHOOTING VARIO BRUSH SLIDE ROTATE COUNTER- CLOCKWISE (OPTIONAL) SV28 ROTATE COUNTER-CLOCKWISE SUCTION LINE PRESSURE / FLOW LINE SV26 RETURN LINE SV28 SV26 SV27 Sentinel 9018524 (05-2019) -
Page 197: Vario Brush Swing Right - Clockwise (Optional)
TROUBLESHOOTING VARIO BRUSH SWING RIGHT - CLOCKWISE (OPTIONAL) SWING RIGHT (CLOCKWISE) SV15 SUCTION LINE PRESSURE / FLOW LINE SV26 RETURN LINE SV25 SV26 SV15 Sentinel 9018524 (05-2019) -
Page 198: Vario Brush Swing Left - Counterclockwise (Optional)
TROUBLESHOOTING VARIO BRUSH SWING LEFT - COUNTERCLOCKWISE (OPTIONAL) SV25 SWING LEFT (COUNTER-CLOCKWISE) SUCTION LINE PRESSURE / FLOW LINE SV26 RETURN LINE SV25 SV26 SV15 Sentinel 9018524 (05-2019) -
Page 199: Vario Brush Slide Right (Optional)
TROUBLESHOOTING VARIO BRUSH SLIDE RIGHT (OPTIONAL) SV21 SLIDE RIGHT SUCTION LINE PRESSURE / FLOW LINE SV26 RETURN LINE SV21 SV26 SV20 Sentinel 9018524 (05-2019) -
Page 200: Vario Brush Slide Left (Optional)
TROUBLESHOOTING VARIO BRUSH SLIDE LEFT (OPTIONAL) SLIDE LEFT SV20 SUCTION LINE PRESSURE / FLOW LINE SV26 RETURN LINE SV21 SV26 SV20 Sentinel 9018524 (05-2019) -
Page 201: Vario Brush Tilt Rear Edge Down (Optional)
TROUBLESHOOTING VARIO BRUSH TILT REAR EDGE DOWN (OPTIONAL) TILT REAR EDGE DOWN SV22 SUCTION LINE PRESSURE / FLOW LINE SV26 RETURN LINE SV22 SV26 SV11 Sentinel 9018524 (05-2019) -
Page 202: Vario Brush Tilt Front Edge Down (Optional)
TROUBLESHOOTING VARIO BRUSH TILT FRONT EDGE DOWN (OPTIONAL) TILT FRONT EDGE DOWN SV11 SUCTION LINE PRESSURE / FLOW LINE SV26 RETURN LINE SV22 SV26 SV11 Sentinel 9018524 (05-2019) -
Page 203: Vario Brush Tilt Left (Optional)
TROUBLESHOOTING VARIO BRUSH TILT LEFT (OPTIONAL) TILT LEFT SV23 SUCTION LINE PRESSURE / FLOW LINE SV26 RETURN LINE SV23 SV26 Sentinel 9018524 (05-2019) -
Page 204: Vario Brush Tilt Right (Optional)
TROUBLESHOOTING VARIO BRUSH TILT RIGHT (OPTIONAL) TILT RIGHT SUCTION LINE PRESSURE / FLOW LINE SV26 RETURN LINE SV23 SV26 Sentinel 9018524 (05-2019) -
Page 205: Vario Brush Lift (Optional)
TROUBLESHOOTING VARIO BRUSH LIFT (OPTIONAL) LIFT SV29 SUCTION LINE PRESSURE / FLOW LINE SV26 RETURN LINE SV29 SV26 SV24 Sentinel 9018524 (05-2019) -
Page 206: Vario Brush Lower (Optional)
TROUBLESHOOTING VARIO BRUSH LOWER (OPTIONAL) LOWER Note: Lowering of brush is due to gravity SV24 (weight of brush & arm) SUCTION LINE PRESSURE / FLOW LINE SV26 RETURN LINE SV29 SV26 SV24 Sentinel 9018524 (05-2019) -
Page 207: Right Turn
TROUBLESHOOTING RIGHT TURN STEERING / BRAKE PRIORITY VALVE TO COOLER INLET SUCTION LINE PRESSURE / FLOW LINE RETURN LINE STEERING VALVE ASSY. STEERING VALVE Sentinel 9018524 (05-2019) -
Page 208: Left Turn
TROUBLESHOOTING LEFT TURN STEERING / BRAKE PRIORITY VALVE TO COOLER INLET SUCTION LINE PRESSURE / FLOW LINE RETURN LINE STEERING VALVE ASSY. STEERING VALVE Sentinel 9018524 (05-2019) -
Page 209: Brake Pedal (Push)
TROUBLESHOOTING BRAKE PEDAL (PUSH) STEERING / BRAKE PRIORITY VALVE SUCTION LINE PRESSURE / FLOW LINE RETURN LINE BRAKE PEDAL FRONT REAR BRAKES BRAKES BRAKE VALVE Sentinel 9018524 (05-2019) -
Page 210: Brake Pedal (Release)
TROUBLESHOOTING BRAKE PEDAL (RELEASE) STEERING / BRAKE PRIORITY VALVE SUCTION LINE PRESSURE / FLOW LINE RETURN LINE BRAKE PEDAL FRONT REAR BRAKES BRAKES BRAKE VALVE Sentinel 9018524 (05-2019) -
Page 211: Propel System
TROUBLESHOOTING PROPEL SYSTEM (PAGE 1) Sentinel 9018524 (05-2019) -
Page 212: Propel System
TROUBLESHOOTING PROPEL SYSTEM (PAGE 2) Sentinel 9018524 (05-2019) -
Page 213: Operational Matrix
SV32 Hopper Door Vaccum close button, or hopper lift/ Latch, Open button to lower/forward/back is pushed. Open operate Valve SV17 remains on until hopper Block door closed button is pushed. RV4@2750 psi, OR5@0.063 in hopper control block. Sentinel 9018524 (05-2019) -
Page 214: Hopper System (Continued)
Port Circuit Pressure Setting Lower & SV4/ Main G2 / C3 / 2750 psi Restrictor 0.040 at C4 Tension SV31 Brush & G2 / G3 Chains Conveyor / T10 250 psi Valve Block In Relief Block Return Sentinel 9018524 (05-2019) -
Page 215: Conveyor System (Continued)
fl uid fl ow to left Motor and Block Brush / side brush lift cylinder through Down M3 Left SV7. Pilot operated check valve (Option) Cylinder at PC1. SV10 controls left side Return brush Lift Sentinel 9018524 (05-2019) - Page 216 Vario Brush Tilt Front Edge Down SV26 and SV11 on Vario Brush Tilt Left SV26 and SV23 on Vario Brush Tilt Right SV26 and SV6 on Vario Brush Lift SV26 and SV29 on Vario Brush Lower SV26 and SV24 on Sentinel 9018524 (05-2019)
-
Page 217: Component Locator
(Top of Frame under Hopper) SV3, SV4, SV12, SV13, SV31 Steering / Brake Priority Valve (Center Frame under Cab) 1239746 Hopper & Vacuum Fan Valve Block (Underside of Hopper) SV1, SV2, SV14, SV16, SV17, SV18, SV19, SV32 Sentinel 9018524 (05-2019) - Page 218 Component Diagram 2 1239746 Hopper & Vacuum Fan Valve Block (Underside of Hopper) SV1, SV2, SV14, SV16, SV17, SV18, SV19, SV32 1237098 Main Brush & Conveyor Valve Block (Top of Frame under Hopper) SV3, SV4, SV12, SV13, SV31 Sentinel 9018524 (05-2019)
- Page 219 (Top of Propel Pump) Speed Control Valve (Underside of Cab, below Propel foot pedal) 767212 Front & Rear Brake Valve (Underside of Cab, below Brake Pedal) 1237099 Pressure Washer Valve Block (Frame Top, forward of Fuel Filler Neck) SV33 Sentinel 9018524 (05-2019)
-
Page 220: Component Locations Tables
Vario brush lower SV25 Swing Vario brush arm left SV26 Enable Vario brush Vario Swing/Slide/Rotate hydraulic valve block SV27 Vario brush rotate clockwise SV28 Vario brush rotate counterclockwise SV29 Vario brush raise Vario Arm hydraulic valve block Sentinel 9018524 (05-2019) - Page 221 Main Brush/Conveyor hydraulic valve block SV32 1 / 2 Enable hopper Hopper/Vacuum Fan hydraulic valve block SV33 Pressure washer Pressure Washer hydraulic valve block SOL2 Reverse propel Top of propel pump SOL3 Forward propel Top of propel pump Sentinel 9018524 (05-2019)
-
Page 222: Service
USB port on the Authorized service providers can download the Service Diagnostics software. Factory-Direct Tennant Service personnel have this software installed on their ServiceLink devices. A USB cable connects from the notebook to an external port on the control console (USB to mini USB adapter cable required). - Page 223 (if applicable). 5. The Service Diagnostics tool automatically detects a new interface module installation if a new interface module was installed. Enter the model and serial number and then click the arrow button. Sentinel 9018524 (05-2019)
- Page 224 Do not interrupt process unless prompted to do so. 9. Cycle the key switch to save selections after Machine Setup Complete appears on the screen. Sentinel 9018524 (05-2019)
-
Page 225: Updating The Machine Firmware
NOTE: Computer may prompt a restart after Master Firmware” begins. The process installing the machine driver. Decline the restart, indicator and fi rmware update status bar close Service Diagnostics, and relaunch Service appear on the left side of the screen. Diagnostics. Sentinel 9018524 (05-2019) - Page 226 9. Click the Release Notes button to access the key switch. attached PDF notes for the fi rmware updates. 10. Refer to the PDF notes to confi rm the fi rmware updates and fi xes to the machine. Sentinel 9018524 (05-2019)
-
Page 227: Reconfi Guring The Machine After New
3. Double click the Service Diagnostics desktop shortcut or fi nd the software in All Programs to launch the software. NOTE: Computer may prompt a restart after installing the machine driver. Decline the restart, close Service Diagnostics, and relaunch Service Diagnostics. Sentinel 9018524 (05-2019) - Page 228 8. Click on the Advanced menu located on the left side of the screen. A password box will appear on the screen. 10. Enter the password into the password box and click the OK button. Contact T.A.C. (Tennant Assistance Center) for required password. Sentinel 9018524 (05-2019)
- Page 229 No button if not reconfi guring the machine. 12. Access the advanced confi guration screen to reset component hours or record old hours on repair order for warranty purposes. 13. Cycle the key switch to save and exit the Advanced Confi guration screen. Sentinel 9018524 (05-2019)
-
Page 230: Accessing Support Documentation
3. Double click the Service Diagnostics desktop shortcut or fi nd the software in All Programs to launch the software. NOTE: Computer may prompt a restart after installing the machine driver. Decline the restart, close Service Diagnostics, and relaunch Service Diagnostics. Sentinel 9018524 (05-2019) - Page 231 Click the Service Manual button to access the most current revision of the Service Manual. Click the Tech Doc Index button to access the Technical Documentation Index for IBs (Instruction Bulletins) and TSBs (Technical Service Bulletins) for the Sentinel. Sentinel 9018524 (05-2019)
-
Page 232: Downloading The Diagnostic Log
NOTE: The parking brake switch must be set to access the supervisor setting screen. Access to the supervisor setting screen is not permitted until the parking brake switch is set. New Checklists All Checklists 00000 12:35 PM 00000 Diagnostic Log 1750 Sentinel 9018524 (05-2019) - Page 233 fl ash drive from the machine. 50.0% 7. Remove the fl ash drive from USB port and turn off the machine when export is complete. 8. Plug the fl ash drive into a computer to view/ download the diagnostic log. Sentinel 9018524 (05-2019)
-
Page 234: Controls Group
16-position ribbon cable Heat-A/C louver Heat-A/C louver Center control panel console Rubber grommet Control panel brace plate Rubber grommet 12-Amp bridge diode Acoustic Air duct insulation Vario FRONT diode/timer Diode circuit board plug Sentinel 9018524 (05-2019) -
Page 235: Replacing The Ui (User Interface) Circuit Board
The previously labeled camera cables must be reconnected to the same terminals where they were previously connected. If the camera cables are not connected to the correct locations, the cameras will the reversed on the UI. Sentinel 9018524 (05-2019) - Page 236 Time Set and Calibrate Touch buttons. NOTE: The parking brake switch must be set to access the settings menu screen. Access to the settings menu screen is inhibited until the parking brake switch is set. 00000 12:35 PM 00000 1750 Sentinel 9018524 (05-2019)
-
Page 237: Calibrate Touch Button
Carefully and quickly press each of the fi ve “+” images on the touchscreen as they appear on the touchscreen display. Press each of the images only once. The touchscreen may not calibrate correctly if the image(s) are pressed for too long or more than once. Sentinel 9018524 (05-2019) -
Page 238: Date/Time Set Button
Press the back button to save the date and navigate back to the previous screen. Press the time button when fi nished changing the date to proceed to the time screen. Sentinel 9018524 (05-2019) -
Page 239: Conveyor/Hopper Group
Roll pins (Qty. 2) Bearing Roller Split housing bearing Sprocket Retainer collar Hydraulic Roll pins gear motor (Qty. 9) Flange bearing Strap spacers Split Bearing cap sprocket retainer strap Lower FRONT shaft Lower Lower bearing cap bearing cap Sentinel 9018524 (05-2019) - Page 240 Roll pins Sprocket hub Bearing (Qty. 2) plate Right side Sprocket panel Center shaft Bearing cup retainer strap Lower bearing cap Guide angles Strap spacers Traction Flange wheel bearing Sprocket hub Lower FRONT shaft Split collar Sentinel 9018524 (05-2019)
- Page 241 Link Links Urethane spring Plugs Retainer block Link Urethane spring Right conveyor lift plate Chain guides Guide angles Left conveyor lift plate Hydraulic cylinder Hydraulic cylinder Conveyor frame Guide angles Chain guides FRONT Deflector plate Deflector plate Sentinel 9018524 (05-2019)
- Page 242 Bronze sleeve bushings Upper link Hydraulic cylinder Strike Roller Rod end plate retainer Guide roller Down adjustment stop Sleeve Push Pivot link Guide roller Support plate Support Conveyor plate support Bronze sleeve bushings Lift arm FRONT Sentinel 9018524 (05-2019)
- Page 243 Upper link roller Roller bearing Strike retainer plate Rod end Push link Roller retainer Down adjustment stop Hydraulic cylinder Guide roller Pivot pin Support plate Guide roller Support Conveyor Sleeve plate support Bronze sleeve bushings Lift arm FRONT Sentinel 9018524 (05-2019)
- Page 244 31.1 in. skirt strip rubber skirt Retainer strip Bulb seal Side deflector skirts (Qty. 2) 31.1 in. backup 5.5 in. Not included strip in conveyor rubber 5.5 in. Conveyor assembly skirt backup trough strip Bulb seal Seal strip Sentinel 9018524 (05-2019)
-
Page 245: Replacing The Conveyor Chains
6. Remove the upper rear panel from the conveyor. 7. Position a small bottle jack on the conveyor so the jack is under the portion of the sprocket/ sprocket hub assembly nearest to either the left of right side panel. Sentinel 9018524 (05-2019) - Page 246 16. Repeat Steps 7-16 to remove the spring block located on the other side of the conveyor Sprocket assembly. Sprocket hub Center shaft 19. Remove the main brush from the machine. See MAINTENANCE section for instructions how to remove the main brush from the machine. Sentinel 9018524 (05-2019)
- Page 247 40. Start the machine and operate the conveyor. Listen for chattering/grinding noises indicating there is binding/alignment issues with chain(s)/ conveyor assembly. 41. Remove the hopper support pin and completely lower the hopper. Sentinel 9018524 (05-2019)
-
Page 248: Axle Assembly/Brakes
(bleeder valves) 4.5-24 VDC speed sensor Ball valve w/handle FRONT Rear Axle Group Brake Right rear line hose brake line Brake line hose Right rear brake line Rear axle Hydraulic straight fittings (bleeder valves) FRONT Sentinel 9018524 (05-2019) - Page 249 Grease zerk Spacer Magnetic Flange plug Half shim Pivoting hub Front Gasket axle housing Bearing Left pivot Dust cap rod end Front steering rod Dust cap Bearing Gasket Pivoting hub Right pivot rod end Lower steering lever Sentinel 9018524 (05-2019)
- Page 250 Stator discs *NOTE: Ring, cover, and driven flange used on front axle wheel hub/brake only. Seals **NOTE: A spanner socket is required to remove this nut to any further remove service brake assembly and/or axle assembly from machine. Sentinel 9018524 (05-2019)
- Page 251 Brake Spacer Bearing Plugs Cover (Qty. 3) Springs (Qty. 3) Circlip Stator discs *NOTE: A spanner socket is required to remove this nut to any further remove service brake Seals assembly and/or axle assembly from machine. Sentinel 9018524 (05-2019)
-
Page 252: Disassembling The Axle
fl ush hoses and fi ttings with air, solvent, or hydraulic fl uid. NOTE: Discard all hydraulic fl uid drained from the hydraulic system. Use only new approved hydraulic fl uid to replenish hydraulic reservoir. Sentinel 9018524 (05-2019) - Page 253 Auto-Lube fi ttings from the steering housing. wheel hub. 12. Front axle only: Remove the cover from the fl ange. 9. Reposition pan as necessary to drain hydraulic fl uid from the service brake assembly in the following step. Sentinel 9018524 (05-2019)
- Page 254 15. Front axle only: Remove the fl ange from the wheel hub. Rear axle only: Remove the hub cover from the wheel hub. 18. Remove the nut and washer from the wheel hub. Sentinel 9018524 (05-2019)
- Page 255 20. Remove twelve socket screws securing the brake assembly to the axle assembly. 24. Cover the exposed axle assembly. 21. Remove the brake assembly from the spindle 25. Remove the hardware at the top of the assembly. assembly. Sentinel 9018524 (05-2019)
- Page 256 34. Machines with Auto-Lube option: Install the 28. Cover the exposed axle assembly. fi tting onto the bottom of the steering housing assembly and connect the Auto Lube hose to the fi tting. Sentinel 9018524 (05-2019)
-
Page 257: Installing The Service Brake Assembly
4. Evenly tighten the hardware installed in the previous step to secure the service brake assembly onto the axle. 5. Connect the hydraulic hose to the service brake assembly . Sentinel 9018524 (05-2019) - Page 258 7. Align the rotor disk teeth. The teeth on each rotor disk must be aligned so the wheel hub 9. Carefully insert the wheel hub into the brake can be installed onto the brake hub assembly. hub assembly. 10. Insert the bearing into the wheel hub. Sentinel 9018524 (05-2019)
- Page 259 16. Bend the locking washer tab into the notch in the big nut to secure the big nut into place. 14. After reaching the 270 Nm (200 ft. lbs.) torque back the nut slightly off from the 270 Nm (200 ft. lbs.) to release the torque. Sentinel 9018524 (05-2019)
- Page 260 fl ange to the wheel hub. 20. Install the shoulder screws to secure the drive fl ange to the wheel hub. 23. Ensure the bottom fi tting on the service brake assembly is fi rmly tightened inside the service brake assembly. Sentinel 9018524 (05-2019)
- Page 261 A right angle funnel, gear lube bottle, 35. Check the hydraulic fl uid level. Replenish the or fl ex extension funnel can also be used for fi lling hydraulic system with fresh hydraulic fl uid as the service brake assembly. necessary. Sentinel 9018524 (05-2019)
-
Page 262: Installing The Service Brake Seal Kit
0° C (32° F) or less. 6. Use a green scouring pad to clean the piston. Do Not use an emery cloth or sandpaper since these abrasive products could damage the sealing surfaces of the piston. Sentinel 9018524 (05-2019) - Page 263 Do Not brake hub. Be careful to not twist or damage damage the piston while tapping it into the seal while installing it into the brake hub. brake hub. Sentinel 9018524 (05-2019)
- Page 264 (9 ft. lbs.) 24. Install a stator disk into the brake hub and on 28. Carefully tap the seal into the cover. Do Not top the piston. bend or damage the seal when tapping it into the cover. Sentinel 9018524 (05-2019)
- Page 265 fl uid (Mobilfl uid 424). so the circlip completely secures the piston in place inside the brake hub. 35. Proceed to INSTALLING THE SERVICE BRAKE ASSEMBLY. Sentinel 9018524 (05-2019)
-
Page 266: Removing The Parking Brake Assembly
fl ush hoses and fi ttings with air, solvent, or hydraulic fl uid. NOTE: Discard all hydraulic fl uid drained from the hydraulic system. Use only new approved hydraulic fl uid to replenish hydraulic reservoir. Sentinel 9018524 (05-2019) - Page 267 Allow the hydraulic piston motor to hang by the hydraulic hoses. 13. Use emery cloth to clean all remaining dirt and RTV sealant residue from the parking brake mounting surface. 10. Remove the hardware securing the parking brake to the front differential. Sentinel 9018524 (05-2019)
- Page 268 Thread four hex screws (SCREW, HEX, .31-18 X 1.50, G5 - Tennant part number 76957) into the piston. Use the hex screws to evenly push the piston out from the spring plate/pressure plate assembly.
- Page 269 27. Place the rotor disks, stator disks, and primary disk onto the spring plate, align the disks onto the spring plate, and hand thread four socket screws enough to hold the disks onto the spring plate. Do Not completely tighten. Sentinel 9018524 (05-2019)
- Page 270 fl ush with the top of the top rotor disk. 32. Clean remaining sealant/debris/dirt from the exposed surface of the cover plate still installed on the front differential. 33. Install the parking brake assembly onto the cover plate. Sentinel 9018524 (05-2019)
- Page 271 fl oor jack be used to help support the hydraulic piston motor when reinstalling the motor onto the parking brake assembly. 37. Reconnect the hydraulic hose to the parking brake assembly. Sentinel 9018524 (05-2019)
-
Page 272: Hopper
NOTE: Mark hydraulic hoses with locations of where they are attached. Markings make it easier to reconnect hoses to proper locations. NOTE: Discard all drained hydraulic fluid. Use only new approved hydraulic fluid to replenish hydraulic reservoir. Sentinel 9018524 (05-2019) - Page 273 10. Carefully lower the vacuum fan assembly so replenish hydraulic reservoir. it is hanging from the hopper by the hoses. Do not brake/damage hydraulic hoses or connections. 11. Remove the hardware securing the intake impeller to the vacuum fan hydraulic motor shaft. Sentinel 9018524 (05-2019)
-
Page 274: Lights/Cameras/Alarms/Sensors
Dome light Color camera 197.0 in. camera cable 28.0 in. camera cable Side brush Color flood light camera Color Headlight camera adapter plates Headlight Amber Turn signal signal light grommet Turn signal FRONT Headlight grommet Amber signal light Sentinel 9018524 (05-2019) - Page 275 3. If necessary, remove parts/components to 9. Reconnect the battery cables to the battery. better access the light, camera, or alarm. 4. Remove the hardware securing the light, camera, alarm, or thermal switch from the machine/mounting bracket. Sentinel 9018524 (05-2019)
-
Page 276: Air Conditioner System
All local, state, and federal laws and regulations must be followed for refrigerant recovery and recycling. Use R-134a Freon to recharge the air conditioner condenser and evaporator. Use ZXL 100 PG compressor oil when changing/ replenishing air conditioner compressor oil. Sentinel 9018524 (05-2019)
Need help?
Do you have a question about the SENTINEL and is the answer not in the manual?
Questions and answers