Tennant sentinel Operator's Manual
Hide thumbs
Also See for sentinel:
- Operator's manual (132 pages) ,
- Service manual (276 pages) ,
- Operator's manual (150 pages)

Related Manuals for Tennant sentinel


Summary of Contents for Tennant sentinel
- Page 1 SENTINEL Sweeper Operator Manual TennantTruet Parts and Supplies North America / International 331000 Rev. 07 (5-2010) *331000* www.tennantco.com Home Find... Go To..
- Page 2 Engine exhaust from this product contains chemicals known to the State of California to cause cancer, birth defects, or other reproductive harm. Thermo- -Sentry, Total View and Vario Sweeping Brush are US registered trademarks of Tennant Company. Specifications and parts are subject to change without notice.
-
Page 3: Table Of Contents
..... LATCHES ......Sentinel 331000 (5- -10) Home Find... Go To.. - Page 4 ....MACHINE JACKING ....Sentinel 331000 (5- -10) Home Find... Go To..
- Page 5 INDEX ....... . . Sentinel 331000 (5- -10) Home Find... Go To..
-
Page 6: Safety Precautions
- - In flammable or explosive areas unless - - Use cardboard to locate leaking designed for use in those areas. hydraulic fluid under pressure. - - Use Tennant supplied or approved 2. Before starting machine: replacement parts. - - Check for fuel leaks. - Page 7 WARNING: Raised cab may fall. Engage cab support bar. WARNING: Do not spray people or animals. Severe personal injury can result. Wear eye protection. Hold sprayer with two hands. Sentinel 331000 (11- -09) Home Find... Go To..
- Page 8 RAISED CAB LABEL - - Located above the side brush(es). Located below the cab on the frame. BRUSH LINKAGE LABEL (VARIO SWEEPING BRUSH) - - Located on the front of the machine. 354168 Sentinel 331000 (11- -09) Home Find... Go To..
- Page 9 LIFT ARMS LABEL (High Dump) - - Located on the side of the hopper lift. 354168 Sentinel 331000 (11- -09) Home Find... Go To..
-
Page 10: Operation
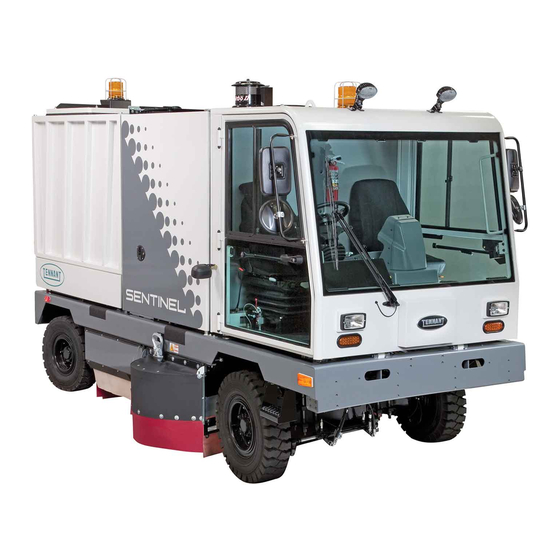
- Order parts and supplies directly from your authorized TENNANT representative. Use the parts manual provided when ordering parts. - The model SENTINEL has a GVWR of 9072 kg (20,000 lb) or 4536 kg (10,000 lb) per axle. Operate only on surfaces capable of supporting this weight. -
Page 11: Machine Components
Diesel Engine Conveyor Hopper Dust Filters Vacuum Fan Hopper Door Vacuum Wand (Option) Hopper Lift Main Brush Side Brush(es) Water Tank (right side) M. Fuel Tank (right side) Vario Sweeping Brush (Option) Sentinel 331000 (6- -06) Home Find... Go To.. -
Page 12: Control Panel Symbols
Vario Sweeping Brush Arm Swing Left Vacuum Wand Door Vario Sweeping Brush Arm Swing Right Hopper Overload Vario Sweeping Brush Up--Down Heater Vario Sweeping Brush Rotation Forward Air Conditioner Reverse Flow Rate Sentinel 331000 (6- -06) Home Find... Go To.. - Page 13 Engine Oil Pressure Hazard Light Voltmeter Side Brush Spot Light Hourmeter Rear Night Sweeping Light Brush Down Front Night Sweeping Light Hopper Tilt Back High Pressure Washer Hopper Tilt Forward Hopper Lift Hopper Lower Sentinel 331000 (6- -03) Home Find... Go To..
-
Page 14: Controls And Instruments
Vario Sweeping Brush On- -Off Switch (Option) Ignition Switch Brake Pedal Propelling Pedal Steering Wheel Tilt Lever Parking Lights, Headlights, Bright Headlights, Signal And Horn Switch Throttle Lever M. Directional Lever Accessory Power Socket Sentinel 331000 (9- -08) Home Find... Go To.. - Page 15 Parking Lights, Headlights, Bright Headlights, Signal And Horn Switch Vario Sweeping Brush On- -Off Switch (Option) Vario Sweeping Brush Raise- -Lower Switch (Option) M. Vario Sweeping Brush Joystick (Option) Vario Sweeping Brush Tilt/Arm Switch (Option) Sentinel 331000 (9- -08) Home Find... Go To..
- Page 16 Left Side Brush Water Valve Knob (Option) Vario Sweeping Brush Left Water Valve Knob (Option) Vario Sweeping Brush Right Water Valve Knob (Option) Right Side Brush Water Valve Knob (Option) Fuses (Under cover) Sentinel 331000 (6- -06) Home Find... Go To..
- Page 17 M. Hopper Lower Switch (High Dump Model) Hopper Door Open Switch Hopper Door Close Switch Water Pump Switch (Option) Left Side Brush Switch Right Side Brush Switch Filter Shaker Switch Conveyor Reverse Switch Vacuum Fan Switch Sweep Switch Sentinel 331000 (6- -03) Home Find... Go To..
- Page 18 Side Brush Spot Light(s) Switch Rear Night Sweeping Light Switch (Option) Front Night Sweeping Light Switch (Option) High Pressure Washer Switch (Option) Dome Light And Map Switch Radio And Cassette Player (Option) Sentinel 331000 (6- -03) Home Find... Go To..
-
Page 19: Operation Of Controls
SEAT BELTS The seat belts are located on each seat. Always fasten the seat belts and adjust them for proper fit before operating the machine. Sentinel 331000 (6- -03) Home Find... Go To.. -
Page 20: Steering Wheel
To tilt the steering wheel, push straight in on lever under the boot. Position the steering wheel at the desired position, then release the lever. Sentinel 331000 (9- -08) Home Find... Go To.. -
Page 21: Parking Lights, Headlights, Bright Headlights, Signal, And Horn Switch
Windshield Wipers Slow Speed: Pull the switch lever to the first position. Windshield Wipers Slow Speed: Pull the switch lever to the second position. Windshield Washer Fluid Spray: Push the switch lever end in. Sentinel 331000 (9- -08) Home Find... Go To.. -
Page 22: Ignition Switch (For Machines Serial Number 007709 And Below)
The travel speed is indicated with the speedometer. See the SPEEDOMETER section of this manual. NOTE: The machine’s travel speed is limited to 5 mph when the hopper is tilted or raised. Sentinel 331000 (9- -08) Home Find... Go To.. -
Page 23: Brake Pedal
NOTE: Machine will not start unless the directional lever is in the neutral position. The machine will not propel with the parking brake on. Reverse: Pull the lever down into the Reverse position. Sentinel 331000 (9- -07) Home Find... Go To.. -
Page 24: Throttle Lever
Brush Tilt: Press the left side of the switch to control the brush tilt with the joystick. Brush Arm: Press the right side of the switch to control the brush arm movement with the joystick. Sentinel 331000 (6- -06) Home Find... Go To.. -
Page 25: Vario Sweeping Brush Joystick (Option)
Slide Sweeping Brush Arm Right: Move and hold the lever to the right until the arm slides into the desired position. WARNING: Brush linkage pinch points. Stay clear when linkage is moving. Sentinel 331000 (6- -06) Home Find... Go To.. -
Page 26: Vario Sweeping Brush On--Off Switch (Option)
Raise brush: Press and hold the right side of the switch. Release the switch when the brush is raised to the desired height. Sentinel 331000 (6- -06) Home Find... Go To.. -
Page 27: Bright Headlights Light
Refer to the PARKING BRAKE SWITCH section of this manual. SIGNAL LIGHT The signal light arrows flash when the turn signals are used or when the 4-way warning lights are on. Sentinel 331000 (6- -03) Home Find... Go To.. -
Page 28: Glow Plug Light
WARNING: Flammable materials can cause explosion or fire. Do not use flammable materials in tank. Only use water. Sentinel 331000 (6- -03) Home Find... Go To.. -
Page 29: Vacuum Wand Door Light (Option)
(7000 lb). The hopper should be dumped when the overload light comes on. HEATER KNOB The heater knob controls the heater temperature. Increase: Turn the heater knob clockwise. Decrease: Turn heater the knob counter-clockwise. Sentinel 331000 (6- -03) Home Find... Go To.. -
Page 30: Fan Knob
If desired, the vents can be closed on the passenger side of the cab for more air flow to the drivers side of the cab. The vents in front of the dash panel are for defrosting. Sentinel 331000 (6- -03) Home Find... Go To.. -
Page 31: Low Brake Pressure Light
11_ and the side to side incline is more than 4_. The machine will not high dump when this light is on. FOR SAFETY: Only dump the hopper on a level surface. Sentinel 331000 (6- -03) Home Find... Go To.. -
Page 32: Engine Shutdown Override Switch
When this happens, this switch will NOT indicate that it is set. See LOW BRAKE PRESSURE LIGHT section of this manual. Sentinel 331000 (6- -06) Home Find... Go To.. -
Page 33: Left Side Brush Water Valve Knob (Option)
If this is NOT done when the machine is shut off, water will continue to flow. NOTE: The water pump switch needs to be on for the water valves to operate. Sentinel 331000 (6- -03) Home Find... Go To.. -
Page 34: Vario Sweeping Brush Right Water Valve Knob (Option)
If this is NOT done when the machine is shut off, water will continue to flow. NOTE: The water pump switch needs to be on for the water valves to operate. Sentinel 331000 (6- -06) Home Find... Go To.. -
Page 35: Fuses
Auto Lube (option) FU-24 10 A Vario Front Brush FU-25 10 A Radio FU-26 10 A Wipers FU-27 15 A Neutral Start Propel FU-28 15 A Daytime Running Lights FU-29 80 A Preheat Sentinel 331000 (12- -03) Home Find... Go To.. -
Page 36: Engine Water Temperature Gauge
1800 will turn off the engine. This keeps the engine km/h from being damaged. To override this automatic shutdown, refer to the ENGINE SHUTDOWN 000239 OVERRIDE SWITCH section of this manual. 351927 Sentinel 331000 (6- -03) Home Find... Go To.. -
Page 37: Voltmeter
1800 km/h 000239 351927 SPEEDOMETER The speedometer displays the machines travel speed. Use this for determining the proper operating speed for sweeping and transporting. 1800 km/h 000239 351927 Sentinel 331000 (6- -03) Home Find... Go To.. -
Page 38: Tachometer
(above 2000 RPM), the green km/h SWEEP light will blink and an audio alarm will sound. This will continue for 15 seconds, then the 000239 sweeping functions will stop and raise. 351927 Sentinel 331000 (6- -03) Home Find... Go To.. -
Page 39: Switch Panel
NOTE: The hopper lift and tilt switches will not operate unless the parking brake is set or the service brake is applied. WARNING: Lift arm pinch point. Stay 351926 clear of hopper lift arms. Sentinel 331000 (6- -03) Home Find... Go To.. -
Page 40: Hopper Lift Switch (High Dump Model)
NOTE: The hopper lift and tilt switches will not operate unless the parking brake is set or the service brake is applied. WARNING: Lift arm pinch point. Stay clear of hopper lift arms. 351926 Sentinel 331000 (6- -03) Home Find... Go To.. -
Page 41: Hopper Door Open Switch
The water pump will shut off automatically when the water tank low light comes on. NOTE: The water valve knobs must be turned open for the wet dust control system to work. 351926 Sentinel 331000 (6- -03) Home Find... Go To.. -
Page 42: Left Side Brush Switch (Option)
The light next to the switch will come on while the filter is shaking. The filter will shake for about 30 seconds, then it will stop and the light will turn off. 351926 Sentinel 331000 (6- -03) Home Find... Go To.. -
Page 43: Conveyor Reverse Switch
Press the switch to turn on the vacuum fan. The light next to the switch will come on. Press the switch again to turn the vacuum fan off. The light will turn off. 351926 Sentinel 331000 (6- -03) Home Find... Go To.. -
Page 44: Sweep Switch
15 seconds. See the TACHOMETER section of this manual. To stop and raise the sweeping functions, press the sweep switch again. The lights next to these sweeping function switches will turn off. Sentinel 331000 (6- -03) Home Find... Go To.. -
Page 45: 4-Way Warning Lights Switch
On: Press the top of the side brush spot light(s) switch. The light(s) will come on. Off: Press the bottom of the side brush spot light(s) switch. The light(s) will go off. Sentinel 331000 (6- -03) Home Find... Go To.. -
Page 46: Rear Night Sweeping Light Switch (Option)
Off: Press the bottom of the high pressure washer switch. The light will go off. FOR SAFETY: When using pressurized air or water, wear eye and ear protection. Sentinel 331000 (6- -03) Home Find... Go To.. -
Page 47: Dome And Map Light Switch
Open the Main Brush Access Doors: Pull on the rubber latch until the door is loose. Remove the door by pulling the door from the pins in the machine frame. Sentinel 331000 (9- -07) Home Find... Go To.. -
Page 48: Traffic Advisor Signal Light Switch (Option)
The light strip in the lower right hand corner of the controller mirrors the light pattern that is being displayed on the traffic advisor signal light on the back of the machine. Sentinel 331000 (6- -03) Home Find... Go To.. -
Page 49: Hopper Support Pin
See ENGAGING HOPPER SUPPORT PIN section of this manual. WARNING: Raised hopper may fall. Engage hopper support pin. The hopper support pin is stored on the right rear fender under the hopper. Sentinel 331000 (6- -03) Home Find... Go To.. -
Page 50: Hopper Support Bar (High Dump Model)
See ENGAGING HOPPER SUPPORT BAR section of this manual. WARNING: Raised hopper may fall. Engage hopper support bar. The hopper support bar is stored on the right side of the lift arms. Sentinel 331000 (6- -03) Home Find... Go To.. -
Page 51: How The Machine Works
Vario Sweeping Brusht (F), and an optional left side brush. There is also either a wet or dry dust control system. When sweeping is finished, clean the hopper dust filter (K) and empty the hopper (I). Sentinel 331000 (6- -03) Home Find... Go To.. -
Page 52: Pre-Operation Checklist
Clean as required. - Check the brakes and steering for proper operation. - Check the fuel level. - Empty the debris hopper. - Check the service records to determine maintenance requirements. Sentinel 331000 (6- -03) Home Find... Go To.. -
Page 53: Starting The Machine
Place your foot on the brake pedal or set the parking brake. NOTE: The machine will not propel unless the operator is in the seat. 3. Move the throttle lever back to the idle position. Sentinel 331000 (9- -07) Home Find... Go To.. - Page 54 Severe respiratory damage or asphyxiation can result. Provide adequate ventilation. Consult with your regulatory agency for exposure limits. Keep engine properly tuned. 8. Adjust the throttle lever to the desired engine speed. Sentinel 331000 (9- -08) Home Find... Go To..
- Page 55 When transporting to the sweeping area and equipped with the Vario Sweeping Brusht, lock the brush into the travel support with the guide pin. FOR SAFETY: When using machine, always follow safety and traffic rules. Sentinel 331000 (9- -07) Home Find... Go To..
-
Page 56: Sweeping And Brush Information
OPERATION SWEEPING AND BRUSH INFORMATION The model Sentinel has a GVWR of 9072 kg (20,000 lb) or 4536 kg (10,000 lb) per axle. Operate only on surfaces capable of supporting this weight. Avoid bulky debris such as crates, boxes, tree branches, and very heavy material. -
Page 57: Sweeping
351926 3. When sweeping light litter (leaves or light trash) check that the conveyor stop brackets are flipped back in position on both sides of the machine. Sentinel 331000 (6- -03) Home Find... Go To.. - Page 58 2000 RPM, the green SWEEP light will blink and an audio alarm will sound. This will 351927 continue for 15 seconds, then the main sweeping functions will lift and turn off. Sentinel 331000 (9- -07) Home Find... Go To..
- Page 59 NOTE: The side brushes will automatically turn on with the SWEEP SWITCH IF they were in the on position when the sweep switch was last turned off. 351926 Sentinel 331000 (6- -03) Home Find... Go To..
- Page 60 The opening can be cleared by redistributing the debris in the hopper. To do this, stop sweeping and tilt the hopper back. Then return the hopper to the sweeping position and continue to sweep. Sentinel 331000 (6- -03) Home Find... Go To..
-
Page 61: Stop Sweeping
Refer to the wet dust control system section of this manual. 351926 3. Check to make sure all the sweeping function lights are out. If any lights are lit, press the switch to turn it off. 351926 Sentinel 331000 (6- -03) Home Find... Go To.. - Page 62 The filter will shake for about 30 seconds. The light next to the switch will come on while the filter is shaking, then turn off. NOTE: Shake the dust filter before tilting the hopper. 351926 Sentinel 331000 (6- -06) Home Find... Go To..
-
Page 63: Emptying The Hopper
NOTE: The minimum clearance height needed to high dump the hopper is 5060 mm (16.6 in). 351926 WARNING: High dump vertical clearance. Stay clear of overhead obstructions and power lines. Sentinel 331000 (6- -03) Home Find... Go To.. - Page 64 6. Press and hold the hopper tilt back switch until the hopper is in the desired tilted position, then release the switch. An audio alarm will sound when the hopper is moving. 351926 Sentinel 331000 (9- -07) Home Find... Go To..
- Page 65 9. Press and hold the brake pedal with your foot. NOTE: The hopper will not lift or tilt unless the parking brake is set or the service brake is applied. Sentinel 331000 (9- -07) Home Find... Go To..
- Page 66 12.For High Dump Model: Press and hold the hopper lower switch until the hopper is fully lowered, then release the switch. An audio alarm will sound when the hopper is moving. 351926 Sentinel 331000 (6- -03) Home Find... Go To..
-
Page 67: Stop The Machine
3. Move the throttle lever back to the idle position. 4. Turbo Charged Engines: Allow the engine to operate for at least 30 seconds at low idle before shutting the engine off. Sentinel 331000 (9- -07) Home Find... Go To.. - Page 68 7. Turn off all accessories such as lights, water valves, and the cab fan. Even with the machine off, many of these accessories will continue to operate unless turned off. Sentinel 331000 (9- -08) Home Find... Go To..
-
Page 69: Post-Operation Checklist
- Lubricate the conveyor chain. - Check the brakes and steering for proper operation. - Check the fuel level - Empty the debris hopper. - Check the service records to determine maintenance requirements. Sentinel 331000 (11- -09) Home Find... Go To.. -
Page 70: Engaging Hopper Support Pin
An audio alarm will sound when the hopper is moving. NOTE: The hopper will not lift or tilt unless the parking brake is set or the service brake is applied. 351926 Sentinel 331000 (9- -07) Home Find... Go To.. - Page 71 6. Turn the ignition switch key counter-clockwise to stop the engine. Remove the switch key. FOR SAFETY: Before leaving or servicing machine, stop on level surface, set parking brake, turn off machine and remove key. Sentinel 331000 (9- -08) Home Find... Go To..
-
Page 72: Disengaging Hopper Support Pin
351926 4. Pull the throttle lever back to the idle position, then turn the ignition switch key counter-clockwise to stop the engine. Remove the switch key. Sentinel 331000 (9- -07) Home Find... Go To.. -
Page 73: Engaging Hopper Support Bar (High Dump Model)
NOTE: The hopper will not lift or tilt unless the parking brake is set or the service brake is applied. 351926 4. Remove the hopper support bar from the storage location on the right side of the lift arms. Sentinel 331000 (6- -03) Home Find... Go To.. - Page 74 Then release the bar. 8. Pull the throttle lever back to the idle position, then turn the ignition switch key counter-clockwise to stop the engine. Remove the switch key. Sentinel 331000 (6- -03) Home Find... Go To..
-
Page 75: Disengaging Hopper Support Bar (High Dump Model)
4. Pull the throttle lever back to the idle position, then turn the ignition switch key counter-clockwise to stop the engine. Remove the switch key. 351926 Sentinel 331000 (9- -07) Home Find... Go To.. -
Page 76: Operation On Inclines
It will come on when the front to back incline is more than 11_ (20%) and the side to side incline is more than 4_. The machine will not high dump when this light is on. Sentinel 331000 (6- -03) Home Find... Go To.. -
Page 77: Options
2. Move the Vario Sweeping Brush from the storage position with the joystick. Then use Vario Sweeping Brush tilt/arm switch and the joystick to move the brush to the desired left--right and up--down position. Sentinel 331000 (6- -06) Home Find... Go To.. - Page 78 Vario Sweeping Brush joystick . 4. Set the Vario Sweeping Brush tilt/arm switch to the brush tilt position and adjust the front and side angle of the brush with the Vario Sweeping Brush joystick. Sentinel 331000 (6- -06) Home Find... Go To..
-
Page 79: Wet Dust Control System
3. The water level can easily be seen on the side of the water tank. The water tank is located behind the access door on the left side of the machine. Sentinel 331000 (6- -06) Home Find... Go To.. - Page 80 The water pump will shut off soon after this light comes on. NOTE: Do not use the water system on wet roads. Turn off the water pump and water valves. Sentinel 331000 (6- -03) Home Find... Go To..
-
Page 81: Vacuum Wand
351926 3. Remove the vacuum wand door tool from the storage location on the right rear fender. WARNING: Lift arm pinch point. Stay clear of hopper lift arms. Sentinel 331000 (6- -03) Home Find... Go To.. - Page 82 351926 6. Press the vacuum fan switch to turn on the vacuum fan. The light next to the switch will come on. 351926 Sentinel 331000 (3- -05) Home Find... Go To..
- Page 83 WARNING: Lift arm pinch point. Stay clear of hopper lift arms. 14. Press and hold the hopper tilt forward switch until the hopper is fully forward. Sentinel 331000 (9- -07) Home Find... Go To..
-
Page 84: Cab Jack
3. Disconnect both door springs from the back of the cab. The springs can remain attached to the doors. 4. Block the windshield wiper hose with a small cable tie or clamp. Sentinel 331000 (9- -07) Home Find... Go To.. - Page 85 8. Reinstall the hardware to secure the cab, remove the cable tie from the windshield wiper fluid hose, and reinstall both door springs to the back of the cab. Sentinel 331000 (9- -07) Home Find... Go To..
-
Page 86: Tilting The Cab (Manually)
2. Disconnect both door springs from the back of the cab. The springs can remain attached to the doors. 3. Block the windshield wiper hose with a small cable tie or clamp. Sentinel 331000 (5- -10) Home Find... Go To.. - Page 87 WARNING: Raised cab may fall. Engage cab support bar. 7. Keep the chain from the overhead hoist attached as added support. Sentinel 331000 (5- -10) Home Find... Go To..
-
Page 88: Machine Troubleshooting
Brake pressure too low Contact service personnel Operator not in seat Sit in seat Parking brake on Release parking brake Directional lever in neutral Move directional lever in forward or reverse position Sentinel 331000 (6- -06) Home Find... Go To.. - Page 89 Vacuum fan not on Turn vacuum fan on Vacuum fan failure Contact TENNANT service per- sonnel Worn brush skids Replace brush skids Brush skids not completely down Check for obstruction then lower skids completely Sentinel 331000 (6- -03) Home Find... Go To..
-
Page 90: Maintenance
MAINTENANCE MAINTENANCE NOTE: Numbered references for maintenance chart pages 87, 88. Sentinel 331000 (11- -09) Home Find... Go To.. -
Page 91: Maintenance Chart
Alternator/fan belt Check tension Air conditioner belt (option) Check tension Engine air filter Check the dust cap Hopper tilt Lubricate Hopper lift (option) Lubricate Wheels Check wheel nut torque Skids Check for wear Sentinel 331000 (3- -05) Home Find... Go To.. - Page 92 TennantTrue premium hydraulic fluid or equivalent Waterproof bearing grease (TENNANT part no. 765819) . . . Distilled water, coolant conditioner (TENNANT part no. 770172) and permanent-type ethylene glycol anti-freeze, --34_ C (--30_ F) ..Automotive-type windshield washer fluid .
-
Page 93: Lubrication
MAINTENANCE LUBRICATION 351930 NOTE: Lettered references for lubrication section of manual pages 89 thru 94. Sentinel 331000 (11- -09) Home Find... Go To.. -
Page 94: Hopper Tilt (Low Dump)
The last two grease fittings are located at the hopper tilt pivot, one on each side. Lubricate these fittings with Waterproof Bearing grease (TENNANT part no. 765819) after every 100 hours of operation. WARNING: Raised hopper may fall. -
Page 95: Steering Cylinder
MAINTENANCE D. STEERING CYLINDER Each steering cylinder has one grease fitting. Lubricate with Waterproof Bearing grease (TENNANT part no. 765819) after every 200 hours of operation. E. WHEEL PIVOTS POINTS The wheel pivots points have eight grease fittings. Lubricate with Waterproof Bearing grease (TENNANT part no. -
Page 96: Vario Sweeping Brush (Option)
MAINTENANCE G. VARIO SWEEPING BRUSH (OPTION) The brush pivot has two grease fittings. Lubricate with Waterproof Bearing grease (TENNANT part no. 765819) after every 200 hours of operation. H. CONVEYOR BEARINGS There are four bearing grease fittings. Lubricate daily with Waterproof Bearing grease (TENNANT part no. -
Page 97: Conveyor Chain
Fill the engine with oil to the level indicated on the oil dipstick. The engine oil capacity is 11.7 L (12.4 qt) including the oil filter. FOR SAFETY: When servicing machine, avoid moving parts. Do not wear loose jackets, shirts, or sleeves. Sentinel 331000 (6- -03) Home Find... Go To.. -
Page 98: Differential
L. MAIN BRUSH SUPPORT RODS The main brush support rods have a total of eight grease fittings, four on each side. Lubricate with Waterproof Bearing grease (TENNANT part no. 765819) daily. Sentinel 331000 (6- -03) Home Find... Go To.. -
Page 99: Hydraulics
TennantTrue Fluid Previous Fluid NOTE: Change the hydraulic fluid, filter, and suction strainer after every 800 hours for ALL machines that have NOT consistently used TennantTrue premium hydraulic fluid or equivalent. Sentinel 331000 (5- -10) Home Find... Go To.. -
Page 100: Replacing Hydraulic Fluid Filter
(Allow to drain for approx. 5 minutes). 4. Lift the filter and internal bowl out of the reservoir and place into an oil pan. Remove the top part of the filter element. Sentinel 331000 (5- -10) Home Find... Go To.. -
Page 101: Hydraulic Fluid
19 L Synthetic (5 gal) If using a locally--available hydraulic fluid, be sure the specifications match the Tennant hydraulic fluid specifications. Substitute fluids can cause premature failure of hydraulic components. Synthetic fluids offer several advantages. Synthetic fluids can operate in a wider range of extreme temperatures. -
Page 102: Hydraulic Hoses
Reconnect the hose to the left lift cylinder. Start the engine and check hydraulic system for leaks. Cycle the sweep mode and observe the conveyor lift for proper operation. Sentinel 331000 (6- -06) Home Find... Go To.. -
Page 103: Engine
--34_ C (--30_ F) rating. Add coolant to the overflow reservoir. Add one pint of conditioner (TENNANT part no. 770172) to each coolant change. FOR SAFETY: When servicing machine, avoid contact with hot engine coolant. -
Page 104: Air Filter
On standard engines, install the end cap on the air filter housing with the rubber dust cap facing downward. On turbo engines, the dust cap is on the housing. Sentinel 331000 (6- -03) Home Find... Go To.. -
Page 105: Air Intake Screen
The fuel water separator separates water from the diesel fuel. It is located on the bottom of the fuel filter. Open the separator daily to allow any accumulated water to drain out. Sentinel 331000 (6- -03) Home Find... Go To.. -
Page 106: Fuel Lines
Engine valve lash adjustment is required after the first 250 hours of operation, then after every 1000 hours of operation after that. Allow the valves to cool before checking valves. Refer to the manufacturer’s maintenance manual. Sentinel 331000 (11- -09) Home Find... Go To.. -
Page 107: Cab Filters
The wet dust control filter is located under the cab between the front wheels. Clean the water filter every 200 hours of operation by removing it and flushing it with clean water. Sentinel 331000 (6- -03) Home Find... Go To.. -
Page 108: Windshield Wiper Blades
200 hours after that, clean and tighten the battery connections. FOR SAFETY: When servicing machine, avoid contact with battery acid. Wear eye and ear protection. NOTE: When the battery is disconnected, the parking brake will come on automatically. Sentinel 331000 (6- -03) Home Find... Go To.. -
Page 109: Belts And Chains
A static drag chain prevents the buildup of static electricity in the machine. The chain is attached to the machine at the rear main brush skirt. Make sure the chain is touching the floor at all times. Sentinel 331000 (6- -03) Home Find... Go To.. -
Page 110: Debris Hopper
3. Remove the nuts holding the filter shaker frame in the hopper. 4. Pull the filter shaker frame and filter out of the hopper. 5. Drill out the rivets holding the filter to the shaker frame. 351931 Sentinel 331000 (6- -03) Home Find... Go To.. -
Page 111: Thermo Sentry
The Thermo Sentry will automatically reset when the air temperature in the hopper falls below 60° ± 3° C (140° ± 5° F). Sentinel 331000 (6- -06) Home Find... Go To.. -
Page 112: Conveyor
Remove the top conveyor panel from rear of the conveyor to access the inside of the conveyor. FOR SAFETY: When servicing machine, wear eye and ear protection when using pressurized air or water. Sentinel 331000 (6- -03) Home Find... Go To.. -
Page 113: Brushes
3. Stop the engine. FOR SAFETY: Before leaving or servicing machine, stop on level surface, set parking brake, turn off machine and remove key. 351926 4. Remove the right side main brush access door. Sentinel 331000 (11- -09) Home Find... Go To.. - Page 114 5. Remove the hardware holding the skid plates to the brush idler plate. 6. Remove the hardware holding the links to the brush idler plate. Remove the brush chains and the skid chain. Sentinel 331000 (6- -03) Home Find... Go To..
- Page 115 17. Mount the skid plates to the idler plate with the hardware removed earlier. 18. Put the right side main brush access door back on the machine. 19. Check and adjust the main brush pattern. Sentinel 331000 (6- -03) Home Find... Go To..
-
Page 116: To Check And Adjust Main Brush Pattern
6. To increase the width of the main brush pattern, turn the main brush down pressure nut counter-clockwise. To decrease the width of the main brush pattern, turn the main brush down pressure nut clockwise. Sentinel 331000 (6- -03) Home Find... Go To.. -
Page 117: Side Brush
WARNING: Side brush can move. Do not step on side brush. 5. Mount the new side brush to the drive hub with the hardware removed earlier. 6. Check the sidebrush linkage for wear and loose hardware. Sentinel 331000 (11- -09) Home Find... Go To.. -
Page 118: Skirts And Seals
The skirt should clear the ground by 3 mm (0.125 in). Check the skirt for wear or damage daily. NOTE: Tire pressure and a full hopper will affect skirt clearances. Sentinel 331000 (6- -03) Home Find... Go To.. -
Page 119: Conveyor Skirts
Check the seals for wear or damage every 100 hours of operation. The cab doors have seals located along their door edges. Check the seals for wear or damage every 100 hours of operation. Sentinel 331000 (6- -03) Home Find... Go To.. -
Page 120: Conveyor Seals
The hopper seals are located on the hopper door, the hopper filter cover, the dust filter, and the front opening of the hopper. Check the seals for wear or damage every 100 hours of operation. Sentinel 331000 (6- -03) Home Find... Go To.. -
Page 121: Skids
Change the fluid after every 1600 hours of operation. PARKING BRAKE The parking brake is set with the parking brake switch. The dry multi--disk brake unit is located between the differential and the propelling motor. Sentinel 331000 (6- -03) Home Find... Go To.. -
Page 122: Tires
This will settle the system. WHEEL NUTS Check the wheel nut torque on the four wheels every 100 hours of operation. The proper torque is 260 -- 305 Nm (190 -- 225 ft lb). Sentinel 331000 (6- -06) Home Find... Go To.. -
Page 123: Pushing, Towing, And Transporting The Machine
When finished pushing or towing, loosen the nuts on the bypass valves with a 13 mm wrench. Turn out the set screws with a 4 mm allen wrench until they top out. Tighten the nuts. Sentinel 331000 (6- -03) Home Find... Go To.. -
Page 124: Transporting The Machine
5. Position the machine onto the truck or trailer as far as possible. If the machine starts to veer off the centerline of the truck or trailer, stop and turn the steering wheel to center the machine. Sentinel 331000 (6- -03) Home Find... Go To.. - Page 125 Do not drive the machine off the truck or trailer unless the loading surface is horizontal AND 380 mm (15 in) or less from the ground. Sentinel 331000 (6- -03) Home Find... Go To..
-
Page 126: Machine Jacking
The rear jacking locations are the rear axle. FOR SAFETY: When servicing machine, block machine tires before jacking machine up. FOR SAFETY: When servicing machine, jack machine up at designated locations only. Block machine up with jack stands. 351930 Sentinel 331000 (6- -03) Home Find... Go To.. -
Page 127: Storing Machine
FREEZE PROTECTION FOR THE HIGH PRESSURE WASHER OPTION 1. Flush the pump with a 50/50 mixture of antifreeze and water before winter storage. Sentinel 331000 (6- -06) Home Find... Go To.. -
Page 128: Specifications
1016 mm (40.0 in) Hopper dump height (high dump) 2895 mm (114 in) Vibration level at steering wheel does not exceed 2.5 m/s Vibration level at operator seat does not exceed 0.5 m/s Sentinel 331000 (5- -10) Home Find... Go To.. -
Page 129: General Machine Performance
Naturally aspirated: API diesel classification CG4 or better Turbo: API diesel classification CG4 or better Air conditioner Refrigerant R134a -- total system capacity, 1.9 kg (4 lb) PAG -- Refrigerant oil, 59.148 ml (2 oz.) Sentinel 331000 (5- -10) Home Find... Go To.. -
Page 130: Power Type (S/N 008500-- )
Ply Rating Pressure Front and Rear (4) Bias Ply Pneumatic 7 x 12 in 930--1000 kPa (135--145 psi) Front and Rear (4) Radial Pneumatic 7 x 12 in 930--1000 kPa (135--145 psi) Sentinel 331000 (11- -09) Home Find... Go To.. -
Page 131: Machine Dimensions
3025 mm (119 in) 2920 mm (115 in) 1750 mm (69 in) To Step 1510 mm 1780 mm (59.5 in) 2210 mm (70 in) (87 in) 5230 mm (206 in) BOTTOM VIEW 351930 MACHINE DIMENSIONS Sentinel 331000 (6- -03) Home Find... Go To.. -
Page 132: Index
Replacing main brush, 111–114 Latches, 45 Replacing side brush, 115 Left side brush switch, 40 Side brush, 115 Left side brush water valve knob, 31 Side brush bristle length, 115 Low brake pressure light, 29 Sentinel 331000 (5- -10) Home Find... Go To.. - Page 133 Conveyor stop brackets, 55 Clogged air filter light, 26 Cylinder, Steering , Lubrication, 93 Coolant level, 50, 67 Cooling system, 101 Engine shutdown override switch, 30 engine valve, 104 Fuel filter, 103 Sentinel 331000 (5- -10) Home Find... Go To..
- Page 134 Hydraulic fluid reservoir, 97 Speedometer, 35 Hydraulic fluid reservoir filter, 98 Tachometer, 36 Hydraulic fluid reservoir filter gauge, 98 Voltmeter, 35 Hydraulic hoses, 100 Glow plugs light, 26 GVWR, 8, 54, 126 Sentinel 331000 (5- -10) Home Find... Go To..
- Page 135 007053 and below), 18 Door latch, 45 Steering wheel tilt (For machines serial number Door skirts, 116 007054 and above), 18 Maintenance, 111 Throttle, 22 Replacing, 111–114 Support rods, 96 Lighter, cigarett, 21 Sentinel 331000 (5- -10) Home Find... Go To..
- Page 136 Disengaging hopper support pin, 70–71 Engaging hopper support bar, 71–73 Engaging hopper support pin, 68–70 Hopper support bar, 48 Hopper support pin, 47 Labels, 6 Precautions, 4 Vario sweeping brush lock pin, 22 Sentinel 331000 (5- -10) Home Find... Go To..
- Page 137 Vario sweeping brush on--off, 24 Steering wheel tilt lever (For machines serial Vario sweeping brush raise--lower, 24 number 007054 and above), 18 Vario sweeping brush tilt/arm , 22 Water pump, 39 Windshield wiper and washer, 19 Sentinel 331000 (5- -10) Home Find... Go To..
- Page 138 Joystick, 23 Left water valve knob, 31 Lock pin, 22 Lubrication, 94 On--off switch, 24 Operation, 75–77 Raise--lower switch, 24 Right water valve knob, 32 Tilt/arm switch, 22 Vents, Air circulation, 28 Sentinel 331000 (5- -10) Home Find... Go To..
Need help?
Do you have a question about the sentinel and is the answer not in the manual?
Questions and answers