Tennant S30 Operator's Manual
Hide thumbs
Also See for S30:
- Parts manual (332 pages) ,
- Service information manual (136 pages) ,
- Operator's manual (68 pages)

Related Manuals for Tennant S30


Summary of Contents for Tennant S30
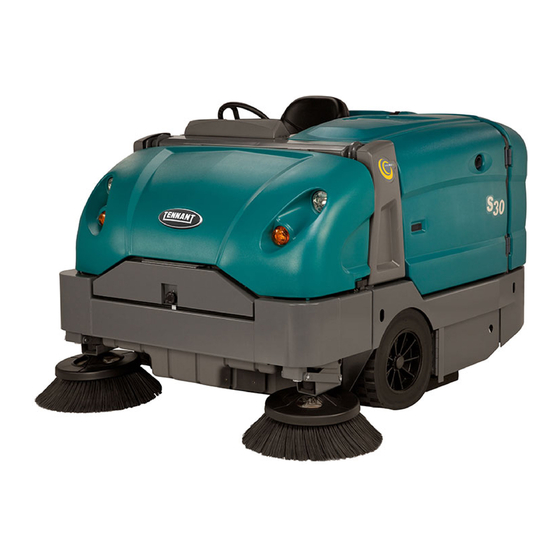
- Page 1 (Gas/LPG) Sweeper Operator Manual SweepSmart System North America / International 9004080 Rev. 02 (12-2008) *9004080* www.tennantco.com...
- Page 2 Thermo- -Sentry, 1- -STEP, EasyOpen, MaxPro, InstantAccess, II- -Speed, Perma- -Filter, Duramer, Lower Total Cost of Ownership, Touch- -N- -Go, and Cab Forward ErgoSpace are US registered and unregistered trademarks of Tennant Company. Specifications and parts are subject to change without notice.
-
Page 3: Table Of Contents
CONTROLS AND INSTRUMENTS ..CONTROLS (OPTION) ... TOUCH PANEL (S30 XP and X4) ..WINDSHIELD WIPER SYMBOL DEFINITIONS . - Page 4 INDEX ........S30 Gas/LPG 9004080 (2- -08)
-
Page 5: Safety Precautions
5. Before leaving or servicing machine: - - Stop on level surface. Apply parking brake before leaving - - Set parking brake. machine. - - Turn off machine and remove key. S30 9004080 (2- -08) - Page 6 Keep area well ventilated. - - Use cardboard to locate leaking hydraulic fluid under pressure. - - Use Tennant supplied or approved replacement parts. 7. When loading/unloading machine onto/off truck or trailer: - - Turn off machine.
- Page 7 LPG ENGINE LABEL - - Located next to the ignition switch on the instrument panel. (LPG machines only) HOPPER LIFT ARMS LABEL - - Located on both hopper lift arms. 354590 S30 9004080 (2- -08)
- Page 8 FOR SAFETY LABEL - - Located on the side of the operator compartment. RAISED HOPPER LABEL - - Located on the hopper lift arm. VACUUM / BLOWER WAND LABEL - - Located on the optional vacuum or blower wands. 354590 S30 9004080 (2- -08)
-
Page 9: Operation
2. Front shroud 9. Operator seat 3. Hopper access door 10. Rear engine shroud 4. Hopper 11. Taillights 5. Side brush 12. Side shroud 6. Headlights 13. Hopper support bar 7. Main brush access door 14. Top cover S30 9004080 (2- -08) -
Page 10: Controls And Instruments
13. Side brush lever 14. Side brush adjustment knob 15. Main brush lever 16. Hopper door switch 17. Hopper raise / lower switch 18. Engine speed switch 19. Vacuum fan / filter shaker switch 20. Indicator panel S30 9004080 (2- -08) -
Page 11: Touch Panel (S30 Xp And X4)
OPERATION TOUCH PANEL (S30 XP and X4) 1. Supervisor control buttons 2. Hour meter / fuel indicator / fault code indicator 3. Contrast control button 4. 1- -STEP sweep button 5. Engine speed button 6. Vacuum fan button 7. Side brush button 8. -
Page 12: Symbol Definitions
Side brush (S30 XP and X4) Hopper Door Manual Open (S30) Filter shaker (S30 XP and X4) Hopper Lower (S30) Hopper Up / Down (S30 XP and X4) Hopper Raise (S30) Hopper raise (S30 XP and X4) Wand Hopper lower (S30 XP and X4) -
Page 13: Operation Of Controls
1. Step on the Steering column tilt pedal and adjust the steering column to the desired BRAKE PEDAL position. Press the Brake pedal to stop the machine. 2. Release the Steering column tilt pedal to lock in place. S30 9004080 (2- -08) -
Page 14: Fuel Gauge
The fuel level fault indicator will The LPG fuel gauge on the tank displays the illuminate when the fuel tank is near empty. Refer amount of fuel in the LPG tank. to DISPLAY MODULE FAULT INDICATOR(S). S30 XP and X4 S30 9004080 (2- -08) -
Page 15: Hour Meter
Idle Speed: This speed is for starting the was operated. Use this information to determine machine. machine service intervals. NOTE: S30 XP and X4 machines automatically start in idle speed. S30 XP and X4 Medium (Fast 1) Speed: This speed is for general sweeping. -
Page 16: Vacuum Fan Controls (S30)
OPERATION VACUUM FAN CONTROLS (S30) VACUUM FAN CONTROLS (S30 XP and X4) The vacuum fan automatically comes on when the The vacuum fan automatically comes on when the main brush is lowered with the Vacuum fan switch 1- -STEP Sweep button is activated. The light next in the automatic/on position. -
Page 17: Filter Shaker Control (S30)
All Lights Off: Press the bottom of the Operating / hazard light switch. FILTER SHAKER CONTROL (S30 XP and X4) The filter shaker automatically activates for about 30 seconds when the 1- -STEP Sweep button is turned off. -
Page 18: Operator Seat
The operator seat has three adjustments: backrest angle, operator weight, and front to back. The backrest adjustment knob adjusts the angle of the backrest. SEAT BELTS FOR SAFETY: Before starting machine, adjust seat and fasten seat belt (if equipped). S30 9004080 (2- -08) -
Page 19: Brush Information
NOTE: The amount and type of soilage play an pedal slows and stops the machine. important role in determining the type of brushes to use. Contact a Tennant representative for The side brush sweeps debris into the path of the specific recommendations. -
Page 20: Changing The Lpg Tank
9. Slowly open the tank service valve and check for leaks. If a leak is found, immediately close the service valve and inform the appropriate personnel. S30 9004080 (6- -08) -
Page 21: Starting The Machine
Keep engine properly tuned. 3. S30: Place the Engine speed switch into the idle position. TURNING OFF THE MACHINE S30 XP and X4: The engine will automatically start in the idle speed. -
Page 22: While Operating The Machine
FOR SAFETY: When using machine, go slow on inclines and slippery surfaces. Maximum rated climb and descent for a full hopper is 10_/18%. Maximum rated climb and descent for an empty hopper is 14_/25%. S30 9004080 (2- -08) -
Page 23: Sweeping (S30)
FOR SAFETY: When using machine, go slow on inclines and slippery surfaces. NOTE: Turn off the vacuum fan when sweeping over large wet areas or standing water. This prevents the dust filter from getting wet while sweeping. S30 9004080 (2- -08) -
Page 24: Sweeping (S30 Xp And X4)
OPERATION 8. To stop sweeping, press the Brake pedal to stop the machine. SWEEPING (S30 XP and X4) 9. Raise the brushes. FOR SAFETY: Do not operate machine, unless operator manual is read and understood. 1. Start the machine. NOTE: Make sure the sweep modes / settings are set before sweeping. -
Page 25: Emptying The Hopper
3. Press and hold the Hopper raise switch or button to raise the hopper. S30 XP and X4 7. S30: Place the Hopper door switch in the automatic position to close the hopper door. S30 XP and X4: Press the Hopper door close button to close the hopper door. -
Page 26: Engaging The Hopper Support Bar
10. Press and hold the Hopper lower switch or 4. Rotate the support bar down into the hopper button to completely lower the hopper. support clip. S30 XP and X4 WARNING: Raised hopper may fall. Engage hopper support bar. ENGAGING THE HOPPER SUPPORT BAR 5. -
Page 27: Disengaging The Hopper Support Bar
OPERATION DISENGAGING THE HOPPER SUPPORT BAR 1. Start the machine. 2. Completely raise the hopper. S30 XP and X4 3. Set the parking brake. 4. Rotate the hopper support bar up into the storage clip. 5. Completely lower the hopper. -
Page 28: Display Module Fault Indicators (S30)
OPERATION DISPLAY MODULE FAULT INDICATORS (S30) The fault indicator lights illuminate when a fault has occurred. Stop the machine immediately and correct the problem if these indicators come on. Refer to the table below to determine the cause and remedy for the fault. -
Page 29: Fault Indicator(S) (S30 Xp And X4)
OPERATION The LCD will display a fault code. If there is more FAULT INDICATOR(S) (S30 XP and X4) than one fault, each fault will alternately display. This machine is equipped with two visual indicators, a red indicator light and an LCD (liquid crystal display). -
Page 30: Dash Fault Indicators
4: Hazard Flasher Not Used Not Used 5: Glow Plug -- Preheat Not Used Not Used (Diesel machines only) 6: Check Engine Engine control system detects a Shut off machine. fault during machine operation Contact TENNANT service representative S30 9004080 (2- -08) -
Page 31: Options
S30 XP and X4 8. Clean the area as needed. 9. S30: Press the Wand switch to shut off the vacuum fan. Then set the engine to idle speed. S30 XP and X4: Press the Vacuum fan button to shut off the vacuum fan. -
Page 32: Heater / Air Conditioner Controls (Option)
Use the Fan knob to control Press the Cab light switch to operate the cab the air conditioner temperature. light. Use the Fan knob to control the fan speed. This knob affects the heater and air conditioner. S30 9004080 (2- -08) -
Page 33: Tower Bumpers (Option)
To open the bumpers: 1. Pull the pin from the bracket and the bumper. 06745 2. Open the bumper. 3. Close and secure the tower bumpers before operating the machine. S30 9004080 (2- -08) -
Page 34: Machine Troubleshooting
Adjust brush Debris caught in main brush drive Remove debris from main brush mechanism drive mechanism Main and/or side brush drive failure Call Tennant service representative Hopper is full Empty hopper Hopper lip skirts worn or damaged Replace lip skirts... -
Page 35: Maintenance
MAINTENANCE MAINTENANCE S30 9004080 (2- -08) -
Page 36: Maintenance Chart
Radiator hoses and clamps Check for tightness and wear Parking brake Check adjustment Brake pedal Check adjustment Rear wheel support Lubricate bearings Steering cylinder bearings Lubricate Hopper lift arm bearings Lubricate Side brush guard Rotate 90_ S30 9004080 (2- -08) - Page 37 . . . Water and ethylene glycol anti-freeze, --34_ C (--30_ F) . . . Special lubricant, Lubriplate EMB grease (Tennant part number 01433--1) NOTE: More frequent maintenance intervals may be required in extremely dusty conditions. S30 9004080 (12- -08)
-
Page 38: Lubrication
3.5 L (3.7 qt) with oil filter. REAR WHEEL SUPPORT Lubricate the rear wheel support bearings after every 200 hours of operation. FRONT WHEEL BEARINGS Repack and adjust the front wheel bearings every 400 hours of operation. S30 9004080 (2- -08) -
Page 39: Hydraulics
Replace the filler cap after every 800 hours of If using a locally-available hydraulic fluid, be sure operation. Apply a light film of hydraulic fluid onto the specifications match Tennant hydraulic fluid the filler cap gasket before installing the cap onto specifications. Substitute fluids can cause the reservoir. -
Page 40: Hydraulic Hoses
FOR SAFETY: When servicing machine, do discovered. not remove cap from radiator when engine is hot. Allow engine to cool. ATTENTION: Only use TENNANT supplied hydraulic hoses or equivalent rated hydraulic Check the coolant level in the radiator after every hoses. - Page 41 Check the radiator hoses and clamps after every 200 hours of operation. Tighten loose clamps. Replace damaged hoses and clamps. FOR SAFETY: When servicing machine, wear eye and ear protection when using pressurized air or water. S30 9004080 (2- -08)
-
Page 42: Air Filter
LPG fuel filter. FUEL FILTER (Gasoline) Replace the gasoline fuel filter after every 400 hours of operation. FOR SAFETY: When servicing machine, keep flames and sparks away from fuel system service area. Keep area well ventilated. S30 9004080 (12- -08) -
Page 43: Electronic Pressure Regulator (Lpg)
50 hours of operation and after every 800 hours after that. Do not remove the vent plugs from the battery or add water to the battery. FOR SAFETY: When servicing machine, avoid contact with battery acid. S30 9004080 (2- -08) -
Page 44: Fuses And Relays
FU13 40 A Not Used FU14 60 A Cab Power (Optional) Refer to the diagram below for locations of the S30 XP and X4 fuses and relays on the relay panel. Fuse Rating Circuit Protected 15 A Horn 15 A... -
Page 45: Engine Harness Fuses And Relays
12 VDC, 40 A Shaker 12 VDC, 40 A Main Brush Valves, Side Brush Valves 12 VDC, 40 A Auxiliary 2 S30 XP and X4 Relay Rating Circuit Controlled 12 VDC, 40 A Horn 12 VDC, 40 A Auxiliary 1... -
Page 46: Removing And Inspecting The Dust Filter
6. Insert the dust filter into the filter housing and reinstall the removed parts. Be sure the seal is installed as shown below. 3. Remove the filter shaker assembly from the filter housing. 7. Close the side shroud and top cover. S30 9004080 (2- -08) -
Page 47: Cleaning The Dust Filter
50 hours of operation, for maximum brush life and best sweeping performance. Refer to REPLACING OR ROTATING THE MAIN BRUSH. Replace the main brush when the remaining bristles measure 25 mm (1.0 in) in length. S30 9004080 (2- -08) -
Page 48: Replacing Or Rotating The Main Brush
7. Reinstall the brush idler plate. 3. Unlatch and remove the brush idler plate. 8. Close the right side main brush access door. 9. Check and adjust the brush pattern if needed. Refer to CHECKING THE MAIN BRUSH PATTERN. S30 9004080 (2- -08) -
Page 49: Checking The Main Brush Pattern
Set the main brush adjustment knob pointer to the same color band as the brush idler plate. 00582 4. If the brush pattern is tapered, see ADJUSTING THE MAIN BRUSH TAPER section of this manual. 00601 S30 9004080 (2- -08) -
Page 50: Adjusting The Main Brush Width
3. Recheck the pattern. Readjust if necessary. 3. Slide the new side brush onto the side brush drive shaft and reinstall the retaining pin. 4. Adjust the side brush pattern. Refer to ADJUSTING THE SIDE BRUSH PATTERN. S30 9004080 (2- -08) -
Page 51: Adjusting The Side Brush Pattern
S30: Turn the side brush adjustment knob counterclockwise to increase the brush pattern and clockwise to decrease the brush pattern. S30 XP and X4: Tighten the side brush adjustment knob into the side brush bracket to increase the brush pattern and loosen the knob to decrease the brush pattern. -
Page 52: Skirts And Flaps
The brush door skirts should clear the floor by 3 to 6 mm (0.12 to 0.25 in). Check the skirts for wear or damage and adjustment daily. S30 9004080 (2- -08) -
Page 53: Seals
DUST FILTER SEALS Check the dust filter seals for wear or damage every 100 hours of operation. HOPPER INSPECTION DOOR SEALS Check the hopper inspection door seal for wear or damage every 100 hours of operation. S30 9004080 (2- -08) -
Page 54: Filter Chamber Inlet Seal
100 hours of operation. CYCLONIC PRE- -FILTER SEALS Check the cyclonic pre--filter seals for wear or damage every 100 hours of operation. DUST RETURN SEALS Check the dust return seals for wear or damage every 100 hours of operation. S30 9004080 (2- -08) -
Page 55: Brakes And Tires
790 + 35 kPa (115 + 5 psi). REAR WHEEL Torque the rear wheel nuts twice in the pattern shown to 122 to 149 Nm (90 to 110 ft lb) after the first 50 hours of operation, and then after every 800 hours. S30 9004080 (2- -08) -
Page 56: Pushing, Towing, And Transporting The Machine
Do Not use the bypass valve during normal machine operation. 4. To winch the machine onto the truck or trailer, attach the winching chains to the holes in the right and left lower corners in front of the machine. S30 9004080 (2- -08) - Page 57 AND 380 mm (15 in) or less from the ground. 10. If the loading surface is horizontal AND is 380 mm (15 in) or less from the ground, drive the machine off the truck or trailer. S30 9004080 (2- -08)
-
Page 58: Machine Jacking
Support machine with jack stands. Rear jacking locations are located directly behind the rear tire on each side of the machine. Front jacking locations are located on the frame directly in front of the front tire. S30 9004080 (2- -08) -
Page 59: Specifications
Maximum rated climb and descent (empty hopper) 14_/25% HYDRAULIC SYSTEM System Capacity Fluid Type TENNANT part no. 65869 -- above 7_ C (45_ F) Hydraulic reservoir 38 L (10 gal) TENNANT part no. 65870 -- below 7_ C (45_ F) Hydraulic total 45 L (12 gal) -
Page 60: Power Type
Parking brake Utilize service brakes, cable actuated TIRES Location Type Size Front (2) Solid 127 mm x 535 mm (5 in x 21 in) Rear (1) Pneumatic 115 mm x 470 mm (4.5 in x 18.5 in) S30 9004080 (2- -08) -
Page 61: Machine Dimensions
Maximum rated climb and descent (empty hopper) 14_/25% HYDRAULIC SYSTEM System Capacity Fluid Type TENNANT part no. 65869 -- above 7_ C (45_ F) Hydraulic reservoir 38 L (10 gal) TENNANT part no. 65870 -- below 7_ C (45_ F) Hydraulic total 45 L (12 gal) - Page 62 Parking brake Utilize service brakes, cable actuated TIRES Location Type Size Front (2) Solid 127 mm x 535 mm (5 in x 21 in) Rear (1) Pneumatic 115 mm x 470 mm (4.5 in x 18.5 in) S30 9004080 (2- -08)
-
Page 63: Index
SPECIFICATIONS MACHINE DIMENSIONS 2095 mm (82.5 in) 1475 mm (58 in) 2360 mm 1590 mm (93 in) (62.5 in) 354726 S30 9004080 (12- -08) - Page 64 SPECIFICATIONS S30 9004080 (2- -08)
- Page 65 Check the coolant level in the radiator, 38 Alarms, 26, 27 Check the coolant level in the reservoir, 38 Fault Indicators (S30 XP and X4), 27 Flush the radiator and the cooling system, 38 Fault Indicators (S30), 26 Cyclonic Pre--filter Seals, 52...
- Page 66 Hopper support bar, 24 Disengaging hopper support bar, 25 Fan knob, 30 Engaging hopper support bar, 24 Fault Indicators (S30 XP and X4), 27 Hour Meter, 13 Fault Indicators (S30), 26 How the Machine Works, 17 Filter Chamber Inlet Seal, 52...
- Page 67 Cyclonic Pre--filter Seals, 52 Dust Filter Seals, 51 Dust Return Seals, 52 Parking Brake, 53 Filter Chamber Inlet Seal, 52 Parking brake pedal, 11 Hopper Inspection Door Seals, 51 Hopper Seals, 51 Vacuum Wand Door Seals, 52 S30 9004080 (2- -08)
- Page 68 Steering Cylinder Bearing, 36 Warning Indicators, 27 Storage Information, 56 Dash fault indicators, 28 Supervisor Control Buttons, 13 Fault Indicators (S30 XP and X4), 27 Fault Indicators (S30), 26 Sweeping (S30 XP and X4), 22 Warning Indicators (S30), 26 Sweeping (S30), 21...
Need help?
Do you have a question about the S30 and is the answer not in the manual?
Questions and answers