Table of Contents
Advertisement
Advertisement
Table of Contents

Related Manuals for Ty Pennington Style D71 M3459


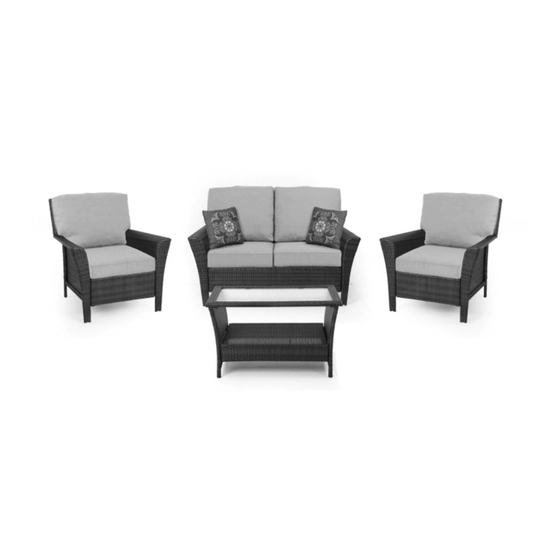
Summary of Contents for Ty Pennington Style D71 M3459
-
Page 2: Table Of Contents
Table of Contents Table of Contents Table of Contents....... 2 Pre-Assembly......4 Safety Information...... 2 Planning Assembly..... 4 Set Up our Furniture Properly..2 Hardware Included..... 4 Examine your furniture....2 Package Contents...... 5 Observe weight Limits....2 Assembly Warranty........3 Chair.......... -
Page 3: Warranty
Warranty Warranty 1 YEAR WARRANTY FOR FRAME, RESIN WEAVE AND CUSHIONS 1 YEAR WARRANTY FOR FRAME, RESIN WEAVE AND CUSHIONS WHAT IS COVERED WHAT IS COVERED We warrant to the original purchaser for one year, from the date of purchase, that the frame, resin weave and cushions will be free from manufacturing defects. -
Page 4: Pre-Assembly
Pre-Assembly Pre-Assembly PLANNING ASSEMBLY PLANNING ASSEMBLY To prevent damage, place all parts on a soft surface during assembly. Remove all protective caps before beginning assembly. HARDWARE INCLUDED HARDWARE INCLUDED NOTED:Hardware not shown NOTED:Hardware not shown to actual size. to actual size. Description QTY. -
Page 5: Package Contents
Pre-Assembly(continued) Pre-Assembly(continued) Package Contents Package Contents QUANTITY QUANTITY PART PART DESCRIPTION DESCRIPTION THE SEAT OF CHAIR THE BACK OF CHAIR LEFT ARM RIGHT ARM Safety Information Safety Information 1. EVERY BOLT NEEDS TO BE USED WITH A WASHER. 1. EVERY BOLT NEEDS TO BE USED WITH A WASHER. - Page 6 Assembly Assembly Attaching the left arm to the seat Attaching the left arm to the seat ATTACH ARM “C” TO THE SEAT “A”,FASTEN WITH BOLTS “MM” TIGHTEN HALF THE WAY USING ALLEN WRENCH JJ .
- Page 7 Assembly Assembly Attaching the back Attaching the back INSERT TWO PINS ON THE BACK “B” INTO THE HOLES ON ARM “C”, ATTACH BACK “B” TO SEAT “A” FASTEN TWO BOLTS “MM” AND TIGHTEN HALF THE WAY USING ALLEN WRENCH JJ .
- Page 8 Assembly Assembly Attaching the right arm Attaching the right arm ATTACH ARM “D” TO THE SEAT “A”,FASTEN BOLTS “MM” AND TIGHTEN HALF THE WAY USING ALLEN WRENCH JJ . INSERT TWO PINS ON THE BACK “B” INTO THE HOLES ON ARM “D”,FASTEN BOLTS “MM” ,TIGHTEN HALF THE WAY USING ALLEN WRENCH JJ .
- Page 9 Assembly Assembly Fasten all the bolts and adding caps Fasten all the bolts and adding caps TURN THE ASSEMBLING CHAIR UPWARD AS SHOWN .USING TWO BOLTS MM TO ATTACH ARM TO BACK B CHECK AND MAKE ADJUSTMENT AS NEEDED. USING THE A LLEN WRENCH JJ FULLY TIGHTEN ALL THE BOLTS ,COVER BOLTS MM WITH CAPS NN .
-
Page 10: Loveseat
Pre-Assembly(continued) Pre-Assembly(continued) Package Contents Package Contents QUANTITY QUANTITY PART PART DESCRIPTION DESCRIPTION THE SEAT OF LOVESEAT THE BACK OF LOVESEAT LEFT ARM RIGHT ARM Safety Information Safety Information 1. EVERY BOLT NEEDS TO BE USED WITH A WASHER. 1. EVERY BOLT NEEDS TO BE USED WITH A WASHER. - Page 11 Assembly Assembly Attaching the left arm to the seat Attaching the left arm to the seat ATTACH ARM “C” TO THE SEAT “A”,FASTEN WITH BOLTS “MM” TIGHTEN HALF THE WAY USING ALLEN WRENCH JJ .
- Page 12 Assembly Assembly Attaching the back Attaching the back INSERT TWO PINS ON THE BACK “B” INTO THE HOLES ON ARM “C”, ATTACH BACK “B” TO SEAT “A” FASTEN TWO BOLTS “MM” FROM TOP TO BOTTOM ( - ) AND TIGHTEN HALF 5 5 6 6 THE WAY USING ALLEN WRENCH...
- Page 13 Assembly Assembly Attaching the right arm Attaching the right arm ATTACH ARM “D” TO THE SEAT “A”,FASTEN BOLTS “MM” AND TIGHTEN HALF THE WAY USING ALLEN WRENCH JJ . INSERT TWO PINS ON THE BACK “B” INTO THE HOLES ON ARM “D”,FASTEN BOLTS “MM” ,TIGHTEN HALF THE WAY USING ALLEN WRENCH JJ .
- Page 14 Assembly Assembly Fasten all the bolts and adding caps Fasten all the bolts and adding caps TURN THE ASSEMBLING LOVESEAT UPWARD AS SHOWN, USING TWO BOLTS MM TO ATTACH ARM C TO BACK B CHECK AND MAKE ADJUSTMENT AS NEEDED. USING THE ALLEN WRENCH JJ FULLY TIGHTEN ALL THE BOLTS , COVER BOLTS MM WITH CAPS NN .
-
Page 15: Coffee Table
Pre-Assembly(continued) Pre-Assembly(continued) Package Contents Package Contents QUANTITY QUANTITY PART PART DESCRIPTION DESCRIPTION COFFEE TABLE TOP COFFEE TABLE LEGS COFFEE TABLE SHELF Safety Information Safety Information 1. EVERY BOLT NEEDS TO BE USED WITH A WASHER. 1. EVERY BOLT NEEDS TO BE USED WITH A WASHER. - Page 16 Assembly Assembly Attaching the leg to the shelf Attaching the leg to the shelf PUT THE LEG “B” ON THE FLOOR AS SHOWN. ATTACH SHELF “C” TO LEG “B” ,FASTEN WITH BOLTS “MM” ,DO NOT FULLY TIGHTEN.
- Page 17 Assembly Assembly Attaching another leg to the shelf Attaching another leg to the shelf PUT ANOTHER LEG “B” ON THE SHELF. USE BOLT “MM” TO ATTACH “B” TO SHELF “C” . FASTEN HALF THE WAY USING ALLEN WRENCH “JJ”...
- Page 18 Assembly Assembly Attaching the top Attaching the top PUT THE TOP OF “A” ON THE FLOOR AS SHOWN. USE BOLTS “VV” TO ATTACH “B” TO THE TOP “A ” .FASTEN HALF THE WAY USING ALLEN WRENCH “JJ”...
- Page 19 Assembly Assembly Adding the caps Adding the caps CHECK AND MAKE ADJUSTMENT AS NEED, USING THE ALLEN WRENCH JJ FULLY TIGHTEN ALL THE BOLTS AND COVER BOLTS MM WITH CAPS NN...
-
Page 20: Care And Cleaning
Care and Cleaning Care and Cleaning Wash the frame with a mild solution of soap and water, rinse with clean water, and dry thoroughly. If your set includes cushions or mesh fabrics, you may Scotchguard them to protect them from the elements Cushions may also be cleaned by hand with a mild solution of soap and water.
Need help?
Do you have a question about the Style D71 M3459 and is the answer not in the manual?
Questions and answers