Advertisement
H 03715 00 . A - W1965B - 2013/02
Notice d'installation et d'utilisation
Français
Instructions for installation and use
English
Montage- und Gebrauchsanleitung
Deutsch
Installatie en gebruikshanleiding
Nederlands
Manual de instalación y de uso
Espanõl
Manual de instalação e utilização
Português
Manuale di installazione e di uso
Italiano
More languages on:
www.zodiac-poolcare.com
FR
F
EN
Advertisement
Table of Contents

Related Manuals for Zodiac indigo voyager 2X


Summary of Contents for Zodiac indigo voyager 2X
- Page 1 Montage- und Gebrauchsanleitung Deutsch Installatie en gebruikshanleiding Nederlands Manual de instalación y de uso Espanõl Manual de instalação e utilização Português Manuale di installazione e di uso Italiano More languages on: www.zodiac-poolcare.com H 03715 00 . A - W1965B - 2013/02...
- Page 2 WARNING ON THE USE OF THIS CLEANER IN A POOL WITH A VINYL SURFACE The surface of certain vinyl patterned surfaces can wear rapidly and the patterns disappear on contact from objects such as cleaning brushes, toys, inflatable buoys, chlorine distributors and automatic pool cleaners. The decoration on some vinyl surfaces can be scratched or worn by basic friction such as through the use of a pool brush. The colours of certain patterns can also be erased during use or when in contact with objects in the pool. The erased patterns, wear or scratching of vinyl surfaces are not the liability of Zodiac® and are not covered by the limited warranty. As part of the continuous improvement process our products may be modified without prior notice. 1 ...
-
Page 3: Table Of Contents
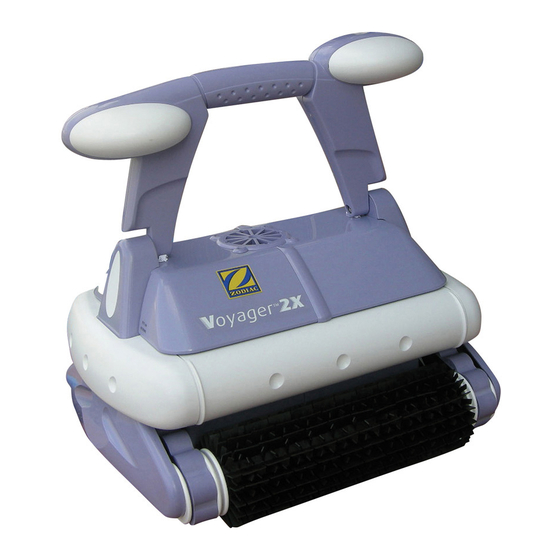
Contents 1. PRECAUTIONS BEFORE USE .................. 2 2. USE .......................... 3 3. CLEANING AND MAINTENANCE ................ 5 4. AJUSTING THE WEIGHTS .................. 6 5. TROUBLESHOOTINGS .................... 7 6. CONFORMITY ...................... 7 1. PRECAUTIONS BEFORE USE 1.1 UNPACKING The packing should contain the following items: • The robot, the transport trolley (to be assembled), the control unit, and a folder containing the user manual. To unpack these items, proceed as follows: • Take out the box located on the robot: this contains the control unit. • Remove the components from the trolley ‐ Figure 1: • 2 top tubes: right (1) and left (2), • 1 control unit hook (3), • 2 cable hooks: top (4) and bottom (5), • 1 hook cover (6) and a fastener kit containing: ... -
Page 4: Use
Figure 1‐a Figure 2 Figure 3 Figure 1‐b Figure 3‐a 2. USE 2.1 RECOMMENDATIONS Use your cleaner robot as often as possible. You will benefit from a pool that is always clean and the filter bag will take longer to clog up. The robot is designed to work in a swimming pool whose water quality is as follows: chlorine < 2 mg/l, Ph ... - Page 5 2.2 ELECTRICAL CONNECTION For your safety, and to obtain the best possible performance from your robot, proceed as follows: • Position the control unit at least 3.5 metres from the edge of the pool, avoiding direct exposure of the unit to the sun. It can be either placed on the ground or hooked onto the trolley as illustrated in Figure 6. • Connect the robot’s cable to the control unit and lock the connector. Figure 4. • You should only connect the control unit to a plug protected by a safety system with a residual current of 30 mA maximum (if in doubt, contact an electrician installer). If you use an extension lead to connect your cleaner to the mains, make sure that the control unit cannot be placed within 3.5 m of the edge of the pool. 2.3 IMMERSION OF THE ROBOT Do not allow anyone to use the pool when the robot is in it. Put the robot into the water and expel the air from it. Turn it upside down if necessary. Figure 5. It is essential for the robot goes down into the water by itself and places itself on the bottom of the pool. Spread the cable out over the pool. 2.4 FUNCTIONING To start the robot, select a cycle on the control unit: • The Perfect Cycle, for a meticulous clean of your pool and the waterline, • The Turbo Cycle, for a rapid clean cycle, if the pool is not very dirty. To start your robot, press the programme button (Perfect or Turbo). Figure 6. The robot starts up after just a few seconds. The indicator light for the programme selected comes on. ...
-
Page 6: Cleaning And Maintenance
3. CLEANING AND MAINTENANCE 3.1 CLEANING THE FILTER BAG We recommend that you clean the filter bag at the end of each cycle. • Make sure that the power supply cable has been disconnected from the mains plug or that the floating cable has been disconnected from the power unit. • Remove the robot from the water and lay it upside down on the poolside, thereby offering access to the filterholder plate located beneath the robot. Figure 8. • Undo the 4 hooks that hold the plate in place. Remove it, whilst holding it upside down so that the dirt remains in the bag. Figure 9. • Release the 2 plastic blocking clips to remove the bag. Figure 10. • Carefully remove the elastic from the base of the filter and then remove it from the filter‐holder plate. Figure 11. • Empty the bag and clean it with running water or if necessary with slightly soapy water. If you use soap, rinse it thoroughly whilst turning it over. You can also machine wash it, following the instructions given on the label inside the bag. • Also rinse the filter‐holder plate and remove any dirt caught under the flaps. • Replace the filter bag by positioning the knot on the holder elastic at the centre of the filter holder and the corners of the bag against the corners of the metallic rods. The Zodiac label should be located alongside a rod. • Position the plastic clips at the top of the rods. • Replace the filter holder and click it into place. 3.2 CLEANING AND STORING THE ROBOT The robot must be cleaned regularly with clean or slightly soapy water. Solutions such as trichlorethylene or similar must on no account be used. Rinse thoroughly in clean water. Do not leave your robot to dry in the sun by the pool. ... -
Page 7: Ajusting The Weights
2. The robot is fitted with foam pads. We recommend that you change the pads after a season’s use. It is essential that they are changed as soon as their surface becomes smooth or worn. In order to do this, proceed as follows: • Turn the robot over. • Push the pads aside to reveal the pad clips. Slide your fingers under the pads in order to release the clips holding them in place. Be careful not push them too far. Figure 15. • Remove the used pads and replace them with new ones (with the smooth side facing inwards). • Replace the clips. Figure 16. • Retighten the pads. 3.4 RECYCLING When this symbol is mentioned on an appliance, it means that the equipment must not be disposed of casually. It will be collected selectively so that it can be reused, recycled or recovered. Any substances it may contain which are potentially dangerous to the environment will be eliminated or neutralised. Enquire with your retailer for the conditions that apply to the recycling of your product and to the organisations that can handle its recycling. 4. AJUSTING THE WEIGHTS It may be necessary to adjust the robot’s weights to improve its efficiency: ‐ The robot rises too high over the water line and takes in air: add one or more weights to position 3. ‐ The robot does not rise on the sides: remove one or more weights. ‐ Problem of coverage rate: shift the weight from its original position 5 to position 3. ... -
Page 8: Troubleshootings
To reach the weight, remove the protective screen from the motor: • Turn over the robot carefully • Remove the filter‐holder plate. Figure 17. • Remove the protective screen from the housing. Figure 18. • Adjust the weights. Figure 19. • Replace the protective screen and the filter‐holder plate Put the robot in the water and carry out a test. It is essential to make sure that the filter bag is clean before doing the test. 5. TROUBLESHOOTINGS 5.1. The robot is not properly hugging the bottom of the pool There is still some air trapped in the appliance’s shell. Repeat the steps of the immersion process, carefully respecting the instructions given in section “Immersion of the robot”. Turn the robot over whilst holding it under the water so that the trapped air can escape. 5.2. The robot will not (or no longer) climb the walls There can be 3 reasons for this: • The filter bag is full or clogged up: simply clean it. • The hose weighting level is not correct. See chapter ADJUSTING THE WEIGHTS. • Although the water seems clear, your pool contains microscopic algae (not visible to the naked eye), which are making the sides slippery and are preventing the robot from climbing them. In this case, carry out an express chlorination session and slightly lower the pH level. ... - Page 9 Notes...
- Page 10 Votre revendeur / your retailer Pour plus de renseignements, merci de contacter votre revendeur. For further information, please contact your retailer. ZODIAC® is a registered trademark of Zodiac International, S.A.S.U., used under license.
Need help?
Do you have a question about the indigo voyager 2X and is the answer not in the manual?
Questions and answers
how to change belts