Table of Contents
Advertisement
Advertisement
Table of Contents

Subscribe to Our Youtube Channel
Related Manuals for Olivetti ECR 7190


Summary of Contents for Olivetti ECR 7190
- Page 1 Cash Register ECR 7190/ECR 7790/ECR 7790LD SERVICE MANUAL Code: Y119070-7...
- Page 2 PUBLICATION ISSUED BY: Olivetti S.p.A. Telecom Italia Group Via Jervis, 77 - 10015 Ivrea (TO) Copyright © 2018 Olivetti All rights reserved...
- Page 3 This publication is intended for use by technicians responsible for installing and servicing ECR 7190 / ECR 7790 / ECR 7790LD systems. The objective of the manual is to supply all the information necessary for correctly installing and servicing the product.
- Page 4 This page is intentionally left blank Service Manual Y119070-7...
-
Page 5: Table Of Contents
INSERTING THE BATTERIES .............................. 2-1 INSERTING RECEIPT ROLL ..............................2-3 CHAPTER 3 – KEYPAD LAYOUT ............................3-1 ECR 7190 – 7790 – 7790LD LAYOUT ..........................3-1 CHAPTER 4 – TROUBLESHOOTING ..........................4-1 DIAGNOSTICS TEST ................................4-1 CHECKING THE SOFTWARE VERSION ........................... 4-2 CHAPTER 5 - PART DISASSEMBLY ........................... - Page 6 This page is intentionally left blank Service Manual Y119070-7...
-
Page 7: Chapter 1 - General Overview
- Range of VAT totals to be printed on the sales receipt Security Functions - Manager password associated with cashier security codes - Passwords and protection codes (ECR 7190) - Memory protection (ECR7790-7790LD) - Lockable cash drawer - Minus, refund, void and no sale activity totalling in management reports... -
Page 8: General Characteristics
GENERAL CHARACTERISTICS ECR 7190 Operator Display - LCD - Large digits - 1-line, alphanumeric 10-position Function selector Sliding 6-positions selector Programmable Keypad -7 keys for direct department access - 20 function keys for setup and menu navigation - 12-key numeric keypad... -
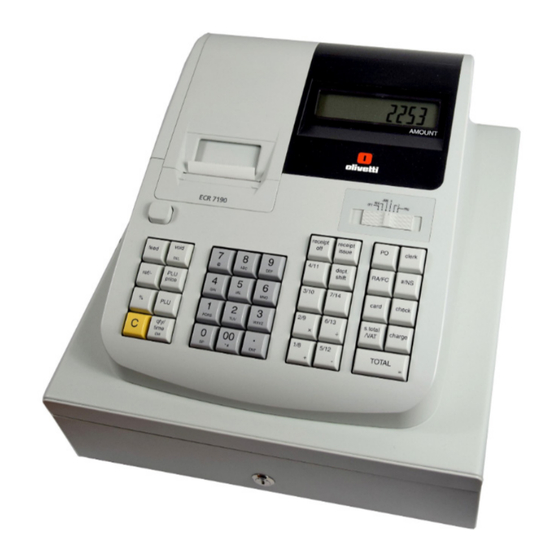
Page 9: External View
EXTERNAL VIEW ECR 7190 – 7790 – 7790LD 1. Operator display 2. Keypad 3. Cash drawer 4. Cash drawer lock 5. Power cord 6. Customer receipt output slot 7. Receipt printer cover 8. Operating mode selector Y119070-7 Service Manual... -
Page 10: Safety Precautions
SAFETY PRECAUTIONS The power socket for this cash register must be located near the machine and must be easily accessible. Do not use this cash register outdoors in the rain or near any liquids. MAINTAINING THE CASH REGISTER Provided below is information on how to maintain the cash register. NOTE Before cleaning the cash register, make sure it is powered off and/or unplugged from the wall outlet. -
Page 11: Cash Register Unpacking And Setup
CASH REGISTER UNPACKING AND SETUP STANDARD ACCESSORIES The cash register comes with the following items: • One standard paper roll • Three standard ‘AN’ size batteries for the battery back-up system • The multilingual User’s Guide, Reference Guide in English and Warranty Card + Setup Poster •... - Page 12 This page is intentionally left blank Service Manual Y119070-7...
-
Page 13: Chapter 2 -Preliminary Operations
CHAPTER 2 –PRELIMINARY OPERATIONS INSERTING THE BATTERIES Before inserting the batteries, first make sure that the cash register connected to the electrical outlet, then follow the steps below. 1. Set the Mode Selector to the OFF position. 2. Open the receipt roll compartment. 3. - Page 14 4. Insert the batteries with the correct polarity as shown below 5. Close the cover of the battery bay and then the cover of the paper roll compartment Service Manual Y119070-7...
-
Page 15: Inserting Receipt Roll
INSERTING RECEIPT ROLL 1. Open the cover of the paper roll compartment 2. Place the paper roll inside the compartment, unrolling it a few centimetres as shown in the figure (1), then close the cover again 3. Using the manual cutter, cut away the excess paper by pulling the paper downwards as indicated in the figure. - Page 16 This page is intentionally left blank Service Manual Y119070-7...
-
Page 17: Chapter 3 - Keypad Layout
CHAPTER 3 – KEYPAD LAYOUT ECR 7190 – 7790 – 7790LD LAYOUT - Advances the receipt one line feed; advances the paper continuously when held down. - [Void] Deletes the last item entered, and used for correcting a particular entry after it is processed and printed. - Page 18 - Registers a preset price of an individual item to the appropriate department. - Clears an entry made from the numeric keypad or with before finalizing a transaction with a Department or function key. Also used to clear error conditions. - [qty] Multiplies (Department), [time] displays the...
- Page 19 - Registers any money taken out of the cash drawer that is not part of a sale. It carries its own total on the financial report. - Assigns a Clerk. Confirms an entered clerk number and three-digit security code. This key is used as a non-add key and prints up to a 7-digits numeric entry on the receipt. Opens the cash drawer without registering any amount or when changing cash for a non-sales transaction.
- Page 20 This page is intentionally left blank Service Manual Y119070-7...
-
Page 21: Chapter 4 - Troubleshooting
CHAPTER 4 – TROUBLESHOOTING DIAGNOSTICS TEST For the diagnostics test, carry out the steps indicated below: OPERATION DISPLAY Power on the cash register Position the selector on PRG After a few seconds, displays the Enter 960804 then press TOTAL memory address Position the selector on OFF and wait for 30 seconds Position the selector on PRG then press TOTAL Displays “P-2”... -
Page 22: Checking The Software Version
CHECKING THE SOFTWARE VERSION When the diagnostics test is run, the software version is displayed at the beginning. You can also check the software version without running the diagnostics test as follows: OPERATION DISPLAY Position the selector on PRG After a few seconds displays the Enter 960801 then press TOTAL software version. -
Page 23: Chapter 5 - Part Disassembly
Given the similarity of the products, when necessary in the operations illustrated below, the image on the left refers to the ECR 7190 (white) model, that on the right to ECR 7790-7790LD (black) models. OPENING AND DISASSEMBLING THE CASH REGISTER 1. - Page 24 3. Lift the main body of the cash register to be able to access the internal components, then remove the screw fixing the earth wire (A). 4. Disconnect the power connector. Service Manual Y119070-7...
-
Page 25: Transformer
TRANSFORMER 1. After having disconnected the connector from the board, as previously shown, remove the screws indicated in the figure and then replace the transformer unit. 2. On ECR 7790-7790LD models, you can check the power fuse (A) and replace it when necessary. Y119070-7 Service Manual... -
Page 26: Keypad Unit
KEYPAD UNIT 1. Disconnect the printer connector (A) and the flat cable (B) of the display then remove all the screws indicated in the figure. 2. The following figure shows the single components constituting the keypad unit. Service Manual Y119070-7... -
Page 27: Display Unit
1. Disconnect the connectors and the flat cable on the display board then remove the screws indicated in the figure. NOTE The ECR 7190 board supports only a single display, while ECR 7790-7790LD models support two displays (as shown in the image). Y119070-7... -
Page 28: Printer Unit
PRINTER UNIT 1. Before unmounting the printer unit first disconnect the flat cable as explained in Step 1 of the section “Keypad Unit”. 2. On the inside release the two retainers then push them so as to separate the cover and cutter from the main unit. - Page 29 UPDATE HISTORY DATE UPDATED PAGES PAGES CODE 04/2018 EDITION Y119070-7...
Need help?
Do you have a question about the ECR 7190 and is the answer not in the manual?
Questions and answers