Advertisement

ASSEMBLY VIDEO
Assembly & Operation
www.reidlifting.com
Tel: +44 (0)1291 620796 www.reidlifting.com

Advertisement

Table of Contents
loading
Need help?

Need help?

Do you have a question about the PGRS20 and is the answer not in the manual?

Questions and answers

Summary of Contents for REID LIFTING PGRS20

  • Page 1 ASSEMBLY VIDEO Assembly & Operation www.reidlifting.com Tel: +44 (0)1291 620796 www.reidlifting.com...
  • Page 2: Table Of Contents

    No. 1 in lightweight, portable, safe lifting solutions CONTENTS ASSEMBLY INSTRUCTIONS INTRODUCTION • Pre-Assembly • Standard Assembly CORRECT OPERATION • Master-link/Close-Coupled Trolley Installation • Intended Use • Height Adjustment • Inspection Prior to Initial Operation • Foot Adjustment • Inspection Before Starting Work •...
  • Page 3: Introduction

    INTRODUCTION All users must read these operating instructions carefully prior to the initial operation. These instructions are intended to acquaint the user with the PORTA-GANTRY RAPIDE and enable him/her to use it to the full extent of its intended capabilities. The operating instructions contain important information on how to handle the PORTA-GANTRY RAPIDE in a safe, correct and economic way.
  • Page 4: Correct Operation

    Check the integrity of all profiles for denting and pin/bolt holes for wear and elongation. PGRS40, PGRM40, PGRS23, PGRM20, PGR1TS20, PGR1TS30, PGR1TS40, PGR1TM20, PGR1TM30, PGRT20, PGRT23, Model PGRS20 Model PGRM23 PGR1TM40, PGR1TT20, PGR1TT30, PGR1TT40 PGRT40 Capacity Capacity Capacity...
  • Page 5: Notes For Correct Usage

    While the PORTA-GANTRY RAPIDE has the capacities • The beam must be horizontal prior to any lift and stated below it is only one part of a fall arrest A-frames vertical and parallel to each other system which is only as strong as its lowest rated •...
  • Page 6: Attaching The Load

    No. 1 in lightweight, portable, safe lifting solutions Regulations • Do not allow personnel to pass under a suspended load The PORTA-GANTRY RAPIDE complies with the following • When gantry is used with multiple persons regulations: attached working procedures should dictate that individual lifelines do not cross and become tangled PPE Regulation (EU) 2016/425, Machinery Directive 2006/42/EC, The Provision and Use of Work Equipment...
  • Page 7: Storage And Transportation

    PORTA-GANTRY RAPIDE followed. Any different or exceeding use is considered Assembly & Operation instructions incorrect and REID Lifting Ltd will not accept any responsibility for damages resulting from false Equipment capacity warning label: refer to maximum application. The risk is solely with the user. If the product capacity section for rating explanations.
  • Page 8: Atex - Classification

    No. 1 in lightweight, portable, safe lifting solutions ATEX - Classification ATEX - Spark Formation Increased danger of ignition may emanate from As standard, the product meets the requirements clashing of special material pairings. These are of Category 3 equipment for use in Zone 2 explosive non corrosion-resistant steel or cast iron against atmospheres, providing a normal level of protection aluminium, magnesium or pertinent alloys.
  • Page 9: Atex - Inspection, Maintenance & Repair

    IRATA ATEX - Inspection, Maintenance & Repair PORTA-GANTRY RAPIDEs are suitable for Rope Access and have been tested to 15KN static load as per test If using the gantry in explosive atmospheres, in requirements of IRATA International Code of Practice addition to the Regular Inspection/Maintenance (ICOP).
  • Page 10: Assembly Instructions

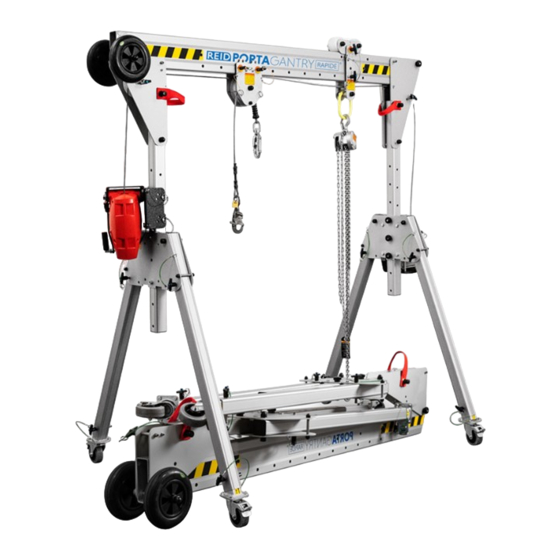
    No. 1 in lightweight, portable, safe lifting solutions ASSEMBLY INSTRUCTIONS Gloves Protective footwear Hard hat N.B. Appropriate PPE should be worn: The PORTA-GANTRY RAPIDE and its constituent components are described in the image below. Trolley Cheek Plate Beam Sheaved Trolley Upright ‘Trap’...
  • Page 11: Pre-Assembly

    PRE-ASSEMBLY Pre set-up Checks • PORTA-GANTRY RAPIDE system delivered flat packed • Ensure castors are locked • Allow sufficient clearance for gantry frame rotation. If sufficient space not available see steps 13 to 17 - Confined Space Set-up method N.B. Trolley can be stored seperately, on the upper Upright or the Leg Standard Assembly Rotate upper Upright to a vertical position.
  • Page 12 No. 1 in lightweight, portable, safe lifting solutions Open leg and insert ball-lock pin into second hole Continue rotation of upper Upright until it comes securing the leg in its open position. Repeat for to rest on ground. second leg on the same Upright. Repeat steps 1-4 for lower Upright.
  • Page 13: Master-Link/Close-Coupled Trolley Installation

    Re-insert ball-lock pin into hole ensuring the pin is Repeat steps 6 and 7 for opposite Upright. fully engaged through hole. A gentle rocking N.B. IF FITTED, ENSURE CASTOR BRAKES motion can be used to induce alignment. APPLIED BEFORE LIFTING A LOAD. Master-link/Close-Coupled Trolley Installation Remove pin.
  • Page 14: Height Adjustment

    No. 1 in lightweight, portable, safe lifting solutions Height Adjustment Foot Adjustment Take weight of gantry Upright. To increase height pull foot down until desired Remove bolts and adjust to the desired height. position is achieved. Re-insert bolts and hand tighten quick release NB: Never adjust the height while the gantry knobs ensuring the gantry is secure.
  • Page 15: Confined Space Assembly

    Confined Space Assembly Rotate upper Upright to vertical position. While in this vertical position remove ball lock pin from its stow hole. Open leg and insert ball-lock pin into second hole Rotate upper Upright around until ball-lock pin is securing the leg in its open position. Repeat for adjacent to beam.
  • Page 16: Gantry Stowage

    No. 1 in lightweight, portable, safe lifting solutions Pre-lift Checks • Ensure all ball lock pins are fully engaged into their respective holes • Ensure all quick release knob/bolts on Trap Plates and Beam are hand tight and secure • Ensure Upright is bolted using top and bottom fixing holes on Trap Plate.
  • Page 17: Winch Bracket Installation

    Winch Bracket Installation Never install winch bracket while gantry is under load. Only install winches which are approved by REID for use with the PORTA -GANTRY RAPIDE and a suitable interface / mounting plate supplied. Winch can be installed on both sides of gantry and on either bolts A and B or B and C (PGR250-500) OR A and B, B and C or A and D (PGR1000).
  • Page 18: Beam Width Adjustment

    No. 1 in lightweight, portable, safe lifting solutions Present Sheaved Trolley to underside of Beam. Insert second pin as shown Capture rope between Sheaved Trolley and Beam Observe both pins are fully engaged and insert pin as shown. Beam Width Adjustment Remove bolt and handle.
  • Page 19: Changing The Foot Option

    Changing the Foot Option Adjustable Foot Option The foot option can be changed by removing For coarse adjustment in leg height set cartridge the ball lock pin and withdrawing the foot at desired point (2x50mm increments). cartridge assembly. Pre-lift Checks •...
  • Page 20: Dimensions

    No. 1 in lightweight, portable, safe lifting solutions DIMENSIONS PORTA-GANTRY RAPIDE 250-500 Unit Dimensions (mm) Weight Goods Fall Arrest Personnel Capacity Beam Capacity* (kg) * (kg) Length (Persons) (kg) PGRS20 2000 2076 1100 1500 2190 PGRS23 2300 2376 1200 1800 1738 1938 1914 2114 2064 2264...
  • Page 21: Porta-Gantry Rapide 1000

    PORTA-GANTRY RAPIDE 1000 Unit Dimensions (mm) Weight Fall Arrest Goods Personnel Capacity* (kg) Capacity Positioning* No of (kg) (kg) Person(s) PGR1TS20 2000 2077 1102 1502 2077 1000 PGR1TS30 3000 3077 1902 2502 1430 1930 1661 2161 1822 2322 1270 1549 2049 3077 1000...
  • Page 22: Quality & Safety

    ACCREDITATIONS Conformité Européenne (CE) Quality and safety are key themes throughout this document and the REID Lifting ethos. It is with this in REID Lifting’s products have been designed, tested and mind that we have undertaken external accreditations approved (as appropriate) by the Conformité Européenne.
  • Page 23: Inspection Record

    INSPECTION INSPECTION RECORD * Insert data from serial numbers found on product into table below Product number(s)* A Serial number(s)* B WLL* C Year of manufacture* D Name of user Date of purchase Date of first use Periodic Examination and Repair History Date Inspected by Pass/Fail...
  • Page 24 All information herein is copyright protected by REID Lifting Ltd. All company and product names are Trade Mark and Trade Name protected and all REID Product IPR is protected under Patents, Patents Pending and/or Design Rights. Printed using environment friendly processes and materials...

Table of Contents