Table of Contents
Advertisement
Advertisement
Table of Contents

Related Manuals for Lippert Components OneControl


Summary of Contents for Lippert Components OneControl
- Page 1 OneControl PROGRAMMING MANUAL ® Rev: 10.22.2018 OneControl® Programming Manual...
-
Page 2: Table Of Contents
Please note that with power to the coach, the tablet should always be able to gain access to the OneControl® Control Panel when placed in the docking station due to it being a wired connection. Use this to assist when diagnosing concerns with the system. -
Page 3: Programming
The hub and range extender do not keep configuration data, so when troubleshooting wireless connection concerns, ensure the tablet can operate the OneControl® Control Panel when housed in the docking station. Again, as long as there is power to the coach, the OneControl® system should operate from the dock. -
Page 4: Onecontrol ® Functions
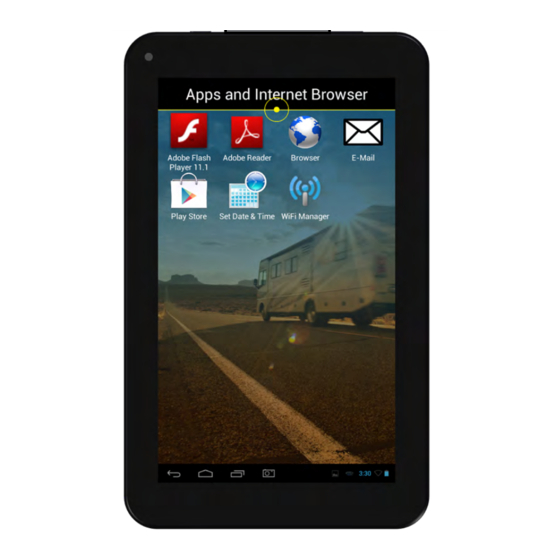
OneControl ® Functions Press the yellow LincPad Applications icon 5 times (Fig. 3A). A pop-up window will prompt the user to enter password (Fig. 4). The password is the last 4 digits of the version located in the bottom right hand of the tablet desktop (Fig. 4A). -
Page 5: Circuit Building For Onecontrol ® Smart Switch
Select “Name”. Press “Send” to set group and name selected (Fig. 9). 10. Repeat process for each function. Fig. 7 Fig. 8 Fig. 9 Circuit Building For OneControl ® Smart Switch Press “Build Circuit” (Fig. 10). Fig. 10 Page 5 Rev: 08.06.18... - Page 6 Select first device by pressing the preferred icon. Then press Select when the pop-up window shows up on the screen (Fig. 11). Device title will highlight in yellow (Fig. 12). Repeat process for each device included in the circuit. Once you have selected (highlighted) all devices for the circuit, press one of the highlighted device icons.
-
Page 7: Multifunction Fuse Programming
Multifunction Fuse Programming Enter the OneControl® configurator screen by tapping the yellow LincPad Applications icon five (5) times (Fig. 15A). You will then be prompted to enter a four-digit password (Fig. 15B). The password is the last four digits of the version number (Fig. 15C). - Page 8 When in the fuse configuration menu, a list of all labeled and unlabeled relay functions will appear (Fig. 21). Select the fuse location from the drop down menu on the right (Fig. 21A and Fig. 22). Fig. 21 Fig. 22 Once all fuse locations are chosen, press and HOLD anywhere on the screen for a pop up menu confirming the fuse locations.
-
Page 9: Operation
operation Power On/Off To power ON the tablet, hold and release the power button for 2-3 seconds (Fig. 25). NoTe: It will take a few moments to start up and load the system. To enter or exit sleep mode, press and release power button. To power OFF the tablet, press and hold the power button until a utility screen appears. -
Page 10: Onecontrol
Locate the “OneControl® Control Panel” on the menu screen (Fig. 28A). Pushing the “OneControl® Control Panel” tab will open the “OneControl® Applications” screen. This screen will display all the icons of the devices on the RV that can be operated with the OneControl® Tablet. -
Page 11: Onecontrol ® Assembly
ONECONTROL ASSEMBLY ® eLeCTRoNICS Tablet Mounting Assembly WiFi Hub Digital Switch and Range extender Multi Function Receiver with Selectable Fuses Lighting Controls Canbus Data Harness Canbus Canbus Terminating Resistor Power Connector Page 11 Rev: 08.06.18 CCD-0001736... -
Page 12: Onecontrol ® Components
NoTe: Part numbers are shown for identification purposes only. Not all parts are available for individual sale. All parts with a link to the Lippert Store can be purchased. Callout Part # Description 406345 5" OneControl® Touch Panel 406347 7" OneControl® Touch Panel 644577 OneControl® Touch Panel Mounting Bracket Page 12 Rev: 08.06.18 CCD-0001736... - Page 13 ONECONTROL COMPONENTS ® eLeCTRoNICS Callout Part # Description 318708 7" Tablet 318750 Wall Mount Docking Station 345081 Digital Switch, Touch Screen Wall Mount Switch Page 13 Rev: 08.06.18 CCD-0001736...
- Page 14 ONECONTROL COMPONENTS ® eLeCTRoNICS Callout Part # Description 318709 Wi-Fi Hub 378610 Range Extender 365207 My RV Range Extender Wi-Fi Gateway Hub 351138 Smart Switch 344920 5 Function Receiver with Selectable Fuses 344922 5 Function Receiver with Selectable Fuses and Hydraulic...
- Page 15 ONECONTROL COMPONENTS ® eLeCTRoNICS Callout Part # Description 436375 Multi-Output LED Lighting Control Module 308958 2 Motor Velocity Sync In-Wall Slide Controller 425749 Leveling Controller 345083 Leveling Controller (LincTab) 406348 Generator Genie Controller Page 15 Rev: 08.06.18 CCD-0001736...
- Page 16 ONECONTROL COMPONENTS ® eLeCTRoNICS Callout Part # Description 425924 Single Zone HVAC Controller 406350 Dual Zone HVAC Controller 709167 V2 Single Zone HVAC Control w/ Auto Gen Start 709168 V2 Dual Zone HVAC Control w/ Auto Gen Start 709169 V2 Triple Zone HVAC Control w/ Auto Gen Start...
- Page 17 ONECONTROL COMPONENTS ® eLeCTRoNICS Callout Part # Description 331111 Canbus Data Harness - 2' 331113 Canbus Data Harness - 5' 331114 Canbus Data Harness - 10' 331116 Canbus Data Harness - 20' 331117 Canbus Data Harness - 30' 351071 Canbus Data Harness - 50'...
- Page 18 ONECONTROL TANK MONITOR COMPONENTS ® eLeCTRoNICS Callout Part # Description 369717 OneControl® Tank Monitor Controller and Harness Kit 341237 OneControl® Tank Monitor Controller 341943 OneControl® Tank Monitor Controller Harness 437442 OneControl® Tank Monitor Controller (V2) 341236 Tank Sensor Resistor Pack Page 18 Rev: 08.06.18...
-
Page 19: Notes
Notes Page 19 Rev: 08.06.18 CCD-0001736... - Page 20 The contents of this manual are proprietary and copyright protected by Lippert Components, Inc. (“LCI”). LCI prohibits the copying or dissemination of portions of this manual unless prior written consent from an authorized LCI representative has been provided. Any unauthorized use shall void any applicable warranty. ...
Need help?
Do you have a question about the OneControl and is the answer not in the manual?
Questions and answers