Table of Contents
Advertisement
Advertisement
Table of Contents

Subscribe to Our Youtube Channel
Related Manuals for Yaohua Weighing System XK3190-A12


Summary of Contents for Yaohua Weighing System XK3190-A12
- Page 1 Digital Weighing Indicator XK3190-A12(E) User Manual 2008.10 OC Version...
-
Page 2: Table Of Contents
XK3190-A12(E) Content ………………….…….. …………..……….……....-2- CHAPTER 1 MAIN SPECIFICATIONS 1.1 TECHNICAL PARAMETERS OF INDICATOR 1.2 INTRODUCTION OF INDICATOR CHAPTER 2 INSTALLATION ....................-5- 2.1 FRONT AND BACK VIEW OF INDICATOR 2.2 KEY FUNCTIONS 2.3 CONNECTION OF THE INDICATOR …………….…... -
Page 3: Chapter 1 Main Specifications
XK3190-A12(E) DEAR CUSTOMERS, PLEASE READ THE USER GUIDE CAREFULLY BEFORE USING THE INDICATOR! Chapter 1 Main Specifications 1.1 TECHNICAL PARAMETERS OF INDICATOR Model name XK3190 - A12 XK3190 - A12E ①Self-indicating instrument ②Non-automatic weighing indicator Indicator Indicator type ③Software-embedded indicator Platform scales ●Commercial weighing and industrial weighing Application... - Page 4 XK3190-A12(E) Maximum signal voltage for dead load 14mV Minimum input-voltage per verification scale interval (ΔUmin) 2µV Electrical Measuring range minimum voltage parameters MRmin Measuring range maximum voltage 20mV MRmax Minimum load cell impedance (R 87Ω Lmin Maximum load cell impedance (R 350Ω...
-
Page 5: Introduction Of Indicator
Windows 2000,Windows XP 1.2 INTRODUCTION OF INDICATOR XK3190-A12(E) weighing indicator is non-automatic weighing indicator applied to platform scale. It can be connected to electric platform scale, electric floor scale, and can be connected 1-4 350 ohm load cells. It is mainly applied to enterprise with factory, wholesale market, bus station, port, mine, warehouse etc, all kinds of weighing occasions. -
Page 6: Chapter 2 Installation
When the voltage of built in battery decreases to a certain value, indicator will alert and remind user to recharge in time. XK3190-A12(E) indicator has the calibration protection and software tamper-proof function. There is calibration switch on the hardware and is protected with lead seal. Only when you open the lead seal and softly touch the calibration switch, the data will be saved. -
Page 7: Key Functions
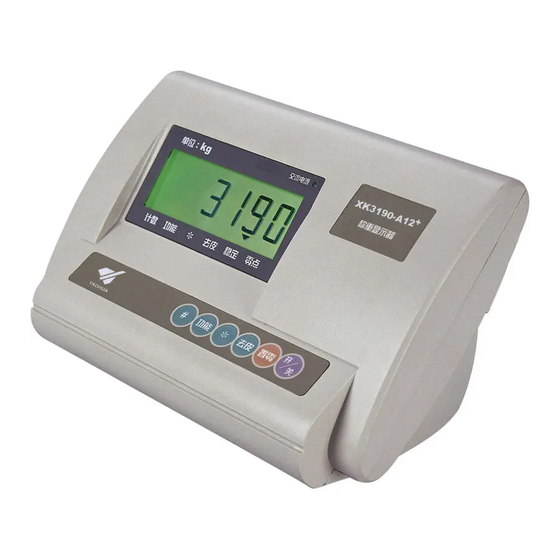
XK3190-A12(E) (2-1) Housing 2.2 KEY FUNCTIONS Function 【 # 】 When turning on the indicator, keep pressing this key to enter the calibration mode When calibration, press this key to switch from parameters 【Func 】 At weighing mode, press this key to start counting; and keep pressing this key for more than 5 seconds to enter the user parameters setting mode A12:【Accum】... -
Page 8: Connection Of The Indicator
XK3190-A12(E) 2.3 CONNECTION OF THE INDICATOR 2.3.1 The definition of the connectors on the PCB (2-2) A12 main board connecting figure (2-3) A12E main board connecting figure 2.3.2 Load cell connection indicator load cell ⑥ EX+ Excitation+ ⑦ S+ ① ②... - Page 9 XK3190-A12(E) (2-4) Load cell connection Please use 6-core shielded cable to connect the load cell. If uses 4-core cable, please short “EX+” and “S+”、“EX-” and “S-”. If the cable is longer than 3m, it’s strongly advised to add a magnetic loop (optional component) on the RS232 interface of the indicator to enhance the anti-interference ability.
-
Page 10: Chapter 3 Operation
XK3190-A12(E) Chapter 3 Operation 3.1 POWER ON AND AUTO ZERO 3.1.1 After turning on the switch on the back housing, keep pressing 【 】 key to turn on the indicator. ON/OFF 3.1.2 The indicator displays all sections, and all the indication signs first, then the display is as follow (1) Model name: 【-A12-】... -
Page 11: Counting
XK3190-A12(E) 3.4 COUNTING to enter the counting mode. Indicator displays “count”, and we can load [Func] At weighing mode, press key, indicator displays “C00000”, then press [Tare] the scale. When stable indication sign is on, press move the small indication triangle directedly, the number corresponded with the small triangle means the [Zero] sample quantity, and this number will increase by one when press key. -
Page 12: Serial Communication
XK3190-A12(E) X=1: Net weight output X=2: Gross weight output 4、P4 RS232 output mode (Default setting:1) X=1: No transmission (RS232 stop) X=2: Continuous transmission X=3: Continuous transmission only when stable 5、P5 Backlight mode (Default setting:2) X=1: No backlight X=2: Automatic backlight X=3: Constant backlight 6、P6... - Page 13 XK3190-A12(E) Communication mode as follows: (1)At normal weighing mode, every group of data consists of 15 bytes as below: byte: „W‟ byte: „G‟ (when the weighing result is gross weight) „N‟ (when the weighing result is net weight) byte: Weighing result including the decimal point When there is no decimal point, the 9 bit is blank (0x20) When the weight is negative, the 3rd bit is the negative sign (0x2d)
-
Page 14: Chapter 4 Calibration
XK3190-A12(E) 13th byte: the 4 low bits of checksum (0x33) byte: 0x0d byte: 0x0a Chapter 4 Calibration 4.1 CALIBRATION Connect load cell properly, then turn on the indicator, keep pressing key while it‟s initializing, it will enter the calibration mode, and display 【d X 】. -
Page 15: Chapter 5 Maintenance
XK3190-A12(E) Calibrate the full capacity Add full capacity load, [AdLOAD] For example: [TARE] press to continue Load 25000 weight on scale(as we set in step 3) [TARE] Press to select the digit bit; [TARE] [ZERO] to change the value to [ZERO] Press to change... -
Page 16: Chapter 6 Error Indication
XK3190-A12(E) 5.3 The load cell and indicator need good connection. System must have a good ground connection, and kept away from strong electric field, strong magnetic field. The load cell and indicator must be kept away from strong corrosive substances and inflammable& explosive materials. ▲!... - Page 17 XK3190-A12(E) ERR 1 The AD value is too small when calibrating the full capacity Please change proper capacity load cell ERR 2 The zero point is out of range when calibrating the zero point Please make sure no load is on the scale ERR 3 The zero point is out of range when turning on Please make sure no load is on the scale when turning on...
Need help?
Do you have a question about the XK3190-A12 and is the answer not in the manual?
Questions and answers