Table of Contents
Advertisement
Advertisement
Table of Contents

Summary of Contents for Yaohua Weighing System XK3190-A12
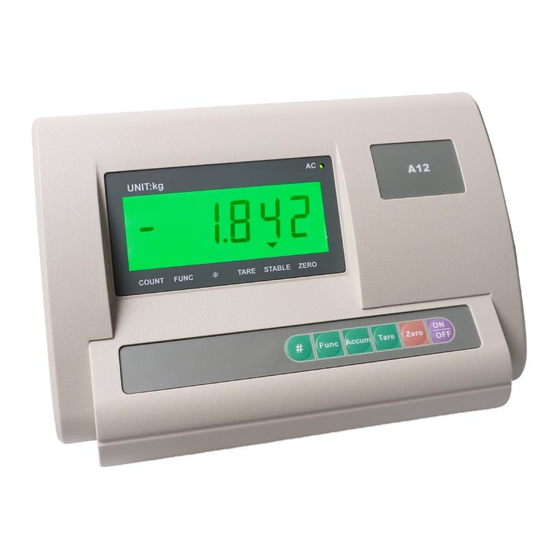
- Page 1 Weighing Indicator XK3190-A12 User Manual A12-51007 V1.0...
-
Page 2: Table Of Contents
Content CHAPTER 1 MAIN SPECIFICATION …………………………………………….……......-2- CHAPTER 2 INSTALLATION ……………………………...…………………........-3- 2.1 FRONT AND BACK VIEW OF INDICATOR …………………………………….………………...-3- 2.2 KEY FUNCTIONS ……………………………...…………………………........-4- 2.3 CONNECTING LOAD CELL TO INDICATOR………….. …………………………....-4- CHAPTER 3 OPERATION …………….…………………………………..……………………..……-5- 3.1 POWER ON & ZERO SETTING…..………………..……………………………………...……… -5- 3.2 MANUAL ZERO SETTING……….………..……………………………………………...………...-5- 3.3 TARE …………….………………………………………………………………………...………….-5- 3.4 ACCUMULATING ………………………………………………………………………...………….-5-... -
Page 3: Chapter 1 Main Specification
Chapter 1 Main Specification 1. Model: XK3190-A12 weighing indicator 2. Accuracy: GradeⅢ, n=3000 3. Sample Rate: 10 times / second 4. Load cell sensitivity: 1.5~3mV / V 5. Scale interval: 1/2/5/10/20/50 for option 6. Display: 6 bits LCD,6 state indicating signals 7. -
Page 4: Chapter 2 Installation
Chapter 2 Installation 2.1 FRONT AND BACK VIEW OF THE INDICATOR Front View Back View A12-51007 V1.0 - 3 -... -
Page 5: Key Functions
2.2 KEY FUNCTIONS Keep pressing this button for 5 seconds more in weighing mode, it will come into [FUNC ] operator setting mode; less than 5 seconds, it will come into counting mode. Press this button to accumulating the weight in weighing mode. [ACCUM ] Press this button for sample taking in counting mode Press this button to tare in weighing mode. -
Page 6: Chapter 3 Operation
Chapter 3 Operation 3.1 POWER ON AND AUTO ZERO-SETTING 3.1.1 The indicator will perform “999999-000000” to self-checking when turning on. Then it will enter weighing mode. 3.1.2 When power on, if loading weight on the scale deviates from the zero point, but still within zero set range, the indicator will set zero automatically;... - Page 7 3.6 USER’S FUNCTION SETTING In weighing mode, keep pressing [F] for 5 seconds more, it will enter operator setting mode (mode P), there are 10 modes from P1 to P10 for option, press [Accum] to choose the mode and press [Tare] to choose the parameter.
-
Page 8: Connect Scoreboard To Indicator
X=1: 0.5e X=2: 1.0e X=3: 1.5e X=4: 2.0e X=5: 2.5e X=6: 3.0e X=7: 5.0e 8、P8 Zero key scope X=1: 2%FS X=2: 4%FS X=3: 10%FS X=4: 20%FS 9、P9 Zero scope upon starting X=1: 2%FS X=2: 4%FS X=3: 10%FS X=4: 20%FS 10、P10 Digital filtering intensity X=1: high... -
Page 9: Serial Communication And Indicator Commection
Non-professional staff is supposed not to be involved in this regard. With RS232(optional) serial communication interface, the XK3190-A12 indicator can be connected to computer for communication. 1. All data are ASCII code, every set of which is composed of 10 bits: the 1 is starting bit, the 10 stop bit, the middle in between are 8 data bits. -
Page 10: Chapter 4 Calibration
Chapter 4 Calibration 4.1 Connect load cell properly, then turn on the indicator, press [#] key while it is initialization, it will enter into the calibration mode and calibrate as following: STEP OPERATION DISPLAY NOTES Select division optional(1/2/5/10/20/50),press [#] Press [TARE] for selection for confirm of division Example: 20... -
Page 11: Chapter 5 Error Indication
4.2.2 Fast calibration for full range point: At any time before it shows [AdLOAD], press [ACCU], it keeps the original division, decimal point, full range, zero point calibration and enter into the full range point calibration mode. When it is finished, press the calibration switch under the lead sealing board at the back of the indicator, it saves the setting and back to the weighing status. -
Page 12: Chapter 7 Maintentance
Chapter 7 Maintenance 7.1 To guarantee indicator clarity and using life, the indicator shouldn’t be placed directly under sunshine and should be set in the plain space. 7.2 The indicator can’t be placed into the place where the dust pollution and vibration are serious. 7.3 Load cell should connect with indicator reliably, and the system should be well connected into ground.


Need help?
Do you have a question about the XK3190-A12 and is the answer not in the manual?
Questions and answers