
Related Manuals for SICK Ranger E


Summary of Contents for SICK Ranger E
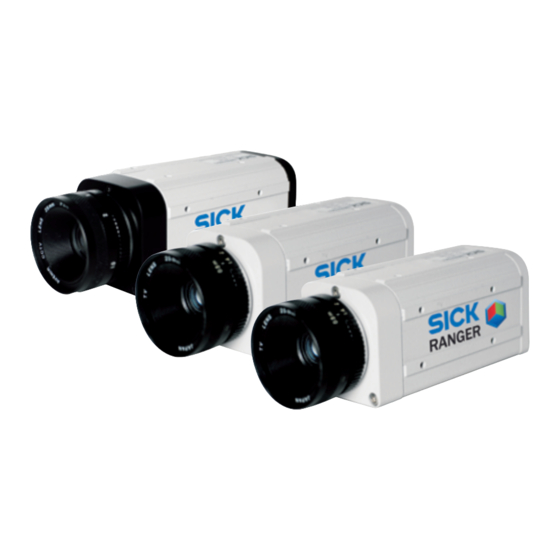
- Page 1 REFERENCE MANUAL Ranger E/D MultiScan 3D camera with Gigabit Ethernet (E) 3D camera with Gigabit Ethernet (D)
- Page 2 All other mentioned trademarks or registered trademarks are the trademarks or registered trademarks of their respective owner. SICK uses standard IP technology for its products, e.g. IO Link, industrial PCs. The focus here is on providing availability of products and services. SICK always assumes that the integrity and confidentiality of data and rights involved in the use of the above-mentioned products are ensured by customers themselves.
-
Page 3: Table Of Contents
Configuring Ranger E and D .......................41 Selecting Configurations and Components................41 Setting Region-of-Interest......................42 Different Triggering Concepts ....................43 Enable Triggering ........................43 Pulse Triggering Using an Encoder ..................45 5.5.1 Triggering Scans.......................45 5.5.2 Embedding Mark Data.....................46 ©SICK AG • Advanced Industrial Sensors • www.sick.com • All rights reserved... - Page 4 Calibration and Post Processing of Buffers................99 8.5.1 Filter Classes......................99 8.5.2 Extraction Filter ......................100 8.5.3 Calibration Filter.....................100 8.5.4 Rectification Filter ....................101 8.5.5 Color Registration filter..................101 8.5.6 Color Generation Filter...................103 ©SICK AG • Advanced Industrial Sensors • www.sick.com • All rights reserved...
- Page 5 Ranger E and D Models.......................115 Laser Safety .........................116 Recommended Network Card Settings ................117 Recommended Switches.....................118 iCon Device Configuration....................118 Connecting Encoders......................119 Ranger E/D Power-I/O terminal ..................121 Laser Safety Key Box (ICT-B) ....................123 ©SICK AG • Advanced Industrial Sensors • www.sick.com • All rights reserved...
-
Page 6: Introduction
Scatter measures how the incoming light is distributed beneath the object’s surface. This is for example useful for finding the fiber direction in wood or detecting delamination defects. ©SICK AG • Advanced Industrial Sensors • www.sick.com • All rights reserved... - Page 7 Ranger E Connects to the PC through a Gigabit Ethernet network. ColorRanger E Combines the function of a Ranger E camera and a three-color line scan camera. Ranger D A low-cost, mid-performance version of the Ranger E, suitable for meas- uring 3D only in applications without high-speed requirements.
-
Page 8: Overview
In addition, the Ranger C, Ranger E and ColorRanger E models – being MultiScan cameras –can also make parallel measurements on the object. This could for example be used for measuring surface properties of the objects at the same time as the shape. -
Page 9: Mounting The Ranger
Selecting the right way of illuminating the objects to measure, and finding the right way in which to mount the Ranger and lightings are usually critical factors for building a vision system that is efficient and robust. ©SICK AG • Advanced Industrial Sensors • www.sick.com • All rights reserved... -
Page 10: Configuring The Ranger
Ranger Studio. This parame- ter file is later used when connecting to the Ranger from the machine vision application. Figure 2.3 – Configuring the Ranger with Ranger Studio. ©SICK AG • Advanced Industrial Sensors • www.sick.com • All rights reserved... -
Page 11: Measurement Methods
The Ranger and the laser line should be oriented so that the laser line is parallel to the rows on the Ranger’s sensor. The Ranger E and D have a laser line indicator on the back plate, indicating in which direction it expects the laser line to be oriented. - Page 12 Reference Manual Ranger E/D The Ranger E and ColorRanger E models have five different components for measuring range, the Ranger C has three components, and the Ranger D has one component. They differ in which method is used for locating the laser line:...
- Page 13 In addition to the range values, the Horizontal max, Horizontal threshold and max, and Hi3D for Ranger E/C and ColorRanger E also deliver intensity values for the measured points along the laser line. The intensity values are the maximum intensity in each column of the sensor, which –...
- Page 14 Gray and HiRes Gray components measure the intensity on the same rows for every col- umn on the sensor, whereas the range components measure the intensity along the triangulation laser line, which may be located on different sensor rows for each column. ©SICK AG • Advanced Industrial Sensors • www.sick.com • All rights reserved...
- Page 15 The data is delivered as separate color channels – one channel for each sensor area. The color channels can then be merged into high quality color images on the PC by using the APIs in the Ranger development software. ©SICK AG • Advanced Industrial Sensors • www.sick.com • All rights reserved...
- Page 16 Where there is a defect, the light is scattered in the gap between the layers, resulting in a wider reflection and thus high scatter response. ©SICK AG • Advanced Industrial Sensors • www.sick.com • All rights reserved...
-
Page 17: Developing Applications
For Ranger C, this requires that the Ranger is connected to a frame grabber board that is supported by the Ranger APIs. If a different frame grabber is used, the measurement data is retrieved using the APIs for that frame grabber. ©SICK AG • Advanced Industrial Sensors • www.sick.com • All rights reserved... -
Page 18: Triggering
PC as mark data. Your application can then use this information to calculate the distance between the profiles. ©SICK AG • Advanced Industrial Sensors • www.sick.com • All rights reserved... -
Page 19: Mounting Rangers And Lightings
The Ranger measures one cross-section of the object at a time. The most useful illumina- tion for this type of measurements is usually a line light, such as a line-projecting laser or a bar light. ©SICK AG • Advanced Industrial Sensors • www.sick.com • All rights reserved... -
Page 20: Range (3D) Measurement
The lens is focused so that the images contain a sharp laser line. The laser is focused so that there is a sharp line on the objects, and that the laser line covers a few rows on the sensor. ©SICK AG • Advanced Industrial Sensors • www.sick.com • All rights reserved... -
Page 21: Occlusion
View from the Ranger Sensor image Figure 3.5 – The resolution in the measured range is higher if the angle between the laser and the Ranger is large. ©SICK AG • Advanced Industrial Sensors • www.sick.com • All rights reserved... -
Page 22: Main Geometries
α β Ordinary Reversed ordinary α α β β Specular Look-away Figure 3.6 – Main geometries for mounting the Ranger and laser. ©SICK AG • Advanced Industrial Sensors • www.sick.com • All rights reserved... -
Page 23: Intensity And Scatter Measurements
(0–10 for Ranger, 0–16 for ColorRanger), and rows 100–511 are filtered. Please refer to “Ranger E and D Models” on page 113 for a list of available models. -
Page 24: Color Measurements
If this is not the case the color channel registration must also compensate for a sideway shift, which is currently not supported by the iCon API. ©SICK AG • Advanced Industrial Sensors • www.sick.com • All rights reserved... -
Page 25: Light Sources For Color And Gray Measurements
To shift the color temperature of the lamp it is also possible to insert additional filters in the light source. Filters for photography called cooling color tempera- ture filters in the series 80A/B are recommended for this. ©SICK AG • Advanced Industrial Sensors • www.sick.com • All rights reserved... -
Page 26: Fluorescent Tubes
White LEDs have a strong blue peak from the main LED and then a wider spectrum from the phosphorescence giving the white appearance. This type of illumination is expected to require approximately 60-70% balance on the blue and green channels compared with the red. ©SICK AG • Advanced Industrial Sensors • www.sick.com • All rights reserved... -
Page 27: Colored Leds
An LED illumination can also be made from individual red, green and blue LEDs. In this case the spectrum of each LED must fall within the respective filter bands. In this case the balance depends on the individual power of the LEDs. ©SICK AG • Advanced Industrial Sensors • www.sick.com • All rights reserved... -
Page 28: Ranger Studio
Acquisition control – to start and stop the scanning loop and to change between meas- uring in Image or Measurement mode. Image mode is used for set-up purposes. Measurement mode is used for collection measurement data. ©SICK AG • Advanced Industrial Sensors • www.sick.com • All rights reserved... -
Page 29: Visualization Tabs
Note that when displaying the high-resolution rows, the row number shown in the status bar and Info window does not match the number of the sensor row. ©SICK AG • Advanced Industrial Sensors • www.sick.com • All rights reserved... - Page 30 To get a proper compound color image, you have to set up the registration parameters. See “Visualizing Color Images” on page 39 for more information. ©SICK AG • Advanced Industrial Sensors • www.sick.com • All rights reserved...
-
Page 31: Zoom Windows
Yellow rectangle. The data is displayed as a 3D surface, where varia- tion in height is also indicated by different colors. The lowest value is shown as black color. ©SICK AG • Advanced Industrial Sensors • www.sick.com • All rights reserved... -
Page 32: Parameter Editor
The parameter tree shows a hierarchical structure of the system configuration. When selecting an item in the parameter tree all available parameters for that item are shown in the Parameter list on the right. ©SICK AG • Advanced Industrial Sensors • www.sick.com • All rights reserved... -
Page 33: Flash Retrieve And Store Of Parameters
To get an image from the Ranger, first connect to the Ranger, and then load a suitable parameter file. Which parameter file to use depends on the model of the Ranger and ©SICK AG • Advanced Industrial Sensors • www.sick.com • All rights reserved... - Page 34 9. If necessary, adjust the aperture and focus of the lens to get an image that is sharp in all areas in which to measure. The view in the visualization tab can be used for finding an appropriate exposure time or the region-of-interest. ©SICK AG • Advanced Industrial Sensors • www.sick.com • All rights reserved...
-
Page 35: Adjust Exposure Time
27. Click Start to start the Ranger again. In some cases it is a good idea to not include data from the background, for example the conveyor belt. ©SICK AG • Advanced Industrial Sensors • www.sick.com • All rights reserved... -
Page 36: Collection Of 3D Data
38. If you want to save the configuration from the Ranger, click Stop to stop the acquisi- tion. 39. Click Save parameters and give the file a name. 40. Click Disconnect. ©SICK AG • Advanced Industrial Sensors • www.sick.com • All rights reserved... -
Page 37: Getting A Complete Object In One Image
54. Place a white or neutral gray object in front of the camera, so that it is visible for all color rows. 55. Open a Profile zoom window by right-clicking and choosing from the zoom menu. ©SICK AG • Advanced Industrial Sensors • www.sick.com • All rights reserved... - Page 38 If it is difficult to achieve a proper white balancing, consider using a light source that better matches the specifications of the sensor and the color filters, as described in chapter 9 “Hardware Description”. ©SICK AG • Advanced Industrial Sensors • www.sick.com • All rights reserved...
-
Page 39: Visualizing Color Images
This will save the image as a BMP file with the name <filename>.BMP To save the image as a PNG file, fill in a file name that ends with .PNG in the dialog box, for example Image1.PNG ©SICK AG • Advanced Industrial Sensors • www.sick.com • All rights reserved... -
Page 40: Save And Load Measurement Data
StreamedData when starting to save a data stream, the resulting files will be named: StreamedData00001.xml StreamedData0001.dat StreamedData00002.xml StreamedData0002.dat StreamedData00003.xml StreamedData0003.dat StreamedData00004.xml StreamedData0004.dat The measurement data will be saved to files until the Ranger is stopped ©SICK AG • Advanced Industrial Sensors • www.sick.com • All rights reserved... -
Page 41: Configuring Ranger E And D
Ranger E/D Configuring Ranger E and D The Ranger E and D can be configured to fit many different applications. This enables testing of different set-ups and fine-tuning of the parameter values, in order to optimize the measurement loop and data quality. -
Page 42: Setting Region-Of-Interest
Measurement component components Figure 5.1 – Hierarchy of parameters for the Ranger E. Ranger D has a similar hierarchy, but has only one measurement component. Setting Region-of-Interest The Region-of-Interest (ROI) defines what part of the sensor to use for the measurements. -
Page 43: Different Triggering Concepts
Ranger will either idle or continue to make another series of scans, depend- ing on the state of the Enable signal and the setting of the Use enable parameter: ©SICK AG • Advanced Industrial Sensors • www.sick.com • All rights reserved... - Page 44 Enable signal: Scan acquisition (level sensitive): scan height scan height scan height Scan acquisition scan height scan height rising flank sensitive): Figure 5.4 – Timing diagram for ENABLE signal ©SICK AG • Advanced Industrial Sensors • www.sick.com • All rights reserved...
-
Page 45: Pulse Triggering Using An Encoder
Similar to the Position mode, but is more sensitive to (legacy) vibrations (jitter). Moving forward Moving backward Moving forward again Position Direction Movement Figure 5.5 – Different pulse triggering modes. ©SICK AG • Advanced Industrial Sensors • www.sick.com • All rights reserved... -
Page 46: Embedding Mark Data
Data”. The parameters used for configuring the camera to send mark data is described in section 6.4 “Measurement Configuration” for Ranger D, and 7.4 “Measurement Configu- ration” for Ranger E respectively. ©SICK AG • Advanced Industrial Sensors • www.sick.com • All rights reserved... -
Page 47: Setting Exposure Time
Exposure time Exposure time Min. cycle time Time Figure 5.7 – Exposure times and cycle times in different combinations of reset and trig modes (continued on the next page). ©SICK AG • Advanced Industrial Sensors • www.sick.com • All rights reserved... - Page 48 – much smaller than for example object properties and factors in the environment. Read-out Sensor Cycle time Reset Exposure time Figure 5.8 - Rolling shutter. ©SICK AG • Advanced Industrial Sensors • www.sick.com • All rights reserved...
-
Page 49: Range Measurement Settings
Out2. The length of the trig pulse is set by the Laser pulse time parameter. If a configuration uses multiple range components, only one of them can pulse the illumination. ©SICK AG • Advanced Industrial Sensors • www.sick.com • All rights reserved... -
Page 50: Details On 3D Profiling Algorithms
Intensity Threshold Sensor row ROI end ROI start Sensor row ROI end ROI start Figure 5.12 – Digitalizing one column of the sensor image using a binary threshold ©SICK AG • Advanced Industrial Sensors • www.sick.com • All rights reserved... - Page 51 Intensity Threshold False laser peak Sensor row ROI end ROI start Sensor row ROI end ROI start Figure 5.14 – Altering the threshold to remove false peaks ©SICK AG • Advanced Industrial Sensors • www.sick.com • All rights reserved...
- Page 52 The morphology filters are designed to reduce the effect of these noise peaks. If, when studying a Ranger ©SICK AG • Advanced Industrial Sensors • www.sick.com • All rights reserved...
- Page 53 In an expanding morphological filter of size Nx1 pixels the operation is defined as a Boo- lean OR of the pixels within the region. That is, if any pixel within the region is 1 the result is 1, otherwise 0. ©SICK AG • Advanced Industrial Sensors • www.sick.com • All rights reserved...
-
Page 54: Color Data Acquisition
White balancing using Ranger Studio is described in section 4.4.6 “White Balancing the Color Data”. Some light sources allow for adjustments of its spectral content. In that case it is possible to white balance by tuning the light source. ©SICK AG • Advanced Industrial Sensors • www.sick.com • All rights reserved... -
Page 55: Color Channel Registration
Figure 5.19 –Illustration of unregistered (left) and registered (right) color scanned by a Ranger E camera. Note the false color edges on the letters in the unregis- tered image. Registration and variations in speed The distance to shift each color channel depends on the geometry, the profile rate, and the object speed. -
Page 56: Calibration
(XY plane) this is equal to a translation between (u, v) and (x, z) but if not you need to compensate for the skewed coordinate system. This is currently not ©SICK AG • Advanced Industrial Sensors • www.sick.com • All rights reserved... -
Page 57: Calibrated Data
Rectification of data means that a new profile is created by re-sampling the calibrated data onto a regular grid. The rectification in iCon is performed along the X-axis only. The new ©SICK AG • Advanced Industrial Sensors • www.sick.com • All rights reserved... -
Page 58: Physical Setup
In the case of reverse ordinary geometry this means that a perpendicular coordi- nate system is given whereas e.g. an ordinary geometry will have a skewed coordinate system. The image below shows what this means in practice. ©SICK AG • Advanced Industrial Sensors • www.sick.com • All rights reserved... -
Page 59: Calibration And 3D Cameras
This section only applies to Ranger cameras since Ruler cameras are shipped pre- calibrated with the LUT stored on device flash. To generate a LUT you need the following: ©SICK AG • Advanced Industrial Sensors • www.sick.com • All rights reserved... - Page 60 This requires the calibration LUT to be stored in camera flash. There is currently support for one such LUT being stored in the camera so for multi range setups (available in Ranger E cameras) only the first range component will be calibrated.
-
Page 61: Ranger D Parameters
Values: 100–4054 bytes. Default value: 1472. 1472 Maximum size without Ethernet Jumbo frames. 4054 Maximum size if all equipment can handle Ethernet Jumbo frames. ©SICK AG • Advanced Industrial Sensors • www.sick.com • All rights reserved... -
Page 62: Image Configuration
Note that only a single image component can be used, and that this component must be active. The Enable parameter is therefore obsolete but is kept to maintain backward compatibility. ©SICK AG • Advanced Industrial Sensors • www.sick.com • All rights reserved... -
Page 63: Measurement Configuration
The shortest possible time - (Pulse triggering) between two measurements. Default value: 3000 microseconds. 1000-50000 microseconds. Start column The first sensor column to acquire data from. 0–1280 (Ranger D50). 0–256 (Ranger D40). ©SICK AG • Advanced Industrial Sensors • www.sick.com • All rights reserved... - Page 64 “Lines per frame” in the Options->Frame Grabber options. See also the explanation in the section “Getting a Com- plete Object In One Image” in the Ranger Studio chapter. ©SICK AG • Advanced Industrial Sensors • www.sick.com • All rights reserved...
- Page 65 1 = Highest value at bottom of ROI Exposure time The time in microseconds during which the sensor is exposed to light. Values: 10–50 000. Default value: 5 000. ©SICK AG • Advanced Industrial Sensors • www.sick.com • All rights reserved...
- Page 66 The acquisition speed of a configuration using the Hi3D component depends mainly on the setting for the ROI. The maximum speed is shown in the following figure. DCM Maximum Profile Speed Profiles per second 1200 1000 Number of rows ©SICK AG • Advanced Industrial Sensors • www.sick.com • All rights reserved...
-
Page 67: Ranger E Parameters
Values: 100–4054 bytes. Default value: 1472. 1472 Maximum size without Ethernet Jumbo frames. 4054 Maximum size if all equipment can handle Ethernet Jumbo frames. ©SICK AG • Advanced Industrial Sensors • www.sick.com • All rights reserved... -
Page 68: 7.3 Image Configuration
Note that only a single image component can be used, and that this component must be active. The Enable parameter is therefore obsolete but is kept to maintain backward compatibility. ©SICK AG • Advanced Industrial Sensors • www.sick.com • All rights reserved... - Page 69 Factor to amplify the analog sensor data before AD conversion. Values: 1, 3, 4. Default value: 1 (No amplification). Image speed Upper bound on the data rate in Megabit/second Values: 5-400, Default value 100. ©SICK AG • Advanced Industrial Sensors • www.sick.com • All rights reserved...
-
Page 70: 7.4 Measurement Configuration
Encoder direction Specifies which direction is the forward direction. Only relevant when Trig mode is set to 3 (Position) or 4 (Direction). 0 = Standard. 1 = Reversed. ©SICK AG • Advanced Industrial Sensors • www.sick.com • All rights reserved... - Page 71 0 = Reset mark every time the Ranger measurement is started by the PC. 1 = Reset mark every time a measurement is started with the Enable signal. Default value 0. ©SICK AG • Advanced Industrial Sensors • www.sick.com • All rights reserved...
-
Page 72: 7.5 Measurement Components
Chapter 7 Reference Manual Ranger E/D 7.5 Measurement Components The Ranger E has ten built-in measurement methods – or measurement components. Two of these are only available for the ColorRanger E – Color and Hi-Res Color: Component Name Measures Note... - Page 73 Values: 1, 3, 4. Default value: 1 (No amplification). Threshold 1 First (low) threshold level. Values: 0–255. Default value: 50. Threshold 2 Second (high) threshold level. Values: 0–255. Default value: 70. ©SICK AG • Advanced Industrial Sensors • www.sick.com • All rights reserved...
- Page 74 ROI and the number of thresholds. The maximum speed with one and two thresholds enabled is shown in the following figure. ©SICK AG • Advanced Industrial Sensors • www.sick.com • All rights reserved...
- Page 75 Ranger E Parameters Reference Manual Chapter 7 Ranger E/D HorThr Maximum Profile Speed 40000 35000 30000 25000 1 threshold 2 thresholds 20000 15000 10000 5000 Number of rows ©SICK AG • Advanced Industrial Sensors • www.sick.com • All rights reserved...
-
Page 76: Horizontal Max (Hormax)
0 = Resolution of 1 pixel 1 = Resolution of ½-pixel Ad bits Number of bits to use when performing AD conversion of sensor data. Values: 5–8. Default value: 7. ©SICK AG • Advanced Industrial Sensors • www.sick.com • All rights reserved... -
Page 77: Horizontal Max And Threshold (Hormaxthr)
The first sensor row to acquire data from. Values: 0–511. Default value: 0. Number of rows The number of rows to acquire algorithm data from. Values: 16–512. Default value: 512. ©SICK AG • Advanced Industrial Sensors • www.sick.com • All rights reserved... - Page 78 Values: 3–5 rows. Default value: 3. The acquisition speed of a configuration using the Horizontal Max and Threshold compo- nent depends mainly on the setting for the ROI and AD bits. ©SICK AG • Advanced Industrial Sensors • www.sick.com • All rights reserved...
-
Page 79: High-Resolution 3D (Hi3D)
Too low an offset gives scatter value = intensity value, while too high an offset gives a dark (black) image. Values 0 – 50. Default value: 35 ©SICK AG • Advanced Industrial Sensors • www.sick.com • All rights reserved... -
Page 80: High-Resolution 3D (Hi3D Cog)
The Hi3D component in Ranger E doesn’t calculate the range values, but instead delivers two values for each column that can be used for calculating the range in the region-of-... - Page 81 Use a lower setting of the AD bits parameter. The used exposure time depends on both the Exposure time parameter and the Cycle time parameter in the Measurement configuration. ©SICK AG • Advanced Industrial Sensors • www.sick.com • All rights reserved...
- Page 82 The acquisition speed of a configuration using the Hi3D component depends mainly on the setting for the ROI and the number of AD bits. The maximum speed at 5–7 bit AD conver- sion is shown in the following figure. ©SICK AG • Advanced Industrial Sensors • www.sick.com • All rights reserved...
-
Page 83: Gray
Values: 10–50 000. Default value: 5000. Gain Factor to amplify the analog sensor data before AD conversion. Values: 1, 3, 4. Default value: 1 (No amplification). ©SICK AG • Advanced Industrial Sensors • www.sick.com • All rights reserved... -
Page 84: Hires Gray
Values: 10–50 000. Default value: 5000. Gain Factor to amplify the analog sensor data before AD conver- sion. Values: 1, 3, 4. Default value: 1 (No amplification). ©SICK AG • Advanced Industrial Sensors • www.sick.com • All rights reserved... -
Page 85: Scatter
The time in microseconds during which the direct region direct of the sensor is exposed to light. Must be less than "Exposure time scatter". Values: 10–50 000. Default value: 50. ©SICK AG • Advanced Industrial Sensors • www.sick.com • All rights reserved... -
Page 86: Color And Hires Color
The selection is done by a parameter setting. Approx. 50 stan- dard rows Figure 7.6 – The high-resolution rows are located above row 0. ©SICK AG • Advanced Industrial Sensors • www.sick.com • All rights reserved... - Page 87 The maximum speed for RGB-color data acquisition is approximately 13 KHz. The most efficient operation (maximum possible scan speed) of ColorRanger is achieved when the balance parameters are close to 100%. ©SICK AG • Advanced Industrial Sensors • www.sick.com • All rights reserved...
- Page 88 Hi3D 6000 4000 2000 Number of rows Maximum Profile Speed: HiResColor + Range 10000 9000 8000 7000 6000 HorThr Hi3D 5000 4000 3000 2000 1000 Number of rows ©SICK AG • Advanced Industrial Sensors • www.sick.com • All rights reserved...
-
Page 89: Icon Api
Ruler API is rotation and translation of the calibrated coordinate system. Note that the example applications for Ranger E and D which are included in the SDK can also be used for Rulers, including the calibration example. -
Page 90: Connecting To An Ethernet Camera
// be retrieved from the framegrabber object.) FGEthernetFastParameters* myFGParameters = dynamic_cast<FGEthernetFastParameters*>(myFramegrabber->getParameters()); framegrabberPort = myFGParameters->getFrameGrabberPort(); redundancyPort = myFGParameters->getRedundancyPort(); string cameraIP = "192.168.0.12"; myCamera->setComParameters(cameraIp, framegrabberPort, redundancyPort, EthernetCamera::HIGH_PERFORMANCE_DATA_CHANNEL); // Initialize the camera. myCamera->init(); ©SICK AG • Advanced Industrial Sensors • www.sick.com • All rights reserved... - Page 91 You can find out which state the camera currently is in by calling the Camera object’s checkCamStatus() method. Notice however that if the camera is currently running, asking for its status may interfere with the measurements and scans may be lost. ©SICK AG • Advanced Industrial Sensors • www.sick.com • All rights reserved...
-
Page 92: Retrieving Measurement Data
Hi3D component is used, each scan will contain one range profile and one intensity profile. If the camera measures with several components simultaneously (MultiScan), each scan may even contain several profiles containing – for example – intensity measurements. ©SICK AG • Advanced Industrial Sensors • www.sick.com • All rights reserved... -
Page 93: Accessing The Measurement Data
To access a single scan within a buffer, you call the getReadPointer() or - getWritePointer() method of the buffer, to get a pointer to the beginning of the scan’s measurement data. ©SICK AG • Advanced Industrial Sensors • www.sick.com • All rights reserved... - Page 94 (strValueType == "BYTE") byteValues = true; else if(strValueType == "WORD") byteValues = false; else return; // Get the number of scans in the buffer const int numberOfProfiles = myBuffer->getNoScans(); ©SICK AG • Advanced Industrial Sensors • www.sick.com • All rights reserved...
-
Page 95: Polling And Call-Back
CallbackWithStatusType If this should happen, it means that scans have been lost as the queue was full, and it is recommended to stop the camera and restart it. ©SICK AG • Advanced Industrial Sensors • www.sick.com • All rights reserved... -
Page 96: Mark Data
Sequence number of scan. Reset at enable or start measure. The time base for the clock used for the ticks is 33 MHz, which gives around 2 minutes of counting before wrap around. ©SICK AG • Advanced Industrial Sensors • www.sick.com • All rights reserved... -
Page 97: Changing Camera Configuration
HorThr 1: string horthrCompPath = “<ROOT><CONFIGURATION name = ‘Measurement’><COMPONENT name ‘HorThr 1’)”; string parameterName = “Threshold 1”; string newValue = “256”; errorCode = myCamera->setParameterValue(horthrCompPath, parameterName, newValue, updateRequired, dataFormatChanged); ©SICK AG • Advanced Industrial Sensors • www.sick.com • All rights reserved... -
Page 98: Error Handling
// reporting errors on both the camera and PC side. class myErrorHandler : public icon::ErrorHandler onError(int errorLevel, const std::string & errorMessage) (errorLevel = icon::ErrorLevel::Fatal) myHandleUrgentErrors(errorMessage); else myLogMessage(errorLevel, errorMessage); ©SICK AG • Advanced Industrial Sensors • www.sick.com • All rights reserved... -
Page 99: Calibration And Post Processing Of Buffers
An individual pixel can be accessed by reading from where the pointer points with an offset of x + width * y, where width is the number of pixels per row. const float *range; res = outBufferRectified.getReadPointer("Hi3D 1","Range", range); ©SICK AG • Advanced Industrial Sensors • www.sick.com • All rights reserved... -
Page 100: Extraction Filter
// inBuffer. numberOfScans is the number of rows per buffer used by the frame // grabber CalibrationFilter calibrationFilter; calibrationFilter.initFromData(calibrationLUT, df, numberOfScans); // Prepare the filter for filtering to avoid a delay during the first execution calibrationFilter.prepareResult(outBufferCalibrated); ©SICK AG • Advanced Industrial Sensors • www.sick.com • All rights reserved... -
Page 101: Rectification Filter
A registration filter is used for shifting the color channels according to the input registra- tion parameters, to compensate for the fact that the measurement values for each color ©SICK AG • Advanced Industrial Sensors • www.sick.com • All rights reserved... - Page 102 // Prepare the registration filter to not let initiation and allocation slow // down processing of the first buffer registrationFilter.prepareResult(outBufferRegistered); […] // Register the color channels in inBuffer using the filter registrationFilter.apply(*inBuffer, outBufferRegistered); ©SICK AG • Advanced Industrial Sensors • www.sick.com • All rights reserved...
-
Page 103: Color Generation Filter
// Include file for extraction filter. Used then saving image to file. #include "filter/extraction.h" […] // Create and set up the color generation filter icon::CreateRGBFilter rgbFilter("Color 1"); rgbFilter.setInput(*(input->getDataFormat()), input->getNoScans()); ©SICK AG • Advanced Industrial Sensors • www.sick.com • All rights reserved... - Page 104 The color generation filter adds a new sub-component to the RGB component. The RGB color data is formatted with 24-bit color stored in 32-bit containers. The last byte is unused. The data is stored in the order B-G-R-x. ©SICK AG • Advanced Industrial Sensors • www.sick.com • All rights reserved...
-
Page 105: Hardware Description
Hardware Description Sensor The Ranger E and D cameras are based on the M12 Smart Vision Sensor series. The M12 Smart Vision Sensor is a CMOS sensor with a 2D pixel matrix, row-parallel AD- converters, and a processor architecture that enables image processing directly on the sensor. -
Page 106: Color Filter Layout
The high-resolution rows are addressed using addresses above the normal 0-511 range, with the gray high- resolution row being row 512. ©SICK AG • Advanced Industrial Sensors • www.sick.com • All rights reserved... -
Page 107: High-Resolution Rows
The M12 sensor and color filter response curves are shown in the following figure. The color filters are combined with an IR-blocking filter so that second order filter peaks do not transmit any light. ©SICK AG • Advanced Industrial Sensors • www.sick.com • All rights reserved... - Page 108 Figure 9.4 – Approximate filter response for the M12 high-resolution color rows. The black line shows the response for uncovered rows, the orange line the IR block filter, and the light blue line the IR pass filter. ©SICK AG • Advanced Industrial Sensors • www.sick.com • All rights reserved...
-
Page 109: Standard And High-Resolution Color Differences
(see the color response graphs on the previous page). This is explained by their larger pixel area, a higher fill-factor, and that the color filters are optimized for the characteristics of the high-resolution pixels. ©SICK AG • Advanced Industrial Sensors • www.sick.com • All rights reserved... -
Page 110: Electrical Connections
There are three connectors on the back of the Ranger E and D. laser line laser line Figure 9.5 – Back plate of the Ranger E and Ranger D respectively, with M12 connectors, Ethernet connector, and LEDs The LEDs on the back plate have the following functions: When lit The Ranger is powered. - Page 111 Gray AUX GND Auxillary Ground (current < 100 mA) Pink Reserved (24 V) Blue Monitor Enable (24 V) Out3 Reserved (B-type) **Color is valid for cable type STL-1208- ©SICK AG • Advanced Industrial Sensors • www.sick.com • All rights reserved...
-
Page 112: Technical Data
Valid for both the pixel matrix and the high-resolution row. IR high pass filter with half transmission at 750 nm, row 0-10 without filter, row 100-511 with filter. ©SICK AG • Advanced Industrial Sensors • www.sick.com • All rights reserved... - Page 113 Valid for both the pixel matrix and the high-resolution row. IR high pass filter with half transmission at 730 nm, row 0-17 without filter, row 100-511 with filter. See table 9.1 on page 105 for more information. ©SICK AG • Advanced Industrial Sensors • www.sick.com • All rights reserved...
-
Page 114: Dimensional Drawing
(M5 x 9 mm depth) 13.5 19.5 Side Fastening threads (M3 x 3 mm depth) 13.2 16.7 124.8 Figure 9.6 – Ranger E and D (not to scale) ©SICK AG • Advanced Industrial Sensors • www.sick.com • All rights reserved... -
Page 115: Appendix
Ranger E and D Models Reference Manual Appendix A Ranger E/D Appendix Ranger E and D Models Table A.1 – Ranger E and D models, and type codes Version Type Code Part no Ranger E40 RANGER-E40414 1040378 Ranger E50 RANGER-E50414... -
Page 116: B Laser Safety
In addition to the above requirements, the certification for class IIIb / 3B laser systems is only given if additional safety requirements are fulfilled and a laser safety officer is named. ©SICK AG • Advanced Industrial Sensors • www.sick.com • All rights reserved... -
Page 117: Recommended Network Card Settings
In the recommended configuration the PC uses IP address 192.168.0.x, where x is 1 – 10. Net mask In the recommended configuration the PC uses net mask 255.255.255.0 ©SICK AG • Advanced Industrial Sensors • www.sick.com • All rights reserved... -
Page 118: D Recommended Switches
Displays a dialog box where a new Camera Application and Camera FPGA firmware can be uploaded to the camera. For further instructions see the readme- file in <PROGRAMFILESFOLDER>\SICK\3D Cameras\ \camera\Ethernet cameras\ReadMe.txt ©SICK AG • Advanced Industrial Sensors • www.sick.com • All rights reserved... -
Page 119: Connecting Encoders
WARNING Failure to follow these rules may damage the Ranger unit. The RS-422 inputs on the Ranger E and D have internal termination, which makes it possible to connect an RS-422 encoder to the Ranger without requiring any external termination. - Page 120 Ranger E/D The signals from the encoder should be connected to the Ranger’s Encoder connector according to the following wire diagram. Table F.3 – Ranger E and D to SICK Stegman Encoder wire diagram Ranger E/D Ranger E and D...
-
Page 121: Ranger E/D Power-I/O Terminal
Ranger. It is connected to the Power I/O and Encoder connectors on the Ranger E or D by using a Ranger E/D PowerIO-Encoder Y-cable with M12 connectors. The other end of the cable is connected to a DSUB connector on the Ranger E/D Power-I/O terminal. - Page 122 7 Power supply (in, 24V) Power I/O pin 2 Ground (0V) Encoder pin 5 Power I/O pin 7 ** Valid when using the Ranger E/D PowerIO-Encoder Y-cable ©SICK AG • Advanced Industrial Sensors • www.sick.com • All rights reserved...
-
Page 123: Laser Safety Key Box (Ict-B)
Input from external power supply and I/O Key switch for Output to laser laser power Figure H.7 – ICT-B Laser Safety box connectors and LEDs ©SICK AG • Advanced Industrial Sensors • www.sick.com • All rights reserved... - Page 124 5 … 10 seconds laser supply power is on Enclosure Rating IP 67 Weight approx. 350 g Operating temperature -10 ... +48 °C Storage temperature -20 ... +70 °C ©SICK AG • Advanced Industrial Sensors • www.sick.com • All rights reserved...
Need help?
Do you have a question about the Ranger E and is the answer not in the manual?
Questions and answers