Table of Contents
Advertisement
Advertisement
Table of Contents

Subscribe to Our Youtube Channel
Related Manuals for Atlas Copco GA 55+


Summary of Contents for Atlas Copco GA 55+
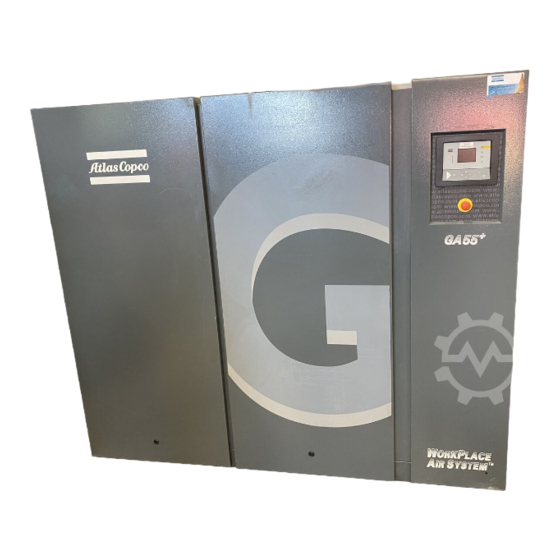
- Page 1 Atlas Copco GA 55+ API603130 Instruction book...
- Page 3 Atlas Copco GA 55+ API603130 Instruction book Original instructions Manufacturing Date: 24/10/2006 Copyright notice Any unauthorized use or copying of the contents or any part thereof is prohibited. This applies in particular to trademarks, model denominations, part numbers and drawings.
-
Page 4: Table Of Contents
Instruction book Table of contents Safety precautions......................6 ........................... 6 AFETY ICONS ......................6 ENERAL SAFETY PRECAUTIONS ................... 7 AFETY PRECAUTIONS DURING INSTALLATION ....................8 AFETY PRECAUTIONS DURING OPERATION ................9 AFETY PRECAUTIONS DURING MAINTENANCE OR REPAIR General description...................... 11 ..........................11 NTRODUCTION ............................ - Page 5 Instruction book 3.10 ..........................33 TATUS DATA MENU 3.11 ........................36 EASURED DATA MENU 3.12 ..........................36 OUNTERS MENU 3.13 ............................. 37 EST MENU 3.14 ....................... 38 ODIFY PARAMETERS MENU 3.15 ........................38 ODIFYING PARAMETERS 3.16 ...................... 39 ODIFYING PROTECTION SETTINGS 3.17 ........................
- Page 6 Instruction book Maintenance........................72 ....................72 REVENTIVE MAINTENANCE SCHEDULE ..........................74 IL SPECIFICATIONS ......................75 TORAGE AFTER INSTALLATION ..........................75 ERVICE KITS ......................75 ISPOSAL OF USED MATERIAL Adjustments and servicing procedures..............76 ..........................76 RIVE MOTOR ............................76 IR FILTER .......................77 IL AND OIL FILTER CHANGE ............................
- Page 7 Instruction book Instructions for use...................... 90 Guidelines for inspection.....................91 Pressure equipment directives................... 92 Declaration of conformity.................... 93 API603130...
-
Page 8: Safety Precautions
Instruction book Safety precautions Safety icons Explanation Danger to life Warning Important note General safety precautions 1. The operator must employ safe working practices and observe all related work safety requirements and regulations. 2. If any of the following statements does not comply with the applicable legislation, the stricter of the two shall apply. -
Page 9: Safety Precautions During Installation
9. If compressed air is used in the food industry and more specifically for direct food contact, Atlas Copco recommends, for optimal safety, the use of certified Class 0 compressors in combination with appropriate filtration depending on the application. Please contact your Atlas Copco Customer Center for advice on specific filtration. -
Page 10: Safety Precautions During Operation
Instruction book 14. In multiple compressor systems, manual valves must be installed to isolate each compressor. Non- return valves (check valves) must not be relied upon for isolating pressure systems. 15. Never remove or tamper with the safety devices, guards or insulation fitted on the machine. Every pressure vessel or auxiliary installed outside the machine to contain air above atmospheric pressure must be protected by a pressure relieving device or devices as required. -
Page 11: Safety Precautions During Maintenance Or Repair
Instruction book • All fasteners are tight • All electrical leads are secure and in good order • Safety valves and other pressure relief devices are not obstructed by dirt or paint • Air outlet valve and air net, i.e. pipes, couplings, manifolds, valves, hoses, etc. are in good repair, free of wear or abuse •... - Page 12 Instruction book 10. Scrupulously observe cleanliness during maintenance and repair. Keep dirt away by covering the parts and exposed openings with a clean cloth, paper or tape. 11. Never weld or perform any operation involving heat near the oil system. Oil tanks must be completely purged, e.g.
-
Page 13: General Description
Instruction book General description Introduction GA 55 up to GA 90 are single-stage, oil-injected screw compressors driven by an electric motor. The compressors are available in air-cooled and water-cooled version. ® The compressors are controlled by an Elektronikon regulator. GA Workplace Full-Feature GA Workplace Full-Feature compressors are enclosed in a sound-insulated bodywork. - Page 14 Instruction book Reference Name Oil cooler Automatic condensate outlet Automatic condensate outlet, dryer Dryer Elektronikon® II regulator Compressor drive motor Vent plug (oil cooler) Emergency stop button Oil filter housing Rear view, GA 55 up to GA 90 Workplace Full-Feature Reference Name Compressor element...
-
Page 15: Air Flow
Instruction book Reference Name Compressed air outlet valve Dryer Air filter Oil cooler Air cooler Unloader Air flow Flow diagrams Flow diagram, GA Workplace Full-Feature Reference Description Intake air Air/oil mixture Wet compressed air Condensate Dried compressed air API603130... -
Page 16: Oil System
Instruction book Description Air drawn through filter (AF) and open inlet valve (IV) into compressor element (E) is compressed. A mix of compressed air and oil flows into the air receiver/oil separator (AR) via check valve (CV). The air is discharged through outlet valve (AV) via minimum pressure valve (Vp) and air cooler (Ca). -
Page 17: Cooling System
Instruction book Description In air receiver/oil separator (AR), most of the oil is removed from the air/oil mixture by centrifugal action. The remaining oil is removed by oil separator (OS). The oil collects in the lower part of air receiver/oil separator (AR), which serves as an oil tank. -
Page 18: Condensate System
Instruction book Description The cooling system comprises air cooler (Ca) and oil cooler (Co). On air-cooled compressors, the cooling air flow is generated by fan (FN). Condensate system Water drains Condensate drains, typical example Reference Designation Automatic drain connection Automatic drain connection of the dryer (only on Full-Feature units) Next to each automatic drain outlet is a manual condensate drain connection for manually draining of the condensate. -
Page 19: Regulating System
Instruction book Regulating system Flow diagram Regulating system (loaded condition) Loading When the net pressure is below the loading pressure, solenoid valve (Y1) is energised. Results: • The space above unloading valve/blow-off valve (UV) is connected with the oil separator tank pressure (1) via the solenoid valve. -
Page 20: Electrical System
Instruction book Electrical system General Also consult sections Electrical diagrams Electrical connections. Electrical components The electrical system comprises following components: Electric cubicle, typical example Reference Designation F1/2/3 Fuses (F3 is only provided in case a phase sequence relay is provided) F4/5/6 Fuses F7/F8/F9... -
Page 21: Electrical Diagrams
Instruction book Reference Designation Transformer Terminal strip (voltage supply) X103/X108 Connectors Earth terminal Electrical diagrams The complete electrical diagram can be found in the electric cubicle. Service diagram for GA 55 up to GA 90 with Elektronikon II and star-delta starter Text on drawing Reference Designation... - Page 22 Instruction book Reference Designation Overload, fan motor Fault, EWD Dp, DD filter Dp, PD filter (10) Remote pressure set selection (11) ES 100 (if installed) (12) Remote emergency stop (13) Auxiliary contacts (14) Manual/automatic operation (15) General warning (16) General shut-down References used (typical) in the electric diagram of the compressor: Below list is a general list.
- Page 23 Instruction book Reference Compressor control module Start button Stop button Emergency stop button Blocking relay Auxiliary relay, star contactor Auxiliary relay, delta contactor Auxiliary relay, loading/unloading Auxiliary relay, air pressure high/low Auxiliary relay, dryer Auxiliary relay, manual/automatic operation Auxiliary relay, warning Auxiliary relay, shut-down Optional equipment Reference...
-
Page 24: Air Dryer
Instruction book Air dryer Flow diagram Air dryer Reference Name Air inlet Air outlet Air/air heat exchanger Air/refrigerant heat exchanger/evaporator Condensate separator Automatic drain / condensate outlet Refrigerant compressor Refrigerant condenser Liquid refrigerant dryer/filter Thermostatic expansion valve Bypass valve Condenser cooling fan Pressure switch, fan control Compressed air circuit Compressed air enters heat exchanger (1) and is cooled by the outgoing, cold, dried air. - Page 25 Instruction book Refrigerant circuit Compressor (5) delivers hot, high-pressure refrigerant gas which flows through condenser (6) where most of the refrigerant condenses. The liquid refrigerant flows through liquid refrigerant dryer/filter (7) to thermostatic expansion valve (8). The refrigerant leaves the thermostatic expansion valve at evaporating pressure. The refrigerant enters evaporator (2) where it withdraws heat from the compressed air by further evaporation at constant pressure.
-
Page 26: Elektronikon Ii Regulator
Instruction book Elektronikon II regulator ® Elektronikon II regulator Control panel General In general, the Elektronikon regulator has following functions: • Controlling the compressor • Protecting the compressor • Monitoring components subject to service • Automatic restart after voltage failure (made inactive) Automatic control of compressor operation The regulator maintains the net pressure between programmable limits by automatically loading and unloading the compressor. - Page 27 The regulator has a built-in function to automatically restart the compressor when the voltage is restored after voltage failure. This function is deactivated in compressors leaving the factory. If desired, the function can be activated. Consult the Atlas Copco Customer Centre. If activated, and provided the regulator was in the automatic operation mode, the compressor will automatically restart if the supply voltage to the module is restored within a programmed time period.
-
Page 28: Control Panel
Instruction book Control panel Elektronikon regulator Parts and functions Reference Designation Function Start button Button to start the compressor. LED (8) lights up indicating that the Elektronikon regulator is operative. Display Shows messages about the compressor operating condition, a service need or a fault. Scroll keys Keys to scroll upwards or downwards through the display. -
Page 29: Function Keys
To return to a previously shown option or menu ‘Canc’ To cancel a programmed setting when programming parameters ‘Del.’ To delete compressor start/stop commands ‘Help’ To find the Atlas Copco Internet address ‘Lim.’ To show limits for a programmable setting ‘Load’ To load the compressor manually ‘Main’... -
Page 30: Scroll Keys
Instruction book Scroll keys Control panel The keys (1) allow the operator to scroll through the display. As long as a downwards pointing arrow is shown at the far right position of the display, the scroll key with the same symbol can be used to see the next item. As long as an upwards pointing arrow is shown at the far right position of the display, the scroll key with the same symbol can be used to see the previous item. - Page 31 Instruction book Menu flow (simplified) Main menu Program Function Main screen Shows in short the operation status of the compressor. Is the gateway to all functions. ‘Status data’ Calls up the status of the compressor protection functions (shut-down, shut-down warning, service warning and warning). Resets a shut-down, motor overload and service condition.
-
Page 32: Main Screen Menu
Instruction book Program Function ‘Measured data’ Calls up the data currently measured and the status of a number of inputs. ‘Counters’ Calls up the running hours, loaded hours, regulator (module) hours and number of motor starts. ‘Test’ Display test. ‘Modify Params’ Modifies the settings for: •... -
Page 33: Calling Up Menus
Instruction book Example of Main screen ‘Compr. Outlet’ ‘Auto Loaded’ ‘Menu’ ‘Unld’ The display indicates: • The name of the sensor and its actual reading • Messages regarding the compressor operating condition • Just above the function keys (3), the actual functions of these keys Calling up menus Description Control panel... -
Page 34: Quick Look At The Actual Compressor Status
Instruction book Quick look at the actual compressor status Procedure Control panel Starting from the Main screen (see section Main screen menu), press the arrow down key (3): A screen similar to the one below appears: Example of the compressor status screen ‘Auto Operation’... -
Page 35: Status Data Menu
Instruction book 3.10 Status data menu Warning Before starting any maintenance or repairs, press the stop button (4) and wait until the compressor has stopped. Close the air outlet valve and press the test button on top of the electronic water drain(s) until the air system between the air receiver and outlet valve is fully depressurised. - Page 36 Instruction book ‘Element Outlet’ ˚C ‘Shd’ ‘Max.’ ‘Menu**’ ‘**Rset’ • The indicators (**) are flashing. The screen shows the actual reading (122˚C), that the compressor is shut down (‘Shd’), and the shut-down setting (120˚C). • It remains possible to scroll through other menus, e.g. to check the values of other parameters. When returning to the ‘Status data’...
- Page 37 • If the service message was referring to ‘Plans’: carry out the service actions related to the indicated plans. Reset the timers of the related plans. Contact your Atlas Copco Customer Centre. See section Service menu. A warning message exists •...
-
Page 38: Measured Data Menu
Instruction book 3.11 Measured data menu Control panel Function To call up information regarding the actually measured data and the status of some inputs such as the motor overload protection. Consult the menu flow in section Control programs. Procedure Starting from the Main screen (see Main screen menu): •... -
Page 39: Test Menu
Instruction book • The number of load cycles Procedure Starting from the Main screen (see Main screen menu): • Press the key ‘Menu’ (F1). • Press the arrow down key (1) until ‘Counters’ is followed by a horizontal arrow. • Press the tabulator key (2) to activate the menu. •... -
Page 40: Modify Parameters Menu
Instruction book 3.14 Modify parameters menu Function To modify a number of programmable settings: • Parameters (see section Modifying parameters). • Protections (see section Modifying protections). • Service plan settings (see section Modifying service plan settings). • Clock function settings (see section Modifying clock function settings). -
Page 41: Modifying Protection Settings
Instruction book • Loading pressure: 4.0 bar • Unloading pressure: 6.0 bar Procedure • Consult the section Procedure above to select ‘Loading Press’. ‘Loading Press.’ ‘Menu’ ‘Mod.’ • The screen shows that the current setting is 6.0 bar(e). To modify this setting, press the key ‘Mod.’ (F2);... -
Page 42: Modifying Service Plans
Instruction book Procedure Starting from the Main screen (see Main screen menu): • Press the ‘Menu’ key (F1). • Press the arrow down key (1) until the option ‘Modify Params’ is followed by a horizontal arrow. • Activate the menu by pressing the tabulator key (2). •... - Page 43 Service plans are to be carried out. Always consult your Atlas Copco Customer Centre if any timer should be changed. The intervals must not exceed the intervals below and must coincide logically.
-
Page 44: Programming Clock Function
Instruction book ‘Service Timer’ ‘Running Hours’ ‘hrs’ 2130 ‘Menu’ • The screen shows the actual running hours. • Press the tabulator key (2): a screen similar to the one below will appear: ‘Service Timer’ ‘Level A’ ‘hrs’ 4000 ‘Menu’ ‘Mod.’ •... - Page 45 Instruction book Starting from the Main screen (see Main screen menu): • Press the key ‘Menu’ (F1). • Press the arrow down key (1) until ‘Modify Params’ is followed by a horizontal arrow. • Activate the menu by pressing tabulator key (2). •...
- Page 46 Instruction book • Programming the command to change over at 18 o’clock to Pressure Band 2 is carried out in a similar way as described above. • Press the key ‘Menu’ (F1) and scroll to ‘Saturday’. Programming the command ‘18:00 Compressor Stop’...
- Page 47 Instruction book ‘Clock Function’ ‘Not Activated’ ‘Menu’ ‘Mod.’ ‘Del.’ • Press the tabulator key (2), the following screen appears: ‘Monday’ ‘Tuesday’ ‘Wednesday’ ‘Menu’ ‘Del.’ • Scroll through the display until ‘Saturday’ is followed by a horizontal arrow. Press the tabulator key (2).
- Page 48 Instruction book • Scroll through the display until ‘Monday’ is followed by a horizontal arrow. Press the tabulator key (2). Scroll through the compressor start/stop/pressure band commands until the first empty command line is indicated by the horizontal arrow. • Press the key ‘Mod.’; the first two digits start flashing. Enter ‘18:00 Compressor Stop’ using the scroll keys (1) to modify a field and the tabulator key (2) to jump from one field to another.
-
Page 49: Modifying Configuration Settings
Instruction book 3.19 Modifying configuration settings Control panel Function To modify a number of parameters. Consult the menu flow in section Control programs. Procedure Starting from the Main screen (see Main screen menu): • Press the key ‘Menu’ (F1). • Press the arrow down key (1) until ‘Modify Params’ is followed by an arrow pointing to the right. •... -
Page 50: Service Menu
Instruction book Compressor control modes The compressor can be controlled locally, remotely or via a local area network (LAN). Procedure Starting from the Main screen (see Main screen menu): • Press the key ‘Menu’ (F1). • Press the arrow down key (1) until ‘Modify Params’ is followed by an arrow pointing to the right. •... - Page 51 Instruction book Example Service plans Intervals Service plan A Every 4000 running hours Service plan B Every 4000 running hours Service plan C Every 8000 running hours Service plan D Every 40000 running hours Resulting service actions according to Service plan A and B 4000 running hours Service plan A, B and C 8000 running hours...
-
Page 52: Saved Data Menu
Instruction book ‘Previous Timer’ ‘Level’ ‘hrs’ 4008 • The screen shows that service plans A and B were carried out at 4008 running hours. • Stop the compressor, switch off the voltage and carry out the service operations related to plans A, B and C;... -
Page 53: Programmable Settings
Instruction book 3.23 Programmable settings Parameters: unloading/loading pressures for compressors without dryer Minimum Factory Maximum setting setting setting Unloading pressures Loading pressures Parameters: unloading/loading pressures for GA Workplace Full-Feature Minimum Factory Maximum setting setting setting Unloading pressures Loading pressures Parameters Minimum Factory Maximum... - Page 54 Delay at starting Service plan Also see section Preventive maintenance schedule. Consult Atlas Copco if a timer setting has to be changed. The intervals must not exceed the nominal intervals and must coincide logically. See section Modifying service plans. Minimum Factory...
-
Page 55: Installation
Instruction book Installation Dimension drawings Dimensions GA 55 up to GA 90 API603130... - Page 56 Instruction book Centre of gravity with dryer with dryer with dryer Type 1150 GA 55 up to GA 90 Dimensions +/- 50 mm (1.97 in) Weight Type Unit Weight, unit with dryer 1580 GA 55 Weights (oil included) +/- 50 kg (110 lb) Reference Designation Electric cable passage...
-
Page 57: Installation Proposal
Instruction book Installation proposal Compressor room example Compressor room example API603130... - Page 58 It is recommended to install by-pass pipes over each filter together with ball valves, in order to isolate the filters during service operations without disturbing the compressed air delivery. Safety valve By-pass system to by-pass the dryer during service operations (available as an option, consult Atlas Copco). API603130...
-
Page 59: Electrical Connections
If frost might occur, the appropriate measures should be taken to avoid damage to the machine and its ancillary equipment. In this case, and also if operating above 1000 m (3300 ft), consult Atlas Copco. Moving/lifting The compressor can be moved by a lift truck using the slots in the frame. - Page 60 Instruction book Electrical connections Reference Designation Customer’s installation 220/230 V: K21, K23 size 10 with 6 fuses type 1 > 230 V: K21, K23 smaller than size 10 with 3 fuses type 1 Option dryer All voltages except: 440-460 V 60 Hz Star connection: all other voltages API603130...
- Page 61 3 of connector (X108). This results in loading and unloading of the compressor at the closing and opening pressures of the external pressure switch respectively. • LAN control: The compressor is controlled via a local network. Consult Atlas Copco. Have the modifications checked by Atlas Copco.
-
Page 62: Pictographs
Instruction book • Low or high air pressure (K05) (5-6 closed means high air pressure) • Manual load/unload or automatic operation (K07) • Warning condition (K08) • Shut-down condition (K09) Maximum contact load: 10 A / 250 V AC. Stop the compressor and switch off the voltage before connecting external equipment. Consult Atlas Copco. - Page 63 Instruction book Reference Designation Warning: Always read the manual, switch off the voltage, depressurise compressor and lock out/ tag out before repairing. Keep the doors closed during operation Switch off the voltage before removing protecting cover inside electric cubicle Warning, voltage Automatic condensate drain Stop the compressor before cleaning the coolers Lightly oil the gasket of the oil filter, screw it on and tighten by hand (approx.
-
Page 64: Operating Instructions
Instruction book Operating instructions Initial start-up Safety The operator must apply all relevant Safety precautions. Procedure For the location of the air outlet valve and the drain connections, see sections Introduction Condensate system. Air receiver transport fixtures API603130... - Page 65 Instruction book Motor and gear casing transport fixtures Electric cubicle, typical example Consult the sections Electric cable size,Installation proposal Dimension drawings The following transport fixtures, painted red, must be removed: • Bolts (1) • Bushes (2) • Supports (3) Check that the electrical connections correspond to the applicable codes and that all wires are clamped tight to their terminals.
-
Page 66: Before Starting
Instruction book Check transformer (T1) for correct connection. Check the settings of drive motor overload relay (F21). Check that the motor overload relay is set for manual resetting. On air-cooled compressors, check the setting of circuit breaker (Q15). Also check that the switch on the circuit breaker is in position I. -
Page 67: Starting
Instruction book Procedure Location of unloader See section Initial start-up for location of the oil system components. Check oil level (Gl), top up if necessary. The pointer should be in the upper field of the green range or in the orange range. If the pointer registers in the LOW range, depressurize the oil system (see section Problem solving). -
Page 68: During Operation
Instruction book Control panel of Elektronikon II Step Action Open the air outlet valve. Switch on the voltage. Check that voltage on LED (6) lights up. During operation Warnings The operator must apply all relevant Safety precautions. Also consult section Problem solving. - Page 69 Instruction book Control panel, Elektronikon II Regularly check the oil level during loaded operation. The pointer of level gauge (Gl) must register in the green range. If the oil level is too low, press stop button (9). Wait until the compressor has stopped and depressurised and push the emergency stop button (10) to avoid the compressor to start unexpectedly.
- Page 70 Instruction book Position of the oil level gauge Unscrew oil filler plug (FC) one turn to permit any pressure left in the system to escape. Wait a few minutes. Remove the plug and add oil until the level reaches the filler opening. Fit and tighten the plug (FC).
-
Page 71: Checking The Display
Instruction book Air filter Position of the service indicator Regularly check the service indicator. If the coloured part of service indicator (VI) shows full out, replace the air filter element. Reset the service indicator by pushing the knob in the extremity of the indicator body. Drains Regularly check that condensate is discharged during operation. -
Page 72: Stopping
Instruction book and the abbreviations of the functions of the keys below the display. Remedy the trouble if alarm LED (7) is lit or flashes, see section Status data menu. The display (2) will show a service message if a service plan interval has been exceeded or if a service level for a monitored component has been exceeded. -
Page 73: Taking Out Of Operation
Instruction book Taking out of operation Warning The operator must apply all relevant Safety precautions. Procedure Step Action Stop the compressor and close the air outlet valve. Press the test button on top of the electronic water drain(s) until the air system between air receiver and outlet valve is fully depressurized. -
Page 74: Maintenance
Service kits For overhauling or carrying out preventive maintenance, service kits are available (see section Service kits). Service contracts Atlas Copco offers several types of service contracts, relieving you of all preventive maintenance work. Consult your Atlas Copco Customer Centre. API603130... - Page 75 When servicing, replace all removed gaskets, O-rings and washers. Intervals The local Atlas Copco Customer Centre may overrule the maintenance schedule, especially the service intervals, depending on the environmental and working conditions of the compressor. The longer interval checks must also include the shorter interval checks.
-
Page 76: Oil Specifications
Oil specifications It is strongly recommended to use genuine Atlas Copco Lubricants. They are the result of years of field experience and research. See section Preventive maintenance schedule for the advised replacement intervals and consult the Spare Parts list for part number information. -
Page 77: Storage After Installation
Service kits For overhauling and for preventive maintenance, a wide range of service kits is available. Service kits comprise all parts required for servicing the component and offer the benefits of genuine Atlas Copco parts while keeping the maintenance budget low. -
Page 78: Adjustments And Servicing Procedures
Instruction book Adjustments and servicing procedures Drive motor General Keep the outside of the electric motor clean for efficient cooling. If necessary, remove dust with a brush and/or compressed air jet. Bearing maintenance The bearing at the non-drive end side is greased for life. The bearing at the drive end side is lubricated by the oil system. -
Page 79: Oil And Oil Filter Change
Instruction book Service indicator Recommendations 1. Never remove the filtration element while the compressor is running. 2. For minimum downtime, replace the dirty element by a new one. 3. Discard the element when damaged. Procedure 1. Stop the compressor. Switch off the voltage. 2. - Page 80 Instruction book Procedure Oil system components Oil drain plugs API603130...
-
Page 81: Coolers
• Next, clean with an air jet in the reverse direction to normal flow. Use low pressure air. If necessary, the pressure may be increased up to 6 bar(e) (87 psig). • If it is necessary to wash the coolers with a cleaning agent, consult Atlas Copco. • Remove the cover used during cleaning. -
Page 82: Safety Valves
Instruction book Safety valves Location of safety valve Operating Operate the safety valve from time to time by unscrewing the cap one or two turns. Retighten it afterwards. Testing Before removing the valve, depressurize the compressor. See also section Problem solving. The safety valve (SV) can be tested on a separate air line. - Page 83 Instruction book When handling refrigerant, all applicable safety precautions must be observed. Please be specifically aware of the following points: • Contact of refrigerant with the skin will cause freezing. Special gloves must be worn. If contacted with the skin, the skin should be rinsed with water. On no account may clothing be removed. •...
-
Page 84: Problem Solving
Instruction book Problem solving Warning Before carrying out any maintenance, repair work or adjustment, press the stop button, wait until the compressor has stopped (approx. 30 seconds) and close the air outlet valve. Press the test button on top of the electronic water drain unit the air system between the air receiver and outlet valve is fully depressurized. - Page 85 Oil cooler clogged Clean cooler Bypass valve malfunctioning Have valve tested Air cooler clogged Clean cooler Compressor element out of order Consult Atlas Copco Customer Centre Faults and remedies, dryer For all references hereafter, consult section dryer. Condition Fault Remedy...
- Page 86 Instruction book Condition Fault Remedy Refrigerant compressor does See below not run Evaporator pressure too high See below Condenser pressure too high See below Condenser pressure too high Fan control switch out of Replace or too low order Fan blades or fan motor out of Check fan/fan motor order Ambient temperature too high Check and correct;...
-
Page 87: Technical Data
Instruction book Technical data Readings on display Elektronikon II regulator Important The readings mentioned below are valid under the reference conditions (see section Reference conditions and limitations). Reference Reading Air outlet pressure Fluctuates between programmed unloading and loading pressures. Compressor element For air-cooled units: approx. -
Page 88: Electric Cable Size And Main Fuses
Instruction book Electric cable size and main fuses Important • The voltage on the compressor terminals must not deviate more than 10% of the nominal voltage. It is however highly recommended to keep the voltage drop over the supply cables at nominal current below 5% of the nominal voltage (IEC 60204-1). -
Page 89: Settings Of Fan Motor Circuit Breaker
Instruction book Recommended cable size Type Approval Recommended Recommended Main wire section (2) wire section (3) fuses (A) (4) GA 55 4 x 70 mm 4 x 70 mm Remarks : (1): current in the supply lines at maximum load (2): recommended wire section under standard conditions (Pack) (3): recommended wire section under worst case conditions (Full-Feature) (4): maximum fuse value - value between ( ) valid in case of 6 fuses for parallel supply cables... -
Page 90: Dryer Switches
Instruction book Maximum fuse (A) Cable size (mm Dryer switches General The regulating and safety devices are factory-adjusted to give optimum performance of the dryer. Do not alter the setting of any of the devices. Reference conditions and limitations Reference conditions Air inlet pressure (absolute) Air inlet temperature ˚C... - Page 91 Instruction book 8 bar Set point, thermostatic valve ˚C Temperature of air leaving outlet valve (approx.), Full-Feature units ˚C Pressure dew point, Full-Feature units ˚C Drive motor, SIEMENS 1LG6 228-2 Motor shaft speed r/min 2975 Nominal motor power Dryer power at full load, Full-Feature units Dryer power at unloaded operation, Full-Feature units Refrigerant type, Full-Feature units R404a...
-
Page 92: Instructions For Use
Instruction book Instructions for use Oil separator vessel This vessel can contain pressurized air. This can be potentially dangerous if the equipment is misused. This vessel must only be used as a compressed air/oil separator tank and must be operated within the limits specified on the data plate. -
Page 93: Guidelines For Inspection
Instruction book Guidelines for inspection Guidelines On the Declaration of Conformity / Declaration by the Manufacturer, the harmonised and/or other standards that have been used for the design are shown and/or referred to. The Declaration of Conformity / Declaration by the Manufacturer is part of the documentation that is supplied with this compressor. -
Page 94: Pressure Equipment Directives
Instruction book Pressure equipment directives Components subject to 97/23/EC Pressure Equipment Directive The following table contains the necessary information for the inspection of all pressure equipment of category II and higher according to the Pressure Equipment Directive 97/23/EC and all pressure equipment according to the Simple Pressure Vessel Directive 87/404/EEC. -
Page 95: Declaration Of Conformity
Instruction book Declaration of conformity Typical example of a Declaration of Conformity document (1): Contact address: Atlas Copco Airpower n.v. P.O. Box 100 B-2610 Wilrijk (Antwerp) Belgium (2): Applicable directives (3): Standards used API603130... - Page 96 Instruction book On the Declaration of Conformity / Declaration by the Manufacturer, the harmonized and/or other standards that have been used for the design are shown and/or referred to. The Declaration of Conformity / Declaration by the Manufacturer is part of the documentation that is supplied with this device.
- Page 98 Atlas Copco delivers the products and services that help to increase your business’ efficiency and profitability. Atlas Copco's pursuit of innovation never ceases, driven by our need for reliability and efficiency. Always working with you, we are committed to providing you the customized quality air solution that is the driving force behind your business.
Need help?
Do you have a question about the GA 55+ and is the answer not in the manual?
Questions and answers