Table of Contents
Advertisement
Advertisement
Table of Contents

Summary of Contents for Just Flight Standard VC10
- Page 1 OPERATIONS MANUAL...
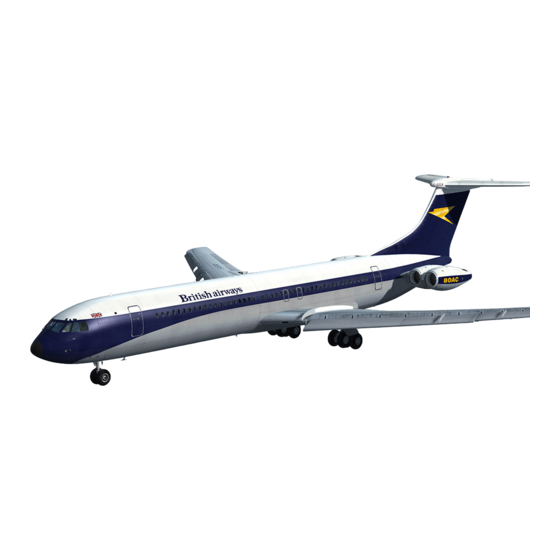
- Page 2 The Spirit of Flight Simulation Available to buy online at www.justflight.com www.justflight.com...
-
Page 3: Table Of Contents
Operations Manual Please note that Prepar3D or Flight Simulator X must be correctly installed on your PC prior to the installation and use of this VC10 Professional simulation. CONTENTS INTRODUCTION ......................6 Aircraft overview ..................... 7 Aircraft specifications ..................... 8 Aircraft in this simulation .................. - Page 4 Flight Engineer’s station – powered flying control units ........35 Flight Engineer’s station – upper electrical panel ..........36 Flight Engineer’s station – lower electrical panel ..........37 Flight Engineer’s station – anti-ice panel ..............38 Flight Engineer’s station – hydraulic/pressurisation panel ........39 Flight Engineer’s station –...
- Page 5 CHECKLISTS ......................84 PERFORMANCE ....................... 88 VC10 STORIES, INCIDENTS AND ANECDOTES ........... 91 CREDITS ........................94 COPYRIGHT......................94 VC10 Professional – Operations Manual...
-
Page 6: Introduction
Specification 239. The VC10 largely fitted the bill, although not without a few changes. The VC10 C Mk1 differed from a standard VC10 in that she had the more powerful engines and the fin tip fuel tanks of the Super VC10. -
Page 7: Aircraft Overview
Super VC10. The RCo.43 offered a modest increase in power, producing 21,800 pounds of thrust as compared to the Standard VC10’s 20,370 pounds of thrust from the RCo.42. To start either engine, an external air source is required to turn the HP compressor. If no external source is available, a single engine can be kept running, providing bleed air to start the remaining three. -
Page 8: Aircraft Specifications
• BOAC G-ARVC (circa 1966) • BOAC G-ARVC (circa 1974) • Gulf Air A40-VI • Gulf Air A40-VK • Just Flight house livery • Nigeria Airways 5N-ABD • Government of the United Arab Emirates G-ARVF VC10 Professional – Operations Manual... - Page 9 Super VC10 • BOAC • BOAC Cunard • BOAC Golden • British Airways • British Airways (BOAC scheme) • Vickers Prototype • East African Airways VC10 C1K • Royal Air Force, 101 Sqn, Modern Grey • Royal Air Force, 101 Sqn, White/Grey •...
-
Page 10: Installation, Updates And Support
To access the aircraft in Prepar3D: 1. ‘Select Aircraft’ > ‘Select Aircraft’ from the menu bar. 2. Select the ‘Publisher’ filter mode and then select ‘Just Flight’ from the list of publishers. 3. Choose one of the schemes and click on ‘OK’. - Page 11 Newsletter and emails. Regular News To get all the latest news about Just Flight products, special offers and projects in development, sign up for our Newsletter and regular emails.
-
Page 12: Panel Guide
PANEL GUIDE Both the Standard and Super VC10 are classic jetliners so the cockpit can be a bewildering place for anyone used to a modern Airbus or Boeing. To help you better understand how to navigate the plethora of switches, dials and knobs, we’ve broken the cockpit down into five main areas: 1. - Page 13 3. Centre pedestal 4. Flight Engineer’s panel, divided into sub-panels VC10 Professional – Operations Manual...
-
Page 14: Moving Around The Cockpit
5. Navigator’s station Over the next few pages we’ll guide you through the 1960s technology that powers the VC10 family. Moving around the cockpit To help you navigate around the VC10’s cockpit, we have added several views that will take you directly to the panel you’re looking for. -
Page 15: Front Panel - Captain
Front panel – Captain 1. LOC/VOR change-over switch – toggles VOR Weather radar indicator between NAV 1 and NAV 2 2. ADF change-over switch – toggles ADF indicator With the increasing number of third-party radar between ADF 1 and ADF 2 add-ons available, we have added a placeholder gauge tile in the centre screen of the weather radar 3. -
Page 16: Front Panel - Centre
Front panel – centre 1. No.1 autopilot indicator lights (top to bottom): Glideslope engaged – illuminates when glideslope capture has occurred Glideslope armed – illuminates when glideslope capture is armed Autopilot failure – illuminates when the autopilot has disengaged 2. No.1 autopilot three-axis trim indicator – displays the rudder, aileron and elevator trim positions 3. -
Page 17: Front Panel - Co-Pilot
Front panel – Co-pilot 1. Cabin altitude gauge 2. ADF indicator – displays the bearing to the NDB tuned into either ADF 1 or ADF 2, depending on the position of the ADF change-over switch 3. Mach meter 4. Stall protection system operating and failed warning lights – extinguished via the stall ident switch on the overhead panel 5. -
Page 18: Overhead Panel
Overhead panel Compared to the modern day overhead, the VC10’s layout is sparse and somewhat confusing. We’ve split the overhead into six sections here to help you get a better feel for the panel. 1. Roof lights switch – used for controlling cockpit lighting 2. - Page 19 1. Left wing lamp switch – switches on the left wing landing or taxi light 2. Nose lamp switch – switches on the nose landing or taxi light 3. Right wing lamp switch – switches on the right wing landing or taxi light 4.
- Page 20 1. Centre windscreen wiper control – left-click to slow/park the wipers and right-click to increase the speed of the wipers 2. Captain’s windscreen wiper control – left-click to slow/park the wipers and right-click to increase the speed of the wipers 3.
- Page 21 1. Pitot head heater ammeters 2. Pitot head and stall warning probe heater switches and master heater lights 3. Upper row lighting switches: a. No Smoking sign b. Fasten Seatbelts sign c. E2B compass light 4. Middle row lighting switches: a.
- Page 22 1. Windscreen overheating warning lights 2. Windscreen heating high/low switches 3. Windscreen heating ammeters 4. Windscreen fan switch 5. Marker beacon sensitivity switch VC10 Professional – Operations Manual...
- Page 23 1. MACH/IAS test switch 2. SELCAL power switch 3. VHF1/HF1 toggle switch 4. VHF2/HF2 toggle switch 5. INS 1 MSU VC10 Professional – Operations Manual...
-
Page 24: Centre Pedestal
Centre pedestal The centre pedestal provides the crew with radios, audio panels, transponders and the all-important throttles. It’s also home to the autopilot and autothrottle systems. To better understand its layout, we’ve broken it down into three sections, starting at the forward end. 1. - Page 25 1. Radio altimeter confidence test switch 2. Left standby yaw damper switch 3. Autopilot mode selector knob 4. Navigation hold switch 5. No.1 autopilot engage switch 6. No.1 yaw damper engage switch 7. No.2 autopilot engage switch 8. No.2 yaw damper engage switch 9.
- Page 26 1. NAV 1 frequency knob 2. NAV 1 active/standby swap switch 3. COM 1 frequency knob 4. COM 1 active/standby swap switch 5. ADF 1 100MHz increment/decrement knob 6. ADF 1 10MHz increment/decrement knob 7. ADF 1 1MHz increment/decrement knob 8.
-
Page 27: Autopilot And Autothrottle System
Autopilot and autothrottle system The autopilot can: • Hold an altitude, airspeed or Mach number existing at the time of engagement • Hold a selected heading • Fly a VOR radial tuned into the NAV 1 radio • Fly an ILS approach •... - Page 28 The autopilot can be disengaged by: • Using the key assignment ([Z] by default) • Using the AP master (power) switches – this method also disengages the associated yaw damper • Deselecting the autopilot engage switch or yaw damper switch •...
-
Page 29: Flight Engineer's Station
Flight Engineer’s station Nothing in the cockpit is quite as daunting as the Flight Engineer’s station. Panel after panel of switches, dials and knobs fill the workspace, and for pilots used to modern airliners it can be overwhelming. Fortunately the Flight Engineer’s station is laid out into logical sections such as electrical, engines and fuel systems. -
Page 30: Flight Engineer's Station - Jettison Panel
Flight Engineer’s station – jettison panel The jettison panel controls the fuel dump system. The panel is situated high up due to the rarity of the systems being used. 1. No.1 tank jettison valve switch 2. No.2 tank jettison valve switch 3. -
Page 31: Flight Engineer's Station - Fuel Panel
Flight Engineer’s station – fuel panel The fuel panel is situated below the jettison panel. Fuel quantities, pump switches and crossfeed valves are all found here. Essentially split into two subsections, the bottom half of the panel displays the fuel flow, temperature and the controls for the booster pumps and main fuel cocks to the engines. -
Page 32: Fuel System
The Super and RAF variants include an additional fuel tank which is located inside the fin. The layout of the fuel panel in those variants differs from the Standard VC10 to accommodate the necessary gauges and controls for this additional tank. - Page 33 Magnetic indicators The fuel panel is fitted with magnetic indicators showing the position of valves. These have two states: • In-line – fully open • Cross-line – fully closed Contents gauges The fuel panel is fitted with contents gauges for each of the tanks. These display the quantity of fuel in each tank in kilograms x 1,000.
-
Page 34: Flight Engineer's Station - Engine Panel
Flight Engineer’s station – engine panel The engine panel sits below the fuel panel. Everything from engine temperature, oil temperature and quantity, as well as power is found here. An instrument of note is the synchroscope, which shows how closely the HP (High Pressure) shafts of engines 2, 3 and 4 are synced to engine 1. -
Page 35: Flight Engineer's Station - Powered Flying Control Units
Flight Engineer’s station – powered flying control units Each of the aircraft’s aileron, elevator, rudder and spoiler sections is operated by powered flying control units (PFCUs) – electrically driven hydraulic pumps which control the surfaces. A complete loss of electrical power (i.e. -
Page 36: Flight Engineer's Station - Upper Electrical Panel
Flight Engineer’s station – upper electrical panel The electric panel is situated below the PFCU panel, in the centre of the Engineer’s panel. For clarity it is spilt into two sections. The largest subpanel is used for controlling the AC power supply on board the VC10, which is provided by generators found within each engine. -
Page 37: Flight Engineer's Station - Lower Electrical Panel
Flight Engineer’s station – lower electrical panel This second subpanel is used to control DC power. Here you’ll find controls for the batteries and the all-important galley power switches which ensure fresh coffee for the crew and passengers! 1. DC voltmeter selector knob 2. -
Page 38: Flight Engineer's Station - Anti-Ice Panel
Flight Engineer’s station – anti-ice panel The anti-ice panel features controls for wing, tailplane and engine anti-icing. 1. Engine anti-ice switches 2. Engine anti-ice air pressure gauges 3. Tailplane anti-ice temperature gauge 4. Tailplane temperature selector switch – left or right 5. -
Page 39: Flight Engineer's Station - Hydraulic/Pressurisation Panel
Flight Engineer’s station – hydraulic/pressurisation panel This panel allows you to control the two hydraulic systems (A and B) that operate the landing gear, flaps, slats, spoilers/speedbrakes, tailplane trim, wheel-brakes and nose-wheel steering. The pressurisation controls are located on the right side of the panel and give you control of the cabin pressurisation. 1. -
Page 40: Flight Engineer's Station - Upper Air Conditioning Panel
Flight Engineer’s station – upper air conditioning panel The air conditioning panel is split into an upper and a lower section and provides control over the air conditioning system for the flight deck and passenger cabin. 1. Flight deck/passenger cabin temperature change-over switch 2. -
Page 41: Flight Engineer's Station - Lower Air Conditioning Panel
Flight Engineer’s station – lower air conditioning panel 1. Thrust augmenter (forward) switch 2. Discharge valve (aft) magnetic indicator 3. Discharge valve (forward) magnetic indicator 4. Discharge valve switch (forward) 5. Discharge valve switch (aft) 6. Left temperature control switch 7. -
Page 42: Flight Engineer's Station - Engine Start Panel
Flight Engineer’s station – engine start panel One of the curiosities of the VC10 is the inclusion of 9. Forward service door indicator the engine start and throttle controls on the Flight 10. Aft service door indicator Engineer’s workstation. This provided the Engineer 11. -
Page 43: Flight Engineer's Station - Rear Bulkhead Panel
Flight Engineer’s station – rear bulkhead panel On the bulkhead the Flight Engineer has access to several controls that vary from an audio control panel to the toilet water heater. There are also several light rheostats to switch on the cockpit lighting at night. Of particular note is the GROUND CREW JACK switch on the bottom right panel which can be used to toggle the ground equipment. - Page 44 Auxiliary Power Unit The Super and RAF variants of the VC10 were equipped with an auxiliary power unit (APU) in the tail cone. The APU supplies ground electrical power and compressed air for engine starting. The panel for controlling the APU is fitted to the rear bulkhead, requiring a modification to its layout.
-
Page 45: Flight Engineer's Station - Rear Roof Panel
Flight Engineer’s station – rear roof panel The final Flight Engineer panel is located above the cockpit door. These controls are rarely used and primarily relate to testing systems. 1. Slat asymmetry test switch 2. Fire extinguisher bottle fired indicators 3. -
Page 46: Navigator's Station - Left Panel
Navigator’s station – left panel Due to simulator limitations related to the number of animations in a model, the Navigator’s station is largely non-functional but it is accurately modelled. An important and functional system that can be controlled from the Navigator’s station is the Inertial Navigation System (INS). -
Page 47: Navigator's Station - Right Panel
Navigator’s station – right panel 1. No.1 compass controller 2. No.2 compass controller 3. DME read-out 4. ADF RMI (based on selection from the front panel) 5. INS 2 MSU 6. VOR RMI (based on selection from the front panel) 7. -
Page 48: Inertial Navigation System
INERTIAL NAVIGATION SYSTEM The VC10 received various upgrades and improvements throughout its life. One of the major improvements to the aircraft was the fitting of an Inertial Navigation System (INS). The INS made the job of navigation much easier by allowing the aircraft to automatically follow up to nine waypoints in sequence, with little or no input from the crew. - Page 49 ALIGN This begins the process of getting the aircraft’s position locked in place within the system. Here the API is assessed and in order to bring the system online, the various modes are run through. First is Mode 8, which begins with a battery test along with a basic alignment to the horizon. During the test the BAT light will illuminate.
-
Page 50: Control Display Unit
Control Display Unit The second part of the unit and main input point for the Navigator is the Control Display Unit. The CDU looks intimidating but don’t be put off by its plethora of buttons and switches as the system is easy to understand. Here’s an overview of the CDU and the functions of each switch: 1. - Page 51 Data selector knob functions Selector position Left data display Right data display Present track angle is displayed (0° to 359.9°) Ground speed (Knots) When HOLD is enabled, the Along When HOLD is enabled, the Along TK/GS Track Acceleration (ATA) sign is Track Acceleration (ATA) value is shown: -N for Negative or blank for shown...
-
Page 52: Operating The Ins
Operating the INS The following section describes how to set up the INS, from powering it up to shutting it down. Please refer to INS TUTORIAL for a Quick Start guide to configuring the INS. Pre-flight From a ‘cold & dark state’, the INS needs to be aligned and set ready for flight. During the alignment procedure the aircraft must remain stationary. - Page 53 4. Start by entering the altitude. You can left-click either the 2 or 8 key to begin entering the altitude. The altitude is rounded to the nearest 1,000 feet and then divided by 1,000, so 6,000 feet would be entered as 6, while 12,600 feet would be entered as 13.
-
Page 54: Doors And Exits
DOORS AND EXITS The aircraft is fitted with two animated passenger doors and two cargo doors, one located on the starboard fuselage and one on the port fuselage. The C1K and K3 are also fitted with a main-deck cargo door on the starboard fuselage. - Page 55 To open the port cargo door, press [Shift]+[E] then [4]. Pressing [Shift]+[E] then [2] will also open the main-deck cargo door on the C1K and K3. VC10 Professional – Operations Manual...
-
Page 56: Ground Equipment
GROUND EQUIPMENT A variety of ground equipment can be toggled using the GROUND CREW JACK control switch on the rear bulkhead panel. The switch can be operated from the Captain’s or First Officer’s position by looking rearwards and locating the switch just above the Flight Engineer’s seat. Air stairs will connect to the two cabin doors and baggage carts will be deployed next to both cargo doors. -
Page 57: Menu Bar Options
When the VC10 is loaded in Prepar3D or Flight Simulator X a new entry will appear in the ‘Add-ons’ menu called Just Flight VC10 Professional. This menu allows you to select panel states, toggle the ground equipment and air supply, and operate the in-flight refuelling equipment. -
Page 58: Flying The Vc10
FLYING THE VC10 For this first tutorial we’ll be operating the VC10 on a typical flight from London Heathrow Airport, the second busiest airport in the world and the closest major airport to the Weybridge factory where the VC10 was built. We’ll be flying up to Glasgow Prestwick for a flight across the Atlantic that will give us the opportunity to demonstrate the INS. -
Page 59: Pre-Flight
2. If you are using FSX, select the Free Flight menu. 3. Choose Load. 4. Select Just Flight VC10 Professional Tutorial 1 from the list of saved flights. 5. Click on OK (Prepar3D) or Fly Now! (Flight Simulator X). Welcome to the cockpit of the VC10. We are sat at Heathrow, Dock 703, which is away from the main terminals in the BA maintenance area. - Page 60 Check that the four HP fuel cocks on the centre pedestal are set to the SHUT position. Set the navigation lights to ON to indicate to the ground crew that the aircraft is in use. To set the lights, navigate to the overhead panel and find the switch which is on the right, next to the switches for the Seatbelts and No Smoking signs.
- Page 61 To get a clearer view of the cockpit instruments and controls, you may wish to hide the control yokes by clicking on the R M YOKE switch which is located forward of the aileron trim controls on the centre pedestal. Click on it again to make the yoke reappear if required.
- Page 62 Moving down to the hydraulics panel, set the various control switches to the NORM/ON/OPEN positions. Finally, looking across the expanse of Flight Engineer controls, you should see that no warning/caution lights are still illuminated. On the overhead panel, switch ON the NO SMOKING and FASTEN BELTS signs. VC10 Professional –...
- Page 63 Moving across to the left side of the overhead panel, set the STALL IDENTIFICATION switch to the No.1 position. Verify that the gear is down and locked (three greens) on the front centre panel. On the Flight Engineer’s fuel panel, confirm that you have sufficient fuel for the flight. We now need to configure the avionics for our departure.
-
Page 64: Starting The Engines
We will tune the VOR frequencies into the Captain’s radio, the first radio on the left-hand stack of the centre pedestal. The radio allows two frequencies to be set, active and standby. The first frequency to set is ironically the second frequency that we’ll need, Honiley (HON) VOR in Birmingham. The frequency is 113.65. To set this frequency, use the left-hand dual tuning knob. - Page 65 Switch to the exterior (Spot) view and confirm that all the doors are closed and the ground equipment is removed. Before starting the engines we need to switch ON the beacon lights. The switch is located on the overhead panel. We can also switch ON the pitot head heaters. The VC10 Type 1101 requires a ground air supply to be connected in order to start the first engine.
- Page 66 Switch ON both fuel booster pumps for tank 3. On the centre pedestal, move the engine 3 HP cock lever forwards to the START (fully forward) position. Moving over to the engine start panel, work through the following steps, referring to the PANEL GUIDE necessary.
- Page 67 Move the engine 3 start switch to START to begin the start sequence for that engine. The starter light will illuminate to indicate that the starter system is energised. The IGN 1 light will illuminate, shortly followed by the IGN 2 light, indicating that both ignitors are charged. Engine 3 should begin to spool up.
-
Page 68: Taxi
Returning to the Captain’s seat, pull back on the system B pitch trim lever to select approximately 5 degrees nose-up trim (the start of the white band on the tail trim indicator gauge). We’re now almost ready to taxi. Move over to the Flight Engineer’s PFCU panel. During the start procedure the PFCUs can disconnect, rendering the flight controls inoperable. -
Page 69: Take-Off
On the overhead panel, extend and switch ON the taxi lights. On the centre pedestal, engage yaw damper 1. We can now taxi to the runway. Release the parking brake and then taxi to the threshold of runway 27R, a short taxi from our current position. - Page 70 As we’re only hauling crew to Prestwick, the take-off roll will be short. As the aircraft starts to gather speed, keep it running down the centre line with small rudder inputs. As you approach 155 knots, start to raise the nose of the aircraft.
-
Page 71: Climb
Climb Reduce power and maintain 240 knots indicated. Climb at approximately +2,500 feet per minute by adjusting power and pitch. You can engage the autopilot to maintain the climb as you pass through 3,000ft AGL. Confirm that the autopilot mode selector is set to MAN (manual) and then engage autopilot 1. The autopilot will maintain the aircraft’s current pitch and hold wings level. -
Page 72: Cruise
With our cruise altitude selected, use the pitch control wheels to select a vertical speed of +2,500ft per minute, as indicated by the tooltip. Finally, select LOC VOR mode. The autopilot will now track towards Compton VOR, allowing us to enjoy the view as we depart Heathrow airspace. -
Page 73: Descent
Descent What goes up must come down and at around 40NM from the Dean Cross (DCS) VOR we need to start our descent into Prestwick. We need to reach the Turnberry (TRN) VOR at 6,000ft so switch ON the seatbelt signs and decrease our target altitude to 6,000ft. - Page 74 As soon as the glideslope deviation needle starts to move down the CDI, indicating that we are approaching the glideslope from below, reduce speed to 165 knots, deploy the second stage of flaps (APR) and lower the landing gear. When the glideslope deviation needle reaches the centre of the CDI, indicating that you are established on the glideslope, the autopilot will automatically start your descent on the glideslope.
- Page 75 Extend the speedbrakes and engage reverse thrust. Apply gentle braking and, once the aircraft has slowed to 70 knots, disengage reverse thrust. Turn onto the first available taxiway. When you are safely off the runway, raise the flaps, retract the spoilers and switch ON the taxi lights. Begin your taxi to the nearest available gate or parking spot whilst you perform the after landing checks.
-
Page 76: Ins Tutorial
INS TUTORIAL With our trip from Heathrow to Prestwick complete, it’s time to head out over the Atlantic for a typical flight flown by the VC10 in the early 1980s – Prestwick to Montreal. The VC10 still holds the record for a transatlantic crossing in a subsonic aircraft at 5 hours and 1 minute, routing from New York’s JFK to Prestwick. -
Page 77: Pre-Flight
2. If you are using FSX, select the Free Flight menu. 3. Choose Load. 4. Select Just Flight VC10 Professional Tutorial 2 from the list of saved flights. 5. Click on OK (Prepar3D) or Fly Now! (Flight Simulator X). You should now find yourself sitting in the cockpit at Glasgow’s Prestwick Airport. For this tutorial it is assumed that you have completed the first tutorial and know how to pre-flight the aircraft. - Page 78 To input the longitude figure, the procedure is very similar. Press the number 4 key to tell the system we’re west of Greenwich and enter our longitude 4366 and then press INSERT. With our current position entered into the system, alignment of the gyros can begin. Rotate the MSU mode selector to ALIGN.
- Page 79 We can now check the status of the alignment process. We can do this by moving the CDU mode selector to DSRTK/STS. On the right-hand display are two digits. The first digit is the one that we’re interested in. This tells us the state of the CDU alignment, from 9 being ‘no alignment’...
- Page 80 To improve our navigational accuracy, we will use the INS in ‘Aided Inertial Operation’ mode. With the MSU mode selectors set to NAV and the API value below 4, we can now configure this. Confirm that the CDU mode selectors are set to DSRTK/STS and then press the 4 key on the CDU keypad. The right-hand display will show a series of ‘0’...
-
Page 81: In Flight
Rotate the CDU mode selectors to DIS/TIME and right-click on the 9 key and then left-click on the 7 key. Rotate the Waypoint/DME selector to select waypoint 3, which corresponds to the first VOR on our route – TRN. The distance to the VOR is shown in the left-hand display. -
Page 82: Entering New Waypoints
For the sake of navigational accuracy, it is also important to correct for gyroscopic drift of the CDI. This can be achieved by periodically using the ‘Heading indicator – reset’ control assignment – [D] by default. Entering new waypoints As we reach waypoint 9, we’ll need to enter the next set of waypoints to continue our routing. Rotate the waypoint/DME selector wheel back to number 1. -
Page 83: Landfall And Updating The Ins
If we’re fortunate, once we enter Canadian airspace we could be given a shortcut or a ‘direct to X’ from ATC. The INS allows us to quickly navigate to a different waypoint. Rotate the CDU mode selector to DIS/TIME and press the WY PT CHG button. -
Page 84: Checklists
CHECKLISTS The following checklists are taken from real-world pilot manuals. They have been modified to suit the characteristics of this simulation. Before starting engine Parking brakes Navigation lights Fuel/payload Throttles IDLE Beacon light Batteries Battery voltage CHECK Fuel booster pumps CHECK Hydraulic quantities Autopilot... - Page 85 After engine is running: Start switch Start master ALL OFF Ground air supply DISCONNECTED Repeat for other engines. Before taxiing CHECK Engine readings Electrical system Hydraulic system AS REQUIRED Altimeter Avionics AS REQUIRED Lights AS REQUIRED Taxiing EXTEND/ON Taxi lights SET (T/O –...
- Page 86 Climb Gear UP, LIGHTS OUT Throttles 93% HP RPM RETRACT Flaps Cabin signs AS REQUIRED OFF/RETRACT Landing lights Altimeters Exterior lights AS REQUIRED Descent Cabin signs AS REQUIRED Altimeters Fuel system Hydraulic system Approach Flaps SET (230 KIAS – 20 degrees, 180 KIAS – 35 degrees) RETRACT Speedbrakes Landing lights...
- Page 87 Shutdown Parking brakes Cabin signs Radios Exterior lights IDLE Throttles Engines 1-3 OFF HP cock levers External power Engine 4 OFF HP cock levers Beacon lights Fuel booster pumps Batteries VC10 Professional – Operations Manual...
-
Page 88: Performance
PERFORMANCE Limiting speeds VMO – Maximum Operating Speed 337 KIAS at sea level reducing by 1kt per 1,000ft to: 317 KIAS at 20,000ft, then increasing by 1kt per 1,000ft to: 329 KIAS at 31,100ft MMO – Maximum Operating Speed Mach M0.886 at 31,000ft and above Mach Horn operates VMO + 6kts. - Page 89 Limiting heights Max. operating height 43,000ft Max. for engine relight 40,000ft Limiting weights Max. taxi weight 143,334 kg Max. take-off weight 142,427 kg Max. landing weight 97,976 kg Max. zero fuel weight 85,457 kg Max. take-off weight for three engine ferry 120,200 kg Take-off/landing speeds Aircraft weight...
- Page 90 Aircraft weight Target threshold speed 150,000 kg 165 KIAS 140,000 kg 159 KIAS 130,000 kg 153 KIAS 120,000 kg 146 KIAS 110,000 kg 140 KIAS 100,000 kg 133 KIAS 90,000 kg 126 KIAS 86,000 kg 123 KIAS 80,000 kg 119 KIAS VC10 Professional –...
-
Page 91: Vc10 Stories, Incidents And Anecdotes
VC10 STORIES, INCIDENTS AND ANECDOTES More than most airliners, the VC10 came to be admired and loved by its crews and passengers. Here is a selection of interesting stories taken from the wonderful VC10.net website which provides a fascinating look into the VC10 story and contains all sorts of useful information, from routes and adverts to technical drawings and much more. - Page 92 As we taxied in we were marshalled to a red carpet at the foot of door #1 Left. The Ceremonial Guard and Band leapt to attention. Chiefy flung the front door open and a couple of hundred semi-frozen Tampax rolled out all over the place! Off went the African VIP.
- Page 93 BOAC’s Super VC10 services operated via Calcutta twice weekly and terminated/turned around in Dacca. Calcutta positioned a BOAC ground engineer on board the flight to handle the turnaround. On this particular day our flight arrived a little behind schedule and was parked on the ramp area about 200 metres from the passenger terminal (no airbridges in those days).
-
Page 94: Credits
COPYRIGHT ©2019 Just Flight. All rights reserved. Just Flight and the Just Flight logo are trademarks of JustFlight London Limited, St. George’s House, George Street, Huntingdon, PE29 3GH, UK. All trademarks and brand names are trademarks or registered trademarks of the respective owners and their use herein does not imply any association or endorsement by any third party. - Page 95 The Spirit of Flight Simulation Available to buy online at www.justflight.com www.justflight.com...
- Page 96 www.justflight.com...
Need help?
Do you have a question about the Standard VC10 and is the answer not in the manual?
Questions and answers