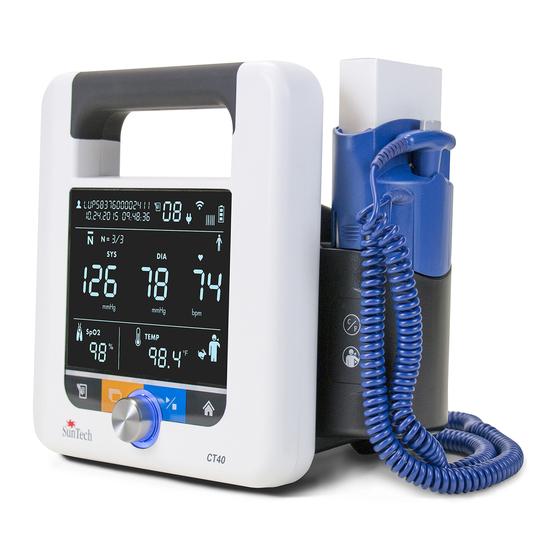
SunTech CT40 Manual
Spot-check vital signs device; advanced configuration application
Hide thumbs
Also See for CT40:
- User manual (48 pages) ,
- Quick reference card (16 pages) ,
- User manual (39 pages)
Table of Contents
Advertisement
Quick Links
- 1 Connecting the Ct40
- 2 Device Configuration: Measurements / Display
- 3 Service Profile
- 4 Device Configuration: Nibp Calibration
- 5 Overview: Measurements / Display
- 6 Device Configuration: Date/Time and Language
- 7 Device Configuration: Power Management
- 8 Administration: Reset to Factory Defaults
- Download this manual
See also:
User Manual
Advertisement
Table of Contents

Related Manuals for SunTech CT40


Summary of Contents for SunTech CT40
- Page 1 Spot-check Vital Signs Device Advanced Configuration Application...
-
Page 2: Changes
Web: www.SunTechMed.com User Responsibility Your SunTech CT40 is designed to perform in conformity with the description contained in this operation manual and accompanying labels and inserts, when assembled, operated, maintained and repaired in accordance with the instructions provided. Further, the user of the device bears sole responsibility for any malfunction that results from improper use, faulty maintenance, improper repair, damage or alteration by anyone other than SunTech Medical or authorized service personnel. -
Page 3: Welcome To The Suntech Ct40
Thank you for choosing this SunTech CT40 for accurate spot checking of vital signs. The SunTech CT40 is designed to be very easy and efficient to use. The mobile device provides a lot of functionality in a compact, cost-effective package. The device can perform automatic blood pressure checks, including averaging of multiple blood pressure readings. -
Page 4: Table Of Contents
Table of Contents Changes ..............2 User Responsibility ........... 2 Copyright Information ..........2 Welcome to the SunTech CT40 ....... 3 1. Introduction ............5 System Requirements ..........5 2. Connecting the CT40 .......... 6 3. Accessing the application ........7 Login ................. -
Page 5: Introduction
1. Introduction While the SunTech CT40 Spot Vital Signs Device can be used out of the box without any additional programming, the CT40 also has an Advanced Configuration Application that can be used to make changes to the device’s advanced settings if necessary. -
Page 6: Connecting The Ct40
CT40 using a Mini-USB to USB connection cable (one of these cables comes with the CT40 Main Unit). Connect the Mini-USB end of the cable to the plug on the back of the CT40 device shown in (E) below:... -
Page 7: Accessing The Application
NOTE: It is strongly recommended that the user change the passwords to both the Service and Medical accounts to a new (not “service” or “medical”) password before using to ensure the unit is secured from tampering. 80-0072-00-MO-RevC SunTech CT40 Advanced Configuration Application | 7 2016/08/17... -
Page 8: Logout
Figure 3.3: Logout confirmation The user can return to the Login screen by clicking “Back to login.” Session Timeout After 10 minutes of inactivity, the device will automatically log the user out. 80-0072-00-MO-RevC SunTech CT40 Advanced Configuration Application | 8 2016/08/17... -
Page 9: Connection Lost
The CT40 could lose its connection because the device was turned off, or the Mini-USB Cable was disconnected from either the CT40 or the computer. Check to make sure that the CT40 is powered on, and that the USB cable is securely connected. -
Page 10: Medical Profile
4. Medical Profile The Medical Profile allows access to clinically-relevant functions in the CT40 Advanced Configuration Application: • Overview menu Device Information Measurements Device Configuration menu • Measurements / Display settings Administration menu • Change Password function System Log The entire Help menu •... - Page 11 If the parameter or accessory is working as expected, it will be highlighted in green and will be labeled ‘OK’. If the parameter or accessory is not communicating to the CT40 because it is not connected, it will be highlighted in yellow and will be labeled ‘Not available’.
-
Page 12: Overview: Measurements
The Measurements page allows the user to view the measurements saved on the device and the current measurement being displayed. The “Latest” table shows the measurement currently displayed on the CT40. This measurement can be in memory or before a measurement is saved. The “Stored” table allows the user to navigate through and view the stored measurements. -
Page 13: Device Configuration: Measurements / Display
The file name can be changed as desired, but should retain the .csv file extension. Device Configuration: Measurements / Display Figure 4.7: Measurements / Display main page To make changes, check the box next to the desired settings and click the “Apply” button. 80-0072-00-MO-RevC SunTech CT40 Advanced Configuration Application | 13 2016/08/17... - Page 14 NIBP measurement. Then, when a heart rate measurement is available after an NIBP reading, the heart rate from NIBP will be displayed. See Section 7 of the SunTech CT40 User Manual (p/n 80-0067-00) for details on the SpO pulse rate function.
-
Page 15: Administration: System Log
The System Log can be used for troubleshooting by service personnel. The log can be viewed by using the scroll bar, or it can be downloaded as a .csv (comma delimited) file by clicking on the download icon. Figure 4.9: Download System Log icon 80-0072-00-MO-RevC SunTech CT40 Advanced Configuration Application | 15 2016/08/17... -
Page 16: Service Profile
5. Service Profile The Service Profile allows access to service-related functions in the CT40 Advanced Configuration Application: Overview menu • Device Information Device Configuration menu • Ethernet (LAN) network settings Wi-Fi (WLAN) network settings NIBP Calibration function Measurements / Display settings... -
Page 17: Overview: Device Information
The Device Information page shows information about the device such as the device Serial Number, the amount of time the device has been on (Uptime), what Parameters are installed, and what kinds of Accessories are connected to the device. Figure 5.2: Hovering over 80-0072-00-MO-RevC SunTech CT40 Advanced Configuration Application | 17 2016/08/17... -
Page 18: Device Configuration: Ethernet
If the parameter or accessory is working as expected, it will be highlighted in green and will be labeled ‘OK’. If the parameter or accessory is not communicating to the CT40 because it is not connected, it will be highlighted in yellow and will be labeled ‘Not available’. -
Page 19: Device Configuration: Wi-Fi
In order to configure the SunTech CT40 for a LAN network, first choose whether or not DHCP should be enabled. If DHCP is disabled, then the user must enter the appropriate IP-address, Subnet mask, Gateway and DNS server. After entering all of the necessary settings, click the “Apply” button. -
Page 20: Device Configuration: Nibp Calibration
Activate calibration check mode on the SunTech CT40 by follow the instructions on the screen. After a calibrated pressure sensor has been connected to the CT40, ensure that the manometer reads 0 mmHg, then click the Calibrate button. If the 0 mmHg calibration process is successful, the following screen will appear: Figure 5.7: Post 0mmHg calibration screen... - Page 21 After successful calibration at both 0 mmHg and 250 mmHg, it is absolutely vital to immediately perform a calibration check of the CT40 device. Follow the instructions on the screen, and/or refer to Section <XX> in the CT40 Service Manual (p/n 80-0068-00) . If the pressure displayed on the CT40 varies more than 2 mmHg from the target check pressures, then repeat the NIBP calibration process.
-
Page 22: Overview: Measurements / Display
NIBP measurement. Then, when a heart rate measurement is available after an NIBP reading, the heart rate from NIBP will be displayed. See Section 7 of the SunTech CT40 User Manual (p/n 80-0067-00) for details on the SpO pulse rate function. -
Page 23: Device Configuration: Emr Settings
Device Configuration: EMR Settings In order to validate Patient ID’s and push patient measurements to an EMR, the SunTech CT40 must be set up to communicate with the EMR system. This setup will require specific information about your network configuration and EMR implementation. - Page 24 Figure 5.12: EMR settings page 80-0072-00-MO-RevC SunTech CT40 Advanced Configuration Application | 24 2016/08/17...
- Page 25 Port: Additional port information for the EMR Server, Provided by EMR configuration specialist. • Use SSL: Use encryption on the connection between the CT40 and the EMR server. Provided by EMR • configuration specialist. Timeout: Time in seconds before a connection attempt to the EMR server is declared a “Timeout”...
-
Page 26: Device Configuration: Emr Server Certificates
A successful import of a certificate will be noted with a “Green” Highlighted Certificate field. Figure 5.14: EMR server certificates ‘Success’ page However, a failed import will be noted with a “Red” highlighted certificate field. 80-0072-00-MO-RevC SunTech CT40 Advanced Configuration Application | 26 2016/08/17... -
Page 27: Device Configuration: Emr Client Certificates
Device Configuration: EMR Client Certificates Figure 5.16: EMR Client Certificates page EMR client certificates are used to authenticate CT40 messaging to the EMR. In order to use this feature, SSL must be enabled in the EMR settings. NOTE: These features are not currently used, and are provided for future functionality. -
Page 28: Device Configuration: Emr Connection Test
Figure 5.17: EMR connection test page This page allows the user to enter a test Patient ID in order to ensure that the CT40 is configured correctly. Enter the test Patient ID in the Patient ID field and click “Apply”. If the test is successful, the following message will appear: Figure 5.18: EMR Connection Test succeeded... -
Page 29: Device Configuration: Date/Time And Language
The NTP server address should be provided by the facilities IT department. NOTE: Daylight Savings Time is automatic, based upon the time zone selected by the user. Figure 5.20: Date/Time and Language 80-0072-00-MO-RevC SunTech CT40 Advanced Configuration Application | 29 2016/08/17... -
Page 30: Device Configuration: Power Management
Figure 5.22: Update Firmware When the CT40 firmware needs to be updated, the user will go here to update the firmware. Instructions on how to update the firmware are found in the release notes for the new firmware supplied by SunTech Medical. -
Page 31: Administration: Reset To Factory Defaults
NOTE: Be aware that Wi-Fi, Ethernet, and Encryption settings will also be cleared. Figure 5.25: Reset in progress If the user of the CT40 wants to reset the device to its original factory settings with the current firmware, this feature is where it can be done. There are six steps. -
Page 32: Administration: System Log
The System Log can be used for troubleshooting by service personnel. The log can be viewed by using the scroll bar, or it can be downloaded as a .csv (comma delimited) file by clicking on the download icon. Figure 5.27: Download System Log icon 80-0072-00-MO-RevC SunTech CT40 Advanced Configuration Application | 32 2016/08/17... - Page 33 NOTE : It is recommended that Security Alerts be checked monthly to ensure that there are no active cyber security threats. SunTech regularly issues firmware updates for the CT40. Check for recent firmware updates by clicking the « Check for Firmware Update » button just above the Download Button.
Need help?
Do you have a question about the CT40 and is the answer not in the manual?
Questions and answers