Table of Contents
Advertisement
Quick Links
User Manual
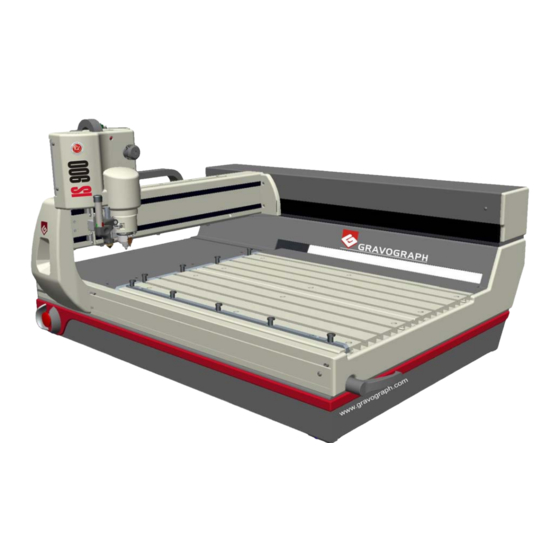
IS900
Machine
Electronic Engraving Machine
First Contact
IS900
Before installing and using this machine, you must read this user guide carefully. Keep it
in a safe place, in case you need to refer to it later.
This manual should not be used without the CN 97 program manual - B2241 701
F3268 701 - 09.2009 - ENG - (UPDATED EDITION NUMBER : 2)
Advertisement
Chapters
Table of Contents

Subscribe to Our Youtube Channel
Related Manuals for GRAVOGRAPH IS900


Summary of Contents for GRAVOGRAPH IS900
- Page 1 User Manual IS900 Machine Electronic Engraving Machine First Contact IS900 Before installing and using this machine, you must read this user guide carefully. Keep it in a safe place, in case you need to refer to it later. This manual should not be used without the CN 97 program manual - B2241 701...
- Page 2 BP 15 - Z.I. - 10600 LA CHAPELLE SAINT LUC - FRANCE Importer's address This publication and its contents are proprietary to GravoTech Marking SAS (Gravograph is a trademark), and are intended solely for the contractual use of GravoTech Marking SAS customers.
-
Page 3: Table Of Contents
Machine with a standard spindle - 90W motor ....................20 Machine with the optional spindle - 200W motor ................... 21 Machine with the High Frequency spindle 150W - Option ................22 Connecting the IS900 IQ machine to a PC ..................24 Switching the machine on ....................... 26 Problems ............................ - Page 4 Adjusting the machine ........................43 Technical characteristics ..............46 Physical characteristics ........................46 Electrical and pnuematical characteristics ..................48 Engraving softwares characteristics ....................48 Optional accessories ........................49 Appendices ..................50 Gravograph Machines Soft setup ......................50 IS900 IQ Machine - Electronic Engraving machine . 4 First Contact...
-
Page 5: Information About Regulations
The equipment must be disposed of at an appropriate collection point for processing, sorting, and recycling of Waste Electrical and Electronic Equipment (DEEE). The elements which compose Electrical and Electronic Equipment may contain substances which have harmful effects on the environment or on human health. By following these instructions, you are helping the environment, contributing to the preservation of our natural resources, and protecting human health. First Contact IS900 IQ Machine - Electronic Engraving machine . 5... -
Page 6: Presentation
• Do not place any object on the machine other than that to be engraved. • The machine should never be used with anything other than Gravograph accessories and tools. • Never hold the material to be engraved in your hands. Only use the GRAVOGRAPH clamping systems designed for your machine. - Page 7 C A U T I O N - L A S E R R A D I A T I O N (pict) Do not stare into beam Laser diode - Wavelength: 630-680nm - Max. Output < 1mW CLASS 2 LASER PRODUCT First Contact IS900 IQ Machine - Electronic Engraving machine . 7...
-
Page 8: Stages Of Unpacking
Keep all the packaging materials so that you can move your machine in total safety. This packing was conceived to guarantee the protection of the machine during its transport (for a return in repair for example). This packaging is in conformity with European recycling standards. IS900 IQ Machine - Electronic Engraving machine . 8 First Contact... -
Page 9: Unpacking - Contents Of Package
Unpacking - Contents of package Check the condition of the packaging when you receive it. If there are any signs of damage, inform the carrier and your GRAVOGRAPH dealer immediately by recorded delivery, specifying the exact nature of the problem. Content of package An IS900 IQ engraving machine User instructions (on CD) A tool box A power cable An IS900 IQ engraving table - IS electronics box connection cable... - Page 10 A round allen key (3 mm) A brush 6 keys ... 2 fuses 4 A (T*) (200W motor supply) D10. A screwdriver (3,5) D11. A pair or tightening rods (special collet spindle) (T*) = These fuses are temporized, with a high breaking capacity and comply with the IEC 127-2 norm. IS900 IQ Machine - Electronic Engraving machine . 10 First Contact...
-
Page 11: Description
Files to be engraved are transferred from the computer to the machine by the intermediary of a cable which is plugged into one of the two ports on the port USB on the IS900 IQ The actual engraving process is controlled by the spindle. -
Page 12: Tool Holder - Standard Motor - 90W
J13. Auxiliary connection (option) This sign shown on the tool-holder of the machine shows the danger caused by the rotating spindle during engraving (risks of getting burnt or cut). To avoid any risks of getting burnt, the protective belt housing (E) of the machine must be always closed, except when carrying out adjustments (if not the machine remains in pause). As long as the protective housing (E) of the machine is opened, the machine remains in pause. Do not never bypass this safety. When the spindle motor is in rotation, the red LED (J3) is lit. CAUTION - LASER RAD Do not stare into beam. LASER diode - Wavelength: 630-680nm - Max. Output < 1mW CLASS 2 LASER PRODUCT. IS900 IQ Machine - Electronic Engraving machine . 12 First Contact... -
Page 13: Tool Holder - Optional Motor - 200W
J13. Auxiliary connection (option) This sign shown on the tool-holder of the machine shows the danger caused by the rotating spindle during engraving (risks of getting burnt or cut). To avoid any risks of getting burnt, the protective belt housing (E) of the machine must be always closed, except when carrying out adjustments (if not the machine remains in pause). As long as the protective housing (E) of the machine is opened, the machine remains in pause. Do not never bypass this safety. When the spindle motor is in rotation, the red LED (J3) is lit. CAUTION - LASER RAD Do not stare into beam. LASER diode - Wavelength: 630-680nm - Max. Output < 1mW CLASS 2 LASER PRODUCT. First Contact IS900 IQ Machine - Electronic Engraving machine . 13... -
Page 14: Control Panel
START (engraving start) PAUSE VALIDATION CANCELLATION and CONFIGURATION SPINDLE ROTATION (Spindle motor On/Off) PLATE Z REF SPINDLE ORIG. ADJUST and RDF MENU JOYSTICK SPINDLE ROTATION SPEED On the engraving machine MAIN STOP BUTTON IS900 IQ Machine - Electronic Engraving machine . 14 First Contact... -
Page 15: Clamping Table
Clamping table The IS900 IQ machine is supplied with a mounted clamping table (T) with a tightening handle (T1). The clamping table (T) allows to hold a flat and large object to be engraved. Vice (option) The vice allows to hold odd shaped and small objects to be engraved (small volume). -
Page 16: Rear View Of The Machine
N4 - Pneumatic supply for the air fan (air seal) of the H. F. spindle (option) N5 - Passage for the adjustable oil-projection tube of the GRAVOGRAPH lubrication system (option) N6 - Plug for accessories (5 A max.) - Dangerous voltage The (N6) plug can only be used with appliances working on 5 A max. and fitted with an integrated protection against overloadt. -
Page 17: 200W Motorization Connections (Option)
200W option motor power supply with a drawer of 2 fuses 4 A (T*) 250 V - Dangerous voltage (T*) = These fuses are temporized, with a high breaking capacity and comply with the IEC 127-2 norm. M2 - 200W spindle motor connection (option) - Dangerous voltage M3 - 200W spindle motor connection (option) - Very low security level 200W Motor Option The machine must always be switched off before connecting or disconnecting a cable as indicated on label displayed on the back of the machine : First Contact IS900 IQ Machine - Electronic Engraving machine . 17... -
Page 18: Installation
Before carrying out the following operations, make sure the machine is switched off and unplugged, switch (L) to position 0. Physical installation advice • Put the Gravograph machine onto a stable flat, clean surface with mini. sizes of 1015 x 750 mm. Make sure the machine is well-ventilated. Do not prevent the air circulation under the machine. We recommend to you the use of the support (S) especially conceived for the machine IS900 IQ • Normal lighting is sufficient to use the machine. -
Page 19: Electric Installation Advice
In order to avoid outside interference, the user is advised to carry out the following points. • Plug the Gravograph machine into a mains line, avoiding having several machines on the same line (several plugs on the same line or using a multi-plug). -
Page 20: Electrical Connections Of The Machine
(label (E1)). 3. Check that the connector (P2) is well connected with the connector (N2) with the cable (G). 4. Check that the power supply cord of the IS900 IQ machine is well connected on the power supply of the IS electronics box of the machine. 5. Plug power supply cord into the engraving machine (N7) and then into the mains socket. To cut off the mains supply to your machine in the case of severe problems, unplug the mains cable or switch off the machine with the main stop button at the side of the machine. Make sure that you can reach them easily. IS900 IQ Machine - Electronic Engraving machine . 20 First Contact... -
Page 21: Machine With The Optional Spindle - 200W Motor
90W, while following the first 4 stages of the procedure described on the preceding page (Do not immediately connect the power supply cord (E) into the mains socket). Then carry out the following procedure : 5. Connect the connectors (P3) (external spindle) and (M2) (200W motor option) with the cable (I1). 6. Connect the connectors (N3) (external spindle) and (M3) (200W motor option) with the cable (I2). It is imperative to set the screws (V) tight to avoid any accidental disconnection of the cables while the machine is turned on, as this could permanently damage the electronic cards (label (E1)). 7. Plug power supply cord into the 200W option motor power supply (M1) and then into the plug (N6) for accessories supply. 8. Plug power supply cord into the engraving machine (N7) and then into the mains socket. To cut off the mains supply to your machine in the case of severe problems, unplug the mains cable or switch off the machine with the main stop button at the side of the machine. Make sure that you can reach them easily. First Contact IS900 IQ Machine - Electronic Engraving machine . 21... -
Page 22: Machine With The High Frequency Spindle 150W - Option
90W, while following the first 4 stages of the procedure described on the page 20. (Do not immediately connect the power supply cord (E) into the mains socket). Then carry out the following procedure : 5. Connect the connectors (P3) (external spindle) and (A8) (150W H.F. spindle option) with the cable (I3). 6. Connect the connectors (N3) (external spindle) and (A2) (150W H.F. spindle option) with the cable(I4). It is imperative to set the screws (V) tight to avoid any accidental disconnection of the cables while the machine is turned on, as this could permanently damage the electronic cards (label (E1)). 7. Connect the pneumatic connectors (A1) of the frequency converter (A) (H.S. spindle air fan) and (N4) of the machine with the pneumatic tube (I5). IS900 IQ Machine - Electronic Engraving machine . 22 First Contact... - Page 23 8. Connect the pneumatic connectors (J12) above the tool holder (H.S. spindle air fan) and (C2) of the 150W HF spindle (150W HF spindle option) with the pneumatic tube (H7). 9. Connect the connectors (C1) (HF spindle) and (J10) (150W HF spindle option) with the cable (H6). 10. Plug power supply cord into the power supply connector (A4) of the converter (A) and then into the plug (N6) for accessories supply. 11. Plug power supply cord into the engraving machine (N7) and then into the mains socket. To cut off the mains supply to your machine in the case of severe problems, unplug the mains cable or switch off the machine with the main stop button at the side of the machine. Make sure that you can reach them easily. First Contact IS900 IQ Machine - Electronic Engraving machine . 23...
-
Page 24: Connecting The Is900 Iq Machine To A Pc
Connecting the IS900 IQ machine to a PC The computer and the IS900 IQ machine must be switched OFF. PC computers and the WINDOWS® graphic environment being very widespread throughout the world, we have based ourselves on these products to define the installation and use... - Page 25 IS900 IQ /PC connection using the USB port Plug the USB cable (P) into the USB port of the machine (pict.). Plug the USB cable (P) into the USB port of the PC. Refer to the installation manual of the computer for the USB port (1.1). First Contact IS900 IQ Machine - Electronic Engraving machine . 25...
-
Page 26: Switching The Machine On
Turn and pull the machine main stop button (L). Après quelques secondes, The machine will then emit a short «beep». The following message will be displayed on the L.C.D. screen of the machine : << GRAVOGRAPH >> VERSION XX.XX Leave the machine plugged in even if it is not in constant use. -
Page 27: Configuration De La Machine (Langue)
The following message is displayed on the screen : < READY TO RECEIVE > Press Release the key when the tool-holder of the IS900 IQ machine starts to move. The machine configuration that you have carried out is saved. In this way the display language that you have just chosen will be taken into account each time you switch the machine on. -
Page 28: Make The Is900 Iq Machine Ready To Engrave With Gravostyle 5
"Gravograph Machines Soft setup" in order to install the GT Smartstream 3.xx driver and the Gravostyle 5 engraving software on your PC. Then add the IS900 IQ machine in the "Installed printer list" of the GravoStyle 5 engraving software. IS900 IQ Machine - Electronic Engraving machine . -
Page 29: Engraving
In the engraving programme, make sure that you have indicated the good engraving parameters, the good machine parameters, the Z speed and the engraving orientation : For a flat engraving, you should select the function (1) in order to activate the automatic ZRef. function (3) You could indicate a personalized origin (2) to use the "point and shoot" function. First Contact IS900 IQ Machine - Electronic Engraving machine . 29... -
Page 30: Positioning The Plate On The Clamping Table
If the plate is correctly tightened, noise and vibrations are reduced to a minimum when the machine is engraving. Check that the object is tightened correctly to ensure that it is not ejected during engraving. IS900 IQ Machine - Electronic Engraving machine . 30 First Contact... - Page 31 If the plate is correctly tightened, noise and vibrations are reduced to a minimum when the machine is engraving. Check that the object is tightened correctly to ensure that it is not ejected during engraving. First Contact IS900 IQ Machine - Electronic Engraving machine . 31...
-
Page 32: Positioning The Plate Onto The Vice (In Option)
2 1 0 1 2 4 5 6 7 6b. Using the tightening knob, tighten the plate so that it cannot move during engraving. If the plate is correctly tightened, noise and vibrations are reduced to a minimum when the machine is engraving. Check that the object is tightened correctly to ensure that it is not ejected during engraving. IS900 IQ Machine - Electronic Engraving machine . 32 First Contact... -
Page 33: Point And Shoot
Point and Shoot This GravoStyle function permits to define the engraving area on the plate with the machine. 7a. Click on "Point and Shoot" in Gravostyle This message is displayed on the LCD-screen of the control panel of the IS900 IQ+ machine: < JOYSTICK > X=xxx.xx I Y = xxx.xx 7b. Move the spindle to the first corner (1) of the area to engrave by using the joystick 7c. Validate... -
Page 34: Transfer
8. From your engraving software, transfer the composition to the IS900 IQ machine. The engraving machine displays the number of bytes received : To engrave XXXX bytes received The following message is displayed for a few seconds as soon as the transfer is complete : TRANSFER COMPLETED Then the following message is displayed : <... -
Page 35: Adjusting The Spindle
The tool holder stops above the material to be engraved exactly where the engraving should start. Adjusting the spindle pressure 10. Set the spindle pressure with the knob (J4) on the position (2). Adjust if necessary. (Position (6) = Rigid spindle and position (1) = Supple spindle). Press the knob (J4) in order to turn it. As soon as the desired position is reached pull it slightly. In RDF mode, the knob (J4) should not be on the position (6). 11. Set the regulating nose (4) in place on the spindle and tighten the nose nut. 12. Unscrew the index finger (5) then unscrew the scaled knob (5.1) (diagram 29). Line up the 0 of the scaled knob with the index finger (6). The scaled knob should be unscrewed in such a way that the index finger blocks it. First Contact IS900 IQ Machine - Electronic Engraving machine . 35... -
Page 36: Putting The Cutter Into The Spindle
0.50 tip. 13. Lower the spindle until the depth regulating nose touches the material to be engraved. Press ZREF = 0.00 mm to change To lower press 14. Open the belt housing of the tool-holder (E). As long as the protective housing (E) of the machine is opened, the machine remains in pause. Do not never bypass this safety. 90W standard spindle 200W optional spindle 15. Screw knob of cutter (J2) onto the spindle (diagram 32). The spindle knob should be tightened anti-clockwise (knob with left-hand thread). The tool is very sharp and to avoid any risks of getting cut, you are advised to use some kind of protection (gloves) to handle it. IS900 IQ Machine - Electronic Engraving machine . 36 First Contact... - Page 37 Chrome Diamond 0,025 Gravometal Carbide Gravoply II Carbide Stainless Steel Diamond Brass Carbide Metallex Carbide Gold Carbide Plastic Carbide 0,35 21. Tighten the index finger in order to maintain the scaled knob in this position. First Contact IS900 IQ Machine - Electronic Engraving machine . 37...
-
Page 38: Adjusting The Rotation Speed Of The Spindle
Adjusting the rotation speed of the spindle 22. Turn the button (M) on the control panel to the speed required From 10000 to 20000 rpm. for the standard spindle (white graduations). From 5000 to 60000 rpm. for the option HF spindle (orange graduations). If you wish the spindle to remain without rotation press IS900 IQ Machine - Electronic Engraving machine . 38 First Contact... -
Page 39: Launching The Engraving
Always wear protective glasses againts chip ejection. Before starting the engraving, ensure : - that the object is tightened correctly. - that the spindle travel area is completely clear. - that no one is in the travelling area of the moving parts of the machine. - that no object will obstruct the travelling of the moving parts. Start the engraving from the IS900 IQ+ machine control panel. 23. Press the START Key (Engraving Start) The tool holder will move, at protected speed (slow), to the first point in the engraving exactly where the engraving should start. To obtain a faster displacement, maintain the START key pressed until at the first point of engraving. Warning - Ensure that no one is in the travelling area of the moving parts of the machine and that no object will obstruct the travelling of the moving parts. In the event of a problem, press the PAUSE key The machine will momentarily pause. -
Page 40: General Maintenance
General maintenance Before carrying out any maintenance, unplug the mains supply cable (label No internal part of the Gravograph machine requires user intervention : general maintenance is limited to external cleaning. If necessary, the user can change the belt or fuses. If you wish to have the inside of your machine cleaned, contact a Gravograph technician. -
Page 41: Changing The Fuses
1 pair of fuses 10 A (T*) 250 V. (T*) = These fuses must be temporized, with a high breaking capacity and must comply with the IEC 127-2 norm. Unplug your machine cable from the mains. 1. Disconnect the mains cable from the socket at the back of the engraving table to give easier access. 2. Press the tag (A) to pull out the drawer containing the fuses. 10 A (T*) 250 V 3. Replace the fuse(s) and close the drawer again. If the new fuse blows without apparent reason, contact an approved GRAVOGRAPH technician. First Contact IS900 IQ Machine - Electronic Engraving machine . 41... - Page 42 (with the 200W spindle option) is supplied with 1 pair of fuses 4 A (T*) 250 V. (T*) = These fuses must be temporized, with a high breaking capacity and must comply with the IEC 127-2 norm. Unplug your machine cable from the mains. 1. Disconnect the mains cable from the socket at the back of the engraving table to give easier access. 2. pull out the drawer containing the fuses. 4 A (T*) 250 V 3. Replace the fuse(s) and close the drawer again. If the new fuse blows without apparent reason, contact an approved GRAVOGRAPH technician. IS900 IQ Machine - Electronic Engraving machine . 42 First Contact...
-
Page 43: Adjusting The Machine
Adjusting the machine After it has been used for some while the reference points ("0" points) of the IS900 IQ machine can alter slightly (the centre of the engraving area of the machine is slightly out of line with the clamping system, the Z position at the me- chanical stop is above or below its normal position). - Page 44 The adjustment of the reference point "red pointer" Op(Xp,Yp) in X,Y is finished. The adjustment of the reference points "left corner" Oc(Xc,Yc) and "red pointer" Op(Xp,Yp), in X,Y, is finished. IS900 IQ Machine - Electronic Engraving machine . 44 First Contact...
- Page 45 : PROTECTED DISPLACEMENT to confirm 23. Press PROT. DISPLACEMENT YES to select 24. Select one of the 2 choices (Yes or No) using the 2 keys For your safety we recommend to you to choose the protected displacement. Because it is possible for you to obtain a faster displacement by maintaining key START pressed until at the first point of engraving. If you want to choose "NO" press the key until it shortly beeps. Warning - Ensure that no one is in the travelling area of the moving parts of the machine and that no object will obstruct the travelling of the moving parts. If you want to choose "YES" press the key. The start menu (A) appears : << GRAVOGRAPH >> VERSION XX.XX First Contact IS900 IQ Machine - Electronic Engraving machine . 45...
-
Page 46: Technical Characteristics
Slope of 15° max. with RDF Clamping table Max. thickness of 10 mm - 0.4 in fastening Red pointer LASER diode X,Y max. engraving 0,05 mm - 0.002 in precision Engraving repeatability < 0,05 mm - 0.002 in IS900 IQ Machine - Electronic Engraving machine . 46 First Contact... - Page 47 +5 °C ; + 41°F max. +40°C ; + 104°F Storage temperature min. -5 °C ; + 23°F max. +45 °C ; + 113°F Degree of relative moisture when in use 5 to 85 % First Contact IS900 IQ Machine - Electronic Engraving machine . 47...
-
Page 48: Electrical And Pnuematical Characteristics
150W rack --------------------- SubD9 <=> DIN8 + FCI_CLIP9 <=> SubD9 Spindle --------------------- FCI_CLIP9 Engraving softwares characteristics PC Engraving software Engraving software GravoStyle 5 (version >___) Operating system Windows XP ; Windows Vista (for the engraving software) Languages Fre, Eng, Ger, Ita, Spa, Nld File formats Gravograph binary IS900 IQ Machine - Electronic Engraving machine . 48 First Contact... -
Page 49: Optional Accessories
Net weight kg - lb Vice type Removable, Manual, self centering Jigs type Plastic Max. opening vice 230 mm - 9.05 in Z max. clearance 60 mm - 2.36 in (jigs - spindle) First Contact IS900 IQ Machine - Electronic Engraving machine . 49... -
Page 50: Appendices
Appendices Gravograph Machines Soft setup IS900 IQ Machine - Electronic Engraving machine . 50 First Contact... - Page 51 MAKE A GRAVOGRAPH LASER MACHINE READY TO ENGRAVE .............5 MAKE A GRAVOGRAPH LASER MACHINE READY TO ENGRAVE WITH LASERSTYLE........8 PLUG ONTO USB PORT AN ADDITIONAL GRAVOGRAPH MACHINE..........11 MAKE A GRAVOGRAPH LASER MACHINE READY TO ENGRAVE WITH A GRAPHICAL EDITOR ....13 LEGAL TERMS ..........................14...
-
Page 52: Gravograph Machines - Soft Setup
Gravograph Machines - Soft setup Gravograph Machines - Soft setup How to make Gravograph machine ready to engrave Install physically the machine on workspace, in accordance with Gravograph user manual. Locate the power button. • Button on 0: machine powered off, out of order •... - Page 53 Run a session as Administrator. A standard user has no right to make a setup in Windows. Have the digital media used to set up your Gravograph engraving program. Explore contents of support iconized as a driver identified by a letter in Computer (for example F: or H:).
- Page 54 Gravograph Machines - Soft setup Setting softlink between PC and engraving machine Plug a single machine onto an USB port of your PC. Power up it. connection > Plug machine onto port, power up it The setup wizard checks the compatibility between GT Smartstream 3.xx and machine firmware (embedded program that carries out engraving instructions).
- Page 55 Gravograph Machines - Soft setup Enabling laser machine in your Gravograph engraving program GravoStyle 5 Double-click in Start menu to run the program. Click tab Open Machines: click Config. machines command in Engraving menu. Click Add machine. Click your machine type.
- Page 56 Gravograph Machines - Soft setup Make a Gravograph laser machine ready to engrave Set up Gravograph L-Solution driver onto your computer. Set softlink between PC and engraving machine. Make this connection using a cable you plug the connectors either onto machine USB port and PC USB port or machine serial or parallel port and PC LPT or COM port Make the machine ready to engrave with the program used to produce engraving.
- Page 57 Gravograph Machines - Soft setup Setting softlink between PC and engraving machine USB connection Plug a single machine onto an USB port of your PC. Power up it. > Plug machine onto port, power up it The setup wizard checks the compatibility between L-Solution 5.xx-3 and machine firmware (embedded program that carries out engraving instructions).
- Page 58 Gravograph Machines - Soft setup LPT or COM Next> Click. Configure your machine as Windows printer in Properties connection dialog box. > Click Next to select the type of port to communicate with machine Ports Click tab. Click the port onto you plugged the cable that links the PC and the engraving machine.
- Page 59 Set up Gravograph L-Solution driver onto your computer. Use GS5 DVD to set up driver. Set the softlink between PC and laser machine. Make your laser machine ready to engrave with LaserStyle Gravograph software. • Check the USB port assigned to L-Solution printer you have just added.
- Page 60 Gravograph Machines - Soft setup How to carry on when GT Smartstream 3.xx driver is already set on your computer? Click Gravograph Manufacturer. Click GT Smartstream3.xx. Printers driver. Next> Click. Click Keep existing driver. Next> Click. Finish Click.
- Page 61 Click ports available on your machine: COM/LPT Click Laserpower (from 30 Watts, see plate at machine rear side). Click (more information in Gravograph manual delivered with laser machine). Click. 12. In Installed printer list click GT Smartstream port named like your laser machine.
- Page 62 Use MajFirmware.exe tool to control and to configure the parameters of the additional machine, before connecting it onto an USB port of your PC. To connect onto USB ports several Gravograph machines , your PC must have at least 4 USB ports free.
- Page 63 Gravograph Machines - Soft setup Updating additional machine firmware When the driver that matches the additional machine has been already set up on PC check its compatibility with this machine firmware. Run MajFirmware.exe tool. Check Number parameter. When value is •...
- Page 64 Gravograph Machines - Soft setup Make a Gravograph laser machine ready to engrave with a graphical editor Set up Gravograph L-Solution driver. To set up driver use L-Solution CD delivered with your machine. Set the softlink between PC and engraving machine.
-
Page 65: Legal Terms
Publisher GRAVOTECH MARKING SAS http://www.gravograph.com Gravograph, Intelligent System, L-Solution, GravoStyle 5, GravoStyle Quick Click, GT Smartstream are either registered trademarks or trademarks of GRAVOTECH MARKING SAS, in the U.S. and/or other countries. Microsoft, Windows 98, Windows NT, Windows ME, Windows 2000, Windows XP, Microsoft Word, WordPad, Internet Explorer, Explorer, HTML Help Viewer, Windows Media Player are either registered trademarks or trademarks Microsoft Corporation, in the U.S.
Need help?
Do you have a question about the IS900 and is the answer not in the manual?
Questions and answers