Table of Contents

Related Manuals for Invitrogen iBlot 2


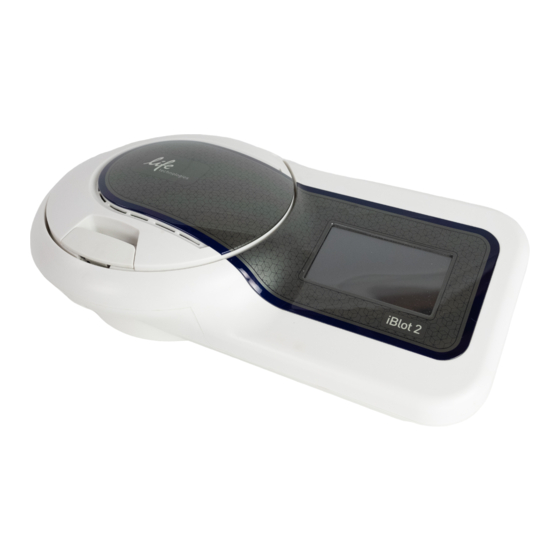
Summary of Contents for Invitrogen iBlot 2
- Page 1 ™ iBlot 2 Dry Blotting System USER GUIDE For dry, electroblotting of proteins from mini-, midi-, and E- ™ PAGE gels Catalog Number IB21001 Publication Number MAN0009112 Revision E.0 For Research Use Only. Not for use in diagnostic procedures.
- Page 2 Life Technologies Corporation | 5781 Van Allen Way | Carlsbad, CA 92008 For descriptions of symbols on product labels or product documents, go to thermofisher.com/symbols-definition. The information in this guide is subject to change without notice. DISCLAIMER: TO THE EXTENT ALLOWED BY LAW, THERMO FISHER SCIENTIFIC INC. AND/OR ITS AFFILIATE(S) WILL NOT BE LIABLE FOR SPECIAL, INCIDENTAL, INDIRECT, PUNITIVE, MULTIPLE, OR CONSEQUENTIAL DAMAGES IN CONNECTION WITH OR ARISING FROM THIS DOCUMENT, INCLUDING YOUR USE OF IT.
-
Page 3: Table Of Contents
Contents ■ CHAPTER 1 Product information ........6 Product contents . - Page 4 Contents Setting date and time ............20 ™...
- Page 5 Contents ■ APPENDIX B Post transfer analysis ........48 Post transfer analysis .
-
Page 6: Chapter 1 Product Information
Product information Product contents ™ Types of products This manual is supplied with the iBlot 2 Gel Transfer Device (Cat. no. IB21001). iBlot 2 Gel The contents of the iBlot ™ 2 Gel Transfer Device are listed below. See “iBlot 2 Gel ™... -
Page 7: Installing The Instrument
Chapter 1 Product information Product contents ™ The iBlot 2 Gel Transfer Device complies with the TUV Rhineland North America Inc. safety requirements, part 15 of the FCC rules, and the European Community ™ Safety requirements. Operation of the iBlot 2 Gel Transfer Device is subject to the conditions described in this manual. -
Page 8: Service Operation Requirements
Chapter 1 Product information Unpacking instructions Service operation In the event of an equipment malfunction, it is the responsibility of the customer to report the need for service to Thermo Fisher Scientific or to one of the authorized requirements agents. For service information, contact Technical Support. Servicing of this device is to be performed by trained service personnel only. -
Page 9: Rear View
Chapter 1 Product information About the system Rear view A rear view showing various parts of the iBlot ™ 2 Gel Transfer Device is shown below. ™ Side view A side view showing various parts of the iBlot 2 Gel Transfer Device is shown below. About the system iBlot 2 Dry... -
Page 10: Features
Chapter 1 Product information About the system Features • Pre-programmed (iBlot ™ 2 Gel Transfer Device) with six Methods for transfer of proteins from various gel types in 7–8 minutes • Built-in safety features in the device enhance user safety •... - Page 11 Chapter 1 Product information About the system Schematic of iBlot ™ 2 Transfer Stack showing the flow of current ™ After the stack is assembled on the iBlot 2 Gel Transfer Device, and the appropriate Method is selected, the run is initiated. Complete transfer of proteins from the gel to the blotting membrane is accomplished in approximately 7–8 minutes.
-
Page 12: Description Of Parts
Chapter 1 Product information Description of parts Description of parts iBlot 2 Gel ™ ™ The iBlot 2 Gel Transfer Device is a protein transfer device with an integrated power supply capable of producing currents up to 6.3 amp, and supplying voltage up to Transfer Device 25 V. -
Page 13: Blotting Roller
Chapter 1 Product information Description of parts Blotting surface ™ The blotting surface is the area where the iBlot 2 Transfer Stacks containing the gel are placed to perform blotting. Alignment guides are used for proper orientation of normal and mini transfer stacks. ™... -
Page 14: Stylus
Chapter 1 Product information Description of parts Stylus A stylus is provided for use with the touch screen of the iBlot ™ 2 Gel Transfer Device. ™ Power cord The Power Cord connects to the iBlot 2 Gel Transfer Device on one end, and to a power adapter (for plugging into an AC electrical outlet) on the other. -
Page 15: Transfer Stacks
Chapter 1 Product information Description of parts iBlot ™ 2 Transfer The iBlot ™ 2 Transfer Stacks are used to transfer proteins from gels onto nitrocellulose ™ or PVDF membranes, and are available in Standard size for blotting E-PAGE , midi-, Stacks or two mini gels, and Mini size for blotting one mini gel. -
Page 16: Top Stack
Chapter 1 Product information Description of parts Top stack The Top Stack is separated from the Bottom Stack by a white plastic separator, and contains a copper electrode and a transfer gel layer. The transfer gel layer acts as an ion reservoir and is composed of an optimized, proprietary gel composition. -
Page 17: Filter Paper
Chapter 1 Product information Description of parts radiolabeling. The proteins bind to the membrane due to hydrophobic and electrostatic interactions. The protein binding capacity is 209 µg/cm • PVDF membrane (0.2 µm, low fluorescence) The PVDF membrane has higher binding capacity than nitrocellulose. The PVDF membrane is preactivated and ready for use without any pretreatment with alcohol. -
Page 18: Gel Transfer Device
Chapter 1 Product information Operating the iBlot 2 Gel Transfer Device ™ ™ Operating the iBlot 2 Gel Transfer Device ™ First time usage The first time the iBlot 2 Gel Transfer Device is turned on, you will need to perform the following actions: of the iBlot ™... -
Page 19: Gel Transfer Device Options Screen
Chapter 1 Product information Operating the iBlot 2 Gel Transfer Device ™ 5. Accessing the Options screen iBlot ™ 2 Gel The Options screen allows the user to perform the following actions: Transfer Device • Set date and time options screen •... -
Page 20: Setting Date And Time
Chapter 1 Product information Operating the iBlot 2 Gel Transfer Device ™ Setting date and Touch Date & Time to access the Date & Time screen. time 1. Touch the Date or Time field to access a keyboard for entering values. 2. -
Page 21: Writing Logs To A Usb Storage Device
Chapter 1 Product information Operating the iBlot 2 Gel Transfer Device ™ ™ Writing logs to a A record of each run is kept by the iBlot 2 Gel Transfer Device, with voltage and current being tracked at 1-second intervals. This information can be downloaded to a USB storage USB storage device in “.csv”... -
Page 22: Upgrading Iblot ™ 2 Gel Transfer Device Firmware
Chapter 1 Product information Operating the iBlot 2 Gel Transfer Device ™ ™ Upgrading iBlot ™ The current firmware version on the iBlot 2 Gel Transfer Device is displayed on the Firmware Version button. 2 Gel Transfer Device firmware 1. To update firmware, visit thermofisher.com/iblot2, and follow the instructions to download the latest firmware version to a USB storage device. -
Page 23: Description Of Methods
Chapter 1 Product information Description of methods Description of methods Methods ™ The iBlot 2 Gel Transfer Device is pre-programmed with six voltage Methods that allow blotting using different combinations of volts and time. Method Voltage Default Run Time Run Time Limit 20 V for 1 minute 7 minutes 13 minutes... - Page 24 Chapter 1 Product information Description of methods Transfer Stack Method Volts Run Time Regular transfer P0, P3 20–25 8–10 minutes stack (1 midi gel or two mini gels) Regular transfer P0, P3 20–25 8–10 minutes stack 48 or 96 (E-PAGE ™...
-
Page 25: Chapter 2 Protein Transfer Protocol
Protein transfer protocol Experimental overview Experimental The table below outlines the experimental steps necessary to perform western blotting ™ using the iBlot 2 Gel Transfer Device. For more details on each step, see indicated outline pages. Step Action Page Select Method for “Selecting a method“... -
Page 26: Recommended Gel Types
Chapter 2 Protein transfer protocol Using the iBlot 2 Gel Transfer Device ™ • Do not trim the membrane or iBlot ™ 2 Transfer Stacks to fit your gel size. See ™ previous page for gel sizes that are compatible with iBlot 2 Gel Transfer Device. -
Page 27: Selecting A Method
Chapter 2 Protein transfer protocol Using the iBlot 2 Gel Transfer Device ™ ™ Selecting a Select the appropriate Method for your application on the iBlot 2 Gel Transfer Device ™ prior to assembling an iBlot 2 Transfer Stack with your gel. method 1. -
Page 28: Removing The Gel
Chapter 2 Protein transfer protocol Using the iBlot 2 Gel Transfer Device ™ Removing the gel Remove the gel from the cassette for transfer after completion of electrophoresis as described below. • Open the mini- or midi gel cassette using the Gel Knife by inserting the knife into the narrow gap between the two plates of the cassette. -
Page 29: Assembling The Iblot ™ 2 Transfer Stack
Chapter 2 Protein transfer protocol Using the iBlot 2 Gel Transfer Device ™ Assembling the 1. Open the lid of the device using the latch. Ensure the blotting surface is clean. iBlot ™ 2 Transfer Stack 2. Unseal the iBlot ™... - Page 30 Chapter 2 Protein transfer protocol Using the iBlot 2 Gel Transfer Device ™ 3. Separate the Top Stack and set it to one side of the bench with the transfer gel layer facing up. Keep the Bottom Stack in the transparent plastic tray. Note: In some instances, the membrane may adhere to the separator.
- Page 31 Chapter 2 Protein transfer protocol Using the iBlot 2 Gel Transfer Device ™ 8. 1 midi gel on an iBlot ™ 2 Regular Transfer Stack 9. 2 mini gels (head-to-head) on an iBlot ™ 2 Regular Transfer Stack 10. 1 mini gel on an iBlot ™...
- Page 32 Chapter 2 Protein transfer protocol Using the iBlot 2 Gel Transfer Device ™ 12. Soak the iBlot ™ Filter Paper (use the appropriate filter paper for the size of the ™ gel) in a clean container of deionized water. iBlot Filter Paper is included with ™...
-
Page 33: Performing Blotting
Chapter 2 Protein transfer protocol Using the iBlot 2 Gel Transfer Device ™ 15. Take the Top Stack from the bench and place it on top of the presoaked filter paper with the copper electrode facing up (and transfer gel layer facing down). Remove any air-bubbles using the Blotting Roller. -
Page 34: Disassembling The Iblot ™ 2 Transfer Stack
Chapter 2 Protein transfer protocol Disassembling the iBlot 2 Transfer Stack ™ 5. Touch the Done icon to stop the beeping. 6. Proceed to Disassembling the iBlot ™ 2 Transfer Stack, “Disassembling the iBlot 2 Transfer Stack“ on page 34. ™... - Page 35 Chapter 2 Protein transfer protocol Disassembling the iBlot 2 Transfer Stack ™ 5. Wipe down instrument and metal contacts with a damp cloth or paper tissue to ™ remove any excess liquid that may have not been absorbed by the iBlot Absorbent Pad.
-
Page 36: Chapter 3 Custom Methods
Custom methods Creating custom methods ™ Introduction Custom methods can be created and saved on the iBlot 2 Gel Transfer Device for specific applications, or fine-tuning transfer conditions. Programming a 1. Select New Method. custom method 2. Select the number of steps to be included in the new Method using the (–/+) buttons. - Page 37 Chapter 3 Custom methods Creating custom methods 3. Select the voltage and time (minutes and seconds) for each step by touching the desired field and using the keyboard to enter the appropriate value. Do not exceed the recommended time limit for voltage. 4.
-
Page 38: Save A Custom Method
Chapter 3 Custom methods Creating custom methods Save a custom 1. Select the Name field, and use the keyboard to enter a name for the new Method. method 2. Save the method. 3. The new Method will appear in the list of Saved Methods. iBlot 2 Dry Blotting System User Guide ™... -
Page 39: Creating Custom Methods From A Template
Chapter 3 Custom methods Creating custom methods from a template Creating custom methods from a template Introduction ™ Custom methods can be created and saved on the iBlot 2 Gel Transfer Device for specific applications, or fine-tuning transfer conditions using a pre-set template or previously saved Method as a starting point. -
Page 40: Change Voltage/Time
Chapter 3 Custom methods Creating custom methods from a template 3. Select Edit from the Edit Method screen to enter Edit Mode (all voltage and time fields become enabled for editing). 4. Continue to “Change voltage/time” (“Change voltage/time“ on page 40), or “Add/remove steps”... -
Page 41: Add/Remove Steps
Chapter 3 Custom methods Creating custom methods from a template 5. Select Done when editing has been completed and proceed to to “Save a Custom Method” (“Save a custom method“ on page 43). 1. Select Manage Steps while in Edit Mode. Add/remove steps iBlot 2 Dry Blotting System User Guide... - Page 42 Chapter 3 Custom methods Creating custom methods from a template 2. Select either Add Steps or Remove Steps. 3. Select the + icon located at the location where you want to insert a step, or the – icon to remove a step. 4.
-
Page 43: Save A Custom Method
Chapter 3 Custom methods Creating custom methods from a template 5. Select Done on the Edit Method screen and proceed to to “Save a Custom Method” (“Save a custom method“ on page 43) 1. Click Save to save the method. Save a custom method iBlot... - Page 44 Chapter 3 Custom methods Creating custom methods from a template 2. Touch the name field on the Name Display screen and use the keyboard to enter in the characters. Touch OK when done. 3. The new Method will now appear under Saved Methods icon button. iBlot 2 Dry Blotting System User Guide ™...
-
Page 45: Appendix A Troubleshooting
Troubleshooting Introduction ™ Review the information below to troubleshoot your experiments using the iBlot Gel Transfer Device and iBlot ™ 2 Transfer Stacks. To troubleshoot the immunodetection process, refer to the instructions supplied by the manufacturer of the immunodetection reagents. Observation Possible cause Recommended action... - Page 46 Appendix A Troubleshooting Introduction Observation Possible cause Recommended action Difficulty closing lid. Transfer stack was too thick. The iBlot 2 Gel Transfer Device can only ™ support gels of ≤1.5mm thickness. Ensure the Note: Do not press forcibly on proper gel is being used. the lid as it can cause damage Ensure that additional filter pads have not been to the unit.
- Page 47 Appendix A Troubleshooting Introduction Observation Possible cause Recommended action Protein not PVDF membrane was Regions where PVDF membranes are dry binding/transferring to dry/partially dry. appear whiter than places where the membrane (PVDF). membrane is wet. Remove the membrane, reactivate in 100% methanol, and rinse in water before reapplying to the transfer stack.
-
Page 48: Appendix B Post Transfer Analysis
Post transfer analysis Post transfer analysis After the transfer, proceed to immunodetection, store the membrane for future use, or stain the membrane. ™ • For immunodetection of proteins, use the WesternBreeze Chromogenic or Chemiluminescent Immunodetection Kits available at thermofisher.com (see “iBlot 2 Transfer Stacks“... -
Page 49: Appendix C Optimizing Blotting
Optimizing blotting Optimizing blotting ™ When using the iBlot 2 Gel Transfer Device, most proteins transfer efficiently using the protocol in this manual. Based on specific properties of a protein or a set of proteins, some optimization of the blotting protocol may be necessary. Optimize blotting as follows: Perform an ethanol equilibration step prior to transfer To improve the transfer of high-molecular weight proteins from mini- or midi-... -
Page 50: Appendix D Maintenance
Maintenance Cleaning ™ Before cleaning the iBlot 2 Gel Transfer Device, make sure the device is turned off. Wipe off the blotting surface and electrodes with a damp cloth or paper tissue. Allow the parts to dry before use. General maintenance To avoid damaging the iBlot ™... -
Page 51: Replacing Electrical Contacts
Appendix D Maintenance Replacing electrical contacts Replacing electrical contacts Electrical contacts should be inspected and replaced regularly as part of routine maintenance. Overtime, electrical contacts can become depressed and worn out. To ensure optimal life of the electrical contacts, wipe down the instrument and contacts with a damp cloth after each use. - Page 52 Appendix D Maintenance Replacing electrical contacts 4. Hold the Lid with one hand, and unpeel the Round Bumper from the Lid. Discard the Round Bumper. 5. Open the bag of the Electrode Replacement Kit (Cat. no. IB28001), and remove all of the parts.
- Page 53 Appendix D Maintenance Replacing electrical contacts 6. Peel off the backing from the Round Bumper and place the bumper into the recess. Hold the Lid with one hand and press down on the bumper for five seconds to ensure proper adhesion. 7.
- Page 54 Appendix D Maintenance Replacing electrical contacts 8. Place a screw through the hole in one of the contacts. Position the contact/screw onto the Contact 2 location. Turn the screw with a screwdriver until it is hand- tight. iBlot 2 Dry Blotting System User Guide ™...
-
Page 55: Appendix E Product Specifications
Product specifications ™ iBlot 2 Gel Transfer Device specifications Dimensions: 37 cm (l) × 20 cm (w) × 11 cm (h) Weight: 2.3 kg Electrical Parameters: 100–240 V, 50/60 Hz, 6.3 A Built-in Features: Digital display, alarm Compatibility: Suitable for transfer of mini- (8 × 8 cm), midi- (8 ×... - Page 56 Appendix E Product specifications iBlot 2 Transfer Stack specifications ™ Top Stack Mini Bottom Stack Gel Layer: 8.5 cm (l) × 8.5 cm (w) × 0.32 cm (thick) Bottom Stack Gel Layer Composition: Proprietary Electrode: Copper-coated mesh Transfer Membrane: Nitrocellulose (0.2 µm) or PVDF (0.2 µm, low fluorescence) Plastic Tray: 16.8 cm ×...
-
Page 57: Appendix F Accessory Products
Accessory products ™ iBlot 2 Transfer Stacks ™ iBlot 2 Transfer Stacks are available at thermofisher.com. Ordering information is provided below. Product Quantity Cat. No. iBlot ™ 2 Regular Transfer 1 pack of 10 IB23001 Stack, Nitrocellulose iBlot ™ 2 Regular Transfer 1 pack of 10 IB24001 Stack, PVDF... -
Page 58: Precast Gels And Premade Buffers
Appendix F Accessory products Precast gels and premade buffers Product Quantity Cat. No. ™ SuperSignal West Dura 100 mL 34075 Extended Duration Substrate ™ SuperSignal West Femto 100 mL 34095 Maximum Sensitivity Substrate SeeBlue ™ PLUS ™ 2 Pre- 500 µL LC5925 Stained Standard ™... -
Page 59: Appendix G Safety
Safety WARNING! GENERAL SAFETY. Using this product in a manner not specified in the user documentation may result in personal injury or damage to the instrument or device. Ensure that anyone using this product has received instructions in general safety practices for laboratories and the safety information provided in this document. -
Page 60: Electrical Safety
Appendix G Safety Instrument safety Electrical safety WARNING! Fuse Installation. Before installing the instrument, verify that the fuses are properly installed and the fuse voltage matches the supply voltage. Replace fuses only with the type and rating specified for the unit. Improper fuses can damage the instrument wiring system and cause a fire. -
Page 61: Cleaning And Decontamination
Appendix G Safety Safety and electromagnetic compatibility (EMC) standards Cleaning and CAUTION! Cleaning and Decontamination. Use only the cleaning and decontamination decontamination methods specified in the manufacturer's user documentation. It is the responsibility of the operator (or other responsible person) to ensure the following requirements are met: ·... -
Page 62: Symbols On Instrument
Appendix G Safety Safety and electromagnetic compatibility (EMC) standards ™ Symbols on The symbols used on the iBlot 2 Gel Transfer Device are explained below: instrument Symbol Information The CE mark symbolizes that the product conforms to all applicable European Community provisions for which this marking is required. ™... -
Page 63: Environmental Design Standards
Appendix G Safety Safety and electromagnetic compatibility (EMC) standards Reference Description Limits and Methods of Measurement of AS/NZS 2064 Electromagnetic Disturbance Characteristics of Industrial, Scientific, and Medical (ISM) Radiofrequency Equipment ICES-001, Issue 3 Industrial, Scientific and Medical (ISM) Radio Frequency Generators FCC Part 15 Subpart B (47 CFR) U.S. -
Page 64: Chemical Safety
Appendix G Safety Chemical safety Chemical safety WARNING! GENERAL CHEMICAL HANDLING. To minimize hazards, ensure laboratory personnel read and practice the general safety guidelines for chemical usage, storage, and waste provided below. Consult the relevant SDS for specific precautions and instructions: ·... -
Page 65: Biological Hazard Safety
Appendix G Safety Biological hazard safety · Vérifier régulièrement l’absence de fuite ou d’écoulement des produits chimiques. En cas de fuite ou d’écoulement d’un produit, respecter les directives de nettoyage du fabricant recommandées dans la FDS. · Manipuler les déchets chimiques dans une sorbonne. ·... -
Page 66: Appendix H Documentation And Support
Documentation and support Customer and technical support Visit thermofisher.com/support for the latest service and support information. • Worldwide contact telephone numbers • Product support information – Product FAQs – Software, patches, and updates – Training for many applications and instruments •... - Page 68 thermofisher.com/support | thermofisher.com/askaquestion thermofisher.com 19 February 2019...
Need help?
Do you have a question about the iBlot 2 and is the answer not in the manual?
Questions and answers