
Related Manuals for SeaLevel SeaLINK+4/485


Summary of Contents for SeaLevel SeaLINK+4/485
- Page 1 SeaLINK+4/485 User Manual USER MANUAL ITEM#2402 Sealevel Systems, Inc. Sealevel.com Phone 864.843.4343...
-
Page 2: Table Of Contents
Switch Examples Continued ..........................15 Installation ................................16 Instructions for Software Installation Download ....................16 SeaCOM Software Installation ..........................16 Upgrading to the current SeaCOM driver ......................17 Hardware Installation ............................17 Verifying Installation ............................17 ©Sealevel Systems, Inc. 2402 Manual SL9101 11/2018... - Page 3 Appendix F - How to Get Assistance ........................34 Technical Support ............................... 34 Warranty .................................. 35 Warranty Policy ..............................35 Non-Warranty Repair/Retest ..........................35 How to obtain an RMA (Return Merchandise Authorization) ................35 ©Sealevel Systems, Inc. 2402 Manual SL9101 11/2018...
-
Page 4: Regulatory
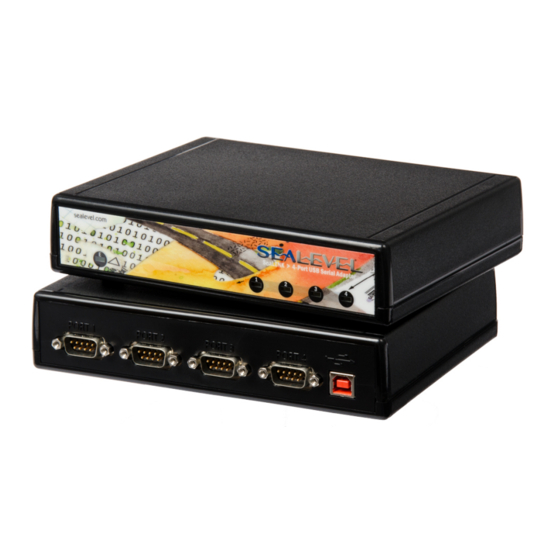
Before You Get Started WHAT’S INCLUDED The 2402 is shipped with the following items. If any of these items are missing or damaged, please contact Sealevel for replacement. • 2402 – USB to RS-422/485 4-Port Serial Interface Adapter •... -
Page 5: Product Description
I/O ports or IRQ’s. It does require a system that supports USB both in terms of hardware and operating system. Sealevel SeaCOM USB software drivers and utilities make installation and operation easy using Microsoft Windows and Linux operating systems. After installing the software, simply connect the 2402 serial interface adapter to your USB port. -
Page 6: Optional Items
DB9 serial connection, including RS-232. The TB05 includes holes for board or panel mounting. The TB05 is designed to connect directly to Sealevel DB9 serial cards or any cable with a DB9M connector. ©Sealevel Systems, Inc. - Page 7 Surge suppression is handled with balanced arrays of high-speed avalanche diodes that divert excess energies created by electrostatic discharges, faulty wiring or lightning away from network interface connections. ©Sealevel Systems, Inc. 2402 Manual SL9101 11/2018...
-
Page 8: Product Family
RS-232, RS-422, and RS-485 peripherals. Unlike traditional UART-based devices, SeaLINK USB products use a state-machine architecture that reduces host processor overhead for faster, more reliable communications. Sealevel's SeaCOM software drivers and utilities make installation and operation easy using Microsoft Windows and Linux operating systems. - Page 9 USB to RS-232 RJ45 Serial Interface Adapter 687U USB to RS-232, RS-485 RJ45 VersaCom Serial Interface Adapter 2161 USB to 16-Port RS-232 RJ45 Serial Interface Adapter 2167 USB to 16-Port RS-232, RS-485 RJ45 VersaCom Serial Interface Adapter ©Sealevel Systems, Inc. 2402 Manual SL9101 11/2018...
-
Page 10: Electrical Specifications
Transmit Data Positive Output Ground RTS + Request to Send Positive Output Request to Send RTS – Output Negative CTS – Clear to Send Negative Input CTS + Clear to Send Positive Input ©Sealevel Systems, Inc. 2402 Manual SL9101 11/2018... -
Page 11: Technical Specifications
500 mA MANUFACTURING All Sealevel Systems, Inc. printed circuit boards are built to UL 94V0 rating and are 100% electrically tested. These printed circuit boards are solder mask over bare copper or solder mask over tin nickel. MEAN TIME BETWEEN FAILURE (MTBF) Greater than 150,000 hours (calculated). -
Page 12: Hardware Configuration
Hardware Configuration ORIGINAL CONFIGURATION This 2402 ships from Sealevel Systems with the following configuration: RS-422 mode 120 ohm termination 1 K ohm pull up on RX+ 1 K ohm pull down on RX- In order to change this configuration, the enclosure must be opened by removing the four screws located on the bottom. - Page 13 OFF: No effect ON : Adds a 1 K ohm pull-up resistor to RX+ RS-485 option, OFF for RS-422. OFF: No effect ON : Adds a 1 K ohm pull-down resistor to RX- ©Sealevel Systems, Inc. 2402 Manual SL9101 11/2018...
-
Page 14: Switch Examples
Note: Switch positions 1 and 2 are for port 1 and switch positions 3 and 4 for port 2 on SW3. Switch positions 1 and 2 are for port 3 and switch positions 3 and 4 for port 4 on SW1. ©Sealevel Systems, Inc. 2402 Manual SL9101 11/2018... -
Page 15: Switch Examples Continued
The corresponding shunt is in the 422/485 position. Switches 485 4, and Port 4 L, L, T, PU, and PD are all in the ON position, NE 4 is in the OFF position. ©Sealevel Systems, Inc. 2402 Manual SL9101 11/2018... -
Page 16: Installation
Installation INSTRUCTIONS FOR SOFTWARE INSTALLATION DOWNLOAD 1. To obtain the most current software driver package from Sealevel’s website, download from here: • SeaCOM for Windows • SeaCOM for Linux 2. Click on the SeaCOM link in the ‘Downloads’ section to download the current driver. -
Page 17: Upgrading To The Current Seacom Driver
4. In right pane near the bottom, expand the ‘Ports (COM & LPT)’ section by clicking the ‘>’ symbol. 5. You should now see the COM assignments with the associated COM numbers in parentheses. ©Sealevel Systems, Inc. 2402 Manual SL9101 11/2018... - Page 18 Your system will assign the next available COM numbers, which will vary by computer (COM 3-6 as shown in this example). ©Sealevel Systems, Inc. 2402 Manual SL9101 11/2018...
-
Page 19: Uninstall & Upgrade Instructions
2. Click ‘Manage’ in the fly-out menu to launch the ‘Computer Management’ console window. 3. In the left pane under ‘System Tools’, click ‘Device Manager’. 4. In right pane near the bottom, expand the ‘Universal Serial Bus controllers’ section by clicking the ‘>’ symbol. ©Sealevel Systems, Inc. 2402 Manual SL9101 11/2018... - Page 20 5. Locate the SeaLINK device in the listing, highlighted below. 6. Right click on the entry for the SeaLINK device and click ‘Uninstall’ in the fly-out menu. ©Sealevel Systems, Inc. 2402 Manual SL9101 11/2018...
- Page 21 8. The window will refresh and the entry for the SeaLINK device will no longer appear. Repeat steps 5-8 as needed for each serial port. 9. Proceed with removing the software on the following pages. ©Sealevel Systems, Inc. 2402 Manual SL9101 11/2018...
- Page 22 5. A confirmation dialog box may appear. Click ‘Uninstall’ 6. In the confirmation dialog box ‘Do you want to allow this app to make changes to your device?’ ‘SeaCOM’, click ‘Yes’. 7. The SeaCOM uninstallation program finishes. ©Sealevel Systems, Inc. 2402 Manual SL9101 11/2018...
- Page 23 Click the ‘Ok’ button on the dialog box. 7. If you are upgrading software, leave the SeaLINK device plugged in and follow the instructions in the ‘UPGRADING TO THE CURRENT SEACOM DRIVER’ section above. ©Sealevel Systems, Inc. 2402 Manual SL9101 11/2018...
-
Page 24: Appendix A - Troubleshooting
Locate the COM ports for your device in Device Manager (described under ‘Verifying Installation’ in the Installation and Configuration section of this manual). Once you have confirmed that the serial adapter COM ports are listed in Device Manager, use the Sealevel WinSSD utility to verify communications. Detailed help is included in the WinSSD utility. - Page 25 This will first open the COM port. From this tab the port can also be closed (See image below). Click the ‘Settings’ button to open the COM Port Properties dialog box. This will allow the Port Settings to be altered. ©Sealevel Systems, Inc. 2402 Manual...
- Page 26 Change your parameters to 9600 bits per second, 8 data bits, no parity, 1 stop bit, and no flow control, as pictured below. Click ‘Apply’ and ‘OK’. ©Sealevel Systems, Inc. 2402 Manual SL9101 11/2018...
- Page 27 In the main WinSSD window, click on the ‘BERT’ tab (Bit Error Rate test). Click on the ‘Start’ button. ©Sealevel Systems, Inc. 2402 Manual SL9101 11/2018...
- Page 28 Receive Frames will increase. The Tx and Rx Data Rates will show the calculated data rate. This verifies that the adapter is working properly. You can continue testing this port with different configurations or proceed with testing other ports, if necessary. ©Sealevel Systems, Inc. 2402 Manual SL9101 11/2018...
-
Page 29: Appendix B - Handling Instructions
9. Turn off power and input signals before inserting and removing connectors or connecting test equipment. 10. Keep work area free of non-conductive materials such as ordinary plastic assembly aids and Styrofoam. 11. Use field service tools such as cutters, screwdrivers, and vacuum cleaners that are conductive. ©Sealevel Systems, Inc. 2402 Manual SL9101 11/2018... -
Page 30: Appendix C - Electrical Interface
(Tx+ to Rx+ and Tx- to Rx-). Four wire mode allows full duplex data transfers. RS-485 does not define a connector pin-out or a set of modem control signals. RS-485 does not define a physical connector. ©Sealevel Systems, Inc. 2402 Manual... -
Page 31: Appendix D - Asynchronous Communications
The data rate and communication parameters for asynchronous communications have to be the same at both the transmitting and receiving ends. The communication parameters are baud rate, parity, number of data bits per character, and stop bits (i.e., 9600,N,8,1). ©Sealevel Systems, Inc. 2402 Manual SL9101 11/2018... -
Page 32: Appendix E - Compliance Notices
Consult the dealer or an experienced radio/TV technician for help CAUTION Sealevel Systems, Inc. is not responsible for any radio or television interference caused by unauthorized modifications of this equipment or the substitution of attachment of connecting cables and equipment other than those specified by Sealevel Systems. -
Page 33: Emc Directive Statement
Always use cabling provided with this product if possible. If no cable is provided or if an alternate cable is required, use high quality shielded cabling to maintain compliance with EMC directives. ©Sealevel Systems, Inc. 2402 Manual SL9101 11/2018... -
Page 34: Appendix F - How To Get Assistance
The Sealevel website is an excellent resource located at www.sealevel.com. The most current software updates and user manuals are available via our homepage by clicking on the 'Drivers' or 'Manuals' links located under ‘Technical Support.’... -
Page 35: Warranty
In the event of failure, Sealevel will repair or replace the product at Sealevel's sole discretion. Failures resulting from misapplication or misuse of the Product, failure to adhere to any specifications or instructions, or failure resulting from neglect, abuse, accidents, or acts of nature are not covered under this warranty.
Need help?
Do you have a question about the SeaLINK+4/485 and is the answer not in the manual?
Questions and answers