Table of Contents
Advertisement
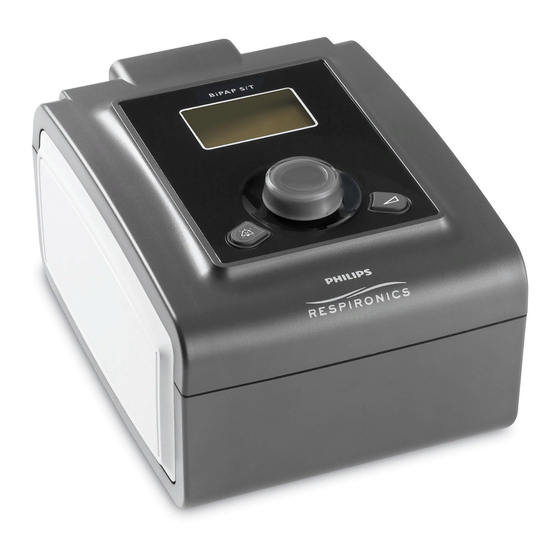
BiPAP S/T Provider Manual
Important! Remove this manual before giving the device to the patient. Only medical professionals should adjust
pressure settings.
Note: If required by the physician, ensure that an alternative means of ventilation is available in the event of a
system failure.
This manual must be used with the User Manual when used by a medical professional. Read and
understand both the User Manual and Provider Manual before setting up the device. This manual
provides you with instructions on how to access and navigate the provider screens used to modify
device settings.
Note: The screens shown throughout this manual are examples only. Actual screens may vary slightly.
Intended Use
The BiPAP S/T device is intended to provide non-invasive ventilatory support to treat adult patients
weighing over 66 lbs (30 kg) and pediatric patients 7 years or older and weighing over 40 lbs (18 kg)
with Obstructive Sleep Apnea (OSA) and Respiratory Insufficiency. This device may be used in the
hospital or home.
Caution: US federal law restricts this device to sale by or on the order of a physician.
Advertisement
Table of Contents

Related Manuals for PHILIPS Respironics BiPAP S/T C Series


Summary of Contents for PHILIPS Respironics BiPAP S/T C Series
-
Page 1: Intended Use
BiPAP S/T Provider Manual Important! Remove this manual before giving the device to the patient. Only medical professionals should adjust pressure settings. Note: If required by the physician, ensure that an alternative means of ventilation is available in the event of a system failure. -
Page 2: Table Of Contents
Table of Contents Intended Use ................................1 Accessing the Provider Mode Screens ......................3 Navigating the Provider Mode Menu ......................3 Setup Screen ..............................4 Updating Software Using the SD Card ......................9 Therapy Features ..............................11 Ramp ................................11 Bi-Flex Comfort Feature ..........................11 Rise Time .................................12 Digital Auto-Trak Sensitivity........................13 Clear Patient Data for Multiple Users ......................15... -
Page 3: Accessing The Provider Mode Screens
Accessing the Provider Mode Screens There are two levels of access: • Provider Mode • User Mode Note: Refer to the User Manual for device details about User Mode. Accessing provider mode unlocks settings that cannot be modified by the user. To access provider mode: 1. -
Page 4: Setup Screen
Setup Screen ( From the Provider screen, highlight “Setup” or the icon and press the wheel. The following Setup screen will appear. Once you’ve entered provider mode, the Setup screen below appears. The screen will only display a few lines at a time. As you rotate the Wheel to toggle over different options, the screen slides up and down accordingly. - Page 5 The sections below describe the settings on the Setup screen. Therapy Settings • Mode ( ) - Choose the therapy mode setting (CPAP, S, or S/T). The default setting is S/T. • CPAP (CPAP) - If CPAP is the therapy mode, you can set the CPAP setting in 1.0 increments.
- Page 6 • Ramp Time ( ) - You can adjust the ramp time from 0 (off ) - 45 minutes in 5-minute increments. The default setting is 0. • Ramp Start Pressure ( ) - If Ramp is enabled, you can adjust the Ramp Start Pressure from 4 to the CPAP or EPAP setting (depending on your therapy mode) in increments of 1.
- Page 7 ) - You can select the correct size diameter tubing that you are using with the device. Choose either “22” for the Philips Respironics 22 mm tubing, or “15” for the optional Philips Respironics 15 mm tubing. When using Heated Tubing, the device will automatically change this setting to the appropriate tubing type (15H).
- Page 8 • hPa/cmH2O ( ) - You can select the units of pressure that are displayed on-screen. Choose “hPa” or “cmH O”. • Setup Parameter Display ( ) - You can select which measured parameters will display on the Monitor Pressure screen. Choose from Leak, BPM (Breaths Per Minute), Min vent, or Vte. See the Measured Parameter section in the User Manual for more information.
-
Page 9: Updating Software Using The Sd Card
Updating Software Using the SD Card You can update the device software using the SD Card. The software update must be done when the therapy is off. Note: The screens may vary slightly from the examples shown here (e.g., software version may be different than screens shown here.) 1. - Page 10 Remove the SD Card from the device. Reload the new software onto the SD Card or load the new software onto another SD Card and try again. If the problem persists, contact Philips Respironics Customer Service department at 1-724-387-4000 or 1-800-345-6443.
-
Page 11: Therapy Features
Therapy Features The device provides the following therapy features. These features are enabled or disabled only in provider mode. Note: Refer to the User Manual for detailed information about the device therapy modes. Ramp If enabled, the device is equipped with a linear ramp function. The Ramp feature will reduce the pressure and then gradually increase (ramp) the pressure to the prescription pressure setting so patients can fall asleep more comfortably. -
Page 12: Rise Time
Rise Time In S and S/T modes, rise time is the amount of time it takes the device to change from the expiratory pressure setting to the inspiratory pressure setting. Rise time levels of 1, 2, 3, 4, 5, or 6 progressively reflect slowed response of the pressure increase that will take place at the beginning of inspiration. -
Page 13: Digital Auto-Trak Sensitivity
Digital Auto-Trak Sensitivity An important characteristic of the device is its ability to recognize and compensate for unintentional leaks in the system and to automatically adjust its trigger and cycle algorithms to maintain optimum performance in the presence of leaks. This feature is known as Digital Auto-Trak Sensitivity. - Page 14 Volume Trigger (EPAP to IPAP) The volume trigger is one method used to trigger IPAP during spontaneous breathing in the S and S/T modes. The volume trigger threshold is 6 ml of accumulated patient inspiratory volume. When patient effort generates inspiratory flow causing 6 ml of volume, IPAP is triggered. Shape Trigger/Shape Cycle (EPAP to IPAP) (IPAP to EPAP) The shape trigger/cycle is another method used to trigger IPAP and/or cycle from IPAP to EPAP during spontaneous breathing in the S and S/T modes.
-
Page 15: Clear Patient Data For Multiple Users
Spontaneous Expiratory Threshold (IPAP to EPAP) A second method used to cycle off IPAP during spontaneous breathing in the S and S/T modes is called Spontaneous Expiratory Threshold (SET). The SET rises in proportion to the inspiratory flow rate on each breath. When the Spontaneous Expiratory Threshold (SET) and actual patient flow value are equal, the device cycles to EPAP. -
Page 16: Cleaning For Multiple Users
Cleaning for Multiple Users Warning: If you are using the device on multiple users, discard and replace the bacteria filter each time the device is used on a different person. If you are using the device on multiple users, complete the following steps to clean the device before each new user. -
Page 17: Adding Supplemental Oxygen
Allow the device to run in preheat mode for 30 seconds. Place your hand above the heater plate (without touching it) to confirm an increase in heater plate temperature. Press the control wheel while “Therapy” or the icon is highlighted on the Home screen to enter therapy and end preheat mode. - Page 18 BiPAP S/T...
-
Page 19: Verifying The Pressure
If part of your patient setup procedure is to verify actual pressure with a manometer, please use the following instructions to ensure that the device is functioning properly. You will need the following equipment to verify the pressure: Philips Respironics Pressure Calibration Kit includes: • Philips Respironics Whisper Swivel II •... - Page 20 6. Set the device to the specific pressure value for the patient. 7. Verify that the pressure setting matches the pressure displayed on the manometer. If the pressure setting does not match the measured value for the device, contact Philips Respironics or an authorized service center to have the device serviced.
-
Page 21: Verifying The Alarms
Verifying the Alarms Use the test orifice from the “Verifying the Pressure” instructions and the patient’s prescription for the following tests. Patient Disconnect Alarm Test 1. Set the Apnea Alarm setting to Off. 2. Set the Patient Disconnect Alarm setting to 15 seconds. 3. -
Page 22: Loss Of Power Alarm Test
Loss of Power Alarm Test 1. While the device is providing therapy, remove the power connector and verify that Loss of Power alarm sounds. 2. Reconnect power and verify that the device resumes providing therapy. Important: When testing is complete, and before patient use, adjust the device to the appropriate patient settings. Specifications Note: Refer to the User Manual for complete device specifications. - Page 23 Provider Manual...
- Page 24 REF 1105820 1105846 R00 JJB 01/01/2013 BiPAP S/T...
Need help?
Do you have a question about the BiPAP S/T C Series and is the answer not in the manual?
Questions and answers