Table of Contents
Advertisement
Quick Links
Advertisement
Table of Contents

Related Manuals for Azumi KL40


Summary of Contents for Azumi KL40
- Page 2 Azumi mobile phone experience well-established functions and simple operation method. Please use the original accessory in order to achieve the best use of effects. Azumi shall not be responsible for any damage in machinery due to use of non-original components.
- Page 3 YOUR PHONE-FRONT VIEW...
- Page 4 YOUR PHONE-BACK VIEW...
- Page 5 Charging Connect to phone via USB. NOTE: First use please make sure the battery is being fully charged。 Insert SIM card and T card Please insert the SIM card as the arrow direction, make sure the lot and the metal at the right direction, and make sure insert to the end.
-
Page 6: Power On And Off
T card lot is at the right side; please insert the card as the picture NOTE: Please insert T card to save multimedia files. Power on & off Long press the power key which situates at the left side to power on Long press the power key which situates at the left side and select the option to power off... - Page 7 Lock & wake up screen When the phone is on, the phone is about to turn black, press the power key can wake it up When it is black, need to press the power key and unlock it.
-
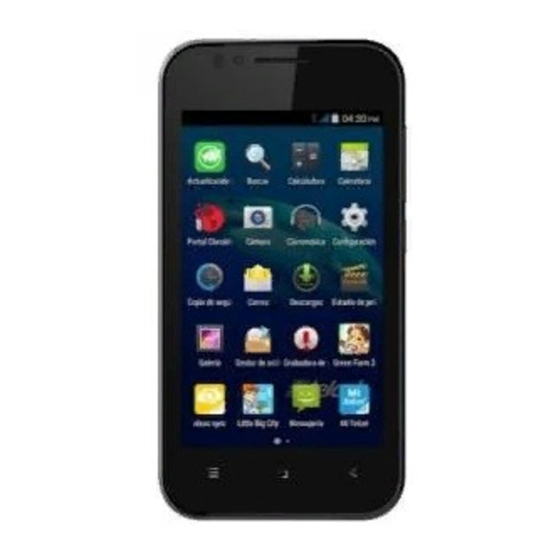
Page 8: Standby Interface
Standby interface status Draw it to left or right to see more content Touch it to enter main menu Touch it to enter message Touch it to enter browser Touch it to enter Ideas interface touch it to enter dial pad Applications 1. -
Page 9: Open Applications
touch open applications Status Display phone status and notification. Notification status icon... -
Page 10: Status Icon
Status icon icon Description icon Description Earphone Signal bar inserted Battery Bluetooth Unread Connect message WIFI Airplane Missed call mode Connect to Alarm Notification interface Notification will show: new email, messages and update Drag it down to show notification touch feedback... -
Page 11: Making A Call
Making a call 1. touch icon 2.enter number in dial pad interface 3.touch icon to make call answer call press hang up call press During calls press the right side tune volume... -
Page 12: Send Message
Send message 1. Touch icon 2. Touch 3. Touch Recipient area, enter number. 4. Touch content area,write message 5. Touch send icon to send messages Add email account The first time you open email, you will be request to create a new email account. And then you could send and receive email. - Page 13 Settings WIRELESS & You can use Wireless & Network NETWORK settings to manage your SIM card, configure and manage connections to networks and devices by using Wi-Fi. You also can set Bluetooth, data usage, airplane mode, VPN, tethering & portable hotspot and mobile networks in this interface.
- Page 14 You can use the Applications settings to view details about the applications installed on your phone, to manage their data and Application force them to stop, to view and control currently running services, and to view the storage used by applications, etc.
-
Page 15: Ringtone Settings
your own time and time zone, rather than obtaining the current time from the network, etc. Scheduled You should set a certain time, power on & when the time arrive, the phone would power on/off automatically. You use the Accessibility settings to configure any accessibility Accessibility plug-ins you have installed on... -
Page 16: Audio Player
1. Insert earphone, touch FM Radio, enter and touch the icon to turn on the FM. 2. Touch the left and right icon to tune channel, press the volume key to tune volume. 3. You can also touch auto search Audio player Control Play/Pause... -
Page 17: Video Recorder
Tune volume Press volume key Playing : touch to open touch play list Update:touch to update touch play list Repeat:touch to repeat touch play Camera 1. Touch camera 2. Touch takes picture icon to take picture Video recorder 1. In camera interface, touch the DV icon to start recording 2. - Page 18 password. Electricity on (inrush current): 200-300mA Electricity screen (screen current): 60-180mA Voltage Display (screen voltage): 3.0-4.2 Vdc Call Electricity (current speaker): 100-280 mA Voltage Call (speaker voltage): 3.4-4.2 Vdc Cell voltage shutdown (power off voltage): 3.35 Vdc Cell voltage (voltage phone): 3.8 Vdc Charger Input (charger input current and voltage): 100-240Vac, 50-60Hz, 0.15A Output (the output current and voltage charging head): 5.0Vcc, 750mA...
- Page 19 FCC Statement 1. This device complies with Part 15 of the FCC Rules. Operation is subject to the following two conditions: (1) This device may not cause harmful interference. (2) This device must accept any interference received, including interference that may cause undesired operation.
- Page 20 on the body) as required by the FCC for each model. The maximum scaled SAR value for this model phone when tested for use at the ear is 0.254W/Kg and when worn on the body, as described in this user guide, is 0.645W/Kg(Body-worn measurements differ among phone models, depending upon available accessories and FCC requirements), The maximum scaled SAR in hotspot mode is 0.903W/Kg.
Need help?
Do you have a question about the KL40 and is the answer not in the manual?
Questions and answers