Table of Contents
Advertisement
1. BASIC INFORMATION .................... 4
1.1.
2. BEFORE USE ...................................... 5
2.1.
2.1.1.
2.1.2.
2.2.
User's Manual of L2U Azumi
Mobile Phone
TABLE OF CONTENT
Appearance Sketch Map ........................... 5
Description of Keys .................................. 6
........................................... 4
............. 5
............. 7
1
Advertisement
Table of Contents

Subscribe to Our Youtube Channel
Related Manuals for Azumi L2U


Summary of Contents for Azumi L2U
-
Page 1: Table Of Contents
User’s Manual of L2U Azumi Mobile Phone TABLE OF CONTENT 1. BASIC INFORMATION ....4 1.1..........4 RIEF NTRODUCTION 2. BEFORE USE ........5 2.1....5 AME AND XPLANATION OF 2.1.1. Appearance Sketch Map ......5 2.1.2. Description of Keys ........6 2.2. - Page 2 2.2.1. SIM Card ........... 7 2.2.2. Memory Card ..........8 2.3............... 8 ATTERY 2.3.1. Install the Battery ........8 2.3.2. Charging ............ 9 2.4..........9 ECURITY ASSWORD 3. QUICK USER GUIDE ..... 10 3.1............10 IAL A 3.2.
- Page 3 4. FUNCTION MENU ......14 4.1. SIM C ............14 LARO 4.2............. 14 ESSAGE 4.3............15 ONTACTS 4.4............15 ALL LOGS 4.5......... 17 LAROIDEAS WEBSITE 4.6............17 ULTIMEDIA 4.7............19 RGANIZER 4.8..............22 AMES 4.9.
-
Page 4: Basic Information
1.1. Brief Introduction Thanks for selecting L2U Azumi color screen GSM digital mobile phone. Through reading the manual, you can fully know how to use L2U Azumi mobile phone, appreciate its complete function and simple operating method. L2U Azumi color screen mobile phone is designed aiming at GSM network environment;... -
Page 5: Before Use
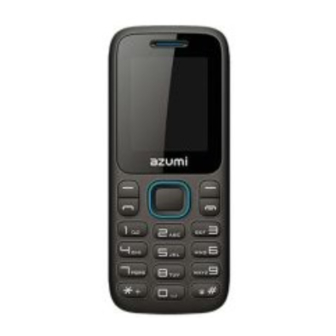
Before Use 2.1. Name and Explanation of Each Part 2.1.1. Appearance Sketch Map The picture is only for your reference. -
Page 6: Description Of Keys
2.1.2. Description of Keys Keys Function 1. Execute functions that the left-down/right-down corner indicator shows. Left soft key/ Right soft 2. In the standby mode, press Left Soft key to access Menu, Right Soft key to access Contacts. On other interfaces, it equals to navigation key Navigation key and direction key except for special functions. -
Page 7: Install Sim Card And Memory Card
3. End calls or reject incoming calls. It is used to dial and input numbers or Number key characters. Press and hold Number key 1 or 2 to get through the preset voice inbox. On the standby interface, input *; after inputting telephone number, if you want to * Key input extension number, please press twice... -
Page 8: Memory Card
When you subscribe to a cellular network, you will receive a plug-in SIM card complete with your subscription details, such as your PIN, and available optional services. Caution: Do not bend or scratch your SIM card. Avoid exposing your SIM card to static electricity, water or dirt. Tips:Face the gold color contact point of SIM card towards the cell phone and push the SIM card into the slot. -
Page 9: Charging
the other end to install the battery. Prompt: Please operate correctly to avoid damaging the battery connector. 2.3.2. Charging Insert the charger on the charging interface at the side end of the phone. Connect the charger to a standard wall outlet and the battery power icon in the up-right corner of the screen will start scrolling. -
Page 10: Quick User Guide
charge); if you input wrong PIN2 for continuous three times, you need to input PUK2 to unlock it. Please contact with network operations company for more details. When changing the locked PIN, you need to input PUK (Personal Unlock Key). -
Page 11: Reject A Call
make a call. If you're making a long distance call, add the area code preceding the telephone number. Press left soft key to access Options. 3.2. Reject a Call You can press End key to reject an incoming call. 3.3. Receive a Call When an incoming call arrives, the phone will give out the corresponding prompt (such as vibration, ring tone, and etc.);... -
Page 12: Extension Speed Dial
3.6. Extension Speed Dial After inputting telephone number, if you want to input branch number, please press and hold “*”, input your extension number after the display screen shows “P”. After getting through the call, it will directly dial the extension. -
Page 13: Call Barring
3.10. Call Barring After call barring function is started, according to different restricted conditions settings (all the dialed calls, all the incoming calls, incoming calls when roaming, dialed international calls, outgoing international calls when roaming), you can restrict the call under the corresponding conditions (need to apply to network operator for business). -
Page 14: Function Menu
Function Menu 4.1. SIM Claro 4.2. Message Message service is actually a network service. This menu works soundly depending on the type of your SIM card and the service provided by the network operator. Therefore, please check it before applying such function. ... -
Page 15: Contacts
Sentbox Save the SMS message you sent successfully. Templates Directly use the default phrases when writing the messages. Broadcast message 4.3. Contacts This function could help you browse the name card holder, store, edit and delete the names and phone numbers in the phone and SIM card. To facilitate the management of the records, this phone sets the group function, collecting the similar items into a group. - Page 16 Display the list of your recent dialed numbers. Received calls Display the list of your recent answered numbers. The operation is the same as the Dialed. Rejected calls Display the incoming call records in the blacklist. Delete all You could delete all the records of the Dialed, Received, Missed and Rejected.
-
Page 17: Claroideas Website
4.5. Claroideas website 4.6. Multimedia Camera The device is equipped with a webcam with high pixels. You can take photo at any time and save the photo in the device or SIM card. Press OK key to get the picture. Image viewer: Enter into image browser list. - Page 18 camera. Effect: The special effect can be classified into: normal, black and white, blue, green, yellow, red, sepia and negative. Settings: Including size, banding, audio, video format, storage etc. Lmage Enter into image browser list. Music This phone could play the MP3 stored in the phone memory and support the background play.
-
Page 19: Organizer
Video This phone supports the video format of 3GP、AVI and MP4. Enter the video play list interface, press left soft key, you could go on the following operations. Recorder Use this function you can record or listen to your own record. The record file format: AMR, WAV. - Page 20 Claro Alarm You can edit alarm, time, ring and repeated ring mode. In “ alarm edit” mode, you can scroll up or down direction key, when the cursor goes to the desired option, press “OK”, then you can select desired settings.
- Page 21 Bluetooth file storage: You can choose bluetooth file save to phone or memory card. Help: You can view the operating instruction of Bluetooth. World clock In the world, and can automatically display the time zone clocks. Ebook Documents Reader eBook ...
-
Page 22: Games
4.8. Games Snake This mobile phone provides a snake game, please see the specific operation within the game operating instructions. 4.9. Settings You can customize the settings, such as time and date, language, call settings etc. Call settings Including: Dual-SIM: including Standby mode, Reply by original SIM, Set SIM name and Set dual SIM call divert. - Page 23 Others: The setting options include Call time minute reminder, Auto redial, Reply SMS after reject, Auto record voice call. Phone settings Date & time: You can set up the date and time on the phone as well as their display mode.
- Page 24 Modify PIN2: Modification of PIN2 code. Phone locked:Open or close the phone lock. The default password is “9999”. Modify the cellphone password: Change the phone and privacy password. Privacy: Set the privacy protection. The default password is “9999”. Auto keypad lock: Set the time of mobile phone automatically locked. Lock screen by end-key: Choose open or closed by red key locking function.
-
Page 25: Text Input
Alarm& calendar ring tone, Call volume and Power ring tone. Ring type: Set the SIM call alert and message alert, alarm & calendar remind. Other alert rings: Set the other alert rings, such as Key tone, Battery low alert, Power ring tone, Dial tone. ... -
Page 26: Care And Maintenance
press the keys on keypad, selected letters will appear on the screen. Press the number key can get the first letter marked on the key, press twice quickly can get the second letter marked on the key. Similarly, if the letter you want to input have the same key with the former letter, please wait until the cursor appears again, then input the new letter. - Page 27 Do not leave fully a charged battery connected to a charger over a week, since overcharging may shorten its lifetime. ·Temperature tends to affect the limit of battery to be charged. Therefore, it is necessary for the battery to be cooled or warmed before it is charged. If the temperature of batter exceeds 40ºC ,the battery cannot be charged.
- Page 28 ·Do not use harsh chemicals or strong detergents to clean the device. ·Use only the supplied or an approved replacement attachments, for the unauthorized ones could invalidate the warranty of maintenance. 1.FCC Statement 1. This device complies with Part 15 of the FCC Rules. Operation is subject to the following two conditions: (1) This device may not cause harmful interference.
- Page 29 Reorient or relocate the receiving antenna. Increase the separation between the equipment and receiver. Connect the equipment into an outlet on a circuit different from that to which the receiver is connected. Consult the dealer or an experienced radio/TV technician for help. SAR Information Statement Your wireless phone is a radio transmitter and receiver.
- Page 30 only the power required to reach the network. In general, the closer you are to a wireless base station antenna, the lower the power output. Before a phone model is available for sale to the public, it must be tested and certified to the FCC that it does not exceed the limit established by the government adopted requirement for safe exposure.
- Page 31 to account for any variations in measurements. Body-worn Operation This device was tested for typical body-worn operations. To comply with RF exposure requirements, a minimum separation distance of 15mm must be maintained between the user’s body and the handset, including the antenna. Third-party belt-clips, holsters, and similar accessories used by this device should not contain any metallic components.
Need help?
Do you have a question about the L2U and is the answer not in the manual?
Questions and answers