
Subscribe to Our Youtube Channel
Related Manuals for Carpet Pro CPU-3QD


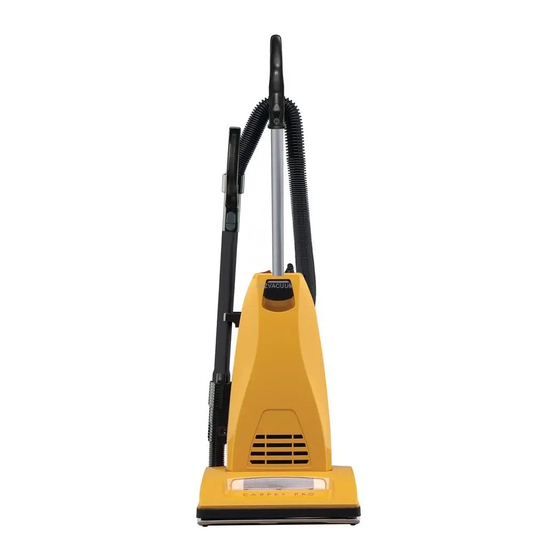
Summary of Contents for Carpet Pro CPU-3QD
- Page 1 Owner’s Manual Household and Commercial Upright Vacuums CPU-3QD CPU-3N CPU-4N CPU-4T Save These Instructions...
-
Page 3: Table Of Contents
Getting Started Important Safety Instructions Grounding Instructions Parts Identification Replacement Bags/Filters How to Assemble and Operate the Vacuum Maintenance and Care How to Change the Vacuum Bag How to Change the Filters Handle Adjustments Edge Cleaning Feature Automatic Self-Adjusting Nozzle On-Board Tool Cleaning How to Replace the Vacuum Belt How to Clean the Nozzle Hose... -
Page 4: Important Safety Instructions
IMPORTANT SAFETY INSTRUCTIONS When using an electrical appliance, basic precautions should always be followed, including the following: READ ALL INSTRUCTIONS BEFORE USING THIS APPLIANCE. FOR HOUSEHOLD USE ONLY. IMPORTANT: The manufacturer cannot accept responsibility for damage caused when the appliance is not used according to the instructions, or for uses other than those for which it was intended. -
Page 5: Grounding Instructions
GROUNDING INSTRUCTIONS MODELS: CPU-3QD and CPU-3N This product is equipped with a polarized alternating current line plug (a plug having one blade wider than the other). This plug fits into the power outlet only one way. This is a safety feature. If you are unable to insert the plug fully into the outlet, try reversing the plug. -
Page 6: Parts Identification
Thermal reset Thermal reset nozzle button instructions Replacement Bags and Filters • Genuine Carpet Pro Vacuum Bags • Genuine Carpet Pro Electrostatic Part # CPP-6 Secondary Filter 6 per package Part # 06.317 1 per package • Genuine Carpet Pro Post Filter Part # CMPS-PF •... -
Page 7: Parts Identification
Furniture Self-adjusting button instructions guard nozzle Replacement Bags and Filters • Genuine Carpet Pro Vacuum Paper Bags • Genuine Carpet Pro Electrostatic Part # CPP-6 Secondary Filter 6 per package Part # 06.317 1 per package • Genuine Carpet Pro Post Filter Part # CMPS-PF •... -
Page 8: How To Assemble And Operate The Vacuum
HOW TO ASSEMBLE AND OPERATE THE VACUUM How to Attach the Handle to the Vacuum Cleaner Model: CPU-3QD The vacuum cleaner and the handle are packed separately. 1. Remove the handle screw, insert handle into the hole on top of the vacuum cleaner (Fig. - Page 9 HOW TO ASSEMBLE AND OPERATE THE VACUUM How to Attach the Handle to the Vacuum Cleaner Models: CPU-3N, CPU-4N and CPU-4T The vacuum cleaner and the handle are packed separately. 1. Remove the handle screw, insert handle into the hole on top of the vacuum cleaner (Fig.
-
Page 10: How To Change The Vacuum Bag
HOW TO CHANGE THE VACUUM BAG Always operate the vacuum cleaner with a vacuum bag installed. Bags should be changed when they are 2/3 full. To Change the Vacuum Bag 1. Unplug the vacuum cleaner. Remove the bag compartment cover, and remove the used bag from the bag holder (Fig. -
Page 11: Handle Adjustments
HANDLE ADJUSTMENTS The handle on this vacuum cleaner can be set to one of three positions – upright, middle or low. How to Adjust the Handle 1. To release the handle, step on the on the left rear corner of the vacuum cleaner nozzle (Fig. -
Page 12: On-Board Tool Cleaning
ON-BOARD TOOL CLEANING Model: CPU-3QD This model is equipped with on-board cleaning tools including a metal telescopic wand, stretch hose, dusting brush and crevice tool. 1. To use the cleaning tools, lift the hose handle straight up from the vacuum (Fig. -
Page 13: How To Replace The Vacuum Belt
HOW TO REPLACE THE VACUUM BELT CAUTION: Unplug the vacuum cleaner before performing any of these steps. How to Remove the Bottom Plate 1. Place the vacuum cleaner in the low position by pressing the foot pedal release twice while reclining the handle. Turn the vacuum over. -
Page 14: How To Clean The Nozzle Hose
The nozzle hose carries the dirt from the nozzle to the vacuum bag. If the hose should become clogged: Model: CPU-3QD 1. Remove the wand from the wand/hose holder. 2. Squeeze the tabs on both sides of the Fig. -
Page 15: Thermal Fuse Protection
THERMAL FUSE PROTECTION This vacuum cleaner comes equipped with a Manual Reset Thermal Fuse Protector. The thermal protector is designed to protect the vacuum cleaner from overheating due to a cutoff in airflow (i.e. clogged hose, operating the vacuum without a bag). Should this situation occur, the thermal fuse protector will safely shut off the vacuum cleaner to avoid any potential damage. -
Page 16: Problem Solving Guide
PROBLEM SOLVING GUIDE Troubleshooting WARNING! To reduce the risk of electrical shock or injury from moving parts, unplug vacuum before servicing or cleaning. CAUTION! To reduce the risk of electric shock, do not handle plug or appliance with wet hands. PROBLEM CHECK POINT POSSIBLE SOLUTION... -
Page 17: Warranty
How to Get Service: Warranty service can only be obtained by presenting the vacuum to an Authorized Carpet Pro Retailer. A proof-of-purchase and product serial number will be required before service is rendered. To locate your nearest service center, please call 866-539-2099 or visit CarpetProVacuums.com. - Page 19 MANUAL DEL Owner’s Manual USUARIO Aspiradoras Verticales de Uso Doméstico y Comercial CPU-3QD CPU-3N CPU-4N CPU-4T Conserve estas instrucciones.
- Page 21 Primeros Pasos Instrucciones de Seguridad Importantes Instrucciones para la Conexión a Tierra Identificación de las Piezas Bolsas/Filtros de Repuesto Cómo Armar y Utilizar la Aspiradora Cuidado y Mantenimiento Cómo Cambiar la Bolsa de la Aspiradora Cómo Cambiar los Filtros Ajustes del Mango Función de Limpieza de Bordes Boquilla de Ajuste Automático Herramientas de Limpieza Integradas...
- Page 22 INSTRUCCIONES IMPORTANTES DE SEGURIDAD Al utilizar un electrodoméstico, siempre deben tomarse las precauciones básicas, incluidas las siguientes: LEA TODAS LAS INSTRUCCIONES ANTES DE UTILIZAR ESTE ELECTRODOMÉSTICO. SOLO PARA USO EN EL HOGAR. IMPORTANTE: El fabricante no acepta la responsabilidad por los daños causados cuando el electrodoméstico no se utiliza de acuerdo con las instrucciones o cuando se utiliza para otros usos que no sean aquellos para los que fue fabricado.
-
Page 23: Instrucciones Para La Conexión A Tierra
INSTRUCCIONES PARA LA CONEXIÓN A TIERRA MODELOS: CPU-3QD y CPU-3N Este producto cuenta con un enchufe polarizado para corriente alterna (tiene una espiga más ancha que la otra). Este enchufe entra solo de una forma en el tomacorriente. Esta es una función de seguridad. -
Page 24: Identificación De Las Piezas
Bolsas y Filtros de Repuesto • Bolsas de aspiradora originales de • Filtro electrostático secundario Carpet Pro original de Carpet Pro Pieza n. CPP-6 Pieza n. 06.317 6 por envase 1 por envase • Filtro posterior original de •... - Page 25 Carpet Pro Pieza n. CPP-6 Pieza n. 06.317 6 por envase 1 por envase • Filtro posterior original de Carpet Pro • Filtro de esponja secundario Pieza n. CMPS-PF original de Carpet Pro 1 por envase Pieza n.
-
Page 26: Cómo Armar Y Utilizar La Aspiradora
CÓMO ARMAR Y UTILIZAR LA ASPIRADORA Cómo Colocar el Mango de la Aspiradora Modelo: CPU-3QD La aspiradora y el mango están empacados por separado. 1. Retire el tornillo del mango e introduzca el mango en el orificio ubicado en la parte superior de la aspiradora (Fig. - Page 27 CÓMO ARMAR Y UTILIZAR LA ASPIRADORA Cómo Colocar el Mango de la Aspiradora Modelos: CPU-3N, CPU-4N y CPU-4T La aspiradora y el mango están empacados por separado. 1. Retire el tornillo del mango e introduzca el mango en el orificio ubicado en la parte superior de la aspiradora (Fig.
-
Page 28: Cómo Cambiar La Bolsa De La Aspiradora
CÓMO CAMBIAR LA BOLSA DE LA ASPIRADORA Siempre utilice la aspiradora con una bolsa instalada. Las bolsas se deben cambiar cuando estén llenos dos tercios de su capacidad. Cómo Cambiar la Bolsa de la Aspiradora 1. Desenchufe la aspiradora. Retire la tapa del compartimento para la bolsa y extraiga la bolsa usada de su soporte Fig. -
Page 29: Ajustes Del Mango
AJUSTES DEL MANGO El mango de esta aspiradora puede ajustarse en una de tres opciones: vertical, media o baja. Cómo Ajustar el Mango 1. Para liberar el mango, coloque el pie sobre la esquina posterior izquierda de la boquilla de la aspiradora (Fig. 1). 2. -
Page 30: Herramientas De Limpieza Integradas
HERRAMIENTAS DE LIMPIEZA INTEGRADAS Modelo: CPU-3QD Este modelo está equipado con herramientas de limpieza integradas, que incluyen un tubo telescópico metálico, una manguera extensible, un cepillo quitapolvo y una boquilla para rincones. 1. Para utilizar las herramientas de limpieza, levante el mango de la manguera en dirección vertical (Fig. -
Page 31: Cómo Reemplazar La Cinta De La Aspiradora
CÓMO REEMPLAZAR LA CINTA DE LA ASPIRADORA PRECAUCIÓN: Desenchufe la aspiradora antes de llevar a cabo cualquiera de estos pasos. Cómo Extraer la Placa Inferior 1. Coloque la aspiradora en la posición baja al presionar el pedal dos veces mientras inclina el mango. Dé vuelta la aspiradora. -
Page 32: Cómo Limpiar La Manguera De La Boquilla
La manguera de la boquilla transporta la suciedad desde la boquilla a la bolsa de la aspiradora. Si hay una obstrucción en la manguera: Modelo: CPU-3QD 1. Retire el tubo del soporte del tubo/ manguera. Fig. 1 2. Presione las pestañas a ambos lados del puerto para limpieza rápida y... -
Page 33: Protección Mediante Fusible Térmico
PROTECCIÓN MEDIANTE FUSIBLE TÉRMICO Esta aspiradora cuenta con un protector de fusible térmico de restablecimiento manual. El protector térmico está hecho para proteger la aspiradora del sobrecalentamiento debido a cortes en el flujo de aire (es decir, cuando hay obstrucciones en la manguera o se utiliza la aspiradora sin una bolsa). -
Page 34: Guía De Resolución De Problemas
GUÍA DE RESOLUCIÓN DE PROBLEMAS Resolución de Problemas ¡ADVERTENCIA! Para reducir el riesgo de una descarga eléctrica o de una lesión debido a las partes móviles, desenchufe la aspiradora antes del mantenimiento o la limpieza. ¡PRECAUCIÓN! Para reducir el riesgo de una descarga eléctrica, no manipule el enchufe ni el electrodoméstico con las manos mojadas. -
Page 35: Garantía
El servicio de la garantía solo puede obtenerse al llevar la aspiradora a un distribuidor autorizado de Carpet Pro. Para que se preste el servicio, deberá presentar el comprobante de compra y el número de serie del producto. Para ubicar su centro de servicio más cercano, llame al 866-539-2099 o visite CarpetProVacuums.com. - Page 37 MANUEL DE Owner’s L’UTILISATEUR Manual Aspirateurs résidentiels et commerciaux verticaux CPU-3QD CPU-3N CPU-4N CPU-4T Conservez ces instructions...
- Page 39 Pour commencer Instructions de sécurité importantes Instructions de mise à la terre Identification des pièces Remplacement des sacs et des filtres Comment assembler et faire fonctionner l’aspirateur Entretien et maintenance Comment remplacer le sac de l’aspirateur Comment remplacer les filtres Ajustements de la poignée Fonction de nettoyage des bords Brosse aspirateur auto-ajustable automatique...
- Page 40 CONSIGNES DE SÉCURITÉ IMPORTANTES Lors de l’utilisation d’un appareil électrique, il est important de prendre des mesures de précaution de base, notamment les suivantes : LISEZ TOUTES LES INSTRUCTIONS AVANT DE COMMENCER À UTILISER CET APPAREIL. DESTINÉ À L’USAGE DOMESTIQUE UNIQUEMENT. IMPORTANT ...
-
Page 41: Instructions De Mise À La Terre
INSTRUCTIONS DE MISE À LA TERRE MODÈLES : CPU-3QD et CPU-3N Ce produit est équipé d’une fiche à courant alternatif polarisée (une fiche ayant une broche plus large que l’autre). Cette fiche entre dans la prise uniquement dans un sens. Il s’agit d’un dispositif de sécurité. -
Page 42: Identification Des Pièces
Remplacement des sacs et des filtres • Filtre secondaire électrostatique • Sacs aspirateurs Genuine Carpet Pro Genuine Carpet Pro n° pièce CPP-6 pièce 06.317 o 6 par paquet 1 par paquet • Filtre postérieur Genuine Carpet Pro •... - Page 43 Genuine Carpet Pro Genuine Carpet Pro pièce 06.317 o pièce CPP-6 1 par paquet 6 par paquet • Filtre secondaire en mousse • Filtre postérieur Genuine Carpet Pro Genuine Carpet Pro pièce CMPS-PF pièce CMPS-SF o 1 par paquet 1 par paquet...
-
Page 44: Comment Assembler Et Faire Fonctionner L'aspirateur
COMMENT ASSEMBLER ET FAIRE FONCTIONNER L’ASPIRATEUR Comment fixer la poignée à l’aspirateur Modèle : CPU-3QD L’aspirateur et la poignée sont emballés séparément. 1. Enlevez la vis de la poignée, insérez la poignée dans le trou sur le dessus de l’aspirateur (Fig. 1). - Page 45 COMMENT ASSEMBLER ET FAIRE FONCTIONNER L’ASPIRATEUR Comment fixer la poignée à l’aspirateur Modèles : CPU-3N, CPU-4N et CPU-4T L’aspirateur et la poignée sont emballés séparément. 1. Enlevez la vis de la poignée, insérez la poignée dans le trou sur le dessus de l’aspirateur (Fig.
-
Page 46: Comment Remplacer Le Sac De L'aspirateur
COMMENT REMPLACER LE SAC DE L’ASPIRATEUR Faites toujours fonctionner l’aspirateur avec un sac d’aspirateur installé. Les sacs doivent être changés lorsqu’ils sont plein aux 2/3. Remplacer le sac de l’aspirateur 1. Débranchez l’aspirateur. Retirez le couvercle du compartiment à sac et enlevez le sac usagé... -
Page 47: Ajustements De La Poignée
AJUSTEMENTS DE LA POIGNÉE La poignée de cet aspirateur peut être réglée sur l’une des trois positions – verticale, intermédiaire ou basse. Comment ajuster la poignée 1. Pour débloquer la poignée, appuyez sur la pédale de commande sur le coin arrière gauche de la brosse aspirateur (Fig. 1). -
Page 48: Nettoyage Avec Outils Intégrés
NETTOYAGE AVEC OUTILS INTÉGRÉS Modèle : CPU-3QD Ce modèle est équipé d’outils de nettoyage intégrés, y compris un tube- rallonge télescopique en métal, un tuyau extensible, une brosse à épousseter et un suceur plat. 1. Pour utiliser ces outils de nettoyage, soulevez la poignée du tuyau... -
Page 49: Comment Remplacer La Courroie De L'aspirateur
COMMENT REMPLACER LA COURROIE DE L’ASPIRATEUR ATTENTION : Débranchez l’aspirateur avant d’effectuer n’importe laquelle de ces étapes. Comment retirer le plateau inférieur 1. Placez l’aspirateur en position basse en appuyant deux fois sur la pédale de commande tout en inclinant la poignée. -
Page 50: Comment Nettoyer Le Tuyau De La Brosse Aspirateur
étapes. Le tuyau de l’aspirateur entraîne la saleté de l’aspirateur jusqu’au sac d’aspirateur. Si le tuyau se bouche : Modèle : CPU-3QD 1. Enlevez le tube-rallonge du support du tube-rallonge ou du tuyau. Fig. 1 2. Pressez les languettes des deux côtés du port de nettoyage rapide et... -
Page 51: Protection Par Fusible Thermique
PROTECTION PAR FUSIBLE THERMIQUE Cet aspirateur est fourni équipé d’un protecteur à fusible thermique à réinitialisation manuelle. Le protecteur thermique est conçu pour protéger l’aspirateur d’une surchauffe due à une interruption du débit d’air (c’est-à-dire si le tuyau est bouché ou en cas de fonctionnement de l’aspirateur sans sac). -
Page 52: Guide De Résolution De Problèmes
GUIDE DE RÉSOLUTION DE PROBLÈMES Dépannage AVERTISSEMENT ! Afin de réduire le risque de décharge électrique ou de blessure à cause des pièces mobiles, débranchez l’aspirateur avant tout entretien ou nettoyage. ATTENTION ! Afin de réduire le risque de décharge électrique, ne manipulez pas la fiche ou l’appareil avec les mains mouillées. -
Page 53: Garantie
Les services de garantie peuvent uniquement être obtenus en présentant l’aspirateur auprès d’un Revendeur agréé Carpet Pro. Avant que le service ne soit fourni, vous devrez présenter une preuve d’achat et le numéro de série du produit en question. Afin de localiser votre centre de service le plus proche, veuillez appeler le 866-539-2099 ou rendez-vous sur notre site Internet à... - Page 54 CarpetProVacuums.com 866-539-2099 1760 Gilsinn Lane Fenton, MO 63026 ©2018 Tacony Corporation...
Need help?
Do you have a question about the CPU-3QD and is the answer not in the manual?
Questions and answers