Table of Contents
Advertisement
Advertisement
Table of Contents

Related Manuals for Zte Spro


Summary of Contents for Zte Spro
- Page 1 Spro User Manual...
- Page 2 About This Manual Thank you for choosing this ZTE device. In order to keep your device in its best condition, please read this manual and keep it for future reference. Copyright Copyright © 2015 ZTE CORPORATION All rights reserved. No part of this publication may be quoted, reproduced,...
- Page 3 Google and Android are trademarks of Google, Inc. ® The Bluetooth trademark and logos are owned by the Bluetooth SIG, Inc. and any use of such trademarks by ZTE Corporation is under license. ® Qualcomm Snapdragon™ processors are products of Qualcomm Technologies, Inc.
- Page 4 is a trademark of SRS Labs, Inc. TruMedia technology is incorporated under license from SRS Labs, Inc. SRS TruMedia™, a feature-rich audio solution tuned specifically for mobile devices, provides a cinema-like surround headphone performance with deep, rich bass. Other trademarks and trade names are the property of their respective owners.
-
Page 5: Table Of Contents
Switching to Silent Mode ..........25 Applying New Wallpapers ..........26 Changing Screen Brightness ..........26 Protecting Your Spro With Screen Locks ......26 Protecting Your Spro With Encryption ....... 27 Knowing the Basics ..........30 Monitoring the Device Status ..........30... - Page 6 Connecting to a USB Device ..........56 Connecting to Virtual Private Networks ......57 Projection ............... 59 Projecting a File Saved in Your Spro ........ 59 Projecting an HDMI Source ..........59 Projecting a File Saved in Your USB Device ..... 60 Projecting a Source on Your Phone (Wi-Fi Display) ..
- Page 7 ™ Gmail ..............67 Opening Your Gmail Inbox..........67 Switching Accounts ............67 Writing and Sending a Message ........68 Replying to or Forwarding a Message ......68 Working With Received Attachments ........ 69 Working With Labels ............69 Changing Gmail Settings ..........70 Browser ..............
- Page 8 Working With Pictures ............81 Retouching Your Pictures ..........82 Playing Videos ..............83 Music ............... 84 Copying Music Files to Your Spro ........84 Viewing Your Music Library ..........85 Playing Music ..............86 Managing Playlists ............87 Play Music .............. 88 Playing Your Music ............
- Page 9 Browsing and Searching for Apps ........98 Downloading and Installing Apps ........98 Creating a Google Wallet™ Account ......... 99 Managing Your Downloads ..........100 Settings ..............101 Wireless and Networks ........... 101 Device ................102 Projector ................ 105 Personal ................ 105 Accounts ................
-
Page 10: Getting Started
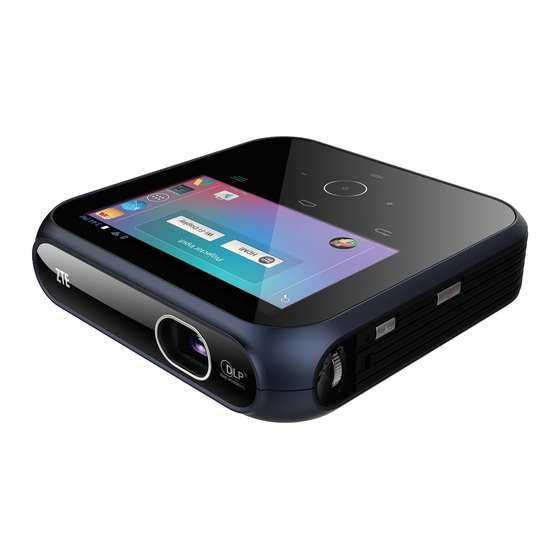
Getting Started Getting to Know Your Spro Projection Lens Touch Screen Indicator Light Home Key Back Key Menu Key Volume Down Volume Up Sleep/Wake Projection Key Up Key... - Page 11 Power Bank Reset Key Power Key Focus Wheel microSDHC Card Slot Cover USB Jack HDMI Input Port Headset Jack Power Socket Ventilation Holes Kickstand Speaker...
- Page 12 Projection Lens Project the display on a surface. WARNING! Do not look directly into the projection lens or point the lens toward people or animals’ eyes when the projector is on as this may cause injury to the eyes. Back Key Touch to go to the previous screen.
- Page 13 Spro. Reset Key You can restart your Spro in situations when it stops responding or won’t power off normally. Using the tip of a pen or paperclip, press and hold the Reset Key until your Spro restarts.
-
Page 14: Installing The Microsdhc™ Card (Not Included)
Installing the microSDHC™ Card (Not Included) A microSDHC card can be installed or removed while Spro is turned on. You need to unmount the microSDHC card before removing it. 1. Open the microSDHC card slot cover. 2. Hold the microSDHC card with the cut edge oriented as shown below. - Page 15 NOTE: Some applications may require a microSDHC card to work properly if it stores certain data on it. Therefore, it is recommended that you keep a microSDHC card installed and not remove or replace it unnecessarily. 3. Close the cover. NOTE: To remove the microSDHC card, open the card slot cover, push the card so it clicks out, and then pull it completely out from the...
-
Page 16: Charging The Battery
CAUTION: Do not try to remove or change the built-in rechargeable battery in your Spro by yourself. By doing so will violate the warranty policy from ZTE. 1. Plug the AC adapter into the power socket on your Spro. -
Page 17: Powering On/Off Your Spro
NOTE: If the power of battery is extremely low, you may not be able to power on Spro even when it is being charged. In this case, try again after charging Spro for at least 20 minutes. Contact the customer service if you still cannot power on Spro after prolonged charging. -
Page 18: Waking Up Your Spro
Waking Up Your Spro Your Spro automatically goes into sleep mode when it is not in use for certain time. The touch screen is turned off to save power and the keys are locked to prevent accidental operations. You can wake up your Spro by following the instruction as below. -
Page 19: Using The Touch Screen
For best results, project onto a non-reflective white flat display surface at a 90° angle to Spro’s touch screen. Using the Touch Screen Your Spro’s touch screen enables you to control actions through a variety of touch gestures. • Touch... - Page 20 • Touch and Hold To open the available options for an item (for example, a message or link in a web page), touch and hold the item. • Swipe or Slide To swipe or slide means to quickly drag your finger vertically or horizontally across the screen.
- Page 21 • Drag To drag, press and hold your finger with some pressure before you start to move your finger. While dragging, do not release your finger until you have reached the target position.
- Page 22 (to zoom in). • Rotate the screen For most screens, you can automatically change the screen orientation from landscape to portrait by turning Spro sideways. NOTE: The Auto-rotate screen check box needs to be selected for the screen orientation to automatically change. Touch the Home Key >...
-
Page 23: Getting To Know The Home Screen
Getting to Know the Home Screen The home screen is the starting point for your Spro’s applications, functions, and menus. You can customize your home screen by adding shortcuts, folders, widgets, and more. Status bar Google Search Primary Widget shortcuts... -
Page 24: Personalizing
Personalizing Changing the System Language Touch the Home Key > Menu Key > System settings > Language & input > Language. Select the language you need. Setting the Date and Time Touch the Home Key > Menu Key > System settings > Date &... -
Page 25: Turning On/Off Other System Sounds
NOTE: You can adjust the media volume by touching the Volume Keys. Switching to Silent Mode You can set your Spro to silent mode by using one of the following methods. • Press and hold the Power Key and then touch... -
Page 26: Applying New Wallpapers
Protecting Your Spro With Screen Locks You can protect your Spro by creating a screen lock. When it is enabled, you need to touch and hold certain icon, draw a pattern or enter a numeric PIN or password to unlock Spro’s screen and... -
Page 27: Protecting Your Spro With Encryption
Please remember the pattern, PIN or password you set. If you forget it, you need to consult the customer service to upgrade your Spro software and all data in your Spro’s internal storage will be lost. Protecting Your Spro With Encryption... - Page 28 2. Read the information about encryption carefully. The Encrypt device button is dimmed if your battery is not charged or the charger is not plugged in your Spro. If you change your mind about encrypting your Spro, touch the Back Key WARNING! If you interrupt the encryption process, you will lose data.
- Page 29 The encryption process starts. Encryption can take an hour or more, during which time your Spro may restart several times. When encryption is completed, you're prompted to enter your PIN or password. Subsequently, you must enter your PIN or password each time...
-
Page 30: Knowing The Basics
Knowing the Basics Monitoring the Device Status The status bar at the top of the home screen provides the status icons on the right side. Below are some of the icons you may see. Battery low Ringer off Battery partially drained Vibration mode Battery full Bluetooth on... - Page 31 Song playing Downloading data USB connected Sending data External USB device Updates available connected Unmount external USB device Open/Close the Notification Panel Notifications report the arrival of new Gmail message, as well as ongoing events, such as when you are playing music. You can open the notification panel to view the details of notifications.
- Page 32 Use Quick Settings The Quick Settings in the notification panel make it convenient to view or change the most common settings for your Spro. Open the notification panel and you can find the following Quick Settings on the top of the screen. Touch to view all setting options.
-
Page 33: Managing Shortcuts And Widgets
Bluetooth: Touch to turn on or off Bluetooth. • Connect to PC: When it is highlighted, you can connect Spro with your computer to transfer files via a USB cable. When it is not highlighted, you can connect Spro with a USB device. -
Page 34: Organizing With Folders
Move Shortcuts or Widgets 1. Touch and hold a shortcut or widget on the home screen. 2. Drag it to the place you need. Remove Shortcuts or Widgets 1. Touch and hold a shortcut or widget on the home screen. 2. -
Page 35: Rearranging The Primary Shortcuts
Create a Folder Touch and hold a shortcut on the home screen and drag it over another shortcut. Release your finger and a new folder will be created with both shortcuts added into it. Rename a Folder Touch a folder to open it. Touch the folder name field below the shortcut icons and enter a new name. -
Page 36: Entering Text
Primary shortcuts Entering Text You can enter text using the onscreen keyboard. Some apps open it automatically. In others, you open it by touching where you want to type. Touch the Back Key to hide the onscreen keyboard. Change Input Methods 1. - Page 37 Android Keyboard The Android Keyboard provides a layout similar to a desktop computer keyboard. • Touch the alphabetic keys to enter letters. Touch and hold some specific keys to enter associated accented letters or numbers. For example, to enter è, touch and hold the available accented letters and number 3 appear.
- Page 38 TouchPal X Keyboard TouchPal X keyboard offers three layouts: T26, T12 and T+. You can touch to select a layout or an input language. ® You can also use Curve to speed up text input by replacing the key tapping operation with a tracing gesture where you move your finger from letter to letter without lifting the finger until you reach the end of the word.
- Page 39 • The alphabetic keys: Touch the keys to enter letters. Touch a key and slide down to enter the number or symbol on the key. You can also touch and hold a key and slide to choose more characters. • The capital key: Touch to use uppercase.
- Page 40 The T12 Layout The layout is similar to a phone pad in T12 mode. Touch an alphabetic key repeatedly until the desired letter appears. You can also touch and hold the key and slide left or right to choose the letter or number you need. If word prediction is enabled ( ), just touch the keys once and choose the right word.
- Page 41 Touch to enter the left letter on the key. Double-tap or flick right to enter the right letter/symbol on the key. You can also touch and hold a key and slide left or right to choose more letters and symbols. If word prediction is enabled ( ), just touch the keys and choose the right word.
-
Page 42: Editing Text
• Lift your finger at the end of the word. A space is added automatically when you begin to trace the next word. Input Method Settings Choose the input method settings by touching > Settings > Language & input from the home screen. In the KEYBOARD &... -
Page 43: Opening And Switching Apps
Opening and Switching Apps Open an App Touch the Home Key > Slide left or right on the screen and touch an app to open it. Switch Between Recently Opened Apps 1. Touch and hold the Home Key. A list of the names and thumbnails of apps you’ve used recently opens. -
Page 44: Connecting To Networks And Devices
4. If the network is secured, enter the password and touch Connect. NOTE: Your Spro automatically connects to previously used Wi-Fi networks when they are in range. NOTE: To connect to a Wi-Fi router that supports WPS, touch your Spro’s Wi-Fi menu and press the WPS button on your router. - Page 45 3. Touch the Menu Key > Advanced. 4. Check Network notification. When Wi-Fi is on, you receive notifications in the status bar when your Spro detects an open Wi-Fi network. Uncheck the option to turn off notifications. Add a Wi-Fi Network...
- Page 46 Forget a Wi-Fi Network You can make your Spro forget about the details of a Wi-Fi network that you added - for example, if you don’t want your Spro to connect to it automatically or if it is a network that you no longer use.
- Page 47 Touch the Menu Key > WPS pin entry. The WPS PIN number displays on the screen. Enter the PIN number into the access point's setup page. After entering the PIN number, your Spro automatically finds the access point and configures the connection. NOTE: For detailed information about the WPS feature of the access point, please refer to its user documents.
-
Page 48: Using Wi-Fi Direct
2. Select the option for sharing via Wi-Fi Direct. The method may vary by application and data type. 3. Touch a device your Spro has connected with or wait for it to search for new devices and touch one of them. -
Page 49: Connecting To Bluetooth ® Devices
Slide the Bluetooth switch to the ON or OFF position. When Bluetooth is on, the icon will appear in the status bar. Make Your Spro Visible In order to work with other phones or devices that have Bluetooth, you need to make your Spro ‘visible’ to them. - Page 50 Slide the Bluetooth switch to the ON position if Bluetooth is off. Your Spro automatically scans for and displays the IDs of all available Bluetooth devices in range. You could touch SEARCH FOR DEVICES on the top right of the screen if you want to scan again.
- Page 51 1234 (the most common passkeys), or refer to the documents for that device. Unpair From a Bluetooth Device You can make your Spro forget its pairing connection with another Bluetooth device. To connect to the device again, you may need to enter or confirm a passkey again.
-
Page 52: Connecting To Your Computer Via Usb
File Manager app. Connecting to Your Computer via USB You can connect your Spro to a computer with a USB cable (not included) and transfer music, pictures, and other files in both directions. Your Spro stores these files in the internal storage or on a removable microSDHC card. - Page 53 Connect Your Spro to a Computer via USB 1. Connect your Spro to the computer using a USB cable (not included). Insert the end of the cable into the USB jack of Spro and insert the other end of the cable into an available USB jack on your computer.
- Page 54 ® Connect With Windows Media Player You can sync music on your Spro and the computer installed with Windows Media Player. 1. Connect Spro with your computer via USB and choose Media device (MTP). 2. Open Windows Media Player and synchronize music files.
- Page 55 Remove the microSDHC Card From Your Spro If you need to remove the microSDHC card while Spro is on, you must unmount it first. Touch the Home Key > > Settings > Storage. Scroll down and touch Unmount SD card > OK.
-
Page 56: Connecting To A Usb Device
Connecting to a USB Device You can connect a USB device such as a USB flash drive to Spro via the USB jack, and touch the Home Key > > File Manager > USB DEVICE to view the files saved in the USB device. -
Page 57: Connecting To Virtual Private Networks
Before unmounting the USB device, you should not enable "Connect to PC" , otherwise the connection between your Spro and the USB device will be broken, and the data in the USB device may be damaged or lost. Connecting to Virtual Private Networks Virtual private networks (VPNs) allow you to connect to the resources inside a secured local network. - Page 58 Connect to a VPN Touch the Home Key > > Settings > More > VPN. Touch the VPN that you want to connect to. When prompted, enter any requested credentials, and then touch Connect. Modify a VPN Touch the Home Key > >...
-
Page 59: Projection
Projection You can use the projector of your Spro to project the files in Spro or other devices connected to it. WARNING! Do not look directly into the projection lens or point the lens toward people or animals’ eyes when the projector is on as this may cause injury to the eyes. -
Page 60: Projecting A File Saved In Your Usb Device
1. Connect your Spro with the laptop or TV STB via the supplied HDMI cable. (Laptop or TV STB is not included in the packaging) 2. Touch the Projection Key to turn on the projector. You may need to wake up your Spro and unlock the screen first. See Waking Up Your Spro. -
Page 61: Projecting A Source On Your Phone (Wi-Fi Display)
1. Connect your Spro with the USB device via the USB jack. Connecting to Networks and Devices – Connecting to a Device. 2. Touch the Projection Key to turn on the projector. You may need to wake up your Spro and unlock the screen first. See Waking Up Your Spro. - Page 62 2. Enable the Wi-Fi display feature or open a Wi-Fi display application on the phone to scan for available devices within range. 3. When you see the name of your Spro displayed in the available devices section, touch the name. The phone then automatically tries to pair with your Spro.
-
Page 63: Using Power Bank
Using Power Bank The Power Bank feature allows you to use Spro to charge other devices via USB cable, such as your phone. NOTE: The projector and Power Bank cannot be enabled at the same time. To charge other devices when your Spro is powered on: 1. - Page 64 To charge other devices when your Spro is powered off: 1. Connect your Spro to your phone or other devices via a USB cable (not included). 2. To turn on the Power Bank feature and start the charging, press and hold the Power Bank Key until your Spro vibrates, and then the indicator light will turn green and flash.
-
Page 65: Accounts
ACCOUNTS section in the Settings menu. Remove an Account Removing an account will delete it and all information associated with it from your Spro, such as Gmails and contacts. 1. Touch the Home Key > > Settings. 2. Touch the account category in the ACCOUNTS section and... -
Page 66: Configuring Account Sync
The Sync screen appears, showing a list of information the account can sync. 3. Check or uncheck items as you need. Checked types of information on Spro and the web will be kept in auto-sync. Sync Manually 1. Touch the Home Key >... -
Page 67: Gmail
™ Gmail After you sign in to your Google account on Spro, you can send and retrieve Gmail messages with the Gmail app. NOTE: This feature may not be available in certain regions or with certain service providers. Opening Your Gmail Inbox Touch the Home Key >... -
Page 68: Writing And Sending A Message
Writing and Sending a Message Open your Gmail inbox and switch to the account you want to use for sending the message. Touch Enter a contact name or email address in the ‘To’ field. Separate each recipient with a comma. Enter the email subject and compose the email text. -
Page 69: Working With Received Attachments
When a message has an attachment, Gmail displays information about it in the ATTACHMENTS section of the email. Depending on the attachment type, the applications installed on your Spro as well as your settings, you may preview, view, or save the attachment. Working With Labels Message labels include both labels you create and default labels such as Sent, Starred, and Outbox. -
Page 70: Changing Gmail Settings
At the top right of the screen, touch > Change labels. Check or uncheck labels in the new screen and touch OK. To add stars to messages: Open the Gmail app and touch in the message list the sender images in front of the messages you want to star. At the top right of the screen, touch >... -
Page 71: Browser
Browser Use Browser to view web pages and search for information. Opening the Browser Touch in the home screen and select Browser to use the web browser. Browser also opens when you touch a web link - for example, in a Gmail. -
Page 72: Using Multiple Browser Tabs
Set the Homepage Your home page opens when you open a new browser tab, and when you start Browser after restarting your Spro. 1. Open the page you want to set as your home page. 2. Touch the Menu Key > Settings > General > Set homepage. -
Page 73: Downloading Files
To use incognito tab for privacy browsing: Pages you view in incognito tabs won’t appear in your browsing history or search history. No trace will be left on your Spro once you close the tab. 1. Touch the tabs icon 2. -
Page 74: Changing Browser Settings
The downloaded files are saved to your Spro or the microSDHC card. You can view or open the downloaded files in the Downloads app ( > Downloads). Changing Browser Settings You can configure a number of Browser settings to customize the way you browse the web, including several that you can use to control your privacy. -
Page 75: Maps
Maps Activating Location Services To use location-related applications, such as finding your location on Google Maps™, you must have location services turned on on your Spro. 1. Touch the Home Key > > Settings > Location access. 2. Slide the Access to my location switch at the top to turn location services on or off. -
Page 76: Getting Your Location
Getting Your Location 1. Touch the Home Key > > Maps. 2. Touch at the bottom. The map centers on a circle that indicates your location. Searching for a Location 1. Touch the Home Key > > Maps. 2. Touch the search box on the top. 3. -
Page 77: Searching For Local Places
1. Touch the Home Key > > Maps. 2. Touch beside the search box. 3. Select the mode of transportation and then enter a start and end point. If your location is found, it will appear in the start point field by default. 4. - Page 78 5. Touch a location to see it on the map or get directions. You can also slide up the bottom card to find out more information, such as the street address, website, and street view, or to call that place, save it to your Google account, or share it with others.
-
Page 79: Google Search
Google Search You can search for information on the web or on your Spro using Google Search. Searching With Text You can search for information on the Internet or on Spro (such as music, apps and contacts) by entering text. -
Page 80: Gallery
> Gallery to view albums of your pictures and videos. Working With Albums When you open Gallery, all pictures and videos on your Spro are displayed in a number of albums. To view album contents: Touch an album to view the pictures and videos it contains. -
Page 81: Working With Pictures
Working With Pictures Touch a picture in an album to view the picture in full screen. When viewing a picture in full screen, the following features are available. • Swipe horizontally to see more pictures or videos. • Double-tap the picture, or pinch two fingers together or spread them apart to zoom out or in. -
Page 82: Retouching Your Pictures
• Touch the Back Key to return to the album. NOTE: Some options may not be available for certain albums or pictures. Retouching Your Pictures You can edit the pictures in Gallery. 1. Touch while viewing a picture in full screen. 2. -
Page 83: Playing Videos
2. Touch the video to view the playback controls. You can touch to play the video in a small floating window and continue with other tasks on Spro. You can also touch > Clip while the video is playing in full screen to cut a... -
Page 84: Music
Touch the Home Key > > Music to play audio files stored on your Spro. Music supports a wide variety of audio formats, so it can play music you purchase from online stores, music you copy from your CD collection, and so on. -
Page 85: Viewing Your Music Library
Receive via Bluetooth You can receive music files from other devices via Bluetooth. Receive Data via Bluetooth. Receive via Wi-Fi Direct You can receive music files from other devices via Wi-Fi Direct. Receive Data via Wi-Fi Direct. Viewing Your Music Library Touch the Home Key >... -
Page 86: Playing Music
Playing Music Touch a song in the music library to listen to it. The following playback screen appears. Number Function Touch to toggle repeat mode: no repeat, repeat the current song, or repeat the current playlist. Album artwork. Swipe left or right on the screen to see lyrics (if available) or the current playlist. -
Page 87: Managing Playlists
Touch to play the current playlist in shuffle mode, where tracks are played in random order. NOTE: ™ Spro supports SRS TruMedia sound effects. You can touch the Menu Key > SRS Setting to turn on Volume boost or select a sound effect when playing a song. -
Page 88: Play Music
Wi-Fi and listen to your favorite songs that you’ve added to your online Google Music library. You can also play audio files you’ve copied directly to your Spro from a computer. NOTE: The availability of Google Music is dependent on your region. If it is not available, or you don’t have a Wi-Fi connection, you can... - Page 89 Number Function Song and artist information. Touch or drag down to return to the music library. Album artwork (if available). Slide left/right to switch to the next/previous song in the playlist. Give the song a thumbs-up. Playback control. Skip songs, pause and resume playback, use shuffle or repeat.
-
Page 90: Managing Playlists
You can still control the music when you are not in the playback screen. • In the music library of the Play Music app, touch the summary information at the bottom of the screen to restore the playback screen. • In other apps, flick down the notification panel. - Page 91 NOTE: Certain automatically created playlists such as Last added cannot be deleted.
-
Page 92: Video Player
Video Player Touch in the home screen and select Video Player to view your video library and play various kinds of videos. Playing and Controlling Videos Touch a video in the video library to play it. The following video play screen appears. Number Function Adjust the video brightness. -
Page 93: Managing Video Files
Adjust the video play volume. Rotate the video play screen. NOTE: ™ Spro supports SRS TruMedia sound effects. You can touch > SRS Setting to turn on Volume boost or select a sound effect when playing a video. Managing Video Files Delete a Video Clip 1. - Page 94 If necessary, touch to preview the selected portion. 4. Touch OK and the trimmed video is saved as a new video file.
-
Page 95: More Apps
Touch the Home Key > > Chrome to browse the Internet. Chrome on your Spro can sync bookmarks, browsing history, and opened tabs from your Google account, so that you can maintain the same experience across your Spro, your phone, your PC, your tablet and other devices. -
Page 96: File Manager
Kingsoft Office Touch the Home Key > > Kingsoft Office. You can use the app to open or create Word, Excel, PowerPoint and TXT files, and read PDF files on your Spro. -
Page 97: News And Weather
News and Weather News & Weather offers weather forecasts and news stories about common topics. You can also customize the news topics that are displayed. Touch the Home Key > > News & Weather. Swipe left or right to view weather forecast and news headlines under different news topics. -
Page 98: Google Play™ Store
Google Play™ Store Touch the Home Key > > Play Store. You can buy or rent music, books, movies, apps, and download them to your Spro. NOTE: The content you can access in Google Play Store depends on your region. -
Page 99: Creating A Google Wallet™ Account
On your computer, go to checkout.google.com to create a Google Wallet account. • The first time you use your Spro to buy an item from Google Play Store, you’re prompted to enter your billing information to set up a Google Wallet account. -
Page 100: Managing Your Downloads
When you’ve used Google Wallet once to purchase items from the Google Play Store app, Spro remembers your password so you don’t need to enter it the next time. For this reason, you should secure your Spro to prevent others from using it without your permission. Managing Your Downloads After you’ve downloaded and installed an app, you can rate it,... -
Page 101: Settings
Settings Touch the Home Key > > Settings. The Settings app contains most of the tools for customizing and configuring your Spro. Wireless and Networks Wi-Fi Turn Wi-Fi on or off and configure your Wi-Fi connections. See ® Connecting to Networks and Devices – Connecting to Wi-Fi When Wi-Fi is on, touch the Menu Key >... -
Page 102: Device
Gmail messages and other events. • Calibration: Calibrate Spro's accelerometer (gravity sensor) when you notice errors. Place Spro flat on a level surface and touch Calibration Test. • Front key light: Control the backlight of the front keys (the Home Key, the Menu Key, the Back Key, the Volume Up/Down Key, and the Projection Key). - Page 103 Speech rate: Select how quickly you want the synthesizer to speak. Listen to an example: Play a brief sample of the speech synthesizer, using your current settings. • Pointer speed: Select how fast the pointer/mouse should scroll when you connect Spro to a trackpad or mouse accessory.
- Page 104 Touch Unmount SD card to unmount the microSDHC card from your Spro so that you can safely remove the card while Spro is on. Touch Erase SD card to delete all data on the microSDHC card. Battery Check how much power remains for the battery and what has been using the battery.
-
Page 105: Projector
Connect to PC Select your USB connection type between your Spro and PC. Connecting to Networks and Devices – Connecting to Your Computer via USB. Projector Touch the Home Key > > Settings > Display light to select normal mode or power saving mode. When in power saving mode, the projector light will be decreased to save the battery power. - Page 106 Power Key. • Owner info: Enter the text that you may display on the lock screen. • Encrypt device: Encrypt your data on Spro to protect your privacy. See Personalizing – Protecting Your Spro With Encryption. •...
-
Page 107: Accounts
Accounts Manage your accounts and synchronization. Touch Add account to sign in to or create accounts on your Spro. Touch an account type to see that type of accounts you have added and adjust the accounts settings. - Page 108 SW Version in the About device menu 7 times. WARNING! The developer option settings are intended for development use only. They can cause your Spro and applications on it to break or misbehave. System Updates Check your system’s software status and upgrade the system.
-
Page 109: Troubleshooting
Troubleshooting If you encounter problems while using Spro, or if it performs abnormally, you can refer to the chart below. If your particular problem cannot be resolved using the information in the chart, contact the dealer where you purchased Spro. - Page 110 Move closer to the Wi-Fi The Wi-Fi network hotspot or a location Poor Wi-Fi signal is too weak at your where is no obstacle signal current location. between Spro and the hotspot. Uninstall the software Spro that may cause the crashes, Some third-party problem.
-
Page 111: For Your Safety
For Your Safety General Safety Your device can Don’t use at gas produce a loud sound. stations. Your device may Avoid contact with produce a bright or anything magnetic. flashing light. Keep away from Don’t dispose of your pacemakers and other electronic medical device in fire. -
Page 112: Radio Frequency (Rf) Energy
Avoid contact with Don’t take your device liquids. Keep your apart. device dry. Radio Frequency (RF) Energy This device is designed and manufactured not to exceed the emission limits for exposure to radio frequency (RF) energy set by the Federal Communications Commission of the United States. -
Page 113: Fcc Compliance
The FCC has granted an Equipment Authorization for this model device with all reported SAR levels evaluated as in compliance with the FCC RF exposure guidelines. SAR information on this model device is on file with the FCC and can be found under the Display Grant section of www.fcc.gov/oet/ea/fccid after searching on FCC ID: SRQ-MF97W. - Page 114 CAUTION: Changes or modifications not expressly approved by ZTE could violate the warranty policy. ZTE will not hold any responsibility of any damage related to that. NOTE: This equipment has been tested and found to comply with the limits for a Class B digital device, pursuant to part 15 of the FCC Rules.
-
Page 115: Distraction
Distraction Driving Full attention must be given to driving at all times in order to reduce the risk of an accident. Using this device while driving can cause distraction and lead to an accident. You must comply with local laws and regulations restricting the use of wireless devices while driving. - Page 116 • Clean your device and its accessories with a soft material such as cleaning cloth, or microfiber. Do not use alcohol or other corrosive substances for cleaning or allow them to get inside. • Do not expose your device or its accessories to open flames or lit tobacco products.
- Page 117 Children Do not leave your device and its accessories with your young children alone. The device is not a toy. They might accidentally damage the device. The projection light may cause uncomfort to them or others without parents’ direction. The device contains small parts that may cause an injury or may become detached and create a choking hazard.
-
Page 118: Electrical Safety
Repetitive Strain Injuries To minimize the risk of Repetitive Strain Injury (RSI) when texting or playing games with your device: • Do not grip the device too tightly. • Press the buttons lightly. • Use the special features which are designed to minimize the times of pressing buttons, such as Predictive Text. -
Page 119: Radio Frequency Interference
Faulty and Damaged Products Do not attempt to disassemble the device or its accessory. Only qualified personnel can service or repair the device or its accessory. If your device or its accessory has been submerged in water, punctured, or subjected to a severe fall, do not use it until you have taken it to be checked at an authorized service center. - Page 120 Hearing Aids People with hearing aids or other cochlear implants may experience interfering noises when using wireless devices or when one is nearby. The level of interference will depend on the type of hearing device and the distance from the interference source, increasing the separation between them may reduce the interference.
-
Page 121: Explosive Environments
Explosive Environments Gas Stations and Explosive Atmospheres In locations with potentially explosive atmospheres, obey all posted signs to turn off wireless devices such as your device or other radio equipment. Areas with potentially explosive atmospheres include fuelling areas, below decks on boats, fuel or chemical transfer or storage facilities, areas where the air contains chemicals or particles, such as grain, dust, or metal powders.
Need help?
Do you have a question about the Spro and is the answer not in the manual?
Questions and answers