Table of Contents
Advertisement
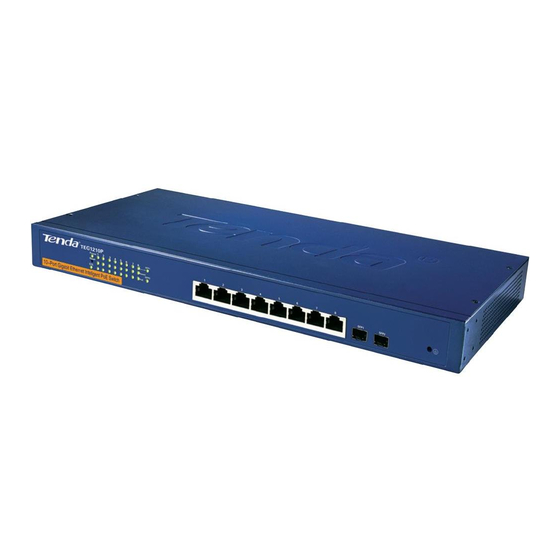
TEG1210P 10-Port Gigabit Intelligent PoE Switch User Guide
Copyright Statement
is the registered trademark of Shenzhen Tenda Technology Co., Ltd.
All the products and product names mentioned herein are the trademarks or registered
trademarks of their respective holders. Copyright of the whole product as integration,
including its accessories and software, belongs to Shenzhen Tenda Technology Co., Ltd.
Without the permission of Shenzhen Tenda Technology Co., Ltd, any individual or party is
not allowed to copy, plagiarize, reproduce, or translate it into other languages.
All photos and product specifications mentioned in this manual are for references only.
Upgrades of software and hardware may occur, and if there are changes, Tenda is not
responsible for notifying in advance. If you would like to know more about our product
information, please visit our website at www.tenda.cn.
- 1 -
Advertisement
Table of Contents

Related Manuals for Tenda TEG1210P


Summary of Contents for Tenda TEG1210P
- Page 1 All photos and product specifications mentioned in this manual are for references only. Upgrades of software and hardware may occur, and if there are changes, Tenda is not responsible for notifying in advance. If you would like to know more about our product information, please visit our website at www.tenda.cn.
-
Page 2: Table Of Contents
TEG1210P 10-Port Gigabit Intelligent PoE Switch User Guide Table of Contents COPYRIGHT STATEMENT.................... - 1 - TABLE OF CONTENTS ....................- 2 - PREFACE ........................- 4 - About this user manual....................- 4 - Security Warnings ......................- 4 - CHAPTER 1 PRODUCT INTRODUCTION ..............- 5 - 1.1 Product Features ....................- 5 -... - Page 3 TEG1210P 10-Port Gigabit Intelligent PoE Switch User Guide 3.5.1 VLAN Mode ....................- 28 - 3.5.2 Port VLAN....................- 28 - 3.5.3 802.1Q VLAN .................... - 29 - 3.5.4 Tag VLAN Config ..................- 30 - 3.6 MAC Address Setting..................- 31 - 3.6.1 MAC Aging....................
-
Page 4: Preface
TEG1210P 10-Port Gigabit Intelligent PoE Switch User Guide Preface Thanks for purchasing this switch from Shenzhen Tenda Technology Co., Ltd. It is a great honor to have you as one of our product users. About this user manual This user manual is designed to familiarize you with the switch and instruct you in the use of it. -
Page 5: Chapter 1 Product Introduction
15.4W supported by a single port. Besides, with the 2 provided independent SFP ports, users can flexibly extend their network from 100 meters to over 80 kilometers. In addition, TEG1210P supports port mirroring, port bandwidth control, port based/tagged VLAN, trunk, static MAC address table, QoS, port authentication, port traffic statistics and power save mode, etc. -
Page 6: Technical Specification
TEG1210P 10-Port Gigabit Intelligent PoE Switch User Guide Supports up to 10 groups of Port based VLANs Supports up to 128 groups of IEEE 802.1Q Tag VLANs with VLAN IDs ranging from 1 to 4094 Supports static MAC address table with up to 64 entries and MAC address filter Supports 802.1w RSTP and is compatible with 802.1D STP... - Page 7 TEG1210P 10-Port Gigabit Intelligent PoE Switch User Guide Forwarding Scheme Store and forward MAC Address Table 14880pps(10Mbps wire-speed) Packet Filter/ 148800pps(100Mbps wire-speed) Forwarding Rate 1488095pps(1000Mbps wire-speed) MAC Address Auto-learning/aging Learning Backplane 32Gbps Bandwidth Physical and Environmental Features AC Input Range 100-240V ~1.5A(Max) 50/60Hz...
-
Page 8: Chapter 2 Hardware Installation
TEG1210P 10-Port Gigabit Intelligent PoE Switch User Guide Chapter 2 Hardware Installation 2.1 Package Contents Please verify the contents to the following after you open the package: 1. One switch 2. One AC power cord 3. One pair of l-shaped brackets and matched screws 4. -
Page 9: Switch's Front Panel
TEG1210P 10-Port Gigabit Intelligent PoE Switch User Guide Attaching L-shaped Brackets Fixing the Switch in the Rack 2.3 Switch’s Front Panel The switch’s front panel includes: network ports, LEDs and a “Reset” button as shown below. Switch’s Front Panel Network Ports:... -
Page 10: Switch's Back Panel
TEG1210P 10-Port Gigabit Intelligent PoE Switch User Guide d efinitions are described in details in the table below: Color Status Description Always ON Switch has power. Power Green Switch has no power, please check whether AC power supply is correctly connected to switch or not... -
Page 11: Chapter 3 Configuration Guide
Chapter 3 Configuration Guide 3.1 Login 3.1.1 Configuration Requirements With the embedded web server in TEG1210P, you can manage and maintain the switch through the web-based interface. Before accessing switch’s web configuration interface, make sure your PC meet the following basic configuration requirements:... -
Page 12: Configuration Interface Description
TEG1210P 10-Port Gigabit Intelligent PoE Switch User Guide 4. Launch the browser, enter http://192.168.0.1 and then press “Enter”. The login page of the switch would appear as shown below. 5. Enter the user name and password (the default values are admin), and then click “Apply”... -
Page 13: System Information
TEG1210P 10-Port Gigabit Intelligent PoE Switch User Guide Menu Submenu Linked Page/Function System Displays switch’s system parameters Information Displays and allows you to make basic configurations for each port of the switch, such Port Config as link status, speed duplex and flow control,... - Page 14 TEG1210P 10-Port Gigabit Intelligent PoE Switch User Guide Displays and allows you to configure 802.1Q 802.1Q VLAN VLAN groups and its member ports Allows you to configure PVID, ingress filter Tag VLAN Config and port Tag Allows you to enable MAC address aging and...
- Page 15 TEG1210P 10-Port Gigabit Intelligent PoE Switch User Guide System Allows you to set switch’s management IP and IP Config Setting VLAN, etc Restore Factory Allows you to restore factory default settings Default Backup Allows you to backup switch’s current settings...
-
Page 16: Port Management
TEG1210P 10-Port Gigabit Intelligent PoE Switch User Guide you can log in to its web based configuration page to manage the device Subnet Mask Switch’s subnet mask value: 255.255.255.0 by default Gateway Gateway IP address: 0.0.0.0 by default MAC Address The switch’s physical address... -
Page 17: Mirror Config
TEG1210P 10-Port Gigabit Intelligent PoE Switch User Guide Speed Duplex Allows you to manually configure 5 working modes: 10Mbps half-duplex, 10Mbps full-duplex, 100Mbps full-duplex, 100Mbps half-duplex and 1000Mbps full-duplex Note: only after auto-negotiation is disabled, can duplex mode be configured Flow Control IEEE802.3x in full duplex and backpressure flow control in half... -
Page 18: Rate Limit
TEG1210P 10-Port Gigabit Intelligent PoE Switch User Guide Note: 1. The bandwidth of the monitoring port should equal or exceed the total bandwidth of the monitored port(s). 2. Monitoring (mirror) port is usually connected to a terminal only. It can not be connected to other devices (such as another switch). -
Page 19: Storm Control
TEG1210P 10-Port Gigabit Intelligent PoE Switch User Guide excessive bandwidth utilization due to some users' excessive downloading activities so that other users can have a guaranteed share of the bandwidth to enjoy a smooth network. After you selected the Ingress/Egress (RX/TX) rates, click the “Apply” button to activate them. -
Page 20: Statistics
TEG1210P 10-Port Gigabit Intelligent PoE Switch User Guide rates. “No limit” means “not controlled”. You can configure a specific storm rate; just remember to click the “Apply” button to activate your setting. When a corresponding traffic exceeds the configured value, system will drop some excessive frames to reduce the traffic into a reasonable range, thus effectively controlling various storms, avoiding network congestion and ensuring normal processing of traffic. -
Page 21: Function Setting
TEG1210P 10-Port Gigabit Intelligent PoE Switch User Guide Field Description Port Port ID TX Bytes The transmitted byte count of a port TX Frames The transmitted frame count of a port RX Bytes The received byte count of a port... - Page 22 TEG1210P 10-Port Gigabit Intelligent PoE Switch User Guide non-standard PD; the former refers to an 802.3af-compliant PD. Common PDs include IP telephone, wireless AP and network camera. 3. PI (Power Interface) : It refers to the port that connects a PSE/PD via a network cable, namely, RJ-45 port.
- Page 23 TEG1210P 10-Port Gigabit Intelligent PoE Switch User Guide in 5 seconds. If the “Static Allocation” mode is selected, then the power allocation is determined by the manually configured value per port. If the actually consumed power of a PD exceeds the...
-
Page 24: Trunk Config
TEG1210P 10-Port Gigabit Intelligent PoE Switch User Guide 3.4.2 Trunk Config 1. Overview Port aggregation refers to the binding of several ports together to form an aggregation group where all member ports share the traffic, thus connectivity reliability and bandwidth are boosted. -
Page 25: Qos Config
TEG1210P 10-Port Gigabit Intelligent PoE Switch User Guide Note: 1. Once a port is set as a member of a trunk group, it can not be used for other purposes except for this trunk group whether it is being used by this trunk or not. -
Page 26: Snmp Config
TEG1210P 10-Port Gigabit Intelligent PoE Switch User Guide On the above page, select a priority type for a port and click the “Apply” button to activate your settings. Fields on the above page are described as below: Field Description Port ID Displays a list of port numbers for current QoS configuration Allows you to configure priority for switch’s physical port;... -
Page 27: Vlan Setting
TEG1210P 10-Port Gigabit Intelligent PoE Switch User Guide To enter the page below, click “Function Setting”—“SNMP Config". To configure the parameters on the above page, just enter values you want to configure and then click the “Apply” button to finish. -
Page 28: Vlan Mode
TEG1210P 10-Port Gigabit Intelligent PoE Switch User Guide 3.5.1 VLAN Mode To enter the page below, click “VLAN Setting”—“VLAN Mode" tabs. This page allows you to select the port based VLAN or 802.1Q VLAN mode. When either mode of the two is enabled, the other one will be disabled automatically and its configurations will be deleted. -
Page 29: 802.1Q Vlan
TEG1210P 10-Port Gigabit Intelligent PoE Switch User Guide Procedures taken to add VLAN groups in Port VLAN mode are listed below: 1. Select a VLAN group number such as “2” from the VLAN Group drop-down list box. 2. Check the ports to join the corresponding VLAN group in VLAN Member box. -
Page 30: Tag Vlan Config
TEG1210P 10-Port Gigabit Intelligent PoE Switch User Guide shown in the above figure. (3)Click the “Apply” button to complete the configuration. The VLAN 4094 will be displayed in VLAN list as shown below: 2.To delete a VLAN, just click the corresponding “Delete” button. -
Page 31: Mac Address Setting
TEG1210P 10-Port Gigabit Intelligent PoE Switch User Guide Note: When two switches are inter-connected to implement VLAN function, the inter-connected ports must be set to the same PVID value and port tag must be set to “Tagged”; otherwise packets can not be forwarded correctly. -
Page 32: Mac Filter
TEG1210P 10-Port Gigabit Intelligent PoE Switch User Guide 3.6.2 MAC Filter MAC filter function enables you to add the MAC addresses of PCs and other devices to the MAC address filter table so that they are prevented from accessing network through the switch. -
Page 33: Static Mac
TEG1210P 10-Port Gigabit Intelligent PoE Switch User Guide 3.6.3 Static MAC According to the actual conditions, network administrators can manually add or delete the static MAC addresses in static MAC table to reduce broadcast traffic in a network. This switch supports a maximum of 64 static MAC address entries. -
Page 34: Rstp Setting
TEG1210P 10-Port Gigabit Intelligent PoE Switch User Guide 2.To delete an added MAC address: click the corresponding “Delete” button in the “Operation” column or the “Delete All” button. 3.7 RSTP Setting 3.7.1 RSTP Config To enter the page below, click “RSTP Setting”—“RSTP Config”. -
Page 35: Rstp Port
TEG1210P 10-Port Gigabit Intelligent PoE Switch User Guide 3.7.2 RSTP Port To enter the page below, click “RSTP Setting”—“RSTP Port”. This page allows you to view and modify RSTP port settings. Fields on the above page are described as below:... - Page 36 TEG1210P 10-Port Gigabit Intelligent PoE Switch User Guide Fields in the RSTP Bridge Overview table on the above page are described as below: Field Description Bridge ID The current Bridge ID, a switch is called a bridge in STP. The bridge...
-
Page 37: Igmp Snooping
TEG1210P 10-Port Gigabit Intelligent PoE Switch User Guide meaning. Note: P2P is a scheme to speed up convergence in RSTP. Most ports in Ethernet are of this type Protocol Displays STP or RSTP The port state in current STP. Such as forwarding, disabled,... -
Page 38: Snooping Status
TEG1210P 10-Port Gigabit Intelligent PoE Switch User Guide 3.8.2 Snooping Status To enter the page below, click “IGMP Snooping”—“Snooping Status”. This page displays the statistic data of the corresponding VLAN’s IGMP multicast packets of different versions. Fields on the above page are described as below:... -
Page 39: 802.1X Setting
TEG1210P 10-Port Gigabit Intelligent PoE Switch User Guide them; if they pass the authentication, they can access resources of the LAN, and otherwise, they can not. This protocol mainly solves the problems of authentication and security in Ethernet. 3.9.1 802.1x Setting To enter the page below, click the “802.1x Setting”—-“802.1x"... -
Page 40: 802.1X Port
TEG1210P 10-Port Gigabit Intelligent PoE Switch User Guide Enabled switch will require re-authentication of client regularly Reauthentication Configure the cycle of reauthentication, “3600” by default. The Period value options available range from 1 to 3600 seconds Configure EAP response timeout, 30 seconds by default. The... -
Page 41: System Setting
TEG1210P 10-Port Gigabit Intelligent PoE Switch User Guide by all clients; Auto: The port uses 802.1X to communicate with the clients and switch between authentication and un-authentication states. 3.10 System Setting 3.10.1 Change Password To enter the page below, click “System Setting”—“Change Password”. -
Page 42: Firmware Upgrade
TEG1210P 10-Port Gigabit Intelligent PoE Switch User Guide To enter the page below, click “System Setting”—“Power Save”. Power Save: To enable this feature, check the box and click the “Apply” button. 3.10.3 Firmware Upgrade To upgrade firmware, click “System Setting” —> “Upgrade”. -
Page 43: Ip Config
TEG1210P 10-Port Gigabit Intelligent PoE Switch User Guide 3.10.4 IP Config To enter the page below, click “System Setting”—“IP Config". If a new IP address is configured and the “Apply” button is clicked, switch will restart and return to the login interface. -
Page 44: Restore Factory Default
TEG1210P 10-Port Gigabit Intelligent PoE Switch User Guide Note: If you have enabled DHCP client, check the IP address assigned by DHCP server and then re-connect switch. Don’t enable this function unless you are aware of the IP address assigned by DHCP server. Please be careful when using it. -
Page 45: Restore
TEG1210P 10-Port Gigabit Intelligent PoE Switch User Guide This page allows you to backup switch’s current configurations. To backup your current settings, first click the “Download” button and then select a path to save the file. 3.10.7 Restore To enter the page below, click “System Setting”—“Restore”. -
Page 46: Warm Restart
TEG1210P 10-Port Gigabit Intelligent PoE Switch User Guide 3.10.8 Warm Restart To warm restart your switch, first click the “System Setting”----“Warm Restart” tabs to enter the page below: Then click the “Restart” button on the above page to reboot the switch. During this process, the switch will be disconnected temporarily and then re-connected quickly. -
Page 47: Chapter 4 Appendixes
TEG1210P 10-Port Gigabit Intelligent PoE Switch User Guide Chapter 4 Appendixes 4.1 Appendix 1: Glossary 1 Overview of QoS QoS(Quality of service) is the ability to provide better priority including improvement on a required bit rate, jitter control and delay (for real-time and interactive flow), packet dropping probability and specifying network flow for different WAN and LAN. - Page 48 TEG1210P 10-Port Gigabit Intelligent PoE Switch User Guide The figure below displays the detailed content of a 802.1Q tag header. The priority field in TCI indicates 802.1p priority, namely, CoS priority which consists of 3 bits and has a value range of 0~7.
- Page 49 TEG1210P 10-Port Gigabit Intelligent PoE Switch User Guide 2. SNMP Working Scheme SNMP consists of NMS and Agent: NMS(Network Management Station)is a workstation that runs client programs. Agent is the server software that is run in network devices (such as a switch).
- Page 50 TEG1210P 10-Port Gigabit Intelligent PoE Switch User Guide forwarding rule, namely stripping off their tag headers so that they can be identified by common devices. The following lists 2 common port types for tagged VLANs: Access Type:The forwarding rule for this type is to strip off the tag headers of all frames that are to be forwarded.
- Page 51 The switch, TEG1210P, supports IGMP v1, IGMP v2 and IGMP v3 Report packets. IGMP Leave Packets: Hosts running IGMP v1 will not send IGMP Leave packets when leaving a multicast group.
-
Page 52: Appendix 2: How To Set Tcp/Ip (Windows Xp Is Used As An Example)
TEG1210P 10-Port Gigabit Intelligent PoE Switch User Guide Leave packets to inform the multicast router that they have left a certain multicast group. 802.1x As an authentication protocol, 802.1X provides methods and policies for authenticating users. It is a port based authentication policy that requires 802.1x-supported switches and PCs to use EAPOL. - Page 53 TEG1210P 10-Port Gigabit Intelligent PoE Switch User Guide 2. Click “Network and Internet Connections” to enter the connection page. Figure 2 3. Click “Network Connections” to display the following window. Figure 3 4. Right click “Local Area Connection” and select “Properties”...
- Page 54 TEG1210P 10-Port Gigabit Intelligent PoE Switch User Guide Figure 4 5. Select “Internet Protocol (TCP/IP)” on the appearing window and click “Properties” button. Figure 5 6. Select “Use the following IP address” and enter the IP address: 192.168.0.xxx (xxx can be any value from 2~254) and subnet mask: 255.255.255.0.
-
Page 55: Appendix 3: Solutions To Login Failure
TEG1210P 10-Port Gigabit Intelligent PoE Switch User Guide Figure 6 7. Click “OK” to return to the “Local Area Connection Properties” window. 8. Click “Close” to exit the window. 4.3 Appendix 3: Solutions to login failure When coming across switch login failure, first make sure whether you can access the switch through “ping”... -
Page 56: Appendix 4: Useful Commands
TEG1210P 10-Port Gigabit Intelligent PoE Switch User Guide management VLAN. 7) Check whether the PC’s NIC has been set with a specific VID and the port connected has been set with PVID filter. 8) Please contact technical support of our branch company at your place for help, if the above mentioned can still not solve your problem. -
Page 57: Appendix 5: Regulatory Statement
TEG1210P 10-Port Gigabit Intelligent PoE Switch User Guide 4.5 Appendix 5: Regulatory Statement FCC Statement This equipment has been tested and found to comply with the limits for a Class B digital device, pursuant to part 15 of the FCC Rules. These limits are designed to provide reasonable protection against harmful interference in a residential installation. -
Page 58: Appendix 6: Technical Support
TEG1210P 10-Port Gigabit Intelligent PoE Switch User Guide 4.6 Appendix 6: Technical Support If you have any poblem, please contact our customer service or technical support Technical Support Toll Free: 400-6622- 666 (For mainland China only) Toll Free: 1-800-570-5892 (For USA only)
Need help?
Do you have a question about the TEG1210P and is the answer not in the manual?
Questions and answers