
Summary of Contents for CardioChek 2750
- Page 1 Printer REF 2750 Designed exclusively for use with CardioChek Plus ® and CardioChek PA analyzers, ® versions 2.55 and greater.
-
Page 3: Important Safety Instructions
Important Safety Instructions Warning 1. Only use the AC adapter provided with this printer, or an AC adapter that has been approved for use with this printer. Use of an incorrect AC adapter may cause risk of overheating or fire. 2. -
Page 4: Fcc Compliance Statement
Restriction of the use of certain hazardous substances (RoHS) Directive analyzers.) Installation Standards EN55022 class B For best performance, we recommend that you install your CardioChek printer on a flat EN61000-3-2, EN61000-3-3 surface in a location that satisfies the following environmental conditions: EN55024 EN60950-1 •... -
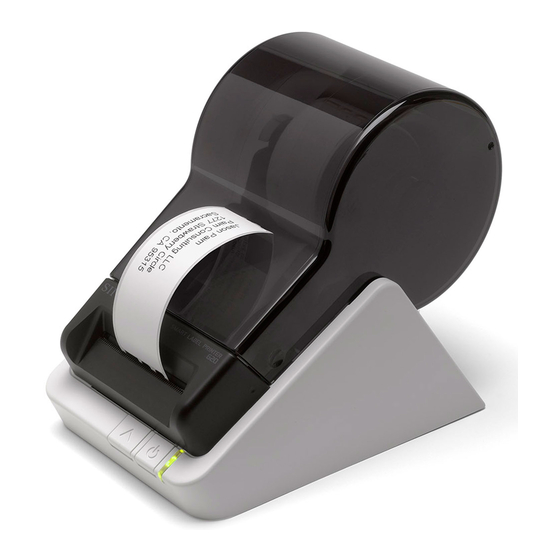
Page 5: Specifications
2.28 in. (57.9 mm) Max. Printable Width 1.92 in. (48.8 mm) Print Speed 100 mm/sec max For best results, we recommend the use of CardioChek printer labels. Other brands may not be Interface 650 USB Operating voltage DC11.4 V to DC 12.6 V engineered to provide optimum, trouble-free results with your printer;... -
Page 6: Removing Stuck Labels
How to Set Up the CardioChek Analyzers for Printing Removing Stuck Labels If a label becomes stuck in your printer, remove it as follows: CardioChek PA Analyzer 1. Make sure that the printer is turned off. If the Status Light is on, hold the Power Button until the printer is turned off. -
Page 7: How To Print Results From Memory
Adjusting the Position of Labels How to Set Up the CardioChek Analyzers for Printing, cont’d. If you find the labels are advancing at an angle, follow these steps to realign them: CardioChek Plus Analyzer 1. If the analyzer is off, press either button to turn on the analyzer. Wait for the display to 1. -
Page 8: Loading A Roll Of Labels
Loading a Roll of Labels Prepare the roll of labels Roll Waste Roll Close Label Cover 1. Remove the sticker from the beginning of the roll of labels. Note: Make sure there is a black sensor mark on the label backing. Prepared end Cut here 2.