Table of Contents
Advertisement
Advertisement
Table of Contents

Summary of Contents for ALINKER R-volution
- Page 1 Alinker R-volution ® User manual AL-RV 1.1 EN...
- Page 2 About this manual About this manual Congratulations on your purchase of the Alinker R-volution. This manual contains instructions for adjusting and using the Alinker. Carefully read these instructions and keep them accessible for reference. Always observe the recommendations included in these instructions.
- Page 3 To minimize this risk seat must not be more than 4” (10cm) above stem to reduce risk of tipping; if need seat higher order a taller Alinker. 3. Before riding, become familiar with it.
- Page 4 • Adjusting and Maintenance. • Using compatible bicycle parts including seats, handlebars, etc. • Assembly When your Alinker first arrives if not assembled by dealer, inspect shipping carton to make sure it hasn’t been dropped or tampered with. • If no shipping damage apparent, open carton and verify all parts present before starting.
-
Page 5: Table Of Contents
Get off .......................................10 The Alinker stand ......................10 Brakes........................... 10 Using the parking brake .................... 11 1.7.1 Set the parking brake of the Alinker ........................11 Ride over a curb or up/down a slope ..............12 1.8.1 Riding over a curb ................................12 1.8.2 Ride up a slope ...................................12... - Page 6 4.3.1 Putting the saddle (bike seat) on ..........................23 4.3.2 Remove the saddle (bike seat) ..........................23 Place the Alinker into the car ................... 23 Maintenance ......................24 Check tire pressure ..................... 24 Clean and lubricate ....................24 Product specifications ....................25...
-
Page 7: Safety And Operations
• In case of defects or for service, make an appointment with the dealer or service@thealinker.com. 1.2 Misuse The Alinker is not intended to use on stairs, uneven terrain and slopes steeper than 5 degree or go faster than 5km/hr (3 miles/hr) -
Page 8: Liability
• Properly adjust the saddle and the handlebar of the Alinker. See 3. Adjust the Alinker. • Practice with the Alinker in a quiet area without traffic. Make sure that you are not alone when you try the Alinker for the first time. -
Page 9: Get On/Off
1. Get on and off from the rear of the Alinker. 2. Set the parking brake of the Alinker when getting on and off. Caution: If you stand alongside the Alinker and swing your leg over the frame like you might with a bike, you may lose your balance. -
Page 10: Get Off
1.6 Brakes Apply the following two methods for braking: 1. The primary brake on the Alinker is your own feet and legs. 2. While the saddle (bike seat) supports your weight, add resistance while decending a slope by engaging your feet and legs. -
Page 11: Using The Parking Brake
Safety and Operations 1.7 Using the parking brake The parking brake can be used to prevent the Alinker from rolling away from you. Use the parking brake when getting on and off or when it is unattended. Set the parking brake of the Alinker 1.7.1... -
Page 12: Ride Over A Curb Or Up/Down A Slope
Safety and Operations 1.8 Ride over a curb or up/down a slope Riding over a curb 1.8.1 Carry out the following instructions simultaneously: • Approach the curb squarely with the front wheels at 90 degrees to the curb. Make sure that both wheels go off the curb at the same time in a slow and controlled manner. -
Page 13: Ride On A Canted Surface (A Surface Slanted Sideways)
1.11 Other cautions Avoid bumping into furniture or obstacles. If the Alinker wheel comes into contact with an object, and the black center button is depressed, the front wheel can unlock and come loose. Check the black button on the front wheel to be sure it is not sticking out while riding. -
Page 14: Which Size Alinker
The Alinker must be sized by your inseam measurement. Measure your inseam yourself or with help from your dealer • Have a dealer take your measurements personally for a Alinker. Table 1 gives an indication for the suitable model for a certain physical height. -
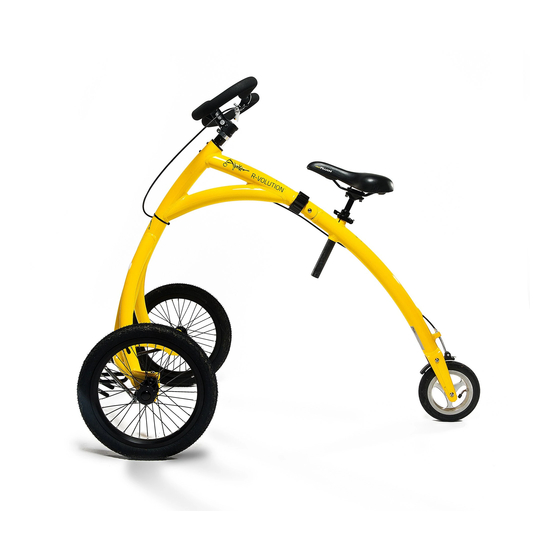
Page 15: Description
L. Hinge F. Quick release hub M. Handbrake G. Small rear wheel N. Parking brake catch 2.2 Delivery The Alinker is delivered nearly completely assembled. Only wheels, saddle and steering needs to be put in place. (Follow the assembly instructions). -
Page 16: Options (Accessories)
Description 2.3 Options (accessories) There are no accessories for the Alinker yet available through the Alinker Inventions. Bicycle accessories (e.g. a saddle, saddle pin, handlebar, handlebar riser, basket, lighting, etc.) can be mounted unto the Alinker. Specific accessories for the Alinker will be developed. -
Page 17: Adjust The Alinker
Choose a saddle (bike seat) 3.1.1 The default saddle (bike seat) on the Alinker is a narrow gel saddle with a spring in the saddle pin. Contact your dealer or local bike shop for saddle (bike seat) options • Any type of saddle (bike seat) can be installed on the Alinker. -
Page 18: Adjust The Saddle (Bike Seat) To The Correct Height
The default handlebar for the Alinker is the butterfly handlebar. Contact your dealer or local bike shop if you want a different handlebar configuration. • Virtually every type of handlebar is suitable for the Alinker. • Choose the handlebar most comfortable for you. -
Page 19: Adjust The Brake If Needed
Adjust the Alinker Adjust the handlebar 1. Loosen the 4 bolts (A) with a 4mm allen key. 2. Adjust the handlebar (B) to the correct position. 3. Tighten the 4 bolts (A) with a 4mm allen key. Adjust the handlebar stem riser 1. -
Page 20: Transport The Alinker
Transport the Alinker Transport the Alinker The Alinker is foldable. The wheels can be clicked off the Alinker and the saddle (bike seat) can be removed. This makes the Alinker easy to transport. 4.1 The front wheels Put the front wheels on 4.1.1... -
Page 21: Remove The Front Wheels
Transport the Alinker Remove the front wheels 4.1.2 1. Hold the wheel (A) with one hand at the hub. 2. Press and hold the black button (B) in with your thumb and place your fingers around the spokes. 3. Remove the wheel (A). -
Page 22: Fold The Alinker
2. Place one hand on the saddle and the other hand on the handlebar. 3. Lift the rear wheel up slightly off the ground. 4. Fold the Alinker by pressing down on the saddle (bike seat). The rear of the Alinker will fold toward the front. -
Page 23: The Saddle (Bike Seat)
2. Remove the saddle and the saddle pin (B) from the frame (C). 3. Fold the quick release (A) inward. 4.4 Place the Alinker into the car 1. Fold the Alinker. 2. Remove the wheels. 3. Remove the saddle (bike seat), if necessary. -
Page 24: Maintenance
• For other maintenance and repair. • Order or replace parts. 5.1 Check tire pressure The tires of the Alinker will loose pressure over time with use. Check them every week and keep them topped up to ensure your ride is smooth and efficient. Tire... -
Page 25: Product Specifications
Product Specification Product specifications Small Medium Large Length (L) 1150 mm / 45” 1240 mm / 49” 1350 mm / 53” Width (W) 720 mm / 30” 720 mm / 30” 720 mm / 30” Rear wheel diameter (D1) 8” aluminum wheel with black, air-filled profiled tire Front wheel diameter (D2) 16”... -
Page 26: Appendix A: Assembly Instructions,First Use Guidelines And Suggestions
You should find: 1. Two front wheels, 2. The Alinker itself, 3. The steering bar (connected with brake cable to the frame (handle with care), 4. The saddle on the saddle pen, 5. A little package with an Allen key and the official manual. - Page 27 NOTE: it takes some time to get used to the saddle, but that is temporary as you will break it in. For longer distances you might consider using padded cycle pants. In principle every bike saddle can be fitted to the Alinker. Note that a wider saddle makes strides and full use of your hip joints harder and not preferred.
- Page 28 Try leaning to the left until it feels like to might want to tip. For your safety when using the Alinker you will want to sit upright, staying in between these two extremes.
- Page 29 – Using the Alinker frame as a footrest, may cause problems. If an Alinker user puts a foot on the frame near the wheel, there is a risk that (1) the foot touches the spokes (especially with little feet or casual footwear) and (2) the foot slides off the frame, which may cause a balance problem or a fall.
- Page 30 www.theAlinker.com AL-RV 1.1 EN...
Need help?
Do you have a question about the R-volution and is the answer not in the manual?
Questions and answers