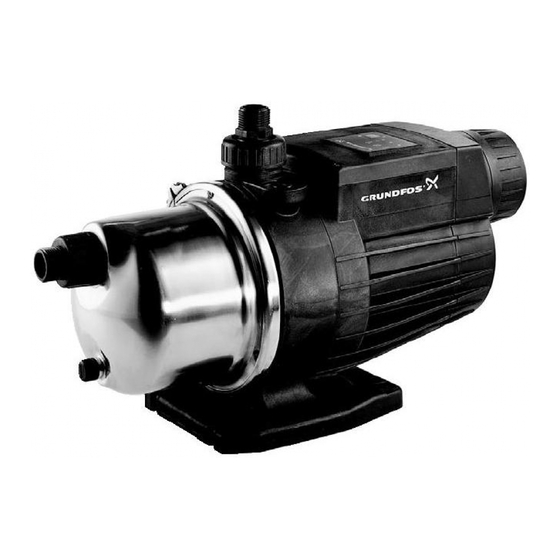
Grundfos MQ 3-35 Service Instructions Manual
Hide thumbs
Also See for MQ 3-35:
- Installation and operating instructions manual (60 pages) ,
- Safety instructions and other important information (156 pages) ,
- Product manual (60 pages)
Table of Contents
Advertisement
Contents
1.
Type identification ..........................................................................................................................................................2
1.1
Nameplate.........................................................................................................................................................................2
1.2
Type key .............................................................................................................................................................................3
2.
Service tools ..................................................................................................................................................................... 4
2.1
Special tools ..................................................................................................................................................................... 4
2.2
Standard tools ................................................................................................................................................................. 4
3.
Dismantling and assembly............................................................................................................................................5
3.1
General information .......................................................................................................................................................5
3.2
Replacing the shaft seal, chambers and impellers................................................................................................. 6
3.3
Replacing the pressure tank ........................................................................................................................................ 8
3.4
Replacing the electronic unit, flow sensor and pressure switch ........................................................................ 9
3.5
Replacing the motor unit............................................................................................................................................ 10
4.
Operation......................................................................................................................................................................... 11
4.1
Priming ............................................................................................................................................................................. 11
4.2
Start................................................................................................................................................................................... 11
4.3
Stop ................................................................................................................................................................................... 11
4.4
Alarm ................................................................................................................................................................................ 11
4.5
Auto-reset........................................................................................................................................................................ 11
4.6
Manual reset................................................................................................................................................................... 11
4.7
Control panel ..................................................................................................................................................................12
4.8
Overview ..........................................................................................................................................................................13
4.9
Fault finding....................................................................................................................................................................14
4.10 Fault finding overview .................................................................................................................................................15
5.
Wiring diagram ............................................................................................................................................................. 24
5.1
Winding resistence measurement........................................................................................................................... 24
GB
28.04.2003
Service instructions
MQ 3-35, MQ 3-45
50/60 Hz
1~
1 / 24
Advertisement
Table of Contents

Related Manuals for Grundfos MQ 3-35


Summary of Contents for Grundfos MQ 3-35
-
Page 1: Table Of Contents
Service instructions MQ 3-35, MQ 3-45 50/60 Hz Contents Type identification ................................2 Nameplate..................................2 Type key .....................................3 Service tools ..................................4 Special tools ..................................4 Standard tools ................................. 4 Dismantling and assembly............................5 General information ...............................5 Replacing the shaft seal, chambers and impellers....................6 Replacing the pressure tank ............................ -
Page 2: Type Identification
1. Type identification 1.1 Nameplate Pos. Description Example Type designation MQ 3-35 A-O-A-BVBP Rated flow rate [m³/h] Model Characters: 1 - 8 Production number 96440338 P7 0127 9 - 10 Factory code 11 - 14 Production year and week Operating pressure [m]... -
Page 3: Type Key
1.2 Type key Example -BVBP Pump range Rated flow rate [m³/h] Max. head [m] Code for pump version A: Standard Code for pipework connection O: External thread Code for materials A: Standard Code for shaft seal 28.04.2003 3 / 24... -
Page 4: Service Tools
2. Service tools 2.1 Special tools Pos. Designation For pos. Description Part no. Pressure gauge SV2061 2.2 Standard tools Pos. Designation For pos. Description Part no. Bit holder 1/4" SV2011 Bits kit 5 mm hexagon SV2010 Ring/open-end spanner M8 - 13 mm SV0055 Straight slot Screwdriver... -
Page 5: Dismantling And Assembly
3. Dismantling and assembly 3.1 General information Position numbers of parts (digits) refer to exploded views, sectional drawings and parts lists; position numbers of tools (letters) refer to section 2. Service tools. 3.1.1 Before dismantling • Disconnect the electricity supply to the motor. •... -
Page 6: Replacing The Shaft Seal, Chambers And Impellers
3.2 Replacing the shaft seal, chambers and impellers 3.2.1 Removing the shaft seal 1. Slacken and remove the strap pos. 92. 2. Remove the screws pos. 91. 3. Carefully remove the pump sleeve pos. 16 using a screwdriver. 4. Remove the inlet part pos. 6 from the pump sleeve or the top of the chamber stack. 5. - Page 7 4. Fit the chambers pos. 4, O-rings pos. 37 and impellers pos. 49 on the motor unit/shaft pos. 150, see drawing. Note: There is no O-ring on the chamber next to the intermediate part pos. 2. 5. Fit the washer pos. 66 and the nut pos. 67 and tighten it with 7 Nm. Hold the shaft end using a screwdriver.
-
Page 8: Replacing The Pressure Tank
3.3 Replacing the pressure tank 3.3.1 Removing the pressure tank 1. Remove the cover pos. 43. 2. Remove the pressure tank pos. 42 including the O-ring pos. 44. It can be loosened using the fingers. 3. If the union nut including O-ring pos. 44 is not removed with the pressure tank, remove it using a 42 mm socket. -
Page 9: Replacing The Electronic Unit, Flow Sensor And Pressure Switch
3.4 Replacing the electronic unit, flow sensor and pressure switch 3.4.1 Removing the electronic unit, flow sensor and pressure switch 1. Slacken the screws pos. 166 and remove the terminal box cover pos. 164. 2. Disconnect the leads and pull them out of the terminal block on the electronic unit pos. 181. 3. -
Page 10: Replacing The Motor Unit
3.5 Replacing the motor unit 3.5.1 Removing the motor unit 1. Remove the shaft seal, see 3.2.1 Removing the shaft seal. 2. Remove the electronic unit, flow sensor and pressure switch, see 3.4.1 Removing the electronic unit, flow sensor and pressure switch. -
Page 11: Operation
4. Operation 4.1 Priming Before initial start-up, pour approx. 5 litres of water into the pump through the priming port, see the installa- tion and operating instructions. When started, the pump will start to evacuate the air contained in the system. Once it starts to deliver water, the pump will change over to normal operation (start/stop). -
Page 12: Control Panel
4.7 Control panel Illustration Description Indicator light (green): Indicates that the pump is ready for operation. When the indicator light is on, the pump will start automatically when water is consumed. The pump will stop a few seconds after the water consumption has ceases. -
Page 13: Overview
4.8 Overview Before starting the fault finding procedure, check the external installation conditions of the pump. For this purpose, see the installation and operating instructions. Note: It is important to read this section as well as 4.9 Fault finding 4.10 Fault finding overview thor- oughly. -
Page 14: Fault Finding
Clean the valve or fit a new non-return when no water is con- ing pipework is leaking or defective. valve. sumed. If the pump does not start when the fault has been corrected, contact your pump supplier or GRUNDFOS for further information. 28.04.2003 14 / 24... -
Page 15: Fault Finding Overview
4.10 Fault finding overview Start the pump and allow it to run for a minimum of 5 minutes with the tap turned on. Then observe how the system reacts. Typical faults If the tap is opened too quickly, there will be no alarm indication. - Page 16 4.10.1 Observation A Turn off the tap. The system is closed; the pressure must be minimum 2.5 bar. If 2.5 bar is not reached, check the hydraulics. If the pressure is above 2.5 bar, continue the fault finding procedure. Wait approx. 15 seconds to see what happens when the pump stops.
- Page 17 P > 2.5 bar At a pressure above 2.5 bar, the switch is closed, and the multimeter must show approx. 0 Ω. If the multimeter shows “OL” or M Ω, the contact is open, and the pressure switch must be replaced. 0 Ω...
- Page 18 4.10.2 Observation B Turn off the tap. If the pump enters an alarm condition after 60 sec., replace the pressure switch. 15 sec. If the pump stops within 15 sec. and does not enter an alarm condition, continue the fault finding procedure. Disconnect the electricity supply by pulling out the plug.
- Page 19 Flow sensor Check for impurities in the flow wheel housing. Replace the flow sensor if defect. Make sure that the magnet on the flow wheel is fitted against the sensor in the flow sensor cover. Fit the controller and the cover. Connect the electricity supply.
- Page 20 4.10.3 Observation C Non-return valve Check that the inlet conditions are satisfactory. Prime the pump. Disconnect the electricity supply by pulling out the plug. Check if the pump is seized-up by means of a screwdriver. If it is impossible to turn the motor and pump, the hydrau- lics must be checked.
- Page 21 Fix the cover on the pump and connect the electricity sup- ply. Wait approx. 5 min. or until water comes out of the tap. If the pump delivers water, the controller must be replaced. If the pump delivers no water, continue the fault finding procedure.
- Page 22 Wait approx. 5 min. or until water comes out of the tap. If the pump delivers water, it is OK. Connect the controller correctly. If the pump does not deliver water, continue the fault finding procedure. The controller continues to be bypassed.
- Page 23 Do not forget to connect the controller correctly after completing the fault finding procedure. 4.10.4 Observation D Replace the controller. 28.04.2003 23 / 24...
-
Page 24: Wiring Diagram
5. Wiring diagram Capacitor Electrical motor Black Ground Yellow-green Phase White => Mains Neutral Black => Flow sensor => Pressure switch 5.1 Winding resistence measurement Ambiemt temperature Motor Resistance Reading point Winding [ Ω ±10%] [V/Hz] [°C] [°F] 230/50 Main 230/60 16.7 Main...
Need help?
Do you have a question about the MQ 3-35 and is the answer not in the manual?
Questions and answers