Table of Contents
Advertisement
Quick Links
Advertisement
Table of Contents

Subscribe to Our Youtube Channel
Related Manuals for Grundig SH 24


Summary of Contents for Grundig SH 24
- Page 1 Stenorette Sh 24 Steno-Cassette 30 ENGLISH www.grundig-gbs.com...
- Page 3 I N D E X V O L D I C T. M I C .
- Page 4 DIN 32 750-T steno-cassette 30 Batterien Batterijen Batteries Batterier Pile Batterierne Piles Pilas Akkuset 462 Rechargeable batteries Accumulatori 462 Accumulateurs 462 Akku´s 462 Ackumulator 462 Akkumulator 462 Baterias 462 Netzbetrieb Mains operation Funzionamento con la rete Fonctionnament sur secteur Gebruik met de adapter Nätdrift Netdrift Funcionamiento a red...
-
Page 5: Supply Voltage
Supply Voltage Battery, rechargeable battery, mains operation Battery/rechargeable battery condition indicator (plus recording indicator): Lights up when recording. Goes out when the batteries/rechargeable batteries are weak. Recording is still possible until the motor stops (sound signal). Battery operation with two 1.5V/LR6/AA batteries (alkaline-manganese), leak-proof. -
Page 6: Controls And Sockets
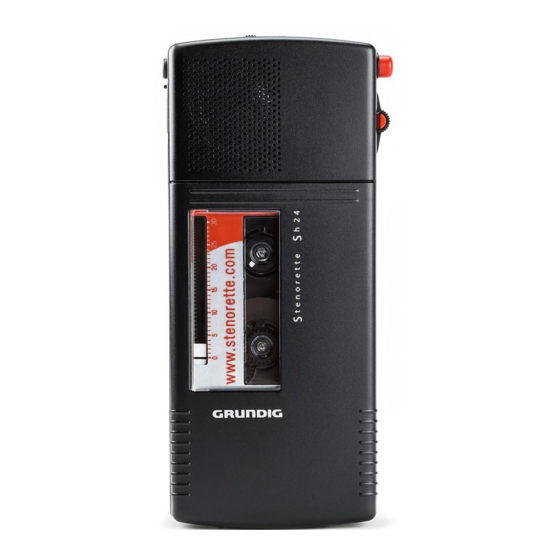
Controls and Sockets Please open folder at beginning of booklet! Playback volume control (turn) DICT. indication Lights up during recording. Microphone Recording button Press the “ DICTATE“ button (locks in). Loudspeaker Switch-on lock red green Prevents accidental switching on. Slide-switch Fast forward (search) Stop Start playback... - Page 7 Accessories indicated in the text are not supplied with the unit. Please make sure to choose only genuine acces- sories from Grundig. Product liability and warranty service are provided only in this case. The use of non-Grundig accessories or those which are not recommended and approved by Grundig automati- cally void any warranty claims towards Grundig.
-
Page 8: Cassette Compartment
General Automatic switch-off If the machine remains switched on inadvertently, the current function is continued till the end of the cassette. After emitting several sound signals, the machine switches off. To put the machine into operation again, set the slide-switch to “ STOP“ then select the desired function. - Page 9 Recording Microphone and recording indicator Conference recordings The housing base is designed so that the dictation machine can vertically be placed on a table. Dictation Speak over the dictation machine. The figure shows the optimum position of the dictation machine. The high-quality microphone allows also for recordings over greater distances.
-
Page 10: Recording Pause
Recording Recording pause Set the slide-switch to “ STOP”: – “DICT.“ goes out. – Recording button “ DICTATE” remains locked in. Set slide-switch to “ START”: – “DICT.“ lights up; tape runs. Text correction Switch the slide-switch to “ REWIND”. –... -
Page 11: Erasing Recordings
Recording Start/stop voice activated (Voice Activation) During speech pauses when recording (more than 4 seconds) the device stops. Recording resumes when you speak; otherwise like “Recording“. You can set different sensitivity levels for Voice Activation: “OFF“ = VA off “LOW“ = VA for dictation “HIGH“... -
Page 12: Text Marks
At the end of the letter, briefly press the “INDEX“ button to record an end mark. These end marks are recognized by all GRUNDIG dictation machines provided with the search func- tion. See chapter “Fast Forward / Rewind”. Info mark Record spontaneous ideas, information or advice even within a dictation. - Page 13 Text Marks Recording brief messages during a dictation. You wish to record a brief message during the dictation. 1. Press and hold down the “INDEX“ button. 2. Speak your message after the info mark. 3. Release the “INDEX“ button after your message. The end mark sounds.
-
Page 14: Index Mark
Text Marks Index mark Press the “INDEX“ button during playback when the text passage to be marked is reached. The machine records the index mark additionaly without erasing the text. Note: Let the person who will do your typing know what to do when an index mark is heard on the tape. - Page 15 Playback Playback Starting playback Set slide-switch to “ START”: – A warning signal sounds if no steno-cassette is fitted. Adjust desired volume (turn). Concluding playback Set slide-switch to “ STOP”.
-
Page 16: Fast Forward/Rewind
Fast Forward/Rewind Rewind and fast forward without search Move the slide-switch briefly to the desired function (“ FFWD“ or “ REWIND“), let go of it and then move the slide-switch immediately to the desired function again. Rewind with search function Set the slide-switch to “... -
Page 17: Care And Maintenance
Care and Maintenance The housing should only be cleaned with a soft cloth which picks up dust. Polishing or cleaning agents may damage the surface. Parts contacting the tape should be checked from time to time for contamination by tape abrasion, see illustration at the end of this booklet. - Page 18 Abbildung zum Text »Bandberührende Teile«, Seite 13. Figure to text "tape contacting parts" , page 13 Figura riferita al capitolo «Parti a contatto con il nastro», pagina 13 Figure au text «Eléments au contact avec la bande», page 13 Afbeelding bij de tekst ”Delen die de band aanraken”, pagina 13 Bild till texten »Bandberörande delar«, sidan 13...
Need help?
Do you have a question about the SH 24 and is the answer not in the manual?
Questions and answers