Advertisement
Quick Links
Configure
1
your classroom
Basic Configuration
AC plugs
RGB/HDMI cable
Power on the TT-12iD
2
Zoom and Focus
Twist the zoom knob to zoom in/out
Press the Auto-focus button to focus
after zooming
Capture and Review
4
A. Insert SD
card/USB
flash drive
View computer desktop
QUICK TRAINING GUIDE:
Training Video (TT-12): http://www.elmousa.com/tt-12-interactive-document-camera
With Computer
AC plugs
Rear
panel
LED light
B. Capture image
Menu(see page 2)
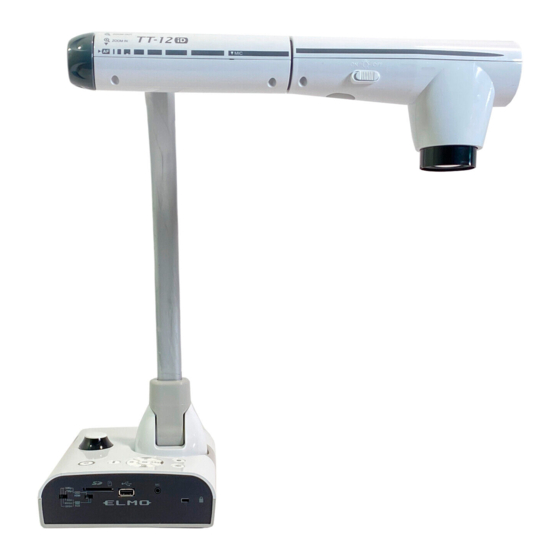
TT-12iD
Install Image
Mate software
USB
To speaker
HDMI IN
From
Plug-in for
HDMI OUT
computer
AC adaptor
To projector
3
Adjust brightness
View document camera image
Pause the camera image. Press again to unfreeze.
With Interactive Whiteboard
RGB IN
USB
RGB OUT
From
To computer
To projector
computer
Rotate
Rotate the camera column close to a
small object, turn the camera head
horizontally to view students giving a
presentation, speech, etc.
Rotate the arm 180°
and position camera
head downward for left-
handed users.
C. Review saved images
Use buttons to
scroll and select.
1
Advertisement

Subscribe to Our Youtube Channel
Related Manuals for Elmo TT-12iD


Summary of Contents for Elmo TT-12iD
- Page 1 To projector Rear panel RGB/HDMI cable Rotate Power on the TT-12iD Rotate the camera column close to a Zoom and Focus small object, turn the camera head horizontally to view students giving a presentation, speech, etc. Twist the zoom knob to zoom in/out Rotate the arm 180°...
- Page 2 Control the TT-12iD from anywhere in the classroom Compare picture: Compare the live image Power to a saved image from the SD card. The Highlight allows you to Zoom In/Out emphasize a specific area of the image. Move the Auto-focus: Press after zooming highlight using arrow buttons [▲][►][▼][◄].
Need help?
Do you have a question about the TT-12iD and is the answer not in the manual?
Questions and answers