Table of Contents
Advertisement
Quick Links
Advertisement
Table of Contents

Related Manuals for Transcend CPAP


Summary of Contents for Transcend CPAP
- Page 1 Quick Guide...
-
Page 2: What's Not Included (All Sold Separately)
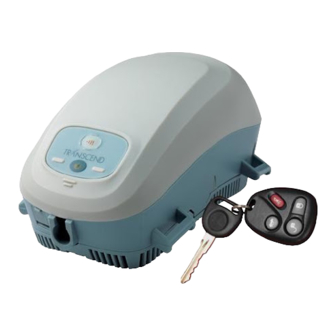
The Transcend Sleep Apnea Therapy System is the smallest, lightest and most portable CPAP system. It truly gives you the freedom to sleep anywhere. Begin by inspecting all items shipped to you. Please report any damaged or missing items to the home healthcare provider that provided the device to you. - Page 3 Two waterless humidification systems are available: Transcend H B Waterless Humidification System includes: • Mask Shell Assembly • Transcend H B Headgear • Adjustable Arm Bars (S,M,L) • Transcend H B Hose (6 foot hose with pressure line, HME-compatible) •...
- Page 4 Transcend Sleep Apnea Therapy Starter System To completely assemble the Transcend Sleep Apnea Therapy Starter System: 1. Attach the Universal Hose Adaptor to the CPAP nose cone. 2. Attach the standard 6 foot hose to the Universal Hose Adaptor. 3. Attach the interface to the other end of the hose.
-
Page 5: Transcend H 6 B Waterless Humidification System
Transcend H B Waterless Humidification System To completely assemble the Transcend H B Waterless Humidification System: 1. Attach the adaptor ring to the mask shell. Connect the top clip first; then connect the bottom clips. Both must click firmly into place. - Page 6 7. Insert the heat moisture exchanger (HME) into the HME cartridge using the plastic pin in the center of the HME. 8. Connect the Transcend H B hose to the mask shell. You will hear an audible click once it is in place.
- Page 7 9. Secure the Transcend H B hose to the Transcend H B headgear using the fold over hook and loop strap. 10. Connect the Transcend H B hose to the CPAP. Chapter 2 • Assembling Your Transcend • page 6...
-
Page 8: Transcend H 9 M Waterless Humidification System
Transcend H M Waterless Humidification System To completely assemble the Transcend H M Waterless Humidification System: 1. Attach the adaptor ring to the mask shell. Connect the top clip first; then connect the bottom clips. Both must click firmly into place. - Page 9 5. With the darker side of the headgear facing up, and the CPAP placed top down with the rear facing towards you, attach the headgear to the CPAP as shown. 6. Attach the interface to the remaining headgear straps and place the forehead pad on the forehead piece.
- Page 10 8. Connect the Transcend H M hose to the mask shell. You will hear an audible click once it is in place 9. Connect the Transcend H M hose to the CPAP. Chapter 2 • Assembling Your Transcend • page 9...
- Page 11 Chapter 2 • Assembling Your Transcend • page 10...
- Page 12 M WATERLESS HUMIDIFICATION SYSTEMS Transcend H B Waterless Humidification System 1. Put on the Transcend H B interface and headgear without the hose attached. The rear headband sits at the nape of the neck. 2. Fit the mask so the forehead pad rests just above the brow line.
- Page 13 6. Adjust the headgear straps until the interface feels secure. 7. Attach the Transcend H B hose to interface, then attach hose to headgear with the fold over hook and loop strap. 8. Attach the other end of the hose to the CPAP. Chapter 3 • Fitting Your Transcend •...
- Page 14 1. Once the Transcend H M Waterless Humidification System has been completely assembled (see Assembly section), place Transcend on the head so that the rear head band fits at the nape of the neck. 2. Fit the mask so the forehead pad rests just above the brow line.
- Page 15 9. Adjust the interface straps or mask adjustments as necessary so the interface creates a complete seal against the face. The interface should feel secure while lying down, but the CPAP will shift slightly with movement of the head. Chapter 3 •...
- Page 16 5 Once the LED power-up flash sequence is complete, the device enters Standby mode and is ready for use (lights will be off). Your Transcend can also be powered by an optional mobile power adaptor, or the optional Transcend battery systems. Visit your home healthcare provider for additional information about these power sources.
- Page 17 Chapter 4 • Powering Your Transcend • page 16...
-
Page 18: Starting Therapy
2 Ensure that the device is connected to a power source and is in Standby mode. (See Powering) 3 Press the lower, blue power button to turn on Transcend. Air flow will begin as the blower delivers your prescribed pressure. -
Page 19: Using The Ramp Function
1 Initiate ramp by pressing the ramp, or top, button after the blue power button has been pressed. Please note: the ramp button on Transcend will not work unless your prescription includes ramp. 2 Therapy pressure will drop to a starting pressure that has been preset by your provider, and will gradually increase over a preset period of time until it reaches your prescribed therapy pressure. - Page 20 CARING FOR YOUR TRANSCEND AND COMPONENTS Dry Mode - Cleaning the Inside of Your Transcend Dry Mode should be used daily to clean the inside of your Transcend. Caution: Do not wear Transcend while it is in Dry Mode 1 Set the device on a dry and stable surface. A cloth surface is not recommended as it may get soiled.
- Page 21 3 Rinse thoroughly. 4 Air dry; components must be completely dry before reconnecting. 5 Reconnect the components. Caution: Do not put any of the Transcend components in the dishwasher or laundry machine. Chapter 6 • Caring for Your Transcend and Components •...
- Page 22 2. Insert the heat moisture exchanger (HME) into the HME cartridge using the plastic pin in the center of the HME. 3. Reconnect the Transcend hose to the mask shell. You will hear an audible click once it is in place.
-
Page 23: Replacing The Air Inlet Filter
CPAP. 3. To replace the new filter plate, lay it on the bottom of the CPAP. Snap the front clips into place first; then the back clips. Make sure the filter plate is completely connected and discard the used filter plate. - Page 24 • • PATIENT COMPLIANCE Transcend comes with a CD that includes the Somnetics Sleep Apnea Therapy Management Utility program. You will need this CD to install the program software onto your computer. Installing the Sleep Apnea Therapy Management Utility Program 1 Insert the Transcend CD into your computer.
- Page 25 Using Somnetics Sleep Apnea Therapy Management Utility Functions 1 Connect Transcend to your computer with a USB cable and to a power source. 2 Launch the Management Utility program from your desktop or Start menu. 3 You will see a Welcome box.
- Page 26 View Provider Information 1. The View Provider Information link is on the top right of the Patient box. 2. View your provider’s company name, email address, and phone number. View Patient Compliance 1 Click the View Patient Compliance button. 2 From the Patient Compliance screen you may generate a PDF of your compliance report for your records.
- Page 27 Email Compliance Information to Your Clinician/Provider 1 Click the Email Compliance from the Patient box or from the View Patient Compliance screen. 2 Click the Email Compliance button. 3 When using a locally installed email program, such as Outlook, an email box will automatically appear with your compliance report attached.
- Page 28 View and Send a Device Fault Log 1 From the Patient box, click the View/Send Device Fault Log button to view, save or email the log. 2 Emailing the device fault log is done in the same manner as shown above for emailing the compliance report.
- Page 29 Chapter 7 • Patient Compliance • page 28...
- Page 30 33 5TH AVE NW, SUITE 500 NEW BRIGHTON, MN 55112 PHONE: 651.621.1800 TOLL FREE: 877.621.9626 FAX: 651.204.0064 ©2011 Somnetics International, Inc. All rights reserved. PN: 103099 REV C...
Need help?
Do you have a question about the CPAP and is the answer not in the manual?
Questions and answers