Dahua DHI-ARC3008C Installer Manual
Alarm control panel
Hide thumbs
Also See for DHI-ARC3008C:
- User manual (50 pages) ,
- User manual (137 pages) ,
- User manual (67 pages)

Related Manuals for Dahua DHI-ARC3008C


Summary of Contents for Dahua DHI-ARC3008C
- Page 1 Alarm Control Panel Installer Manual V1.0.1 ZHEJIANG DAHUA VISION TECHNOLOGY CO., LTD.
-
Page 2: Cybersecurity Recommendations
Alarm Control Panel Installer Manual Cybersecurity Recommendations Mandatory actions to be taken towards cybersecurity 1. Change Passwords and Use Strong Passwords: The number one reason systems get “hacked” is due to having weak or default passwords. It is recommended to change default passwords immediately. -
Page 3: Foreword
This installer manual (hereinafter referred to as "the Manual") introduces the functions and operations of the Alarm Control Panel (hereinafter referred to as "the Control Panel"). Models DHI-ARC3008C, ARC3008C, DH-ARC3008C, OEM-ARC3008C Safety Instructions The following categorized signal words with defined meaning might appear in the Manual. - Page 4 Alarm Control Panel Installer Manual About the Manual The Manual is for reference only. If there is inconsistency between the Manual and the actual product, the actual product shall prevail. We are not liable for any loss caused by the operations that do not comply with the Manual. ...
-
Page 5: Important Safeguards And Warnings
Alarm Control Panel Installer Manual Important Safeguards and Warnings This Chapter describes the contents covering proper handling of the Device, hazard prevention, and prevention of property damage. Read these contents carefully before using the Device, comply with them when using, and keep it well for future reference. Operation Requirement ... -
Page 6: Table Of Contents
Alarm Control Panel Installer Manual Table of Contents Cybersecurity Recommendations ..........................1 Foreword ..................................2 Important Safeguards and Warnings ......................... 4 Introduction ................................7 Overview ................................7 Features ................................7 Terms and Definitions ............................8 Wiring and Installation ............................9 Dimension ................................. - Page 7 Alarm Control Panel Installer Manual 1.24 WIRED ZONES ............................. 34 1.25 IN AND ZONES ............................. 39 1.26 OUTPUTS ..............................41 1.26.1 Entering OUTPUT Menu ........................41 1.26.2 Configuring OUTPUT Categories ....................... 42 1.27 AREAS ................................47 1.28 SYSTEM FUNCTIONS ..........................49 1.29 SYSTEM TIMING ............................
-
Page 8: Introduction
Alarm Control Panel Installer Manual 1 Introduction Overview The product is a high performance anti-theft controller designed for the middle and small alarm solution application. Adopting embedded Linux operation system and relying on embedded platform, the system can run steadily with advanced controlling technology and strong data transmission ability. The embedded design also supports the product with high security and excellent stability. -
Page 9: Terms And Definitions
Alarm Control Panel Installer Manual Supports abnormality alarm, including network disconnected alarm, PSTN fault alarm, tampering alarm, low battery alarm, battery loss alarm, power loss alarm, and keyboard faults alarm. In-field firmware upgradable. App-based system control through DMSS. Terms and Definitions Refer to the terms and definitions that are used in the Manual as below. -
Page 10: Wiring And Installation
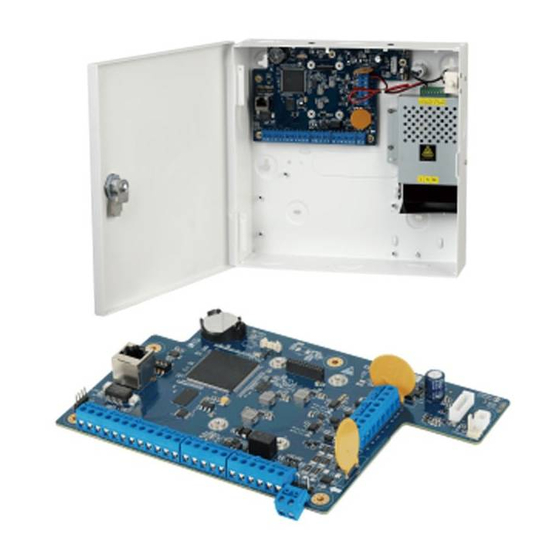
Alarm Control Panel Installer Manual 2 Wiring and Installation This chapter introduces the main ports, wiring connection, and installation of the Alarm Control Panel. Dimension Figure 1-1 Dimension of Control Panel (mm [inch]) Main Board Ports 1.5.1 Overview The PSTN module, 2G module, and 4G are not supplied with standard models, and you should purchase separately if needed. -
Page 11: Ports
Alarm Control Panel Installer Manual Figure 1-2 Main board ports overview 1.5.2 Ports WARNING Only the professionals should be assigned to install the Control Panel Do not operate on the structural components of the Control Panel when it is powered on. - Page 12 Alarm Control Panel Installer Manual Figure 1-3 Grand tour Table 1-2 Function introduction Name Function DIP switch Restores the factory settings. For details, see "1.5.3 DIP Switch." Network port Connects to Ethernet port. LINK indicator Network indicator. ACTIVE indicator Network indicator. Z1–Z8 Zone 1–Zone 8 Ground.
-
Page 13: Dip Switch
Alarm Control Panel Installer Manual Name Function should receive ground connection. Ground. TIP_O, RING_O Telephone connection port TIP_IN, RING_IN Telephone line port ON: OUT_1 is open OUT_1 indicator OFF: OUT_1 is closed ON: OUT_2 is open OUT_2 indicator OFF: OUT_2 is closed Data transmitting indicator of the second group of RS-485 ports. - Page 14 Alarm Control Panel Installer Manual Figure 1-4 DIP switches on the Control Panel 1.5.3.1 Functions DIP 1 and DIP 2: Reserved functions that might be developed in the future. DIP 3: ON represents Italian language, OFF represents English. DIP 4: Enables whether to report the siren tamper event and case tamper event.
-
Page 15: Wiring
Alarm Control Panel Installer Manual DIP 5 DIP 6 Function Security code reset Supervisor code reset (default 1234) Total reset (depends on settings in SYSTEM FUNCTIONS menu) Normal operation Step 2 After setting DIP 5 and DIP 6, to take the setting effect, move the DIP 8 to the ON position. After rebooting is completed, the RS-485 light blinks three times. - Page 16 Alarm Control Panel Installer Manual Figure 1-6 Wiring of detectors...
- Page 17 Alarm Control Panel Installer Manual Figure 1-7 Keypad connection...
-
Page 18: Installation
Alarm Control Panel Installer Manual Installation The Control Panel supports wall-mounting installation. Figure 1-8 Control Panel installation Step 1 Unpack the box and take out the expansion bolts and self-tapping screws. Step 2 Drill screw holes on the mounting surface according to the dimensions as shown in Figure 1-8. Step 3 Insert expansion bolts into the drilled screw holes, and then put in and fasten the self-tapping screws (leave the middle self-tapping screw unfastened). -
Page 19: System Boot-Up
Alarm Control Panel Installer Manual 3 System Boot-Up Setting Keypad Address Every Keypad registered to the Control Panel must have a unique address. When replacing the Keypad, the new Keypad must use the same address as the previous Keypad. Before powering on the system, set an address (range: 1–8) for the Keypad by DIP switches on the Keypad. -
Page 20: Lead-Acid Battery
Alarm Control Panel Installer Manual Access Codes TECHNICIAN: 1961 Supervisor User: 1234 Access is required for Arming: Yes Network Default IP Address: 192.168.1.108 Others 2G/4G is enabled by default P2P is disabled by default. The DMSS app cannot access the Control Panel. ... -
Page 21: About The Keypad
Alarm Control Panel Installer Manual 4 About the Keypad This chapter introduces the dimension, main functions, indicators, keys operations, and installation of the Keypad. 1.13 Dimension Figure 1-9 Dimension (mm [inch]) -
Page 22: The Grand Tour
Alarm Control Panel Installer Manual 1.14 The Grand Tour Figure 1-10 Grand tour Table 1-5 Functions introduction Name Function Show all the system information including management and LCD display programming. For details, see "1.17 Main Interface of LCD Display." Give information about power status, battery status, failures, bypass, LED indicators and alarm status of each Area. -
Page 23: Numeric Keys (From 0 To 9)
Alarm Control Panel Installer Manual Figure 1-11 The keys 1.15.1 Numeric Keys (from 0 to 9) The numeric keys give the functions as below: Type in access codes as required to access programming (TECHNICIAN or user) or to arm/disarm. ... -
Page 24: Key Combination Operations
Alarm Control Panel Installer Manual Function Quick input. For example, if your type in 130, press immediately to confirm the input, otherwise the input will become invalid. Quick jump. For example, if there are 300 logs and you want to view ... -
Page 25: Led Indicators
Alarm Control Panel Installer Manual Function Panic Activation (silent activation or with sirens and Keypad buzzer) On the menu of ZONE TROUBLES, ZONE MANAGER, and CHIME ZONES, press + 1 (F1) to show the Area selection interface where can select the Areas within which to do the searching and + 1 (F1) filtering. -
Page 26: Status
Alarm Control Panel Installer Manual Meaning Icon Color Fault status Green Bypass Alarm status of eight Areas 1.16.2 Status Power LED Indicator ( Glows: The system operates with normal power supply. Slowly flashes: The system does not operate normally due to a lack of power supply, and therefore a ... -
Page 27: Main Interface Of Lcd Display
Alarm Control Panel Installer Manual Glows: The Area is armed. Slowly flashes: The alarm is in progress or the alarm has occurred Quickly flashes: The Area is in alarm condition and the linkage is in progress. This condition ... - Page 28 Alarm Control Panel Installer Manual Symbol Event Partition Arming 1 Partition Arming 2 Upper case P Partition 1 + Partition 2 arming Lower case t Total Forced Arming Upper case A Alarm Entry delay time Exit delay time Area not ready (Zones open) Alarm delay Alarm Message Display During an alarm, the main interface shows the general reason description for the alarm in the first line, for...
-
Page 29: Installation
Alarm Control Panel Installer Manual 1.18 Installation Figure 1-14 Keypad installation Step 1 Loosen the screws on the back of Keypad to remove the rear panel. Pull the cables out of the rear panel. Step 2 Step 3 Drill a hole on the wall①, and put the expansion bolt② through the rear panel to fix it onto the wall. Step 4 Put the self-tapping screws④... -
Page 30: Installer Menu
Alarm Control Panel Installer Manual 5 Installer Menu This Chapter describes the menu operations included in the Installer Menu. 1.19 Entering the Installer Menu To enter the Installer Menu, the TECHNICIAN must be authorized from the User Menu. The default TECHNICIAN code for entering the Installer Menu is 1961. Step 1 Type in the access code (Default Supervisor code1234), and then press The ZONE TROUBLES menu is shown on the LCD display. -
Page 31: Keypads
Alarm Control Panel Installer Manual KEYPADS COMMUNICATOR POWER SUPPLIES WIRED ZONES IN AND ZONES OUTPUTS AREAS SYSTEM FUNCTIONS SYSTEM TIMING SYSTEM TIMERS ACCESS CODES DATE/TIME HOLIDAY TEL NUMBER ... - Page 32 Alarm Control Panel Installer Manual Submenu Setting Establish on which Areas each keypad can control. Area 1 to Area 8 can be assigned individually or in combination. To assign or remove Areas from the keypad, press the corresponding key (1 AREA to 8) and then press .
-
Page 33: Communicator
Alarm Control Panel Installer Manual Submenu Setting Select which areas to adopt rapid arming without entering the access code. RAPID Rapid arming can be allocated to one or more Areas from this keypad. ARMING Press the number of the Area to enable or disable the Area. Press continue. -
Page 34: Power Supplies
Alarm Control Panel Installer Manual Press to alter the options. Press to confirm the setting and move to the next submenu. Table 1-12 Communicator programming settings Submenu Setting PRIORITY Set the call mode to PSTN. Set the maximum number of call attempts that the Communicator will make to the same telephone number. -
Page 35: Wired Zones
Alarm Control Panel Installer Manual Step 4 Press to return to the POWER SUPPLIES menu. Then you can press to move to the next menu or press to exit from the Installer Menu. 1.24 WIRED ZONES Step 1 After entering the Installer Menu, press to scroll up and down until you reach the WIRED ZONES menu. - Page 36 Alarm Control Panel Installer Manual Table 1-13 Wired zone setting Submenu Setting ACTIVE: This wired zone is fully operational. ISOLATE: This wired zone is programmed but permanently bypassed STATE from the system. TEST: This wired zone is operational but does not generate alarms. ...
- Page 37 Alarm Control Panel Installer Manual Submenu Setting activates the help outputs for the area to which the setting is assigned. When it is in an alarm state, the LCD display shows MEDICAL ALARM. Key: The key type zone is used as an auxiliary command to arm/disarm ...
- Page 38 Alarm Control Panel Installer Manual Submenu Setting NO: Establishes that the wired zone is not automatically excludable (it blocks the arming of the Area which it belongs to). YES: Establishes that the wired zone can be automatically bypass permanently until the Area is disarmed.
- Page 39 Alarm Control Panel Installer Manual Submenu Setting commands or direct auxiliary signals. Step 5 Press to return to the WIRED ZONES menu. Then you can continue with programming other wired zones, or press to return to the WIRED ZONES menu from where you can press to move to the next menu or press to exit from the Installer Menu.
-
Page 40: In And Zones
Alarm Control Panel Installer Manual RESTART: This option turns off and immediately re-arms the control panel. This function can be useful to perform PATROL ROUND to disarm one or more areas getting automatic re-arm after the programmed exit time area. TIMER OFF: This option is not subject to TRIGGER, DELAY OR FORCED and works only in the ... - Page 41 Alarm Control Panel Installer Manual Submenu Setting Select the zones that you want to combine the alarm linkage. To select the zone number, type in the number and press to confirm the input. You can also press to adjust the number. The IN AND ZONES can consist of any combination of wired or ...
-
Page 42: Outputs
Alarm Control Panel Installer Manual 1.26 OUTPUTS 1.26.1 Entering OUTPUT Menu Step 1 After entering the Installer Menu, press to scroll up and down until you reach the OUTPUTS menu. See Figure 1-22. Figure 1-22 Outputs Step 2 Press to enter the programming mode. Step 3 Press to select an output that you want to configure, and then press... -
Page 43: Configuring Output Categories
Alarm Control Panel Installer Manual 1.26.2 Configuring OUTPUT Categories On the CATEGORIES submenu, press to select the output category from AREAS, ZONES, LINK, GENERIC, or SYSTEM, and then press to enter the programming mode of output that you selected. Press to alter the options. - Page 44 Alarm Control Panel Installer Manual Submenu Setting ALARM MEMORY: Follows the addition to the memory of a siren alarm being triggered. It remains active until the User reset. READY: Follows the zone ready condition. This can be one or more ...
- Page 45 Alarm Control Panel Installer Manual Submenu Setting The Area output can be programmed to follow the Areas condition for AND or OR mode. If only one area has been assigned, this parameter has NO value. If 2 to 8 areas have been assigned, the behavior of the output must be defined for the presentation of the TYPE event in multiple areas.
- Page 46 Alarm Control Panel Installer Manual Submenu Setting If only one area has been assigned, this parameter has no value. The choice of the output polarity determines the at rest status of the output itself. In practice, the output can be placed in HIHG or LOW electrical status (high status gets more security) ...
- Page 47 Alarm Control Panel Installer Manual Submenu Setting The choice of the output polarity determines the at rest status of the output itself. In practice, the output can be placed in HIGH or LOW electrical status (high status gets more security) DIRECT ...
-
Page 48: Areas
Alarm Control Panel Installer Manual Item Setting If you press to confirm the option, you will exit and the output will immediately take on the selected polarity. SYSTEM Outputs The system outputs follow on from general system conditions regardless of the areas. Table 1-20 System outputs programming Item Setting... - Page 49 Alarm Control Panel Installer Manual Step 3 Press to select the Area that you want to configure, and then press By pressing + 2, you can enter the EDITING mode for changing the description of Area. Step 4 Configure the settings. See Table 1-21. Press to alter the options.
-
Page 50: System Functions
Alarm Control Panel Installer Manual Step 5 Press to return to the AREAS selection menu. Then you can continue with programming other AREAS, or press to return to the AREAS menu from where you can press to move to the next menu or press to exit from the Installer Menu. - Page 51 Alarm Control Panel Installer Manual Submenu Setting Trouble alarm response mode. Set the TROUBLE ALARM (PSTN disconnection, GSM failure, antenna TROU AL MODE tamper, AC loss, battery loss, battery voltage failure, SIM expiration, time display problem) response type: SILENT, BUZZER, SIREN, and BUZ/SIR. COM trouble alarm.
-
Page 52: System Timing
Alarm Control Panel Installer Manual Submenu Setting FIRMWARE VER Show the firmware version of the Control Panel. Step 4 Press to return to the SYSTEM FUNCTIONS menu. Then you can press to move to the next menu or press to exit from the Installer Menu. -
Page 53: System Timers
Alarm Control Panel Installer Manual Submenu Setting Set the disarming time period for the patrol user. If you set the time to 0, PATROL DISARM disarming is not allowed. Set the time period for the test mode of zone. After this period, the zone ZONE IN TEST returns to ACTIVE. -
Page 54: Access Codes
Alarm Control Panel Installer Manual Submenu Setting Type in the start time for automatic arming, access code duration, and LINK OUTPUT duration. Press the corresponding keys to enter the desired value and then press START TIME to confirm the value. You can also press to change the value. -
Page 55: Configuring Authority Level
Alarm Control Panel Installer Manual User type Authority level Operations only on the Areas that are assigned to Master. The Master can Master only change his own code and those of a lower level and access the User Menu up to option 9. Operations only on the Areas that are assigned to User. - Page 56 Alarm Control Panel Installer Manual Submenu Setting AREAS Establish which Areas the access code can operate. PART1 Establish whether the access code can operate Partition 1 and Partition 2 arming types under the selected Areas. PART2 Establish whether the access code has the authority to arm or disarm the Control Panel.
-
Page 57: Configuring Access Code
Alarm Control Panel Installer Manual Submenu Setting Establish whether the access code has the authorization to activate command outputs (maximum 4) and the number of outputs to be activated. LINK 1, 2, 3, 4 This function is valid only when the Link type is selected in the OUTPUTS menu of Installer Menu. -
Page 58: Date/Time
Alarm Control Panel Installer Manual Customizing the Description of Access Code You can customize the factory default description (Access Code no.) if needed. Step 1 On the access code submenu, for example, Access Code 2, press + 2 (F2) to enter the editing status. -
Page 59: Holiday
Alarm Control Panel Installer Manual Submenu Setting This function is supported only when the SIM TYPE is set to CONTRACT in the COMMUNICATIOR menu. Set the expiration date of the SIM card installed in the GSM telephone communicator. It is suggested to set a minimum period of 10 days before the real ... -
Page 60: Tel Number
Alarm Control Panel Installer Manual 4: Holiday end month 5: Holiday year Step 4 Type in the value and press to confirm the setting, or press to change the value, and then move on to the next field. Step 5 Press to return to the holiday selection menu. - Page 61 Alarm Control Panel Installer Manual Table 1-28 Telephone number setting Item Setting ACTIVE: Allow the telephone number to be linked. STATE ISOLATE: The telephone number is programmed but temporarily not used. YES: When the alarm event occurs, if the event is programmed to link ...
-
Page 62: Remote Service
Alarm Control Panel Installer Manual Submenu Setting Type in the specific time when user wants to receive SMS text for SYSTEM SMS TIME status and/or CREDIT SIM. Press 1 to 8 to select the alarm event from which Area can be sent to this AREA SMS number. -
Page 63: Monitor Station
Alarm Control Panel Installer Manual 1.36 MONITOR STATION Step 1 After entering the Installer Menu, press to scroll up and down until you reach the MONITOR STATION menu for digital Contact ID alarm centralization parameters (up to 3 Monitor Station numbers). See Figure 1-34. Figure 1-34 Monitor station Step 2... - Page 64 Alarm Control Panel Installer Manual Figure 1-35 Vocal messages Step 2 Press to enter the programming mode. Step 3 Press to select the vocal message that you want to configure, and then press Step 4 Configure the settings. See Table 1-31. Press to alter the options.
- Page 65 Alarm Control Panel Installer Manual Submenu Setting If select AREA in CATEGORIES, then you can select an event from the following. When the selected event is triggered, the 2G/4G module will make a voice call to the choosen telephone number. ...
- Page 66 Alarm Control Panel Installer Manual Step 2 Provide a correct password (it will match with a valid one stored in a control panel). The password must be the same as the one used locally by the keypad but here must have 6 digits. If it has 4 or 5 digits on the keypad, prefix it with zeros before the code to bring it to 6 digits (for example, 001234).
- Page 67 Alarm Control Panel Installer Manual Figure 1-36 Vocal message flow...
-
Page 68: Sms Messages
Alarm Control Panel Installer Manual Figure 1-37 Voice prompts during entering password process 1.38 SMS MESSAGES If equipped of the 2G/4G module, the Alarm Control Panel is able to transmit and receive SMS as command and request to state. Step 1 After entering the Installer Menu, press to scroll up and down until you reach the SMS MESSAGES menu. - Page 69 Alarm Control Panel Installer Manual Then you can continue with programming other SMS messages, or press to return to the SMS MESSAGES menu from where you can press to move to the next menu or press to exit from the Installer Menu. To send SMS messages as remote control command, e.g.
- Page 70 Alarm Control Panel Installer Manual — Alarm Info (22/05/18 13:13)– 4.1.1 Wired zone1 alarm Z1_Area:12345678 — Alarm Info (22/05/18 13:13)– 4.2.1 Wired zone1 tamper alarm Z1 Tamper_Area:12345678 — System Info (22/05/18 13:13)– 4.4.1 Main power Failure Main Power Failure — System Restore (22/05/18 13:13)–...
- Page 71 Alarm Control Panel Installer Manual Triggered by Emergency Restore(22/05/18 13:13)– zone1 Duress Restore:Z1_Area:12345678 Triggered by Emergency Info(22/05/18 13:13)– keypad Robbery Alarm 4.13.1 Robbery Alarm Triggered by Emergency Info(22/05/18 13:13)– zone1 Robbery Alarm:Z1_Area:12345678 Triggered by Emergency Restore(22/05/18 13:13)– keypad Robbery Restore 4.13.2 Robbery Alarm Restore Triggered by...
-
Page 72: Digital Format
Alarm Control Panel Installer Manual 1.39 DIGITAL FORMAT Step 1 After entering the Installer Menu, press to scroll up and down until you reach the DIGITAL FORMAT menu. See Figure 1-39. Figure 1-39 Digital format Step 2 Press to enter the programming mode. Step 3 Configure the programming settings. - Page 73 Alarm Control Panel Installer Manual Category Event No. Setting CID Code Reserved Reserved System Date/Time Failure SIM Failure TCP Network Failure Autotest Failure (For example, Fuses) Keypad Failure Module report code group Keypad Tamper Panic Alarm Duress Alarm Emergency Report Robbery Alarm Code Group Medical Alarm...
-
Page 74: Tcp/Ip Network
Alarm Control Panel Installer Manual Category Event No. Setting CID Code Wired Zone 3 Tamper Wired Zone 4 Tamper Wired Zone 5 Tamper Wired Zone 6 Tamper Wired Zone 7 Tamper Wired Zone 8 Tamper Wired Zone 1 Exclusion Wired Zone 2 Exclusion Wired Zone 3 Exclusion Wired Zone 4 Exclusion Wired Zone 5 Exclusion... -
Page 75: Log Event
Alarm Control Panel Installer Manual Submenu Setting Configure this setting only if DHCP is set to NO. IP ADDRESS Set the IP address that the control panel will have within the network. Consult the network administrator if you do not know the details. Configure this setting only if DHCP is set to NO. -
Page 76: 4G Module
Alarm Control Panel Installer Manual Step 5 Press to return to the log event selection menu. Then you can continue with viewing other log events, or press to return to the LOG EVENT menu from where you can press to move to the next menu or press to exit from the Installer Menu. - Page 77 Alarm Control Panel Installer Manual Step 4 Press to return to the LANGUAGE menu. Then you can press to move to the next menu or press to exit from the Installer Menu.
-
Page 78: Alarm Config Tool
Alarm Control Panel Installer Manual 6 Alarm Config Tool The Alarm Config Tool is for Installers to configure alarm control parameters. 1.44 Introducing the Main Interface Figure 1-47 Main interface Table 1-38 Main interface introduction Name Description Includes two menus: Setting and Update Device. For Menu details, see "1.45 Setting"... -
Page 79: Setting
Alarm Control Panel Installer Manual Name Description You can configure parameters and enter related information Parameters for activators, modules, I/O, system, communication, digital prompt, and log events. 1.45 Setting In the Setting Module, you can configure parameters that are related to clients, utility, installers and language. - Page 80 Alarm Control Panel Installer Manual Modifying a Client You can modify information that you entered. Step 1 Move your mouse cursor to a row, and click the left mouse button. The row you clicked turns orange. Step 2 Click Modify. The Modify Client Profile interface is displayed.
- Page 81 Alarm Control Panel Installer Manual Figure 1-49 Client Step 2 Enter the searching options. Step 3 Click Search. The clients you want to search will be shown. 1.45.1.3 Configuring Client Parameters Activator In Activator, you can configure parameters for keypads and access codes. Keypads On the Client interface, select Activator >...
- Page 82 Alarm Control Panel Installer Manual On the Client interface, select Activator > Access Codes, and the Access Codes interface is shown. See Figure 1-51. You can start configuring the parameters if needed, and the settings will be effective in real time.
- Page 83 Alarm Control Panel Installer Manual Figure 1-53 Wired zones In And Zones On the Client interface, select I/O > In And Zones, and the In And Zones interface is shown. See Figure 1-54. You can start configuring the parameters if needed, and the settings will be effective in real time. Figure 1-54 In And Zones Outputs...
- Page 84 Alarm Control Panel Installer Manual Figure 1-55 Output System In System, you can configure parameters for Areas, SYS Functions, 2G/4G SYS Timings, Timers, and Holidays. Areas On the Client interface, select System > Areas, and the Areas interface is shown. See Figure 1-56. You can start configuring the parameters if needed, and the settings will be effective in real time.
- Page 85 Alarm Control Panel Installer Manual Figure 1-57 SYS Functions 2G/4G On the Client interface, select System > 2G/4G, and the 2G/4G interface is shown. See Figure 1-58. You can start configuring the parameters if needed, and the settings will be effective in real time. Figure 1-58 2G/4G SYS Timings...
- Page 86 Alarm Control Panel Installer Manual Figure 1-60 Timers Holidays On the Client interface, select System > Holidays, and the Holidays interface is shown. See Figure 1-61. You can start configuring the parameters if needed, and the settings will be effective in real time. Figure 1-61 Holidays Communication...
- Page 87 Alarm Control Panel Installer Manual Telephone No. On the Client interface, select Communication > Telephone No, and the Telephone No interface is shown. See Figure 1-63. You can start configuring the parameters if needed, and the settings will be effective in real time. Figure 1-63 Telephone No At the top right corner of Figure 1-63, you can select Voice, SMS, or SMI Number as Telephone No.
- Page 88 Alarm Control Panel Installer Manual Figure 1-65 Setting SYS Event On the Client interface, select Digital Port > SYS Event, and the SYS Event interface is shown. See Figure 1-66. You can start configuring the parameters if needed, and the settings will be effective in real time.
- Page 89 Alarm Control Panel Installer Manual Figure 1-67 Module Event Emergency Event On the Client interface, select Digital Port > Emergency Event, and the Emergency Event interface is shown. See Figure 1-68. You can start configuring the parameters if needed, and the settings will be effective in real time.
- Page 90 Alarm Control Panel Installer Manual Figure 1-69 Emergency Event Zones Event On the Client interface, select Digital Port > Zones Event, and the Zones Event interface is shown. See Figure 1-70. You can start configuring the parameters if needed, and the settings will be effective in real time.
-
Page 91: Utility
Alarm Control Panel Installer Manual Figure 1-71 Log events Table 1-39 Functions of buttons Name Function Click Read Main Panel, you can read logs recorded in the alarm Read main panel control panel. Click Read Archived, you can read logs that were saved to your Read archived computer. -
Page 92: Language
Alarm Control Panel Installer Manual Figure 1-73 Input Installer Code 1.45.4 Language Click Language, and the Language box is shown. See Figure 1-74Figure 1-57. You can select English or Italian. Figure 1-74 Language 1.46 Updating Device Keep the power supply during upgrading; otherwise the Alarm Control Panel might not work and must be sent back to factory for repair. -
Page 93: Using Dmss Plus App
Alarm Control Panel Installer Manual 7 Using DMSS Plus App You can remotely manage the Alarm Control Panel from DMSS Plus App. 1.47 Installing DMSS Plus App Use your smart phone to scan the following QR code to download and install DMSS Plus App. Android OS 1.48 Adding Alarm Control Panel... - Page 94 Alarm Control Panel Installer Manual Figure 1-77 Add alarm device Step 3 Tap Alarm Control Panel > P2P. The P2P interface is displayed. See Figure 1-78. Figure 1-78 Step 4 Enter a name, serial number, and password to connect the alarm control panel, and then tap View Alarm Hub.
-
Page 95: Area Arming And Disarming
Alarm Control Panel Installer Manual Figure 1-79 Alarm control panel You can also add alarm control panels by scanning the bar code on the Control Panel or by scanning the QR code on the carton. 1.49 Area Arming and Disarming Take Area 1 arming as an example. -
Page 96: Zone Settings
Alarm Control Panel Installer Manual Figure 1-80 Area 1 Step 2 Select arming type from Total, P1, and P2. P1 and P2 can be selected at the same time. Take selecting Total as an example. See Figure 1-81. Figure 1-81 Total arming To disarm the area, on the Area 1 interface, tap Disarm. - Page 97 Alarm Control Panel Installer Manual Step 1 Tap 0 zone open. The protection zones are displayed. See Figure 1-82. Figure 1-82 Protection zones Step 2 Tap Zone 1. The Zone 1 interface is displayed. See Figure 1-83. Figure 1-83 Zone 1 Step 3 Configure the Zone 1 parameters.
-
Page 98: Viewing Linked Ipc Channels
Alarm Control Panel Installer Manual Detector Status: Indicates the detector status that includes normal, open, tamper, anti-mask, and short-circuit. Bypass: Switch the button to turn it to , then this zone will be bypassed. IPC Linkage: Tap to select an IPC channel, for example, select Channel 01, and then tap Preview Linked IPC Video to enter the real-time monitoring interface. -
Page 99: Siren Output Settings
Alarm Control Panel Installer Manual Figure 1-85 Live preview of linked IP cameras 1.52 Siren Output Settings On the Alarm Control Panel interface, tap the PGM tab. The siren output setting interface is displayed, see Figure 1-86. You can edit the name of output and enable or disable it. Figure 1-86 Siren output... -
Page 100: Appendix 1 Technical Specification
Alarm Control Panel Installer Manual Appendix 1 Technical Specification Appendix table 1-1 Technical specification Parameter DHI-ARC3008C, ARC3008C, DH-ARC3008C, OEM-ARC3008C Main High Performance Industrial Embedded Microcontroller. processor Embedded LINUX. System Simultaneously handle multiple alarm events and conduct the System source network operations. - Page 101 Alarm Control Panel Installer Manual Parameter DHI-ARC3008C, ARC3008C, DH-ARC3008C, OEM-ARC3008C Supports 100 users. User Number and Supports 7 user levels: Supervisor, Manager, Master, User, management level of users Temporary, Duress, and Patrol. Supports 1 TECHNICIAN. Main power 220V AC/0.19A Standby...
-
Page 102: Appendix 2 Keypad Buzzer Sound
Alarm Control Panel Installer Manual Appendix 2 Keypad Buzzer Sound Appendix table 2-1 Keypad sound Buzzer sound Description One slight beep Keypad pressing. One beep Menu entering. Switching between the first menu and the last menu after login the system. Continuous three beeps ... -
Page 103: Event Log Messages
Alarm Control Panel Installer Manual Appendix 3 Event Log Messages Appendix table 3-1 Event log messages Event message Description Event message Description P1.Arm Partitial1 Arm Alarm P2.Arm Partitial2 Arm S.T.RES Siren Tamper Restore AL.PAN. Panic Alarm AL.S.T Siren Tamper Alarm AL.ROB. -
Page 104: Appendix 4 Installer Menu Map
Alarm Control Panel Installer Manual Appendix 4 Installer Menu Map KEYPADS Keypad 1–8 STATE AREA SHOW EVENTS TAMPER TROUBLE RAPID BUZ.ON/OFF BUZ.ENTRY BUZ.EXIT BUZ.ALARM BUZ.CHIME KEYPAD BEEP BACKLIGHT BUS ERRORS COMMUNICATOR PRIORITY ATTEMPTS PSTN TROU GSM TROU SIM TYPE OPERATOR NUM SMS INSTRUCTION POWER SUPPLIES TROUBLE... - Page 105 Alarm Control Panel Installer Manual Wired Zone 1–8 STATE TYPE TERMINATION AREA BYPASS PARTITION1 PARTITION2 AUTO BYPASS ALARM ALARM CYCLE ALARM REPEAT OUTPUT LINK IN AND ZONES IN AND ZONE 1–8 STATE ZONE1 ZONE2 IN SEQUENCE TRIGGERS AND TIME OUTPUTS Output 1–40 STATE CATEGORIES...
- Page 106 Alarm Control Panel Installer Manual AREAS Area 1–8 ENTRY D1 ENTRY D2 EXIT DELAY BUZ DUR BUZ DELAY IN AND AREA TIMER 1 TIMER 2 TIMER 3 TIMER 4 CLIENT ID SYSTEM FUNCTIONS MAX AL CYCLE SYS AL CYCLE PANEL TAMPER SIREN TAMPER TAMP AL MODE TROU AL MODE...
- Page 107 Alarm Control Panel Installer Manual SIR AL DLY CHIME AL DUR FIRE AL DUR PANIC AL DUR HOLDUP AL DU MEDICL AL DU AC LOSS DLY PATROL DISARM ZONE IN TEST PROGRAM TIME SYSTEM TIMERS Timer 1–8 STATE TYPE START TIME DAYS HOLIDAYS ARMING...
- Page 108 Alarm Control Panel Installer Manual DATE SOL TO LEG LEG TO SOL EXPIRE HOLIDAY Holiday 1–20 TIME TEL NUMBER TEL NUM Tel number 1–8 STATE STOP CYCLE SMS NUM SMS number 1–8 STATE SYSTEM CREDIT SMS TIME AREA EVENT SIN NUM REMOTE SERVICE STATE MONITOR STATION...
- Page 109 Alarm Control Panel Installer Manual CATEGORIES AREA ZONE SYSTEM SMS MESSAGES SMS message 1–377 DIGITAL FORMAT TCP/IP NETWORK DHCP IP ADDRESS SUBNET GATEWAY PORT REMOTE CONF LOG EVENT 2G/4G MODULE 2G/4G ENABLE P2P ENABLE LANGUAGE...
-
Page 110: Appendix 5 Faq
Alarm Control Panel Installer Manual Appendix 5 Q: The Alarm Control Panel does not boot up after it is powered on. A: Possible reasons as below. Power input is incorrect. AC adapter damage that causes there is no 14.5V DC output. ... - Page 111 In conclusion, if you do not want the detector to generate alarms during exit delay countdown, set the protection zone to be Delay or Path type. ZHEJIANG DAHUA VISION TECHNOLOGY CO., LTD. Address: No.1199, Bin'an Road, Binjiang District, Hangzhou, P.R. China...
Need help?
Do you have a question about the DHI-ARC3008C and is the answer not in the manual?
Questions and answers