Advertisement
Available languages
Available languages
Table of Contents
- 1 Table of Contents
- 2 Package Contents
- 3 Hardware Contents
- 4 Preparation
- 5 Safety Information
- 6 Assembly Instructions
- 7 Downrod Style Fan Mounting
- 8 Closemount Style Fan Mounting
- 9 Closemount Style Fan Mounting
- 10 Care and Maintenance
- 11 Troubleshooting
- 12 Warranty
- 13 Replacement Parts List
- Download this manual
Harbor Breeze
is a registered trademark of LF,
®
LLC. All Rights Reserved.
ATTACH YOUR RECEIPT HERE
Serial Number
Purchase Date
Questions, problems, missing parts? Before returning to your retailer,
call our customer service department at 1-800-643-0067, 8 a.m. - 6 p.m., EST,
Monday - Thursday, 8 a.m. - 5 p.m., EST Friday
PB18424
ITEM #0076253
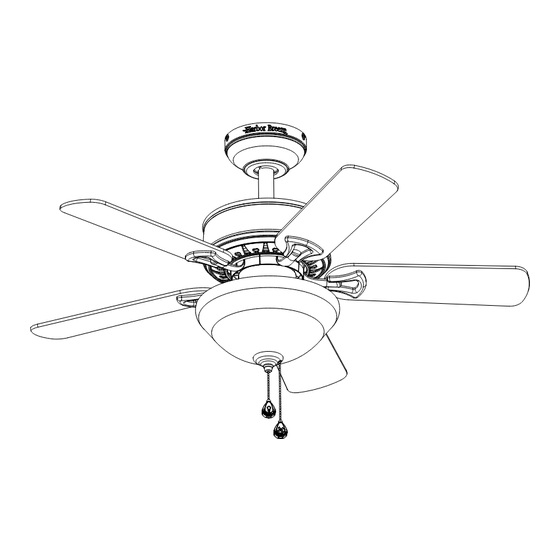
CLASSIC STYLE
CEILING FAN
MODEL #00892
UL MODEL #CSS36
Español p. 19
1
Advertisement
Table of Contents

Related Manuals for Harbor Breeze 00892


Summary of Contents for Harbor Breeze 00892
- Page 1 ITEM #0076253 CLASSIC STYLE CEILING FAN MODEL #00892 UL MODEL #CSS36 Harbor Breeze is a registered trademark of LF, ® Español p. 19 LLC. All Rights Reserved. ATTACH YOUR RECEIPT HERE Serial Number Purchase Date Questions, problems, missing parts? Before returning to your retailer, call our customer service department at 1-800-643-0067, 8 a.m.
-
Page 2: Table Of Contents
TABLE OF CONTENTS PACKAGE CONTENTS Package Contents...................... 3 Hardware Contents..................... 4 Preparation ....................... 4 Safety Information....................... 5 Assembly Instructions ....................6 Downrod style fan mounting ..................7 Closemount style fan mounting ................. 8 Operating Instructions ....................16 Care and Maintenance ..................... 17 Troubleshooting...................... -
Page 3: Hardware Contents
HARDWARE CONTENTS SAFETY INFORMATION READ AND SAVE THESE INSTRUCTIONS Please read and understand this entire manual before attempting to assemble, operate or install the product. • When using an existing outlet box, be sure the box is securely attached to the building structure and can support the full weight of the fan, so to avoid potential serious injury or death. -
Page 4: Assembly Instructions
ASSEMBLY INSTRUCTIONS ASSEMBLY INSTRUCTIONS 1. Determine mounting method to use. 4. Install the mounting bracket (A) to the outlet box (not included), sliding the mounting bracket (A) Outlet A - Downrod Mount (standard or angled ceiling) over the two outlet box screws (not included). B - Closemount (normal ceiling only) Securely tighten the two outlet box screws. -
Page 5: Closemount Style Fan Mounting
DOWNROD STYLE FAN MOUNTING CLOSEMOUNT STYLE FAN MOUNTING 3. Loosen the two set screws from the yoke on 2. Remove three of the six screws and the top of the motor housing (G). Slip downrod lockwashers (every other one) securing assembly (D) into housing yoke, aligning holes the motor collar to the top of the fan motor clip... -
Page 6: Closemount Style Fan Mounting
WIRING FINAL INSTALLATION 1. Connect the BLACK and BLUE wires from 2. Install the two screws that were removed in the fan to the house BLACK wire. Connect previous step and tighten securely. Supply Circuit screw the WHITE wire from fan to the house WHITE outlet box wire. - Page 7 FINAL INSTALLATION FINAL INSTALLATION 5. Fasten the blade bracket (E) to the motor by 8. Remove the plug from the center hole in the inserting the alignment post into the slot on the switch housing cover (I). bottom of the motor housing (G) and tightening the blade bracket screws with washers.
- Page 8 FINAL INSTALLATION FINAL INSTALLATION 11. Connect the white wire from the light kit (J) 14. Remove the rubber washer, hex nut, bowl to the white wire from the switch housing (H). cap (L) and finial (M) from the light kit (J). Connect the black wire from the light kit (J) to the blue wire from the switch housing (H).
-
Page 9: Care And Maintenance
OPERATING INSTRUCTIONS CARE AND MAINTENANCE • To reduce the risk of fire, electric shock or injury to persons, care and maintain this fan. PULL CHAIN: • Important: Shut off main power supply before beginning any maintenance. 1. The fan pull chain is for motor speed control: High, Medium, Low and Off. Pull the chain once for each position. -
Page 10: Warranty
WARRANTY The manufacturer warrants this fan to be free from defects in workmanship and material present at time of shipment from the factory for lifetime limited from the date of purchase. This warranty applies only to the original purchaser. The manufacturer agrees to correct such defect at no charge or at our option replace the ceiling fan with a comparable or superior model. - Page 11 ARTÍCULO #0076253 VENTILADOR DE TECHO CLASSIC STYLE MODELO #00892 MODELO UL #CSS36 Harbor Breeze es una marca registrada de LF, ® LLC. Todos los derechos reservados. ADJUNTE SU RECIBO AQUÍ Número de serie Fecha de compra ¿Preguntas, problemas, piezas faltantes? Antes de volver a la tienda, llame a nuestro Departamento de Servicio al Cliente al 1-800-643-0067, de lunes a jueves de 8 a.m.
- Page 12 ÍNDICE CONTENIDO DEL PAQUETE Contenido del paquete....................21 Aditamentos .......................22 Preparación....................... 22 Información de seguridad...................23 Instalación inicial ...................... 24 Montaje del ventilador en estilo de varilla..............25 Montaje del ventilador en estilo cerrado..............26 Instrucciones de funcionamiento ................34 Cuidado y mantenimiento ..................35 Solución de problemas....................35 Garantía........................36 Lista de piezas de repuesto ..................
- Page 13 ADITAMENTOS INFORMACIÓN DE SEGURIDAD LEA Y GUARDE ESTAS INSTRUCCIONES Lea y comprenda completamente este manual antes de intentar ensamblar, usar o instalar el producto. • Si utiliza una caja de salida existente, asegúrese de que esté bien sujeta a la estructura del edificio y que pueda sostener el peso del ventilador, a fin de evitar posibles lesiones graves o la muerte.
- Page 14 INSTALACION INICIAL INSTALACION INICIAL 1. Determine el método de instalación que 4. Instale la abrazadera de montaje (A) en la utilizará. caja de salida (no se incluyen), deslizando la Caja de abrazadera de montaje (A) por los dos tornillos salidad A - Montaje de varilla (techos normales o en de la caja de salida (no se incluyen.
- Page 15 MONTAJE DEL VENTILADOR EN ESTILO DE VARILLA MONTAJE DEL VENTILADOR EN ESTILO CERRADO 3. Suelte los dos tornillos de fijación de la 2. Retire tres de los seis tornillos y arandelas horquilla en la parte superior de la carcasa del de seguridad (uno por medio) fijando el collar sujetador motor (G).
- Page 16 CABLEADO INSTALACION FINAL 1. Conecte el cable NEGRO y el AZUL del ventilador 2. Vuelva a colocar los dos tornillos que Circuito de al cable NEGRO de la caja. Luego, conecte el cable se retiraron en el paso anterior y apriete suministro BLANCO del ventilador al cable BLANCO de la caja.
- Page 17 INSTALACION FINAL INSTALACION FINAL 5. Fije la abrazadera del aspa (E) al motor 8. Retire el tapón del agujero central de la insertando el poste de alineación en la ranura cubierta de la carcasa del interruptor (I). de la parte inferior de la carcasa del motor (G) y ajuste los tornillos de las abrazaderas de aspa con las arandelas.
- Page 18 INSTALACION FINAL INSTALACION FINAL 11. Conecte el conductor blanco del kit de 14. Retire la arandela de goma, la tuerca iluminación (J) con el conductor blanco hexagonal, la tapa de la pantalla (L) y el de la carcasa del interruptor (H). Conecte remate (M) del kit de iluminación (J).
- Page 19 INSTRUCCIONES DE FUNCIONAMIENTO CUIDADO Y MANTENIMIENTO • Para reducir el riesgo de incendios, descargas eléctricas o lesiones personales, trate 1. CADENA DE TIRO: este ventilador con cuidado y realice el mantenimiento correspondiente. 1. La cadena de tiro del ventilador es para controlar la velocidad del motor: Alto, medio, •...
- Page 20 GARANTÍA El fabricante garantiza que este ventilador no presenta defectos de fabricación ni en los materiales presentes en el momento del transporte desde la fábrica, durante un período limitado de por vida a partir de la fecha de compra. Esta garantía es válida sólo para el comprador original. El fabricante acepta reparar dichos defectos sin cargo o, según nuestro criterio, reemplazar el ventilador de techo por un modelo comparable o superior.
Need help?
Do you have a question about the 00892 and is the answer not in the manual?
Questions and answers