Table of Contents
Advertisement
EDV705HQWA
EDV805JQWA
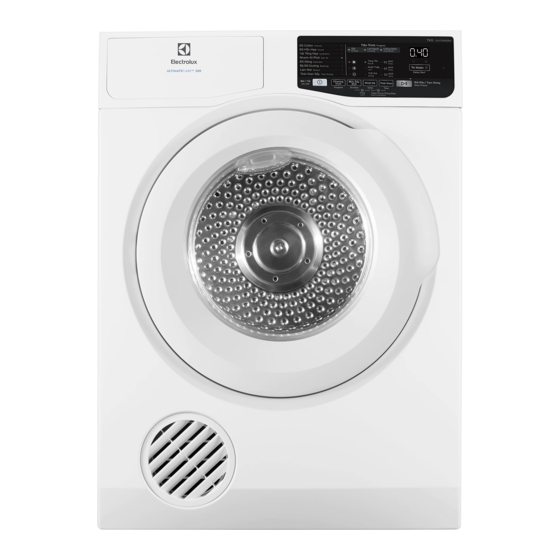
Tumble Dryer
EN
User Manual
EASY WAY TO REGISTER
PRODUCT WITH YOUR SMARTPHONE
Photograph the camera icon located
1
on your product's serial tag, including
the 4 dots ( ).
Easy register with your smartphone
1. Photograph the camer a icon, including the 4 dots(
).
2.
Send it in via Line, Facebook Messenger or go online.
@eluxreg
eluxreg
eluxreg.com
Send it in via Line, Facebook Messenger
2
or go online.
@eluxreg
Enjoy many privileges.*
3
YOUR
12345678
eluxreg
eluxreg.com
*Terms and conditions apply.
2
Advertisement
Table of Contents

Summary of Contents for Electrolux EDV705HQWA
- Page 1 EDV705HQWA EDV805JQWA User Manual Tumble Dryer EASY WAY TO REGISTER YOUR PRODUCT WITH YOUR SMARTPHONE Photograph the camera icon located on your product’s serial tag, including the 4 dots ( ). Easy register with your smartphone 1. Photograph the camer a icon, including the 4 dots( Send it in via Line, Facebook Messenger or go online.
-
Page 2: Table Of Contents
WE’RE THINKING OF YOU Thank you for purchasing an Electrolux appliance. You’ve chosen a product that brings with it decades of professional experience and innovation. Ingenious and stylish, it has been designed with you in mind. So whenever you use it, you can be safe in the knowledge that you’ll get great results every time. -
Page 3: Important Safety Instructions
ENGLISH IMPORTANT SAFETY INSTRUCTIONS 1.1 Dryer Safety 1.2 Fire Hazards Failure to follow these safety instructions could Some fabrics are not suitable for tumble drying. The following MUST NOT be placed in your damage the dryer or your clothes dryer due to the risk of a fire or an explosion : You may then not be covered by warranty for this damage. -
Page 4: Cleaning The Lint Filter
Your load, when dry must not exceed the rated LINT BUILD-UP IS A FIRE HAZARD capacity A clean lint filter reduces drying times, saves 7.0 kg for the EDV705HQWA energy and avoids overheating. Overheating 8.0 kg for the EDV805JQWA dryer may also damage your clothes. -
Page 5: Installation Instructions
ENGLISH INSTALLATION INSTRUCTIONS Inverted Place Dryer Program Inverted Mode You can setting inverted mode follow instruction on Mains Cable page 6. Air Inlet Duct Normal Place Dryer Outlet Cover Back Feet Worktop Control Panel Upside Button on off Air Flow Down Door Handle Door... - Page 6 Inverted Mounting Mode To set the appliance to Inverted Mounting Mode, press and hold Program & Time buttons for 3 seconds. and waiting play Tone KeyAccept to confirm and the inverted mode will operate on display. Hold touch pad Program and Time 3 seconds.
-
Page 7: Use
ENGLISH 3.1 The Control Panel 90 mins. 60 mins. ON/OFF BUTTON Dryness Option Guidelines: This button is used to switch the Level of dryness Type of fabric appliance ON or OFF. Extra Dry Cotton and linen PROGRAM SELECTOR (bathrobes, Ideal for towels bath towels) or similar BUTTON... - Page 8 DISPLAY 6.3 ANTI CREASE CYCLE IN PROGRESS The display shows the following information ● This process will operate after end of cycle to protect wrikle of clothes, After selecting a program, the After Cooling process finish and ● duration is displayed in hours display show “END”...
- Page 9 ENGLISH LOCK ( ) CHANGE AND CANCEL DELAY START This option use for protecting change the program when the machine still operate After user set delay start for waiting ● ON/OFF button user can use. operate machine. Change time To Activate “LOCK” Press Start/Pause and press Delay ●...
-
Page 10: Operating Sequence
3.2 Operating Sequence See program table guides for load size info. Step 1 * Do not select the “Extra Dry” option for Load your dryer loosely until it is no more delicates fabric such polyester as than TWO THIRDS FULL. Clothes must shrinking may occur. -
Page 11: Hints
ENGLISH Checking the Load WARNING: Never stop a tumble dryer before the end of the drying cycle To check the dryness or add clothes during the unless all items are quickly removed cycle, simply open the door. The dryer will and spread out so that the heat is beep several times indicating the door is open. - Page 12 For best results, sort the load according to To avoid static charge when drying is complet- fabric. Such as heavy items which may take ed, use either a fabric softener when you are longer to dry, eg. towels, flannelette sheets, washing the laundry or a fabric conditioner etc.
-
Page 13: Troubleshooting
ENGLISH TROUBLESHOOTING 5.1 Troubleshooting Possible Failures Check the points listed here before you call for Certain problems are due to lack of help, and make sure that you have followed the simple maintenance or oversights, which Important safety Instructions on pages 3 and 4. can be solved easily without calling out an engineer. -
Page 14: Customer Center
Should you require further instructions in the use and care of your clothes dryer please contact the CUSTOMER CENTER on the phone number listed below: 5.2 Customer Center Electrolux Customer Care 10310 Plaza Kuningan - Menara Utara 2 Fl. Suite 201 JI. HR. Rasuna Said Kav. -
Page 15: Technical Data
ENGLISH 6. TECHNICAL DATA Worktop Control Panel Button on off Door Handle Door Exhaust Grille Dimensions (H/W/D) 850x600x610 mm Power supply (Voltage / Frequency) 220-240 V / 50 Hz Total power (Heater/Motor) 1500/150 W Minimum fuse protection 10 A...


Need help?
Do you have a question about the EDV705HQWA and is the answer not in the manual?
Questions and answers