Advertisement
Table of Contents
- 1 Table of Contents
- 2 Overview
- 3 Preset Mode
- 4 Custom Mode
- 5 Timeline, Bigsky & Mobius Mode
- 6 Tap, Fav, Boost & Speed Mode
- 7 Combo Mode
- 8 Appendix
- 9 Preset Mode Pedal Setup
- 10 Timeline, Bigsky & Mobius Mode Setup
- 11 Tap, Fav, Boost & Speed Mode Pedal Setup
- 12 Compatibility Chart
- 13 Specifications
- 14 Warranty
- Download this manual
Advertisement
Table of Contents

Subscribe to Our Youtube Channel
Summary of Contents for Strymon MultiSwitch Plus
- Page 1 USER MANUAL...
-
Page 2: Table Of Contents
MultiSwitch Plus - Extended Control Table of Contents OVERVIEW PRESET MODE CUSTOM MODE TIMELINE, BIGSKY & MOBIUS MODE TAP, FAV, BOOST & SPEED MODE COMBO MODE APPENDIX PRESET MODE PEDAL SETUP TIMELINE, BIGSKY & MOBIUS MODE SETUP TAP, FAV, BOOST & SPEED MODE PEDAL SETUP... -
Page 3: Overview
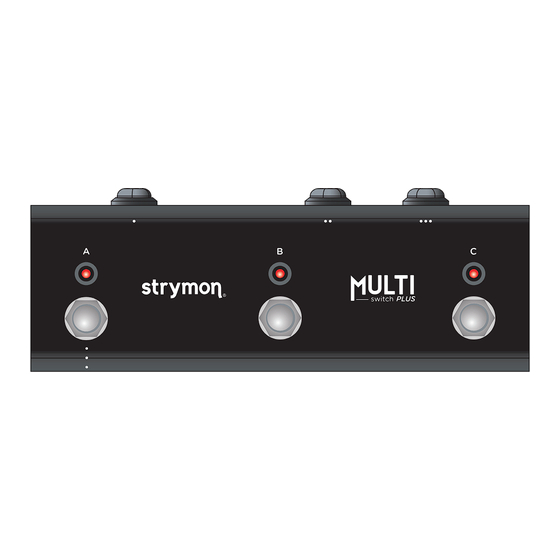
MultiSwitch Plus - Extended Control Overview MultiSwitch Plus enhances your ability to control Strymon pedals at your feet without the complexity of MIDI. MultiSwitch Plus has three LEDs, output jacks, footswitches. OUTPUT JACKS The output jacks allow commands to be sent to your pedals and provide power from these pedals. -
Page 4: Preset Mode
Enter Preset Mode by holding down the A footswitch while connecting the TRS cable to MultiSwitch Plus. The A LED will flash to confirm the selection. Release the footswitch. The LEDs on... -
Page 5: Custom Mode
Enter Custom Mode by holding down the C footswitch while connecting the TRS cable to MultiSwitch Plus. The C LED will flash to confirm the selection. Release the footswitch. The LEDs on... -
Page 6: Timeline, Bigsky & Mobius Mode
Enter TimeLine, BigSky and Mobius Mode by holding down the B and C footswitches at the same time while connecting the TRS cable to MultiSwitch Plus. The B and C LEDs will flash to confirm the selection. Release the footswitches. The LEDs on... -
Page 7: Tap, Fav, Boost & Speed Mode
FAV jack of the pedal you wish to control. Enter Tap, Favorite, Boost & Speed Mode by holding down the B footswitch while connecting the TRS cable to MultiSwitch Plus. The B LED will flash to confirm the selection and all LEDs will illuminate. -
Page 8: Combo Mode
Enter Combo Mode by holding down the A and B footswitches while connecting the TRS cable to MultiSwitch Plus. The A and B LEDs will flash to confirm the selection. After entering Combo Mode the C footswitch... -
Page 9: Appendix
MultiSwitch Plus - Extended Control Appendix Connected Pedal Setup pg 9... -
Page 10: Preset Mode Pedal Setup
MultiSwitch Plus - Extended Control Preset Mode Pedal Setup A quick reference for the connected pedal setup. For more details see pedal user manual. Riverside Volante Setting EXP jack to MIDI mode. Setting EXP jack to Preset mode. To configure the EXP jack, press and hold Press and hold the FAVORITE footswitch while the TAP button while powering up Volante. -
Page 11: Timeline, Bigsky & Mobius Mode Setup
TimeLine, BigSky & Mobius Mode Pedal Setup A quick reference for the connected pedal setup. For more details see pedal user manual. TimeLine, BigSky and Mobius may require firmware update to work with MultiSwitch Plus. Check the Compatibility Chart on pg.15 details. - Page 12 REVERSE HALF SPEED UNDO/REDO 6 - BUTTON LOOPER (TimeLine Only) Hold TimeLine’s TAP footswitch to enter looper mode, and MultiSwitch Plus now gives you instant access to Reverse, Half Speed, and Undo/Redo. pg 12...
-
Page 13: Tap, Fav, Boost & Speed Mode Pedal Setup
MultiSwitch Plus - Extended Control Tap, FAV, Boost & Speed Mode Pedal Setup A quick reference for the connected pedal setup. For more details see pedal user manual. BigSky, Mobius, TimeLine Deco Setting EXP jack to Tap Tempo mode. Setting EXP jack to Tap Tempo mode. - Page 14 MultiSwitch Plus - Extended Control Tap, FAV, Boost & Speed Mode Pedal Setup (cont.) Brigadier, DIG, El Capistan, Flint Riverside Setting EXP jack to Favorite mode. Setting EXP jack to Favorite mode. Press and hold FAVORITE footswitch at power Set both toggles to middle position.
-
Page 15: Compatibility Chart
MultiSwitch Plus - Extended Control Compatibility Chart Here is the list of MultiSwitch Plus compatibility. For the latest list of compatible product visit strymon.net/multiswitchplus. Mode Description Compatibility Preset Mode Adds the ability to select and bypass Sunset, Riverside, Volante onboard presets 1, 2, and 3. -
Page 16: Specifications
No additional power supply required Chassis Rugged black anodized aluminum chassis Dimensions 6.8” wide x 2.2” deep x 1.7” tall (172mm wide x 57mm deep x 42mm tall) Additional TRS cables can be purchased from strymon.net/store. Designed and built in the USA. pg 16... -
Page 17: Warranty
In no event will Strymon be liable for more than the amount of the purchase price, not to exceed the current retail price of the product. Strymon disclaims any other warranties, expressed or implied. By using the product, the user accepts all terms herein.
Need help?
Do you have a question about the MultiSwitch Plus and is the answer not in the manual?
Questions and answers