
Related Manuals for SPHINX Myth 9


Summary of Contents for SPHINX Myth 9
- Page 1 SERVICE MANUAL MYTH 9 COMPACT DISC PLAYER PLAY NEXT PAUSE PROG PEAK OPEN STOP PREV TIME SHU F REPEAT STBY...
-
Page 2: Table Of Contents
Encountering problems..........................10 6. TECHNICAL SPECIFICATIONS.......................11 7. ADJUSTMENT PROCEDURES......................12 8. PROBLEMS AND SOLUTIONS .......................13 9. DIAGRAMS AND PARTS LIST ......................14 General Overview Myth 9........................... 15 Power Supply............................. 16 D/A converter ............................. 17 Input / Output ............................. 18 Display ............................... 19... -
Page 3: Unpacking
If you need separated sections for the digital and analogue to transport your Myth 9 at a later time it will be best supply. Combined with the integrated power line protected by the original packing materials. -
Page 4: The Cd Player At A Glance
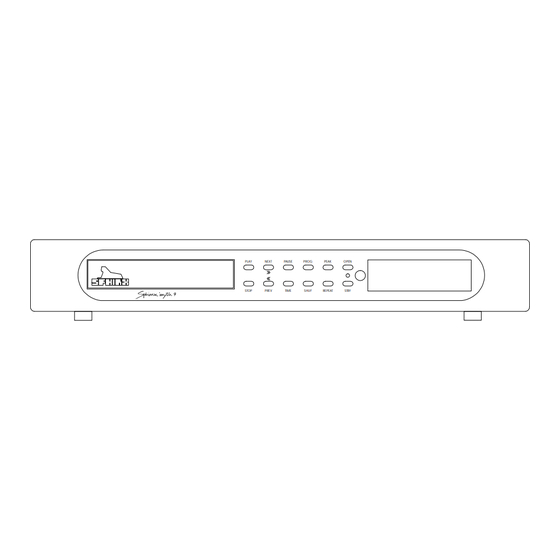
SPHINX Myth 9 Service Manual 3. THE CD PLAYER AT A GLANCE Front panel 10 11 12 13 14 15 PLAY NEXT PAUSE PROG PEAK OPEN STOP PREV TIME SHU F REPEAT STBY 1. CD tray: To be opened with the OPEN button. -
Page 5: Rear Panel
OUTPUT L and R: Connect this to the CD input Warning!: This shows important information of the amplifier. about the safety regulations for the Myth 9. Control IN and OUT: To connect the optical AC Power: Connect the mains cable to a mains cable from the pre-amplifier and to the next power outlet (100 - 240 VAC). -
Page 6: Operation
Connect the mains cable to a mains outlet. Once you have finished connecting all components, Playing a different track you can power on the Myth 9 with the mains switch If you would like to play another track then you may O / I (23). -
Page 7: Program Play (Prog)
SPHINX Myth 9 Service Manual Program Play (PROG) Playing the programmed tracks With Program Play you can change the playback of a CD: After you have finished programming the tracks you Only play the tracks you want to hear (and thus can start playing the program. -
Page 8: To Temporarily Halt Play (Pause)
Power off You switch the Myth 9 off (to stand-by) with the m STBY button (13). Special modes for recording CD’s Recording a CD is highly simplified with two special modes: Peak and Fade. -
Page 9: The Sphinx Remote Control
Service Manual 5. THE SPHINX REMOTE CONTROL This single Sphinx Remote Control lets you control all functions: not only of the Myth 9 but also of all other Sphinx equipment. Only the following buttons on the Remote apply to the Myth 9 CD player (when pressed the »(((O« will... -
Page 10: Operation
Select the correct one Important: Always press the m CD button before you Distance to component Use Remote at closer send a command (even if you only have one Sphinx exceeds 7 m range component). Otherwise it is possible that, although the Remote... -
Page 11: Technical Specifications
This unit conforms to the EMC interference regulations issued by the EU and to the CE standards. This unit complies with safety regulation VDE 0860 and therefore with international safety regulation IEC 65. Technical specifications may be changed by SPHINX without prior notice if technical developments make this necessary. -
Page 12: Adjustment Procedures
SPHINX Myth 9 Service Manual ADJUSTMENT PROCEDURES The Myth 9 has no parameters needing adjustment! Any specific and particular serviceable items may be found in the ensuing Problems and Solutions table on the next page. -
Page 13: Problems And Solutions
SPHINX Myth 9 Service Manual 8. PROBLEMS AND SOLUTIONS At the moment of writing the Myth 9 has no known Please also send (by fax or e-mail) the specific specific problems. information to the Sphinx International Service If in the future you encounter any problem(s) you Department (see page 3): this info can then be may enter the info in this table. -
Page 14: Diagrams And Parts List
SPHINX Myth 9 Service Manual 9. DIAGRAMS AND PARTS LIST The next pages contain a complete set of schematic drawings including the associated parts list (if applicable). -
Page 15: General Overview Myth 9
SPHINX Myth 9 Service Manual General Overview Myth 9 Display Power supply dac.sch front.sch supply.sch In- and output io.sch... -
Page 16: Power Supply
SPHINX Myth 9 Service Manual Power Supply 7805 C1_1 Vout C1_2 ACP1 AC20 100n 100n BYD17 BYD17 AC10 + C8 + C5 ACP2 SW1.1 10u/16V 4700u/25V 100n 100n 115_230 SW1.2 100n 100n BYD17 BYD17 115_230 AC21 ACP3 C1_3 7805 Vout... -
Page 17: D/A Converter
SPHINX Myth 9 Service Manual D/A converter D C L + 560R 560R D C A D J L 2SC4382 BC807 BC807 DEEM +5VD 120R DEEM2 AD711N 100p_pol LEFT DEEM1 100p_pol 100n 49R9 470p_pol DGND 120R 2SA1668 BC817 BC817 DEEM... -
Page 18: Input / Output
SPHINX Myth 9 Service Manual Input / Output C1_1 +5VD +5VD 1N4148 REL1A 6V/150mW 1N4148 7404 BYD77 100K 7404 4013 + C27 + C25 IC3C 220u/25V 10u/16V 100n BCV47 BCV47 7404 DGND 1N4148 1N4148 + C26 7404 1u/16V 100n DGND... -
Page 19: Display
SPHINX Myth 9 Service Manual Display SFH506-38 DGND DISPLAY_BOARD PAUSE TRACK PEAK TOTAL TTIME SPACE 1N4148 1N4148 1N4148 SHUFFLE TIME PEAK REPEAT STOP NEXT PLAY OPEN/CL PROGRAM PAUSE PREVIOUS STANDBY C2-2 C2-1 C2-3 DGND... -
Page 20: Parts List
SPHINX Myth 9 Service Manual Parts List Designator Part Type Description 100n MKT capacitor 100n MKT capacitor 100n MKT capacitor 100n MKT capacitor 100n MKT capacitor MKT capacitor 100n MKT capacitor 6u8/35V Electrolytic capacitor 4700u/25V Electrolytic capacitor 68u/6V3 Electrolytic capacitor... - Page 21 SPHINX Myth 9 Service Manual Designator Part Type Description 100n MKT capacitor 470u/25V Electrolytic capacitor 100n MKT capacitor 10u/16V Electrolytic capacitor 10u/16V Electrolytic capacitor 100n MKT capacitor 10u/16V Electrolytic capacitor 470u/25V Electrolytic capacitor 100n MKT capacitor 10u/16V Electrolytic capacitor 470u/25V...
- Page 22 SPHINX Myth 9 Service Manual Designator Part Type Description 470u/25V Electrolytic capacitor 470u/25V Electrolytic capacitor 100n MKT capacitor 100n MKT capacitor 10u/16V Electrolytic capacitor 100n MKT capacitor 100n MKT capacitor 100n MKT capacitor Styroflex capacitor Styroflex capacitor 100n MKT capacitor...
- Page 23 SPHINX Myth 9 Service Manual Designator Part Type Description 1N4148 Diode BYD17 Diode 1N4148 Diode BYD17 Diode 1N4148 Diode BYD17 Diode Fuse Fuse 7404 Digital IC 7400 Digital IC 4013 Digital IC TDA1315 DIGITAL AUDIO RECEIVER TDA1305T AUDIO DAC TDA1305T...
- Page 24 SPHINX Myth 9 Service Manual Designator Part Type Description Resistor 100K Resistor Resistor Resistor Resistor Resistor Resistor Resistor Resistor Resistor Resistor Resistor Resistor Resistor Resistor 120R Resistor Resistor Resistor 120R Resistor Resistor Resistor Resistor Resistor Resistor Resistor 390R Resistor Resistor...
- Page 25 SPHINX Myth 9 Service Manual Designator Part Type Description Resistor 560R Resistor 560R Resistor 560R Resistor 560R Resistor Resistor Resistor 100k Resistor Resistor Resistor 100k Resistor 100k Resistor Resistor Resistor Resistor 120R Resistor Resistor Resistor Resistor Resistor Resistor Resistor 100k...
- Page 26 SPHINX Myth 9 Service Manual ©1999 Audioscript BV Version: 1999-04-21 23:37...
Need help?
Do you have a question about the Myth 9 and is the answer not in the manual?
Questions and answers