Table of Contents

Related Manuals for Cirrus Research Dosebadge 5


Summary of Contents for Cirrus Research Dosebadge 5
- Page 1 Noise Dosimeter User Manual Page 1 CR:120A doseBadge Noise Dosimeter User Manual This manual, the software to which it relates, the program code and drawings are all: © Copyright Cirrus Research plc 1989-2017 Revision C...
- Page 2 The content of this manual, any illustrations, technical information and descriptions within this document were correct at the time of going to print. Cirrus Research plc reserves the right to make any changes necessary, without notice, in line with the policy of continuing product development and improvement.
-
Page 3: Table Of Contents
doseBadge Noise Dosimeter User Manual Page 3 Introduction........................................6 Information, Safety & Warnings .................................. 7 Getting to know the doseBadge ................................8 The CR:120A doseBadge ..........................................8 The RC:120A dBConnect ..........................................9 The CU:120A doseBadge Dock ......................................... 10 Quick start .......................................... 11 Charging the doseBadge .................................... - Page 4 doseBadge Noise Dosimeter User Manual Page 4 Stopping a measurement with the dBLink App ................................34 Scheduled measurements ........................................... 35 Downloading measurements ..................................35 Downloading to NoiseTools ........................................35 Viewing measurements with the dBLink App ................................... 38 Viewing measurements on the RC:120A dBConnect ..............................38 Storing &...
- Page 5 ......................................69 Resetting the doseBadge ..........................................70 Calibration failure .............................................. 71 Declarations ........................................72 CE Declaration of Conformity ........................................72 Bluetooth® Connectivity ..........................................73 FCC/Industry Canada ............................................. 73 Product Guarantee & Extended Warranty ............................. 74 Cirrus Research Offices ....................................76...
-
Page 6: Introduction
doseBadge Noise Dosimeter User Manual Page 6 Introduction The doseBadge is the result over 20 year’s development of the original doseBadge concept and maintains the unique features of the doseBadge including: • No cables, controls or display • Simple setup, deployment & data download •... -
Page 7: Information, Safety & Warnings
doseBadge Noise Dosimeter User Manual Page 7 Information, Safety & Warnings This product is not approved for intrinsically safe operation and must not be used in hazardous areas or zones. The CR:120A doseBadge , RC:120A dBConnect and CU:120A Dock contain no user serviceable parts. -
Page 8: Getting To Know The Dosebadge
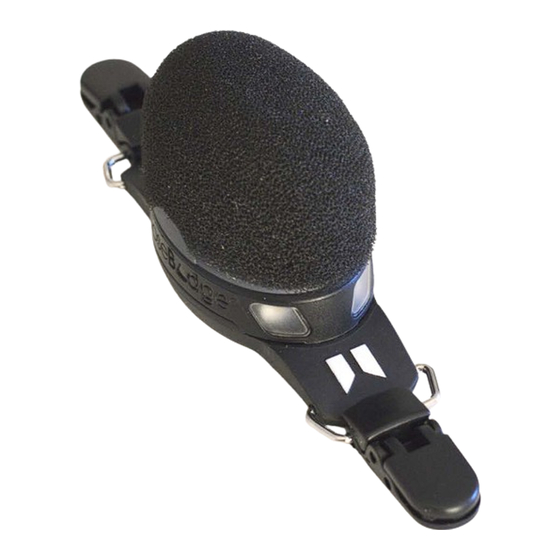
doseBadge Noise Dosimeter User Manual Page 8 Getting to know the doseBadge The CR:120A doseBadge The CR:120A doseBadge is supplied complete with a windshield (which is secured to the carrier) and mounting clips to attach the instrument to a person whose noise exposure is to be measured. Windshield &... -
Page 9: The Rc:120A Dbconnect
doseBadge Noise Dosimeter User Manual Page 9 Each doseBadge instrument is identified by a unique serial number that is shown on the information plate on the underside of the instrument. Battery charging & USB connections Serial Number Standards & compliance information The RC:120A dBConnect The RC:120A dBConnect is supplied with a wrist strap and 2 x AAA/LR03 batteries. -
Page 10: The Cu:120A Dosebadge Dock
doseBadge Noise Dosimeter User Manual Page 10 The CU:120A doseBadge Dock The CU:120A doseBadge Dock is supplied used with the CU:196A Mains Power Supply and a standard USB cable (Type A to Type B). There are 5 slots, each of which can accommodate a CR:120A doseBadge instrument. -
Page 11: Quick Start
doseBadge Noise Dosimeter User Manual Page 11 Quick start Step Action Optional actions See page Charge the doseBadge Clear the memory Configure the integrators & peak channels Check the configuration Program scheduled timers Allocate instruments to a person, place or project Octave Band Enable or disable the octave band filters Mode23... -
Page 12: Charging The Dosebadge
doseBadge Noise Dosimeter User Manual Page 12 Charging the doseBadge The doseBadge is charged using the CU:120A doseBadge Dock. The doseBadge instruments are intelligent and the store information about the amount of charge that has been put into and taken out of the batteries. This allows the instrument to maintain optimum battery performance for as long as possible. -
Page 13: Connecting To The Dosebadge
doseBadge Noise Dosimeter User Manual Page 13 Charging should be carried out where the ambient temperature is between +15°C and +30°C (+59°F to +86°F). Charging at higher temperatures may increase the charge time required or may result in a failure to fully charge. Please note that the CU:120A Dock must be powered for data downloaded to be possible. -
Page 14: Configuring The Dosebadge
doseBadge Noise Dosimeter User Manual Page 14 Configuring the doseBadge Configuration overview The doseBadge is an advanced noise measurement instrument and can provide up to 4 independent integrators, 2 independent Peak channels and up to 4 independent maximum SPL channels. In many applications, the configuration of the doseBadge will not change once it has been setup for the first time but any of the configuration options can be adjusted to allow the instrument to meet any noise... -
Page 15: Configuring Via Noisetools
doseBadge Noise Dosimeter User Manual Page 15 Scheduled measurements Scheduled measurements are a new feature in the doseBadge that give the user more control over when measurements are made. There may be situations where it is not possible for the person responsible for making noise measurements to be present to start, pause or stop the instrument. - Page 16 doseBadge Noise Dosimeter User Manual Page 16 If more than one instrument is connected, each can be configured in turn and the settings saved to the doseBadge units. For experienced users, the New Instrument Wizard can be skipped. The Dock View When a doseBadge is connected to a powered CU:120A Dock and the Dock is connected to the NoiseTools software via a USB cable, the Dock will appear in the Instrument window.
- Page 17 doseBadge Noise Dosimeter User Manual Page 17 Person, Place & Project Each doseBadge can be individually assigned to a person before measurements are made. Alternatively, measurements can be assigned either at the point of download into NoiseTools or afterwards when the measurements are analysed. This information is stored along with the measurement data in the NoiseTools database, allowing the measurement information to be sorted, filtered and searched quickly and effectively.
- Page 18 doseBadge Noise Dosimeter User Manual Page 18 To transfer settings from one badge to others that are connected to the Dock, select the source badge (which will be highlighted in blue) and from the Transfer Settings button, select From Selected Instrument. The setting will be copied from the source badge to the other badges on the Dock.
- Page 19 doseBadge Noise Dosimeter User Manual Page 19 Storage The storage options allow for the configuration of the following: Time history rate Throughout a measurement the doseBadge is logging the noise data at a specified rate. This information is used in the NoiseTools software to display the graphs of noise vs time. The sample period for the data logging can be selected to be either 1 second or 1 minute and this affects all data logging channels.
- Page 20 doseBadge Noise Dosimeter User Manual Page 20 Confirmation is required before the memory is cleared. Once the memory has been cleared, measurements cannot be retrieved. Integrating Integrators are at the heart of any noise dosimeter and the doseBadge is no different. Up to 4 independent integrators can be run at any time and these can be chosen from a pre-set list or customised as required.
- Page 21 doseBadge Noise Dosimeter User Manual Page 21 RC:120A dBConnect Interface The RC:120A dBConnect Interface allows the user to define what information is displayed by an RC:120A dBConnect when a measurement is read from a doseBadge instrument. The RC:120A dBConnect can display up to 5 pages of acoustic values in addition to the calibration information and measurement summary information.
- Page 22 doseBadge Noise Dosimeter User Manual Page 22 To add a new page, click the “Click to add a page” button at the bottom of the screen and select the type of screen required. Select the data type for that screen from the drop-down options. Pages can be deleted using the red X button. Please note that the pages shown on the RC:120A dBConnect do not affect the measurement data stored by the instrument which is defined in the Storage, Integrating and Peak/Max tabs.
-
Page 23: Configuring Via The Dblink App
doseBadge Noise Dosimeter User Manual Page 23 Calibration This setting allows the calibration level that the doseBadge is expecting to be adjusted to suit the acoustic calibrator being used. By default, this is set to 114dB to suit the CR:518 acoustic calibrator. Tamper &... -
Page 24: Clearing The Memory
doseBadge Noise Dosimeter User Manual Page 24 • Project - This information is downloaded into NoiseTools along with the measurement • Clock (synchronise the clock in the doseBadge to the mobile device) • Clear the instruments memory • Select the integrators o Up to 4 independent integrators can be enabled at any time •... -
Page 25: Connecting The Acoustic Calibrator
doseBadge Noise Dosimeter User Manual Page 25 Connecting the acoustic calibrator Connect the acoustic calibrator to the doseBadge microphone and switch on the calibrator. - Page 26 doseBadge Noise Dosimeter User Manual Page 26 The doseBadge will automatically detect the acoustic signal from the calibrator and will start the calibration process. If the level provided by the acoustic calibrator is within the tolerances acceptable to the doseBadge the instrument will calibrate.
-
Page 27: Post-Measurement Calibration
doseBadge Noise Dosimeter User Manual Page 27 Post-measurement calibration The doseBadge allows for a calibration to be carried out after a measurement has been completed. Many occupational standards and regulations require a post-measurement calibration to be carried out and for the differences between the pre- and post measurement calibration levels to be reviewed. -
Page 28: Attaching & Removing The Dosebadge
doseBadge Noise Dosimeter User Manual Page 28 Attaching & removing the doseBadge Where to position the doseBadge You should consult any local regulations or standards for specific information about the positioning of noise dosimeters but it is recommended that the doseBadge is mounted close to the ear, typically within 10-15cm (4”... -
Page 29: Starting A Measurement
doseBadge Noise Dosimeter User Manual Page 29 Starting a measurement Scheduled measurements If scheduled measurements have been configured and enabled in the doseBadge unit, they will be active once the instrument has been removed from the Dock. Remove the doseBadge from the Dock and connect to the worker. -
Page 30: Starting A Measurement With The Rc:120A Dbconnect
doseBadge Noise Dosimeter User Manual Page 30 Starting a measurement with the RC:120A dBConnect Connect to the doseBadge instrument and select the measure option as shown below: When the instrument is not measuring, the only option is to start a measurement. Pressing the Left button will start a measurement and a confirmation will appear for a few seconds. -
Page 31: Measurement Running Indication
doseBadge Noise Dosimeter User Manual Page 31 Measurement running indication When a doseBadge instrument is running, the Blue LED will flash every 2 seconds. See page 69 for details of the LED status indicators. Pausing a measurement When the doseBadge unit is running and measuring data, the Blue LED will flash every 2 seconds. -
Page 32: Using Scheduled Measurements
doseBadge Noise Dosimeter User Manual Page 32 Using scheduled measurements If a scheduled pause has been programmed into the instrument, this will be activated at the appropriate time. Pause indication When a doseBadge instrument is paused, the Blue LED will flash every 5 seconds. See page 69 for details of the LED status indicators. -
Page 33: Using The Dblink App
doseBadge Noise Dosimeter User Manual Page 33 Using the dBLink App To view the measurement status of an instrument whilst it is running, connect to the badge and select it from the discovery window. If the badge is running, the current measurement data will be displayed below the badge information. The measurement data for the first integrator is displayed on this screen. -
Page 34: Stopping A Measurement
doseBadge Noise Dosimeter User Manual Page 34 The current information can be refreshed by selecting the menu in the top right selecting Refresh Current Measurement. Please note that to reduce power consumption, the data is not refreshed automatically. Pressing the refresh icon will load the current measurement data again. -
Page 35: Scheduled Measurements
doseBadge Noise Dosimeter User Manual Page 35 Scheduled measurements If a scheduled stop has been programmed into the instrument, this will be activated at the appropriate time and the instrument will end. The measurement data will be stored in the instrument ready for download or viewing. - Page 36 doseBadge Noise Dosimeter User Manual Page 36 Download all measurements This function will download all measurements from all connected instruments and stored them into the database. Where a person, project or place has been allocated to an instrument, these will be added to the appropriate measurement.
- Page 37 doseBadge Noise Dosimeter User Manual Page 37 The Group downloaded measurements option allows a number of measurements to be grouped together for analysis, comparison and reporting. The measurement group can be named as required. The Open after download option allows any measurements to be opened automatically in NoiseTools once the download has completed.
-
Page 38: Viewing Measurements With The Dblink App
doseBadge Noise Dosimeter User Manual Page 38 When the measurements have been selected, click the Download button to store the measurements into the NoiseTools database. If the Open after download option is selected, the downloaded measurements will be shown. An example measurement is shown below. In this measurement, 4 integrators have been enabled along with LCPeak, LZPeak, LAFmax, LASmax and Octave Bands. -
Page 39: Storing & Transport Instruments
doseBadge Noise Dosimeter User Manual Page 39 Storing & transport instruments Where the doseBadge will not be used for extended periods the units can be set to Transport Mode. This will prevent the badge from running and will minimise power consumption. The doseBadge can then be stored for long periods of time without charging the battery. - Page 40 doseBadge Noise Dosimeter User Manual Page 40 NoiseTools will display a warning as follows: Click Yes and the doseBadge will be set to transport mode. Remove the doseBadge from the Dock and store in the carrying case. To disable transport mode, reconnect the doseBadge to a powered CU:120A Dock.
-
Page 41: Configuring Scheduled Measurements
doseBadge Noise Dosimeter User Manual Page 41 Configuring scheduled measurements The scheduled measurements function is powerful and unique function of the doseBadge It allows the user to configure the instruments to start, pause and stop at specific times throughout the day and to enable or disable the schedules for specific days of the week. -
Page 42: Adding A Pause To The Measurement
doseBadge Noise Dosimeter User Manual Page 42 Adding a pause to the measurement To add a pause to a measurement, click the “Click to add a Pause”. Choose the Start Time and the Duration of the measurement. NoiseTools will show the stop time based on the start time and duration. - Page 43 doseBadge Noise Dosimeter User Manual Page 43 Example 2 - Start at 8am & run for 12 hours. Start at 9pm & run for 8 hours Example 3 - Start at 8am & run for 12 hours with a 1 hour pause at 1pm...
- Page 44 doseBadge Noise Dosimeter User Manual Page 44 Example 4 – Start at 8.30am & run for 8 hours (Tuesday, Wednesday & Thursday)
-
Page 45: The Rc:120A Dbconnect
doseBadge Noise Dosimeter User Manual Page 45 The RC:120A dBConnect The RC:120A dBConnect is an optional item that allows instruments to be controlled, measurements started, paused and stopped and for mid-shift readings to be taken. The information displayed by the RC:120A dBConnect when reading measurements from a doseBadge unit is configured in the instrument. -
Page 46: Controlling The Dosebadge With The Rc:120A Dbconnect
doseBadge Noise Dosimeter User Manual Page 46 If the connection from the RC:120A dBConnect to the doseBadge5 fails or the connection is lost, one of the following screens will be displayed: Connection lost will be shown when the doseBadge5 moves out of range of the RC:120A dBConnect. When the RC:120A dBConnect is connected to a doseBadge , more options become available from the Main view. - Page 47 doseBadge Noise Dosimeter User Manual Page 47 Measure This page lets the user start/stop/pause/resume measurements. The available actions depend on whether the instrument is measuring or not. The doseBadge is not measuring When the instrument is not measuring, the only option is to start a measurement. Pressing the Left button will start a measurement and a confirmation will appear for a few seconds.
- Page 48 doseBadge Noise Dosimeter User Manual Page 48 Pressing the Up button will pause the measurement and a confirmation will appear for a few seconds. The message is split into two lines. Too many pauses in a measurement A measurement can be paused up to 5 times. An error message will be displayed if trying to pause a measurement too many times.
- Page 49 doseBadge Noise Dosimeter User Manual Page 49 Review After reading the measurements from the doseBadge , the Review page is shown. The details of a measurement are accessed by using the Left/Right buttons, while the Up/Down buttons are used to go to the next/previous measurement. Each measurement consists of several pages: •...
- Page 50 doseBadge Noise Dosimeter User Manual Page 50 4. The “Integrator template” contains the name of the integrator (e.g. ISO, OSHA PEL, ACGIH, etc.) and two acoustic values (e.g LAeq, Lavg, TWA, exposure, dose, etc.). 5. The “Values only template” contains two acoustic values not linked to an integrator channel (e.g. LCPeak).
- Page 51 doseBadge Noise Dosimeter User Manual Page 51 Note that it is not possible to change the time on the doseBadge while it is measuring, and the “Yes” button will be disabled. Timers This page gives the option to enable or disable scheduled measurements on the instrument. The current setting is highlighted by a yellow border (e.g.
- Page 52 doseBadge Noise Dosimeter User Manual Page 52...
-
Page 53: Rc:120A Dbconnect Settings
doseBadge Noise Dosimeter User Manual Page 53 RC:120A dBConnect settings This page brings a menu to modify the configuration of the RC:120A dBConnect. Available choices are: Clock – Set the clock on the RC:120A dBConnect Language – Change the language of the interface Display –... -
Page 54: Replacing The Batteries
doseBadge Noise Dosimeter User Manual Page 54 Replacing the batteries The RC:120A dBConnect is powered by 2 x AAA/LR03 batteries. These are located behind the battery cover on the rear panel. Remove the retaining screw and remove the cover. The cover is secured by a strap to prevent it from being lost. Replace the batteries and secure the cover. -
Page 55: The Dblink App
doseBadge Noise Dosimeter User Manual Page 55 The dBLink App The dBLink App is a mobile application that can be installed onto Android and iOS devices. If allows doseBadge instruments to be controlled, configured and measurement information viewed. It can be used to gather mid-shift readings from instruments without having to disturb the worker. -
Page 56: Configuring The Dosebadge
doseBadge Noise Dosimeter User Manual Page 56 Configuring the doseBadge Select the instrument from the discovery screen and use the menu to select the measurements option or swipe left to view the Setting screen. The following items can be configured from the settings screen: •... - Page 57 doseBadge Noise Dosimeter User Manual Page 57 Integrators, Peak & SPL Max values To change the integrators, Peak or SPL Max values, press on the option on the right-hand side and choose from the available selections. Click Update to accept the new values or Cancel to return to the previous screen. Scheduled measurements Scheduled measurements can be enabled or disabled.
-
Page 58: Starting A Measurement
doseBadge Noise Dosimeter User Manual Page 58 Any existing scheduled measurements will be displayed. Click edit to adjust the current settings or Delete to remove the current setting. Click OK to accept the changes or Cancel to return to the previous screen. Starting a measurement To start a measurement with the dBLink App, connect to the required instrument that is running and from the instrument discovery window, press the Green run button. -
Page 59: Mid-Shift Readings
doseBadge Noise Dosimeter User Manual Page 59 Mid-shift readings To view the measurement status of an instrument whilst it is running, connect to the badge and select it from the discovering window. If the badge is running, the current measurement data will be displayed below the badge information. The measurement data for the first integrator is displayed on this screen. -
Page 60: Pausing A Measurement
doseBadge Noise Dosimeter User Manual Page 60 The current information can be refreshed by selecting the menu in the top right selecting Refresh Current Measurement. The current status of the instrument is shown at the bottom of the screen. Please note that to reduce power consumption, the data is not refreshed automatically. Pressing the refresh icon will load the current measurement data again. -
Page 61: Stopping A Measurement
doseBadge Noise Dosimeter User Manual Page 61 Stopping a measurement To stop a measurement with the dBLink App, connect to the required instrument that is running and from the instrument discovery window, press the red stop button. Press again to confirm. The status of the instrument is shown by the Green run, Blue pause and Red Stop buttons. -
Page 62: Clearing The Memory
doseBadge Noise Dosimeter User Manual Page 62 Swiping left and right will move through the available measurements. The current measurement number is shown at the top of the screen. Use the menu to return to the instrument summary, settings or discovery screen. Clearing the memory The memory of the doseBadge can be cleared from the instrument settings screen. -
Page 63: Specifications
doseBadge Noise Dosimeter User Manual Page 63 Specifications Applicable Standards Overall Measurements IEC 61252:1993 +AMD1:2000 Personal Sound Exposure Meters ANSI S1.25:1991 (R2017) Personal Noise Dosimeters 1:1 Octave Band Filters (where enabled) IEC 61260-1:2014 Class 2 ANSI S1.11-2014 Class 2 63Hz to 8kHz Measurement Range (Typical) Overall Measurements RMS Range... -
Page 64: Configuration Options
doseBadge Noise Dosimeter User Manual Page 64 Overload & Tamper sensor detection For each Integrator Channel Average Integrated Sound Level (Leq/LAVG) Time Weighted Average (LEP,d/LEX,8/TWA) Sound Exposure & Estimated Sound Exposure % Dose & Estimated % Dose ULT Duration SPL Max Level & Time SPL Min Level For each Peak Channel Overall LPeak level... -
Page 65: Measurement Control
doseBadge Noise Dosimeter User Manual Page 65 75% to 100% in 5% steps Peak Channels Frequency weighting A,C or Z Measurement Control Manual Manual Start, Stop & Pause via the doseBadge5 dBControl or the dBLink App Manual Start & Stop via NoiseTools Automatic scheduled measurements Timed start, pause &... -
Page 66: Communication
doseBadge Noise Dosimeter User Manual Page 66 CU:120 doseBadge5 Dock External power via CU:196A Mains Power Supply RC:120A dBConnect 2 x AAA (MN2400) Communication CR:120A doseBadge Bluetooth® Wireless communication to the doseBadge5 dBControl Bluetooth® Wireless communication to the dBLink App (Android & iOS) USB download to NoiseTools via the doseBadge5 Dock CU:120 doseBadge Dock... -
Page 67: Humidity
doseBadge Noise Dosimeter User Manual Page 67 Humidity Up to 95% RH Non-Condensing Software NoiseTools software supplied as standard with license free installation and free of charge upgrades available from the Cirrus website. CR:51x Acoustic Calibrator Frequency 1kHz +/- 1% Sound Level CR:514 94dB re 20uPa... -
Page 68: Glossary Of Terms
doseBadge Noise Dosimeter User Manual Page 68 Glossary of Terms A detailed glossary of the terminology used in the doseBadge can be downloaded from This information is available in a range of different languages and can be downloaded, free of charge, from the Cirrus website. -
Page 69: Support & Troubleshooting
Noise Dosimeter User Manual Page 69 Support & Troubleshooting Additional support and information is available from the Cirrus Research support website: www.cirrusresearch.co.uk/doseBadge5support LED Indicators on the doseBadge The doseBadge uses a set of LED indicators to show the status of measurements, charging, calibration and general operation. -
Page 70: Resetting The Dosebadge
doseBadge Noise Dosimeter User Manual Page 70 Badge measuring & Dose threshold exceeded Red Flashing (0.1/2.0) Badge Paused Blue Flashing (0.1/5.0) Badge paused & Dose threshold exceeded Red Flashing (0.1/5.0) Battery Low (not measuring) Orange Flashing (0.1/2.0) Battery Low & measuring Orange Flashing (0.1/2.0) Blue Flashing (0.1/2.0) Alternating flashes... -
Page 71: Calibration Failure
doseBadge Noise Dosimeter User Manual Page 71 Calibration failure The doseBadge is pre-programmed to accept a calibration level that is provided by an acoustic calibrator. If the level provided by the acoustic calibrator is different from the level that the instrument is expecting by more than +/- 3dB, the instrument will not start the calibration process. -
Page 72: Declarations
Noise Dosimeter User Manual Page 72 Declarations CE Declaration of Conformity Cirrus Research plc Hunmanby UK CE Certificate of Conformity Manufacturer: Cirrus Research plc Acoustic House, Bridlington Road Hunmanby, North Yorkshire, YO14 0PH United Kingdom Telephone +44 1723 891655... -
Page 73: Bluetooth® Connectivity
doseBadge Noise Dosimeter User Manual Page 73 Bluetooth® Connectivity All models of the CR:120A doseBadge noise dosimeter support wireless connectivity via Bluetooth®. Declaration ID D034062 Receiver sensitivity -93 dBm (Typical) TX power 0 dBm (Typical) FCC/Industry Canada This product contains an FCC and Industry Canada certified Class 2 wireless (Bluetooth) low energy single mode module: FCC Identifier: T7V1740. -
Page 74: Product Guarantee & Extended Warranty
2. The initial guarantee covers all faults and accidental damage to the product. 3. Warranty extension If the product is returned to Cirrus Research plc or one of its Authorised Service & Calibration Centres for routine verification & calibration after the initial guarantee period, upon completion of the verification the product will be given an additional free one (1) year warranty. - Page 75 9. Where an instrument is being returned under the guarantee or warranty, it must be returned to Cirrus Research plc without undue delay at the customer’s risk with transportation charges prepaid. 10. Where the product is deemed to be faulty due to manufacturing defects, Cirrus Research plc shall: a. Repair or replace the defective products b.
-
Page 76: Cirrus Research Offices
Page 76 Cirrus Research Offices The addresses given below are the Cirrus Research plc offices. Cirrus Research plc also have approved distributors and agents is many countries worldwide. For details of your local representative, please contact Cirrus Research plc at the address below.
Need help?
Do you have a question about the Dosebadge 5 and is the answer not in the manual?
Questions and answers