Table of Contents

Subscribe to Our Youtube Channel
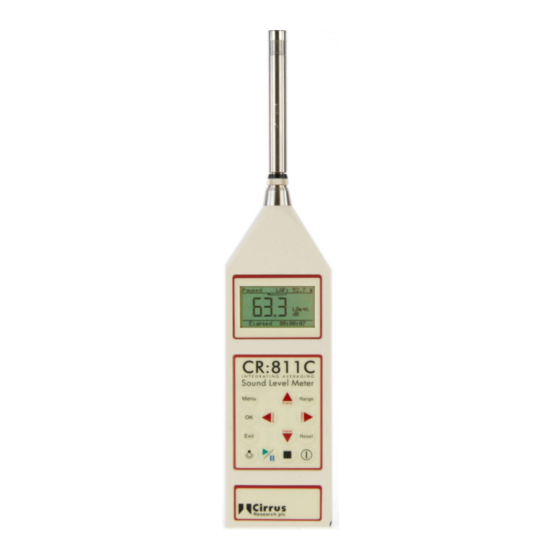
Related Manuals for Cirrus Research CR:811C


Summary of Contents for Cirrus Research CR:811C
- Page 1 CR:800C Series Sound Level Meter User Manual Page 1 User Manual for the CR:800C Series of Sound Level Meters This manual, the software to which it relates, the program code and drawings are all: © Copyright Cirrus Research plc 1989-2008...
- Page 2 The content of this manual, any illustrations, technical information and descriptions within this document were correct at the time of going to print. Cirrus Research plc reserves the right to make any changes necessary, without notice, in line with the policy of continuing product development and improvement.
-
Page 3: Table Of Contents
CR:800C Series Sound Level Meter User Manual Page 3 1 Preface ........................5 1.1 Messages and Symbols................... 5 2 Introduction ......................6 2.1 Main Features ....................... 6 2.2 Measurement Functions ..................6 2.3 Broadband Measurement Mode ................6 2.4 1:1 & 1:3 Octave Band Measurement Mode ............... 7 2.5 Options &... - Page 4 10.2 Changing the Battery..................64 10.3 Specification..................... 65 10.4 Technical Information ..................66 10.5 Free Field Correction ..................67 11 Appendix 3 CE Certificate of Conformity ..............68 12 Warranty Information................... 69 13 Cirrus Research Offices ..................70...
-
Page 5: Preface
Page 5 1 Preface Thank you for purchasing this CR:800C Series Sound Level Meter from Cirrus Research plc. This powerful instrument provides excellent expansion capability, and has been designed to provide reliable, accurate measurements over a long period of time. -
Page 6: Introduction
Page 6 CR:800C Series Sound Level Meter User Manual 2 Introduction 2.1 Main Features 2.2 Measurement Functions The measurement functions that can be provided by the CR:800C depend upon the options that have been fitted. Listed below is a summary of the measurements that can be provided by the basic Broadband instrument, and by the addition of the 1:1 Octave Band or the 1:3 Octave Band filters. -
Page 7: 1:1 & 1:3 Octave Band Measurement Mode
The CR:800C Series are also available with a range of options and accessories that can enhance the performance and applications of the instrument. For full details, please contact Cirrus Research plc or your local representative. The most commonly used accessories are listed below. -
Page 8: Getting Started
Page 8 CR:800C Series Sound Level Meter User Manual 3 Getting Started 3.1 How to... These example settings are designed to demonstrate the different configurations that are available from the CR:800C Sound Level Meters. Please check the configuration of the instrument to match the measurement requirements of your application before making a measurement. -
Page 9: Quick Start
CR:800C Series Sound Level Meter User Manual Page 9 3.2 Quick Start Switch on Key Press Display When the instrument has switched on, the start-up screen will change to the standard noise level display. Calibrate the Sound Level Meter If a microphone extension cable is to be used during a measurement, the instrument must be calibrated with the cable attached. - Page 10 Page 10 CR:800C Series Sound Level Meter User Manual Set the measurement duration Press the menu key to view the current measurement duration and the status of the auto repeat and auto synchronise function. At the bottom of the screen is the current configuration.
- Page 11 CR:800C Series Sound Level Meter User Manual Page 11 In this example, the instrument is set to Broadband Measurement Mode In this example, the instrument is set to 1:1 Octave Band Measurement Mode In this example, the instrument is set to 1:1 Octave Band Measurement Mode Start &...
- Page 12 Page 12 CR:800C Series Sound Level Meter User Manual Review the measurement When the measurement has been stopped, the instrument automatically stores the measurement in memory and enters the measurement review mode. Use the Up and Down arrow keys to view the different measurement values and press the exit key to return to the main display.
-
Page 13: Unpacking And Checking The Sound Level Meter
Carefully remove the instrument from its shipping container and inspect it for possible damage or missing items. If the meter appears to be damaged or something is missing, contact Cirrus Research plc or your local representative immediately. The basic CR:800C instrument is supplied with the following standard accessories:... -
Page 14: Instruments Layout
Page 14 CR:800C Series Sound Level Meter User Manual 3.4 Instruments Layout... -
Page 15: Assembly
Preamplifier for Class 1 instruments and the batteries. Preamplifier The Class 1 versions of the CR:800C (CR:811C, CR:821C and CR:831C) are supplied with a removable preamplifier, the MV:200D. Also, a removable preamplifier may be fitted as an option to the Class 2 instruments. - Page 16 Page 16 CR:800C Series Sound Level Meter User Manual Using an external power supply The CR:800C can be used with an external power supply. When the external supply is connected, the CR:800C switches automatically from the internal battery power. When the external power is either removed or switched off, the instrument will automatically switch back to the internal battery supply.
-
Page 17: Switching On
CR:800C Series Sound Level Meter User Manual Page 17 3.6 Switching On Key Press Display When the instrument is first switched on, a Welcome screen is shown with the instrument type and version number. After 3 seconds, the display will change and the current Sound Level will be shown with the current configuration shown as above. -
Page 18: Checking The Configuration Of The Instrument
Page 18 CR:800C Series Sound Level Meter User Manual 3.7 Checking the Configuration of the Instrument The Setup of the instrument should be checked before making a measurement. Time and Date Key Press Display Comments The current time and date are shown at the bottom of the screen. - Page 19 CR:800C Series Sound Level Meter User Manual Page 19 Measurement Mode Key Press Display Comments The current measurement mode is shown on the screen. In this example, the measurement mode is Broadband. Measurement Duration Key Press Display Comments The measurement duration is shown at the bottom of the screen.
- Page 20 Page 20 CR:800C Series Sound Level Meter User Manual Measurement Auto Repeat Key Press Display Comments The status of the Auto Repeat is shown at the bottom of the screen. In this example, the Auto Repeat is switched on. When the Auto Repeat is switched off, the display is Repx Measurement Auto Synchronise Key Press...
-
Page 21: Calibration
CR:800C Series Sound Level Meter User Manual Page 21 3.8 Calibration If a microphone extension cable is to be used during a measurement, the instrument must be calibrated with the cable attached. Attach the acoustic calibrator to the sound level meter, and press the menu key. The first menu option is Calibrate. -
Page 22: Starting A Measurement
Page 22 CR:800C Series Sound Level Meter User Manual The calibration level is unstable. The background noise level may be too high or the acoustic calibrator may not be fitted correctly to the sound level meter. 3.9 Starting a measurement Broadband Mode Key Press Display... - Page 23 CR:800C Series Sound Level Meter User Manual Page 23 The user can override the automatic sweep by pressing the Up arrow key to step to the next frequency band. The display will show ---- until enough data has been accumulated to give an accurate measurement.
-
Page 24: Displaying The Data During A Measurement
Page 24 CR:800C Series Sound Level Meter User Manual Key Press Display Comments The instrument has not accumulated sufficient data to give an accurate measurement. When enough information has been gathered, the LZeq value will be displayed. 3.10 Displaying the data during a measurement Broadband Mode During a Broadband Mode measurement, the user can step through the different measurement parameters. -
Page 25: Pausing And Resetting A Measurement
CR:800C Series Sound Level Meter User Manual Page 25 The Sound Level is shown, in this case the LAF. The real time display of the noise level is shown as 1 second Leq samples. The display shows 2 minutes of information and then starts to scroll across the screen. -
Page 26: Viewing The Stored Measurements
Page 26 CR:800C Series Sound Level Meter User Manual Key Press Display Comments When the Stop key is pressed, the current measurement is stored in the memory and the display changes to the memory revie mode. this example, the measurement is a Broadband measurement. -
Page 27: Configuring The Sound Level Meter
CR:800C Series Sound Level Meter User Manual Page 27 4 Configuring the Sound Level Meter This section of the manual covers the configuration of the Sound Level Meter and the different options that are available to the user. 4.1 Keypad Move through the measurement parameters when running a measurement. -
Page 28: Measurement Mode
Page 28 CR:800C Series Sound Level Meter User Manual 4.3 Measurement Mode To select the Measurement Mode, press the Menu Key. The current measurement mode is displayed. Key Press Display Broadband Mode To select the Broadband Measurement Mode: Key Press Display... - Page 29 CR:800C Series Sound Level Meter User Manual Page 29 1:1 Octave Band Mode To select the 1:1 Octave Band Measurement Mode: Key Press Display 1:3 Octave Band Mode To select the 1:3 Octave Band Measurement Mode: Key Press Display...
-
Page 30: Measurement Duration
Page 30 CR:800C Series Sound Level Meter User Manual 4.4 Measurement Duration The configuration of the Run Duration, the Auto-Repeat and the Auto-Synchronise functions are all connected and affect each other. Always ensure that the status of these three functions is checked before making a measurement. -
Page 31: Measurement Auto Repeat
CR:800C Series Sound Level Meter User Manual Page 31 In this example, the measurement duration will be set to 15 Minutes, and the instrument will run continuously until the Stop key is pressed. The change the measurement duration, use the Up and Down keys to select the require duration and press OK to select. - Page 32 Page 32 CR:800C Series Sound Level Meter User Manual With the Auto Repeat function enabled, the instrument will make further 15 minute measurements, one after the next until the total number of measurements has been made. This allows the user to tell the instrument, for example, to make 96 individual 15 minute measurements over a 24 hour period.
-
Page 33: Measurement Auto Synchronise
CR:800C Series Sound Level Meter User Manual Page 33 4.6 Measurement Auto Synchronise This function allows the start of the measurements to be started in time with the clock of the instrument. The diagram below shows how the measurement runs from when the Start key is pressed for the duration defined by the Run Duration when the auto-repeat function is not activated. -
Page 34: Measurement Range
Page 34 CR:800C Series Sound Level Meter User Manual When the Auto Synchronise function has been selected, the display will show the Sync at the bottom of the screen with a tick next to it as shown above. 4.7 Measurement Range One of the most important features of a Sound Level Meter is the measurement range. - Page 35 CR:800C Series Sound Level Meter User Manual Page 35 Display Comments The measurement range is 40dB to 110dB and the noise level is 120.6dB. The instrument is overloading and the O/L symbol is shown. The measurement range is 70dB to 140dB and the noise level is 58.9dB.
-
Page 36: Instrument Setup
Page 36 CR:800C Series Sound Level Meter User Manual 4.8 Instrument Setup Select the Setup option from the main menu and press OK. Key Press Display Comments Display Contrast To adjust the contrast of the display, select the Contrast Option and press OK Key Press Display Comments... - Page 37 The level at which the CR:800C instrument calibrates can be adjusted, if required, to suit different Acoustic Calibrators. The default calibration level is 93.7dB for use with Cirrus Research plc CR:515 or CR:514 Series Acoustic Calibrators set to the 94dB setting. The correction of –0.3dB is...
-
Page 38: Display Resolution
Right arrow keys to move between the numbers. Press OK to accept the calibration level. Cirrus Research plc does not recommend the use of Acoustic Calibrators other than those manufactured or supplied by Cirrus Research plc for use with the CR:800C instruments. Display Resolution The display resolution of the CR:800C instruments can be set to be either 0.1dB or... - Page 39 CR:800C Series Sound Level Meter User Manual Page 39 Key Press Display Comments Select the required Time Weighting and press OK to select. The currently selected Time Weighting is indicated by a tick. Press Exit to return to the main display.
- Page 40 Page 40 CR:800C Series Sound Level Meter User Manual Select the required Frequency Weighting and press OK to select. The select Frequency Weighting is indicated by a tick. Press Exit to return to the main display. The Frequency Weighting applies to the following parameters: Broadband Mode Integrated Sound Level , or LZ...
- Page 41 CR:800C Series Sound Level Meter User Manual Page 41 Key Press Display Comments The Ln to be changed can be selected using the Up and Down arrow keys. Press OK to select the Ln to change. In this example, the Ln1 has been selected.
- Page 42 Page 42 CR:800C Series Sound Level Meter User Manual Note that if the LIeq,t function is selected, the CR:800C will automatically select the Impulse Time Weighting which will apply to all other measurement functions described. Before the Time Weighting can be selected to either Fast or Slow, the User Metric must be set to SEL.
-
Page 43: Viewing And Downloading The Measurements
CR:800C Series Sound Level Meter User Manual Page 43 5 Viewing and Downloading the measurements When a measurement stops, either by the user pressing the Stop key or when a measurement stops automatically, the data is automatically stored in the memory. 5.1 Recalling Stored Measurements To view stored measurements, ensure that the instrument is not running. - Page 44 Page 44 CR:800C Series Sound Level Meter User Manual Broadband Measurement Key Press Display Comments The User Metric setting of the instrument determines if the unit stores LAE, LAIeq,t or LAFTeq. If the unit was in Overload or Under-Range during the measurement this is indicated on the screen.
-
Page 45: Checking & Clearing The Memory
CR:800C Series Sound Level Meter User Manual Page 45 1:3 Octave Band Measurements Key Press Display Comments The graphical display of the 1:3 Octave Band measurement is shown with the measurement range shown on the left hand scale. 5.2 Checking & Clearing the memory... - Page 46 Page 46 CR:800C Series Sound Level Meter User Manual The memory of the instrument can be checked for available space and also to allow the user to delete the measurements that are stored. To check the available memory, select the Memory option from the menu: Key Press Display Comments...
- Page 47 CR:800C Series Sound Level Meter User Manual Page 47 Please note that when the memory has been cleared, any measurement previously stored cannot be retrieved and are permanently deleted.
-
Page 48: Downloading Measurements To The Software
USB Connection 5.6 Installation Requirements Cirrus Research plc accepts no responsibility for the installation of the Deaf Defier3 software where the system requirements are not fully met and where the user does not have the correct configuration or access rights to enable the software to install correctly. -
Page 49: Connecting The Instrument To The Pc
CR:800C Series Sound Level Meter User Manual Page 49 5.7 Connecting the instrument to the PC The CR:800C instruments connect to the PC using the supplied ZL:100 USB Cable. Connect the ZL:100 USB Cable to the USB socket on the bottom of the instrument. Ensure that the cable is inserted correctly with the arrow on the top of the connector. -
Page 50: Understanding How The Measurements Are Stored
Page 50 CR:800C Series Sound Level Meter User Manual 5.8 Understanding how the measurements are stored The memory of the CR:800C can store up to 1,300 measurements. Each measurement is known as an Event and can be either Broadband, 1:1 Octave Band or 1:3 Octave Band. - Page 51 CR:800C Series Sound Level Meter User Manual Page 51...
-
Page 52: Maintenance & Care
If you experience any problems with the operation of the instrument, refer to page 53 for basic troubleshooting. If this does not solve the problem, contact Cirrus Research plc or your local representative for further assistance. -
Page 53: Troubleshooting
This section contains information which may solve simple operational problems you may encounter. If you are unable to solve the problem or experience any problems with the assembly or operation of the instrument contact Cirrus Research plc or your local representative for further assistance 7.1 Basics... -
Page 54: Measurements & Settings
Page 54 CR:800C Series Sound Level Meter User Manual 7.3 Measurements & Settings Symptom Possible Cause Possible Remedy No measurements have been Memory is full. Check the available memory. stored See page 45 The measurement was reset Restart the measurement In 1:1 or 1:3 Octave Band The Run Duration has been set Select a Preset Run Duration... -
Page 55: Glossary
CR:800C Series Sound Level Meter User Manual Page 55 8 Glossary 1:1 Octave Band Filters A division of the frequency range into bands, the upper frequency limit of each band being twice the lower frequency limit. 1:3 Octave Band Filters Single 1:1 Octave bands divided into three parts. - Page 56 Page 56 CR:800C Series Sound Level Meter User Manual Impulse Time weighting The minimum Sound level with ‘A’ Frequency weighting and AImin Impulse Time weighting Sound level with ‘A’ Frequency weighting and Slow Time weighting The maximum Sound level with ‘A’ Frequency weighting and Slow ASmax Time weighting The minimum Sound level with ‘A’...
- Page 57 CR:800C Series Sound Level Meter User Manual Page 57 Sound Level Sound Pressure Level with a Frequency weighting, such as dB(A) Sound Level Meter An instrument for measuring various noise parameters Sound Pressure Level, the basic measure of noise loudness, expressed in decibels Statistical Analysis A calculation performed by a Sound Level Meter on the noise...
-
Page 58: Appendix 1 Specifications
Page 58 CR:800C Series Sound Level Meter User Manual 9 Appendix 1 Specifications 9.1 Instrument Versions CR:811C Class 1 CR:812C Class 2 CR:821C Class 1 with 1:1 Octave Band Filters CR:822C Class 2 with 1:1 Octave Band Filters CR:831C Class 1 with 1:1 & 1:3 Octave Band Filters CR:832C Class 2 with 1:1 &... -
Page 59: Amplitude Weighting
CR:800C Series Sound Level Meter User Manual Page 59 9.8 Amplitude Weighting Q=3 (True Energy Integration) 9.9 Measurement Range Broadband 21dB(A) to 140dB(A) Class 1 25dB(A) to 140dB(A) Class 2 143dB(C) Peak (70 to 140dB Range) 1:1 Octave Band Filters 19dB(Z) to 140dB(Z) 1:3 Octave Band Filters 14dB(Z) to 140dB(Z) -
Page 60: Frequency Bands (Nominal Frequencies)
Page 60 CR:800C Series Sound Level Meter User Manual 9.12 Frequency Bands (Nominal Frequencies) 1:1 Octave Band 31Hz, 63Hz, 125Hz, 250Hz, 500Hz, 1kHz, 2kHz, 4kHz, 8kHz, 16kHz 1:3 Octave Band 25Hz to 16kHz 20Hz & 20kHz with MO:800/6 Factory Option 9.13 Memory 16Mbit memory allowing up to: 1300 broadband measurements... -
Page 61: Battery Life
CR:800C Series Sound Level Meter User Manual Page 61 9.19 Battery Life Broadband Typically >30 hours Filter Mode Typically >20 hours Battery voltage is continuously monitored and warning is given on display of impending low battery condition. When batteries approach end of life the unit will store any data required and switch off automatically. -
Page 62: Appendix 2 Acoustic Calibrators
Page 62 CR:800C Series Sound Level Meter User Manual 10 Appendix 2 Acoustic Calibrators 10.1 Operation. Switching on the Calibrator Press the Power Button on the end of the Calibrator to switch the unit on. The Indicator will illuminate to show that the unit is operating. The calibrator will automatically switch off after 5 minutes to preserve battery power. - Page 63 CR:800C Series Sound Level Meter User Manual Page 63 Calibrating a Sound Level Meter. Push the microphone of the Sound Level Meter into the cavity at the end of the calibrator. Ensure the microphone is fully inserted into the cavity and is past the ‘O’ ring seals.
-
Page 64: Changing The Battery
Page 64 CR:800C Series Sound Level Meter User Manual 10.2 Changing the Battery The CR:514 & CR:515 acoustic calibrators use a single 9v alkaline battery. This type of battery is known as 6F22 or NEDA 1604. It is also commonly known as PP3. Unscrew the screw holding the battery cover on, using a coin. -
Page 65: Specification
CR:800C Series Sound Level Meter User Manual Page 65 10.3 Specification. Frequency 1kHz ± 1% Sound Level 94dB re 20μPa Standardisation CR:514 - IEC 60942:2003 Class 2 CR:515 - IEC 60942:2003 Class 1 Distortion Less than 2% Operating Humidity 25 to 90% Relative Humidity Operating Static Pressure 65 kPa to 108kPa Operating Temperature... -
Page 66: Technical Information
Page 66 CR:800C Series Sound Level Meter User Manual 10.4 Technical Information The normal mode of operation of the calibrator is with the unit switched on. When the LED indicates the unit is switched on this produces the greatest radio frequency emissions. -
Page 67: Free Field Correction
93.7dB). The table below shows the correction values for the standard microphones of Cirrus Research plc. Calibration corrections are listed below for the Cirrus Research plc ½" Capsules and three microphone capsules commonly used in Calibration Laboratories: Microphone Correction Values... -
Page 68: Appendix 3 Ce Certificate Of Conformity
EU EMC Directive (Dec 2004) 2004/108/EU Applied Harmonised standards (where appropriate) EN 61000-6-3:2007 EN 61000-6-1:2007 Except where modified by IEC 61672-1:2002 IEC 61672-2:2003 IEC 61942:2003 Signed for and on behalf of Cirrus Research plc Date: 10 January 2008 Mr S.T.O'Rourke Engineering Director... -
Page 69: Warranty Information
14. In the event of any dispute on the terms of the warranty Cirrus Research plc will accept pendulum arbitration by the United Kingdom Institute of Acoustics Ltd. -
Page 70: Cirrus Research Offices
CR:800C Series Sound Level Meter User Manual Cirrus Research Offices The addresses given below are the Cirrus Research plc offices. Cirrus Research plc also have approved distributors and agents in many countries worldwide. For details of your local representative, please contact Cirrus Research plc at the address below.
Need help?
Do you have a question about the CR:811C and is the answer not in the manual?
Questions and answers