Joerns Oxford Switch Service Manual
Hide thumbs
Also See for Oxford Switch:
- User instruction manual (92 pages) ,
- Manual (4 pages) ,
- User instruction manual (12 pages)

Related Manuals for Joerns Oxford Switch


Summary of Contents for Joerns Oxford Switch
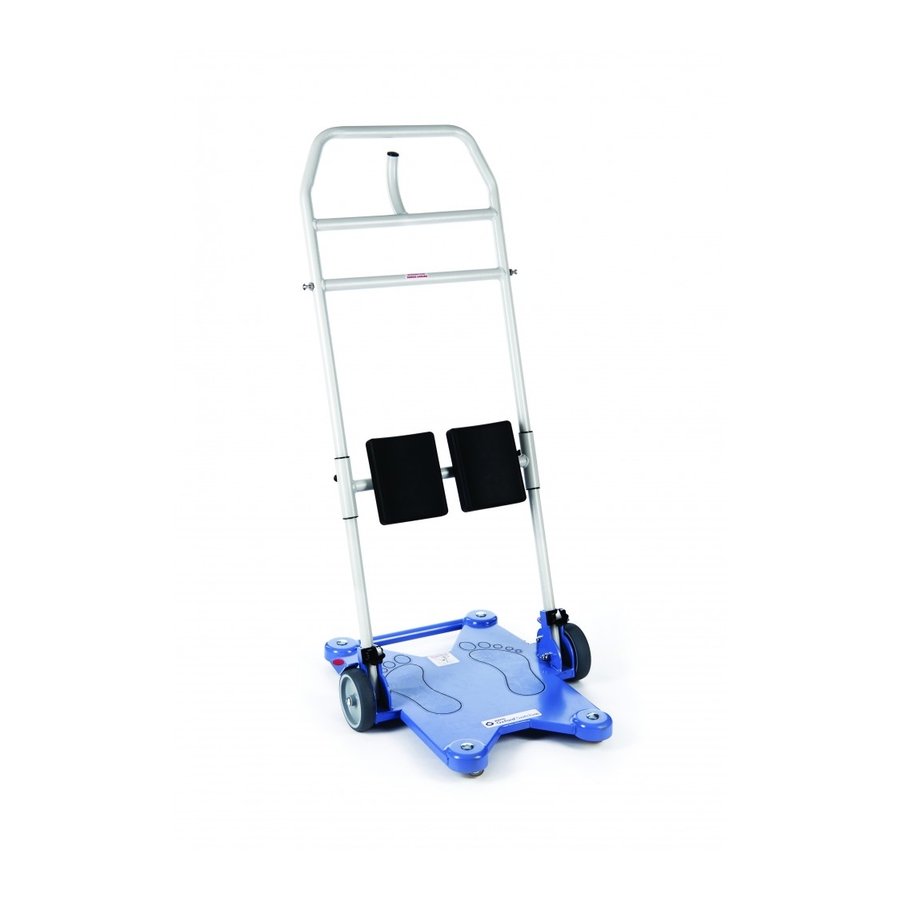
- Page 1 Service Manual Oxford Switch ®...
- Page 2 Oxford ® Switch Contents Inspection Criteria............................3 Service / Repair Schedule ......................... 4 Torque Settings............................8 Notes ............................... 10...
-
Page 3: Inspection Criteria
Switch Inspection Criteria Joerns Healthcare Ltd recommends a thorough inspection and test of the Oxford Switch and its accessories, belts etc. is carried out every six months. The examination and test should be conducted according to the recommendations and procedures below. Joerns Healthcare Ltd recommends, authorised service dealers should carry out maintenance, inspection and certified testing only. -
Page 4: Service / Repair Schedule
Oxford ® Switch Service / Repair Schedule Tools Required • 5mm hex key • 6mm hex key • 8mm A/F combination spanner • 2 x 10mm A/F combination spanner • 14mm A/F combination spanner • 16mm A/F combination spanner • 0-50Nm range torque wrench •... - Page 5 Oxford ® Switch Centre Wheels NOTE: The frame must be removed to enable removal of the centre wheels as detailed in the ‘Frame Removal’ procedure. Removal 1. Unscrew the centre wheel bolt using a 6mm hex key and a 16mm A/F combination spanner. 2.
- Page 6 9. Fit the M8 brake pedal domed securing nut to the brake pedal securing bolt and tighten to 20Nm using a 14mm A/F combination spanner. Repeat the ‘Brake Pedal/Pad Removal/Replacement’ procedure for the left hand brake pedal. WARNING Ensure the brakes operate correctly before returning the Oxford Switch to service.
- Page 7 Oxford ® Switch Base Removal 1. Remove the frame as detailed in the ‘Frame Removal’ procedure. 2. Remove the 4-off corner castors as detailed in the ‘Corner Castors Removal’ procedure. 3. Remove the 2-off centre wheels as detailed in the ‘Centre Wheels Removal’ procedure. 4.
- Page 8 Oxford ® Switch Knee Pad Positioning Spring-Loaded Quick Release Pins Removal 1. Unscrew the knee pad positioning spring-loaded quick release pin from the knee pad sliding section using an 8mm A/F combination spanner. Replacement 1. Assemble the knee pad positioning spring-loaded quick release pin to the thread on the knee pad sliding section.
-
Page 9: Torque Settings
Oxford ® Switch Torque Settings Tighten the brake pedal securing nuts to 20Nm - 2 places Tighten the corner castor securing nut to 25Nm - 4 places Tighten the centre Tighten the castor wheel securing nut spindle securing nut to 25Nm - 2 places to 20Nm - 4 places Tighten the knee pad spring-loaded quick release pins to 10Nm - 2 places... - Page 10 Oxford ® Switch Notes:...
-
Page 11: Notes
Oxford ® NOTES Switch Notes:... - Page 12 Joerns Healthcare Limited Drakes Broughton Business Park, Worcester Road, Drakes Broughton Pershore, Worcestershire, WR10 2AG United Kingdom (T) 0844 811 1156 • (F) 0844 811 1157 www.joerns.co.uk • email: info@joerns.co.uk © 2019, Joerns Healthcare • 6120072 Rev A • DCO18-0051...
Need help?
Do you have a question about the Oxford Switch and is the answer not in the manual?
Questions and answers