Table of Contents
Advertisement
SOUND STORM LABORATORIES
3451 Lunar Court, Oxnard CA 93030
TECHNICAL ASSISTANCE
www.soundstormlab.com/customer-support
888-387-8676 US Toll-free
805-751-4855 Customer Service
DD899B
BLUETOOTH® • DOUBLE-DIN DVD/MP3/CD AM/FM RECEIVER
0518
iPod
and iPhone
are registered trademarks of Apple Inc. in the U.S. and other countries.
®
®
Sound Storm Laboratories is not a liated with Apple Inc.
The Bluetooth® word mark and logos are registered trademarks owned by Bluetooth SIG, Inc. and any use of such marks by
Sound Storm Laboratories is under license. Other trademarks and trade names are those of their respective owners.
USER'S MANUAL
DD899B
BLUETOOTH® • DOUBLE-DIN DVD/MP3/CD
AM/FM RECEIVER
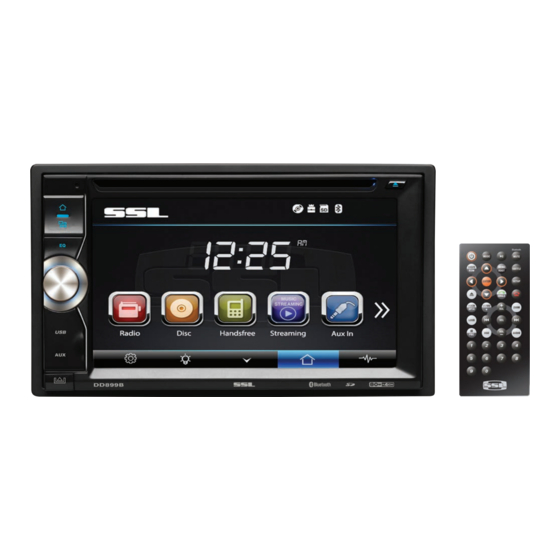
FEATURING 6.2" (157 mm) DETACHABLE WIDESCREEN TOUCHSCREEN DIGITAL TFT LCD MONITOR
DETACHABLE
FACE
REAR
TRUE
CAMERA
DOUBLE
DIN
INPUT
Advertisement
Table of Contents

Related Manuals for Ssl DD899B


Summary of Contents for Ssl DD899B
- Page 1 USER’S MANUAL SOUND STORM LABORATORIES 3451 Lunar Court, Oxnard CA 93030 DD899B TECHNICAL ASSISTANCE www.soundstormlab.com/customer-support BLUETOOTH® • DOUBLE-DIN DVD/MP3/CD 888-387-8676 US Toll-free AM/FM RECEIVER 805-751-4855 Customer Service FEATURING 6.2" (157 mm) DETACHABLE WIDESCREEN TOUCHSCREEN DIGITAL TFT LCD MONITOR DD899B BLUETOOTH® • DOUBLE-DIN DVD/MP3/CD AM/FM RECEIVER...
- Page 2 To ensure safety while driving and to comply with laws, drivers should not watch video or operate the video device while driving.
-
Page 3: Table Of Contents
Congratulations on your purchase of a SSL Multimedia Receiver. It has been designed, engineered and manufactured to bring you the highest level of performance and quality, and will offer you years of entertainment pleasure. Content Accessories ………………………………………………………………………………………………………………………………………... Unit Installation ……………………………………………………………………………………………………………………………….. -
Page 4: Accessories
Accessories Package contains the following accessories for installation and operation of the unit. (1) Washer, Spring (5) Rubber (2) Washer, Cushion M5 Nut (3) Screw (6) Screw Left (7)installation (4) Bolt bracket Right (5) Mounting Strap Power and Speaker Cables Trim Ring Remote Control Panel bag... -
Page 5: Unit Installation
Unit Installation Bracket Screw 1. Put the 2 brackets to the left and right side of the unit; 2. Use screws to( fix ) secure the brackets to the unit. Wire Connection The Description of the Input/output Interface of the Rear Chassis. -
Page 6: Parking Brake Connection
Parking Brake Connection In order to view videos, the parking brake wire must be connected, and the vehicle is parked. Connecting the reversing line to tail light on the car... -
Page 7: Speaker Connection
Speaker Connection Connect the speakers according to the following diagram, incorrect connections may damage the unit or your speakers. Do not chassis ground the speakers. Always observe correct polarity. Correct connection Left front - Right front | Left rear - Right rear. Incorrect connections... -
Page 8: Button Description
Button Description 1. MIC 2. HOME BUTTON Press home button to return back to main menu. 3. SOURCE BUTTON Press source button to change mode. 4. EQ BUTTON Enter the radio mode,and then press the EQ button to enter EQ mode. 5. - Page 9 Button Description 6. USB/ AUX USB for Multimedia playback files only. Insert a USB drive into this slot and the unit will automatically start reading and playback. * Supported Music File Format: MP3, WMA files. Put the AUX plug into the AUX-IN jack which was marked on front panel. 7.
-
Page 10: Remote Control
Remote Control 1: MODE 2: POWER 3: UP 4: BAND/RANDOM/CLEAR 5: ENTER 6: LEFT 7: DOWN 8: EJECT 9: STEREO/MONO/* 10:P.SCAN/REPEAT/# 11: SEEK-/BACKWARD 12: LOUD 13: OSD 14: STOP/PBC 15: PLAY/PAUSE 16: MUTE/BLUETOOTH 17: MENU/ROOT 18: SUB TITLE 19: RIGHT 20: SETUP 21: DIAL/ANGLE 22: HANG UP... - Page 11 Remote Control 10. P.SCN/ RPT /# button In DVD mode, press to repeat REP 1 => REP Title => REP ALL. In SD /USB mode ,press to repeat REP 1 => REP Dir => REP ALL. In Radio mode, PS (preset scan): Press to scan all preset stations in the memory of the current band and stay on each memory stations for about 5 seconds.
- Page 12 Remote Control / SEEK + buttons In DVD/CD mode, press button to skip to the next track, press and hold button for two seconds to activate fast forward (FF) search in a track. In Radio mode, press and hold button to select station forward automatically, touch again will stop select station.
-
Page 13: Main Menu
Main Menu The best way to discover the program is to explore each screen in detail, and to find out how to move from one to another. Read this chapter for a guided tour. Unit starts by displaying the main menu. This is the root of the screen hierarchy, and you can simply access all features by tapping on the touch screen buttons. -
Page 14: Dvd Operation
DVD Operation DVD Player To start DVD player, tap on DVD button from main menu screen. Touch Screen Menu You will not see any buttons while DVD is played, buttons will appear when you tap on TFT screen. Tap the screen again to hide the buttons, slide the subtitle part of bottom screen to switch the following 2 pages. -
Page 15: Usb/Sd Operation
USB/SD Operation When a file of USB or SD card is played (music, video, photo), the screen will show following interface: Press it to repeat REP 1 => REP DIR => REP ALL Press it to skip to the previous track. Play/pause button. -
Page 16: Settings Operation
Settings Operation Tap time setting button to setup time Tap SWC item to program SWC 1) First check whether the car has steering wheel button. 2) The steering wheel and the unit must be connected on the line. 3) While holding down the button on the steering wheel and the corresponding button on the SWC interface it will display complete setting. - Page 17 Settings Operation Sound Control Sound Effect Subwoofer Loudness : select on/off Loudness Cut off Freq: Tap Sound Effect button to show following interface select User—Classic—Rock—Pop—Jazz— Electric—Flat Reset TV Type Aspect Ratio : select 4:3PS/4:3LB /16:9 Adjust : adjust screen brightness /contrast/Hue/Saturation/Sharpness Panel :setting backlight time...
-
Page 18: Bluetooth Operation
According to mobile pairing device manual, after searching new device (BT friendly name: Boss Audio DD899B) select it, input password "0000" and confirm OK, device paring is finished. The phone name will available on the panel after the pairing is completed. It means device is connected and ready for Bluetooth communication. -
Page 19: Aux-In Operation
Bluetooth Operation A2DP (Advanced Audio Distribution Profile) (A2DP) Music Mode Tap the button for ‘Streaming’ in main menu. music button to start Bluetooth music player. Tap music button to listen music in Bluetooth mode. You can select the function with the key for previous, play / pause, stop, and next. -
Page 20: Notes Of Disc
Notes of Disc... -
Page 21: Troubleshooting
Troubleshooting Symptom Cause Remedy Replace with fuse of the same amperage. If Fuse is blown the fuse blows again, consult your store of Power does not turn purchase ON (No sound is produced) Incorrect wiring Consult your local retailer or installer 1. - Page 22 Troubleshooting symptom Cause Solution If the power supply is properly connected The car ignition is not on to the car accessory switch the ignition key to “ACC” No power The fuse is blown Replace the fuse Presence of disc inside the Remove the disc in the player then put a Disc cannot be loaded player...
-
Page 23: General Specification
General Specification General Power supply 11~16V DC Current consumption Max. 10 A Maximum power output 80W x 4 channels (max) Compatible formats DVD ±R/RW Video, CD ±R/RW Audio & Video Dimensions (W x D x H) / weight 6.5” x 7.0” x 3.9” /7.5 lbs Working temperature range -4°F -- +140°F ESP function...
Need help?
Do you have a question about the DD899B and is the answer not in the manual?
Questions and answers